


文章目录
前言
Fast DDS的安装方法可以参考技术手册:
https://fast-dds.docs.eprosima.com/en/v2.14.1/installation/sources/sources_linux.html#
该章节描述了各种操作系统下如何安装Fast DDS。
本文以ubuntu20.04为例,按照手册的指导,以source的方式进行编译安装。
一、安装方式
Fast DDS支持binary和source安装方式。
二、source安装方式
按照手册的描述,主要分为Fast DDS library、Fast DDS Python bindings、Fast DDS-Gen这三部分的编译和安装。
1.Fast DDS library
会安装以下3个库:
foonathan_memory_vendor:一个兼容STL的c++内存分配器库
fastcdr:一个c++库,根据标准CDR序列化机制进行序列化
fastrtps:Fast DDS的核心库
1.1 安装以下工具
sudo apt install cmake g++ python3-pip wget git
1.2 安装依赖库
Asio and TinyXML2 libraries:
Asio是一个用于网络和低级I/O编程的跨平台c++库,它提供了一致的异步模型。TinyXML2是一个简单、小巧且高效的c++ XML解析器。
sudo apt install libasio-dev libtinyxml2-dev
OpenSSL:加密库
sudo apt install libssl-dev
Libp11 and SoftHSM libraries
Libp11为OpenSSL提供pkcs# 11支持。这是一个可选的依赖项,只有当eprosima Fast DDS与安全性和pkcs# 11 uri一起使用时才需要。
sudo apt install libp11-dev
SoftHSM是硬件安全模块(HSM)的软件实现。如果启动了eProsima Fast DDS测试,并且系统上安装了libp11,则还需要SoftHSM运行pkcs# 11特性的测试。
sudo apt install softhsm2
注意,softhsm2包创建了一个名为softhsm的新组。为了授予对HSM模块的访问权限,用户必须属于这个组。
sudo usermod -a -G softhsm <user>
OpenSSL通过其引擎功能访问HSM和其他硬件设备。为了设置一个新的引擎,必须更新OpenSSL配置文件(通常是/etc/ssl/openssl.cnf),指定libp11和硬件模块(这里是SoftHSM)的动态库位置。使用p11kit可以避免手动配置这个步骤,它允许OpenSSL在运行时找到pkcs# 11设备,而不需要静态配置。
sudo apt install libengine-pkcs11-openssl
确认p11kit是否执行成功:
p11-kit list-modules
openssl engine pkcs11 -t
1.3 安装Fast DDS核心库
创建工作目录
mkdir ~/Fast-DDS
编译Foonathan memory
cd ~/Fast-DDS
git clone https://github.com/eProsima/foonathan_memory_vendor.git
mkdir foonathan_memory_vendor/build
cd foonathan_memory_vendor/build
cmake .. -DCMAKE_INSTALL_PREFIX=~/Fast-DDS/install -DBUILD_SHARED_LIBS=ON
cmake --build . --target install
编译Fast CDR
cd ~/Fast-DDS
git clone https://github.com/eProsima/Fast-CDR.git
mkdir Fast-CDR/build
cd Fast-CDR/build
cmake .. -DCMAKE_INSTALL_PREFIX=~/Fast-DDS/install
cmake --build . --target install
编译Fast DDS
cd ~/Fast-DDS
git clone https://github.com/eProsima/Fast-DDS.git
mkdir Fast-DDS/build
cd Fast-DDS/build
cmake ..  -DCMAKE_INSTALL_PREFIX=~/Fast-DDS/install
cmake --build . --target install
可以在install/lib目录下看到成功编译的so库。
注意:新版本的Fast-DDS可能跟旧版本不太一样,新版本编译出来的是fastdds.so库,以前旧版本可能是fastrtps.so库。
注意:
编译过程中可能会遇到ubuntu系统cmake版本过低问题,解决方法:
# 下载cmake
wget https://cmake.org/files/v3.22/cmake-3.22.1.tar.gz
sudo tar -xvzf cmake-3.22.1.tar.gz -C /usr/share
cd /usr/share/cmake-3.22.1
# 安装cmake
sudo chmod 777 ./configure
sudo ./configure
sudo make
sudo make install
sudo update-alternatives --install /usr/bin/cmake cmake /usr/local/bin/cmake 1 --force
cmake --version
2.Fast DDS Python bindings
Fast DDS Python bindings是Fast DDS的Python接口。项目中不需要用到Python,因此不安装该部分。
3.Fast DDS-Gen
Fast DDS-Gen是一个Java应用程序,它使用IDL文件中定义的数据类型生成源代码。
sudo apt install openjdk-11-jdk
cd ~
git clone --recursive https://github.com/eProsima/Fast-DDS-Gen.git
cd Fast-DDS-Gen
./gradlew assemble
三、helloworld程序
3.1 程序演示
官方技术手册提供了一个手把手demo教程。
https://fast-dds.docs.eprosima.com/en/v2.14.1/fastdds/getting_started/simple_app/simple_app.html
可以照着手册一步步敲,但可能效率太低。
在我们上面安装Fast-DDS核心库的时候,在编译完成后,已经有demo可以供测试。
在安装目录的example目录下,已经有很多例程,其中有个helloworld程序。
cd ~/Fast-DDS/Fast-DDS/examples/cpp/hello_world
mkdir build
cmake ../
make
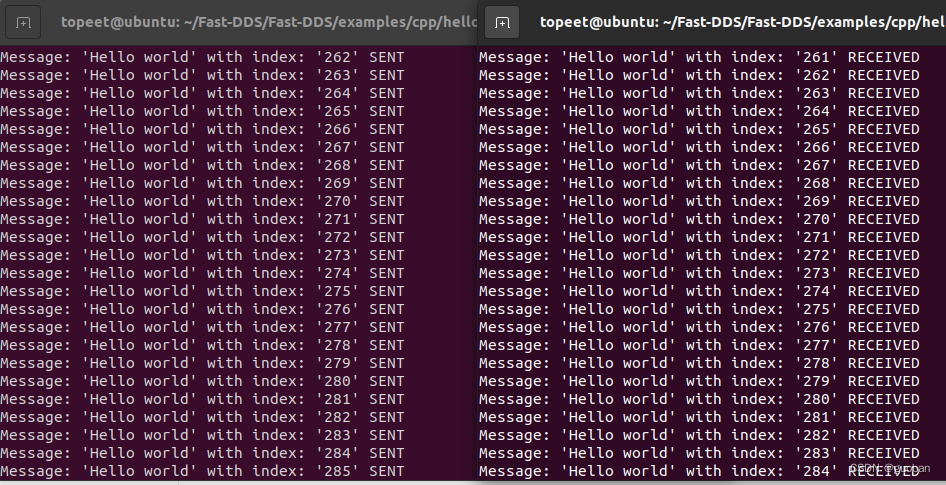
编译成功后,会有个hello_world程序,先执行看效果。
#运行前export下库的搜索路径(根据自己实际安装路径来)
export LD_LIBRARY_PATH=/usr/local/lib/
./hello_world subscriber
#新开另外一个终端
export LD_LIBRARY_PATH=/usr/local/lib/
./hello_world publisher
运行效果:
3.2 fastddsgen工具基本使用
hello_world目录下包含了idl文件和源文件。
按照官方的流程,需要先使用fastddsgen工具通过idl文件生成数据类型的代码。但在demo里面,这些已经都有了。
HelloWorld.idl文件的内容很简单:
@extensibility(APPENDABLE)
struct HelloWorld
{
	unsigned long index;
	string message;
};
用fastddsgen工具生成的步骤:
fastddsgen -d ../include/idl HelloWorld.idl #-d选项可以指定生成的文件的保存路径
#执行结果
openjdk version "11.0.22" 2024-01-16
OpenJDK Runtime Environment (build 11.0.22+7-post-Ubuntu-0ubuntu220.04.1)
OpenJDK 64-Bit Server VM (build 11.0.22+7-post-Ubuntu-0ubuntu220.04.1, mixed mode, sharing)
Processing the file idl/HelloWorld.idl...
Generating Type definition files...
Generating Type Support files...
Generating TypeObjectSupport files...
Adding project: idl/HelloWorld.idl


 529
529


 被折叠的 条评论
为什么被折叠?
被折叠的 条评论
为什么被折叠?
 到【灌水乐园】发言


