


1. 引言
你可能已经注意到,LLM时代下的许多项目(特别是Github上的论文项目、工程项目)都要求我们设置OpenAI的API Key,就像这样:
os.environ["OPENAI_API_KEY"] = "sk-"

from langchain_openai import ChatOpenAI
llm = ChatOpenAI(...)
这种方法虽然直接,但限制了我们自由使用本地模型或自定义API的能力。
而且,使用OpenAI的服务还得考虑网络问题,这无疑给本就复杂的开发流程又添了一堵墙。
但是如何在尽可能不修改原项目代码的情况下,不依赖OpenAI的API令牌,封装自定义的大语言模型(LLM)模块呢?
本文的目的就是带你一起探索如何利用langchain库,绕过这些限制,快速封装自定义的LLM。
适用于:
- 想用本地的开源模型
- 想调用网上的API接口
- 想调自己实现的简单方法
2. 简化封装,直接使用__call__
在工程学中,大型语言模型(LLM)的核心可以简化为一个简单的文本输入输出函数。我们希望像调用函数一样使用模型。
custom_llm = CustomLLM()
print(custom_llm("How to play basketball?"))
为了实现这一点,我们需要在自定义模型类中重写__call__方法。
from typing import List, Optional

class CustomLLM1:
    def __call__(self, prompt: str) -> str:
        # 这里是调用自定义模型或API接口的逻辑
        messages = [
            {"role": "user", "content": prompt}
            # 如果需要,可以在这里添加更多的消息历史
        ]

        response = self.llama_completion(messages)
        return response

    def llama_completion(self, messages: List[dict]) -> str:
        # 调用llama的接口,返回响应
        return "Hello from llama!"```
现在,我们可以通过创建CustomLLM1的实例,并直接调用它,来模拟获取答案的过程:
custom_llm = CustomLLM1()
print(custom_llm("How to play basketball?"))
这个简化的封装过程让我们能够快速地实现和测试自定义模型的调用逻辑,而无需深陷复杂的实现细节。
进一步完善,下面我们将 __call__方法简单地委托给 _call 方法,同时增加一些可选的参数(比如输出的停词逻辑)
# 不可运行,仅供思路参考
class CustomLLM2:
    def __call__(self, prompt: str, stop: Optional[List[str]] = None) -> str:
        #
        return self._call(prompt, stop)

    def _call(self, prompt: str, stop: Optional[List[str]] = None) -> str:
        messages = [
            {"role": "user", "content": prompt}
        ]
        response = self.llama_completion(messages)
        if stop is not None:
            response = self.enforce_stop_tokens(response, stop)
        return response
看上去似乎有点多余?不过这是langchain内LLM类构造的思想,这里我们了解其中意思即可。
3. 实际应用:封装ChatGLM3和ChatGLM4模型
听上去很简单,但是还是不知道应该怎么替换原项目中的相关代码。
如果是常规项目,我们其实直接替换对应的生成函数就行。
至于项目原本封装好的LLM,多半是langchain库下的LLM家族,哪怕是OpenAI的。
故我们可以继承langchain下的基础LLM类,替换其中特定的调用方法为自己的模型接口,其他方法保持不变即可。
现在,让我们通过两个实际的例子来展示如何封装自定义的LLM:使用本地部署的开源模型ChatGLM3和通过API接口调用的ChatGLM4。
3.1 封装ChatGLM3本地模型
首先,我们看看如何封装一个本地的ChatGLM3模型。这个模型使用transformers库加载,并利用其提供的AutoTokenizer和AutoModel进行文本生成。
from langchain.llms.base import LLM
from langchain.llms.utils import enforce_stop_tokens
from transformers import AutoTokenizer, AutoModel
import torch

class ChatGLM3(LLM):
    def __init__(self):
        super().__init__()
        print("construct ChatGLM3")
        self.tokenizer = None
        self.model = None

    def load_model(self, model_path, quantize=False):
        # 加载模型和分词器
        self.tokenizer = AutoTokenizer.from_pretrained(model_path)
        self.model = AutoModel.from_pretrained(model_path).half()
        if quantize:
            self.model = self.model.quantize(8)
        # 将模型移动到适当的设备上
        device = torch.device('cuda' if torch.cuda.is_available() else 'cpu')
        self.model = self.model.to(device)
        self.model.eval()

    def _call(self, prompt, stop=None):
        # 使用模型生成文本
        response, _ = self.model.chat(
            self.tokenizer,
            prompt,
            history=self.history,
            max_length=8192,
            temperature=0.01,
            top_p=0.9
        )
        if stop is not None:
            response = enforce_stop_tokens(response, stop)
        return response

# 使用示例
if __name__ == "__main__":
    llm = ChatGLM3()
    model_path = "path_to_your_chatglm3_model"
    llm.load_model(model_path)
    print(llm("如何打好羽毛球?"))
3.2 封装ChatGLM4 API接口
接下来,我们看看如何封装一个通过API接口调用的ChatGLM4模型。这个例子中,我们假设已经下载了ZhipuAI的SDK,它允许我们发送请求并接收模型的响应。
from langchain.llms.base import LLM
from langchain.llms.utils import enforce_stop_tokens

class ChatGLM4(LLM):
    def __init__(self):
        super().__init__()
        print("construct ChatGLM4")

    def glm4_completion(self, message):
        from zhipuai import ZhipuAI
        client = ZhipuAI(api_key="your_api_key")  # 使用你的API密钥
        response = client.chat.completions.create(
            model="glm-4",
            messages=message,
            stream=False,
            temperature=0.1
        )
        return response.choices[0].message.content

    def _call(self, prompt, stop=None):
        messages = [{"role": "user", "content": prompt}]
        response = self.glm4_completion(messages)
        if stop is not None:
            response = enforce_stop_tokens(response, stop)
        return response

# 使用示例
if __name__ == "__main__":
    llm = ChatGLM4()
    print(llm("如何学好编程?"))
在这两个例子中,我们都利用了langchain的LLM基类(其实也可以换成BaseLLM基类)来快速封装自定义模型。对于ChatGLM3,我们直接与本地模型交互;而对于ChatGLM4,我们通过API与远程模型交互。这样的封装方式不仅使得我们的应用程序更加灵活和模块化,而且也简化了模型切换和维护的过程。
4. 核心扩展思路
有了上述的实际实践,但是如ChatOpenAI类的直接替换仍旧存在一些问题。如果直接替换不能成功,提示说不存在某种方法,比如已经封装好的格式化输出方法。
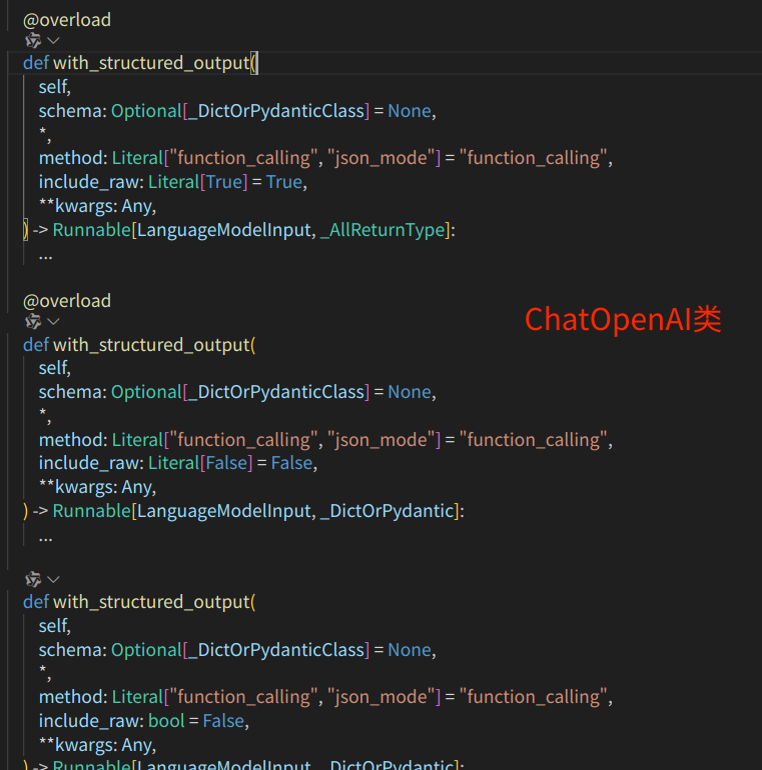
这时候,我们当然不是copy源码拿去应用,只需要将继承的LLM类修改为对应的类,即可实现该方法的补全。
如下即为使用llama3的开源API实现的接口模型,用于替换ChatOpenAI。
# 创建一个自定义的接口模型
from langchain_openai import ChatOpenAI
from typing import Optional, List


class LlamaChat(ChatOpenAI):
    # max_token: int = 512
    temperature: float = 0.1
    history = []
    api_secret:str = ""

    def __init__(self, api_secret: str):
        super().__init__()
        self.api_secret = api_secret
        print("construct LlamaChat")

    @property
    def _llm_type(self) -> str:
        return "LlamaChat"

    def llama_completion(self, messages):
        print("llama_completion")
        import requests
        import json

        url = "https://api.atomecho.cn/v1/chat/completions"
        headers = {
            "Content-Type": "application/json",
            "Authorization": f"Bearer {self.api_secret}",
        }
        data = {
            "model": "Atom-7B-Chat",
            "messages": messages,
            "temperature": self.temperature,
            "stream": False,
        }

        response = requests.post(url, headers=headers, data=json.dumps(data))

        if response.status_code == 200:
            return response.json()["choices"][0]["message"]["content"]
        else:
            return None

    # Override _call method to use API for model inference
    def _call(self, prompt: str, stop: Optional[List[str]] = None) -> str:
        messages = [
            {"role": "user", "content": prompt}
            # Add more message history if needed
        ]

        response = self.llama_completion(messages)
        if stop is not None:
            response = self.enforce_stop_tokens(response, stop)
        return response

    def __call__(self, prompt: str, stop: Optional[List[str]] = None) -> str:
        return self._call(prompt, stop)
结语
本文旨在展示如何利用langchain快速封装自定义LLM,从而突破现有环境下对OpenAI API Key的依赖。通过langchain的LLM类或现有项目的类继承,再修改特定的回调方法即可实现更加个性化和灵活的LLM应用,推动项目快速进展。


 731
731

 被折叠的 条评论
为什么被折叠?
被折叠的 条评论
为什么被折叠?
 到【灌水乐园】发言


