


1、为什么要学习okio源码?
a)okio是安卓大神JakeWharton之作,大神之作必须是值得学习的。
b)okio简单易用,高效。okio是对Java io、nio的简洁封装,原生的Java io采用装饰者模式,使用的时候非常繁琐,而相同的操作okio只需短短几行代码就可以搞定,当然除了简单易用之外,okio还是一个非常高效的io库,显著的节省CPU和Memory资源。
c)okio是okhttp的io组件。现在okhttp已经被Google采纳,作为Android默认的通信组件,这么牛的io组件难道不值得一学吗?
2、概述
2.1 整体结构

上图是okio的整体结构,可以看到整个okio分为四个重要部分,sink(输出,可以理解为是Java中的OutputStream的代理,最终通过OutputStream将byte写入文件等)、Source(输入,可以理解为是Java中的InputStream的代理,最终通过InputStream读取字节)、Timeout是okio中加入的超时机制、SegmentPool是okio中的Segment池,和一般的池的作用是一样的,可以避免重复的创建对象,节省资源。Segment是okio缓存的基本单位。
2.2 整体流程
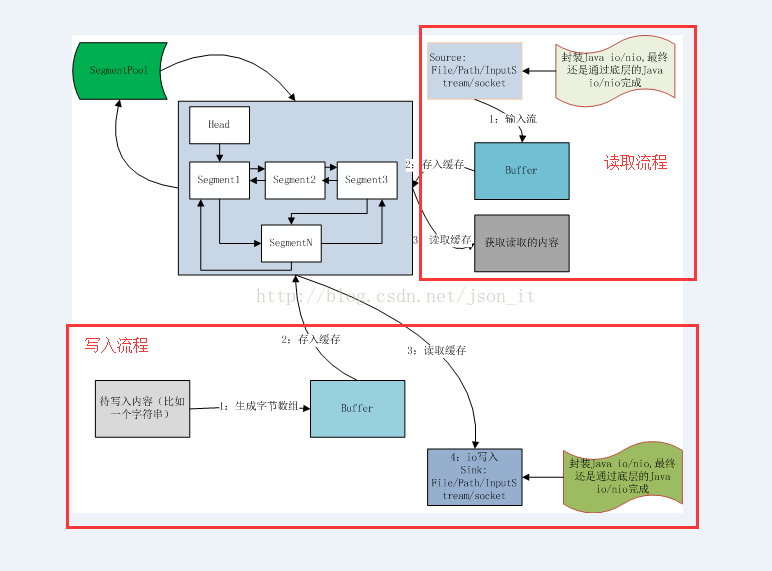
在解析源码之前,一张简明的流程图可以让我们事半功倍,不明白流程就直接扎到源码中,额,这太跟自己过不去了。
注意上述缓存结构中有一个head头结点,没错,Buffer中保存了head节点,因此可以通过head节点完成对整个双端链表的读和写操作。
首先解析一下几个比较重要的概念:
a)source:okio通过source子类读取数据,source子类是对原生Java io/nio的封装,最终还是通过Java InputStream的相关方法读取数据。
b)Buffer:数据缓存可以有效提升性能,缓存的操作主要是通过Buffer类来完成,Buffer类主要包含一系列的readxxx和writexxx方法用于读缓存和写缓存。
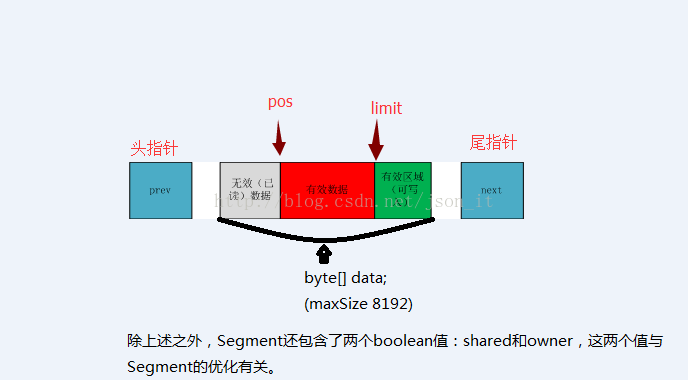
c)缓存的数据结构:okio中缓存是一个双端链表的数据结构,Segment是缓存的基本单位,Segment包含了一个Byte数组,这样整个链表既具备了数组又具备了链表的优点,同时为了避免不必要的对象创建,使用了Segment池。
d)Sink:和Source一样,Sink子类也是对Java 原生io/nio的封装,最终通过OutputStream完成数据写入。
以上各交互都是通过操作byte数组进行的。
3、okio的简单使用
 private void okio_write() {
        File file = new File(getExternalCacheDir(), "okio.txt");
        boolean isCreate = false;
        if (!file.exists()) {
            try {
                file.createNewFile();
                isCreate = true;
            } catch (IOException e) {
                e.printStackTrace();
                isCreate = false;
            }
        } else
            isCreate = true;
        if (isCreate) {
            BufferedSink bufferedSink = null;
            try {
                bufferedSink = Okio.buffer(Okio.sink(file));
                bufferedSink.writeUtf8("okio 写入测试");
                bufferedSink.flush();//一定要flush,flush的作用是将Flushes this output stream and forces any buffered output bytes to be written out.
            } catch (Exception e) {
                e.printStackTrace();
            } finally {
                if (bufferedSink != null) {
                    try {
                        bufferedSink.close();
                    } catch (IOException e) {
                        e.printStackTrace();
                    }
                }
            }
        }
    }

    private void okio_read() {
        File file = new File(getExternalCacheDir(), "okio.txt");
        BufferedSource bufferedSource = null;
        try {
            bufferedSource = Okio.buffer(Okio.source(file));
            String content = bufferedSource.readUtf8();
            Toast.makeText(OkioActivity.this, content, Toast.LENGTH_SHORT).show();
        } catch (Exception e) {
            e.printStackTrace();
        } finally {
            if (bufferedSource != null) {
                try {
                    bufferedSource.close();
                } catch (IOException e) {
                    e.printStackTrace();
                }
            }
        }
}4、源码解析
@Override public String readString(Charset charset) throws IOException {
    if (charset == null) throw new IllegalArgumentException("charset == null");

    buffer.writeAll(source);//写入缓存
    return buffer.readString(charset);//将缓存内容读取出来
}@Override public long writeAll(Source source) throws IOException {
if (source == null) throw new IllegalArgumentException("source == null");
long totalBytesRead = 0;
for (long readCount; (readCount = source.read(this, Segment.SIZE)) != -1; ) {
totalBytesRead += readCount;
}
return totalBytesRead;
} private static Source source(final InputStream in, final Timeout timeout) {
if (in == null) throw new IllegalArgumentException("in == null");
if (timeout == null) throw new IllegalArgumentException("timeout == null");
return new Source() {
@Override public long read(Buffer sink, long byteCount) throws IOException {
if (byteCount < 0) throw new IllegalArgumentException("byteCount < 0: " + byteCount);
if (byteCount == 0) return 0;
try {
timeout.throwIfReached();//加入了超时机制:超时或中断抛异常
Segment tail = sink.writableSegment(1);//获取一个Segment,这个Segment来自SegmentPool或者新创建的Segment
int maxToCopy = (int) Math.min(byteCount, Segment.SIZE - tail.limit);
int bytesRead = in.read(tail.data, tail.limit, maxToCopy);//从输入流中读取数据byte数据到tail缓存起来,tail是尾节点,数据的插入在尾节点处开始,数据的读取则在头结点处开始。
if (bytesRead == -1) return -1;
tail.limit += bytesRead;//修改Segment的limit
sink.size += bytesRead;
return bytesRead;
} catch (AssertionError e) {
if (isAndroidGetsocknameError(e)) throw new IOException(e);
throw e;
}
}
@Override public void close() throws IOException {
in.close();
}
@Override public Timeout timeout() {
return timeout;
}
@Override public String toString() {
return "source(" + in + ")";
}
};
} @Override public String readString(long byteCount, Charset charset) throws EOFException {
checkOffsetAndCount(size, 0, byteCount);
if (charset == null) throw new IllegalArgumentException("charset == null");
if (byteCount > Integer.MAX_VALUE) {
throw new IllegalArgumentException("byteCount > Integer.MAX_VALUE: " + byteCount);
}
if (byteCount == 0) return "";
Segment s = head;
if (s.pos + byteCount > s.limit) {
// If the string spans multiple segments, delegate to readBytes().
return new String(readByteArray(byteCount), charset);
}
String result = new String(s.data, s.pos, (int) byteCount, charset);//从缓存中读取,生成需要的内容
s.pos += byteCount;
size -= byteCount;
if (s.pos == s.limit) {//pos是segment中有效数据的开始索引,limit是segment中有效数据的结束索引,如果pos和limit相同,则说明这个Segment读取完成,应读取下一个Segment了
head = s.pop();
SegmentPool.recycle(s);//丢入SegmentPool,留待复用
}
return result;
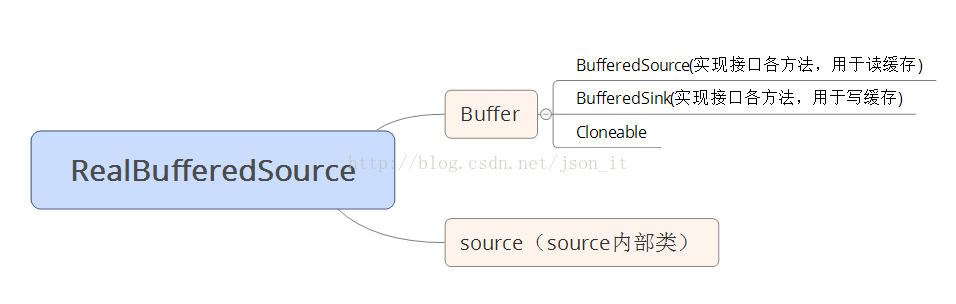
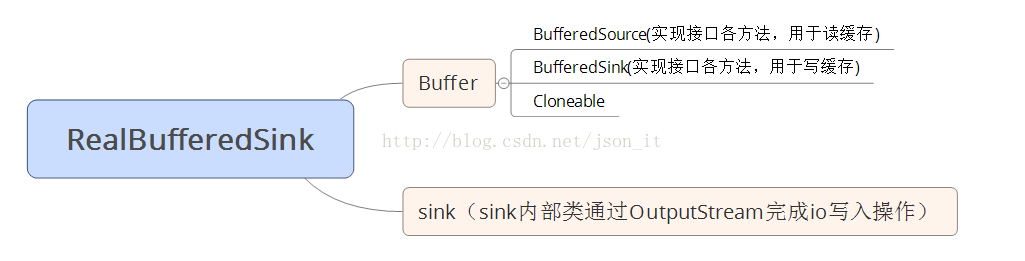
}4.2、RealBufferedSink之写(与RealBufferSource过程基本类似,不再详细分析)
 @Override public BufferedSink writeString(String string, Charset charset) throws IOException {
    if (closed) throw new IllegalStateException("closed");
    buffer.writeString(string, charset);//写入缓存
    return emitCompleteSegments();//调用sink,完成io写
}@Override public Buffer write(byte[] source, int offset, int byteCount) {
if (source == null) throw new IllegalArgumentException("source == null");
checkOffsetAndCount(source.length, offset, byteCount);
int limit = offset + byteCount;
while (offset < limit) {
Segment tail = writableSegment(1);//获取一个Segment
int toCopy = Math.min(limit - offset, Segment.SIZE - tail.limit);
System.arraycopy(source, offset, tail.data, tail.limit, toCopy);//将待写入内容的byte数组缓存到Buffer中
offset += toCopy;
tail.limit += toCopy;
}
size += byteCount;
return this;
} @Override public BufferedSink emitCompleteSegments() throws IOException {
if (closed) throw new IllegalStateException("closed");
long byteCount = buffer.completeSegmentByteCount();
if (byteCount > 0) sink.write(buffer, byteCount);//最终调用了okio.sink(...);生成的Sink子类的write方法,完成io写入文件操作
return this;
} private static Sink sink(final OutputStream out, final Timeout timeout) {
if (out == null) throw new IllegalArgumentException("out == null");
if (timeout == null) throw new IllegalArgumentException("timeout == null");
return new Sink() {
@Override public void write(Buffer source, long byteCount) throws IOException {
checkOffsetAndCount(source.size, 0, byteCount);
while (byteCount > 0) {
timeout.throwIfReached();//超时机制
Segment head = source.head;
int toCopy = (int) Math.min(byteCount, head.limit - head.pos);
out.write(head.data, head.pos, toCopy);//将buffer中的byte数组通过OutputStream写入文件
head.pos += toCopy;
byteCount -= toCopy;
source.size -= toCopy;
if (head.pos == head.limit) {//依次遍历Buffer中的双端链表中的Segment节点
source.head = head.pop();
SegmentPool.recycle(head);//遍历过的节点放入池中留待复用
}
}
}
@Override public void flush() throws IOException {
out.flush();
}
@Override public void close() throws IOException {
out.close();
}
@Override public Timeout timeout() {
return timeout;
}
@Override public String toString() {
return "sink(" + out + ")";
}
};
}

public Segment split(int byteCount) {
    if (byteCount <= 0 || byteCount > limit - pos) throw new IllegalArgumentException();
    Segment prefix;

    // We have two competing performance goals:
    //  - Avoid copying data. We accomplish this by sharing segments.
    //  - Avoid short shared segments. These are bad for performance because they are readonly and
    //    may lead to long chains of short segments.
    // To balance these goals we only share segments when the copy will be large.
    if (byteCount >= SHARE_MINIMUM) {
      prefix = new Segment(this);
    } else {
      prefix = SegmentPool.take();
      System.arraycopy(data, pos, prefix.data, 0, byteCount);
    }

    prefix.limit = prefix.pos + byteCount;
    pos += byteCount;
    prev.push(prefix);
    return prefix;
} public void compact() {
if (prev == this) throw new IllegalStateException();
if (!prev.owner) return; // Cannot compact: prev isn't writable.
int byteCount = limit - pos;
int availableByteCount = SIZE - prev.limit + (prev.shared ? 0 : prev.pos);
if (byteCount > availableByteCount) return; // Cannot compact: not enough writable space.
writeTo(prev, byteCount);
pop();
SegmentPool.recycle(this);
}http://blog.csdn.net/gpwner/article/details/65656341
3、大概是最完全的Okio源码解析文章


 1002
1002

 被折叠的 条评论
为什么被折叠?
被折叠的 条评论
为什么被折叠?
 到【灌水乐园】发言


