


1. 前言
上一节深度学习算法优化系列二十一 | 在VS2015上利用TensorRT部署YOLOV3-Tiny模型 分享了使用TensorRT在GPU上部署FP32的YOLOV3-Tiny模型,这一节继续分享一下如何部署INT8的YOLOV3-Tiny模型。
2. 确定走哪条路?
和上一节一样,这里仍然是走ONNX->TRT这条路,也就是说我这里的INT8量化是在TensorRT中使用nvonnxparser解析了YOLOV3-Tiny 的ONNX模型之后完成的,似乎这也是比较主流的方法。官方例子中提供了一个MNIST数据集的INT8量化,过程也是先用nvcaffeparser解析Caffe模型然后直接做量化并将原始模型序列化为TRT文件以供后面的图像推理。
所以,我这里走的路就是直接解析ONNX模型->INT8量化->序列化为TRT文件->完成推理。
3. 准备校准集
如果你懂TensorRT的量化原理,就没必要看这一节了,如果不懂也没关系后面我会单独写一篇文章来尝试解释一下。首先宏观的说一下,TensorRT对一个模型进行全INT8量化包含权重和激活值两大部分,对于权重采用的是直接非饱和量化,也就是说直接统计权重的最大值和最小值就可以完成量化。而对于激活值的量化,则需要以下步骤:

可以看到在量化激活值的时候需要利用校准集进行FP32的推理并收集每一层的激活值并统计直方图。因此,在INT8量化之前我们首先需要准备一下校准集。这里怎么准备呢?
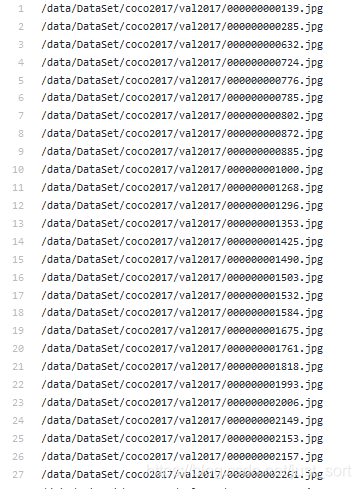
很简单,你训练YOLOV3-Tiny的验证集抽出一部分就可以了(我这里使用了100张,NVIDIA的PPT里面说需要使用1000张,最好和PPT里面指定的图片数量一致,PPT见附录),然后将图片的路径放到一个*.txt文件里面就可以了,如下图所示:
4. TensorRT INT8量化核心步骤
接着上一次推文的介绍,你已经可以获得YOLOV3-Tiny的FP32的ONNX文件。然后我们只需要写一个新的类int8EntroyCalibrator继承Int8EntropyCalibrator这个类,然后重写一些和数据读取相关的成员函数即可。这样就可以随心所欲的去修改校验数据的读取格式,不用像官方例子那样还必须转成Caffe模型并将数据集制作为指定格式。重载后的代码如下:
namespace nvinfer1 {
	class int8EntroyCalibrator : public nvinfer1::IInt8EntropyCalibrator {
	public:
		int8EntroyCalibrator(const int &bacthSize,
			const std::string &imgPath,
			const std::string &calibTablePath);

		virtual ~int8EntroyCalibrator();

		int getBatchSize() const override { return batchSize; }

		bool getBatch(void *bindings[], const char *names[], int nbBindings) override;

		const void *readCalibrationCache(std::size_t &length) override;

		void writeCalibrationCache(const void *ptr, std::size_t length) override;

	private:

		bool forwardFace;

		int batchSize;
		size_t inputCount;
		size_t imageIndex;

		std::string calibTablePath;
		std::vector<std::string> imgPaths;

		float *batchData{ nullptr };
		void  *deviceInput{ nullptr };


		bool readCache;
		std::vector<char> calibrationCache;
	};

	int8EntroyCalibrator::int8EntroyCalibrator(const int &bacthSize, const std::string &imgPath,
		const std::string &calibTablePath) :batchSize(bacthSize), calibTablePath(calibTablePath), imageIndex(0), forwardFace(
			false) {
		int inputChannel = 3;
		int inputH = 416;
		int inputW = 416;
		inputCount = bacthSize*inputChannel*inputH*inputW;
		std::fstream f(imgPath);
		if (f.is_open()) {
			std::string temp;
			while (std::getline(f, temp)) imgPaths.push_back(temp);
		}
		int len = imgPaths.size();
		for (int i = 0; i < len; i++) {
			cout << imgPaths[i] << endl;
		}
		batchData = new float[inputCount];
		CHECK(cudaMalloc(&deviceInput, inputCount * sizeof(float)));
	}

	int8EntroyCalibrator::~int8EntroyCalibrator() {
		CHECK(cudaFree(deviceInput));
		if (batchData)
			delete[] batchData;
	}

	bool int8EntroyCalibrator::getBatch(void **bindings, const char **names, int nbBindings) {
		cout << imageIndex << " " << batchSize << endl;
		cout << imgPaths.size() << endl;
		if (imageIndex + batchSize > int(imgPaths.size()))
			return false;
		// load batch
		float* ptr = batchData;
		for (size_t j = imageIndex; j < imageIndex + batchSize; ++j)
		{
			//cout << imgPaths[j] << endl;
			Mat img = cv::imread(imgPaths[j]);
			vector<float>inputData = prepareImage(img);
			cout << inputData.size() << endl;
			cout << inputCount << endl;
			if ((int)(inputData.size()) != inputCount)
			{
				std::cout << "InputSize error. check include/ctdetConfig.h" << std::endl;
				return false;
			}
			assert(inputData.size() == inputCount);
			int len = (int)(inputData.size());
			memcpy(ptr, inputData.data(), len * sizeof(float));

			ptr += inputData.size();
			std::cout << "load image " << imgPaths[j] << "  " << (j + 1)*100. / imgPaths.size() << "%" << std::endl;
		}
		imageIndex += batchSize;
		CHECK(cudaMemcpy(deviceInput, batchData, inputCount * sizeof(float), cudaMemcpyHostToDevice));
		bindings[0] = deviceInput;
		return true;
	}
	const void* int8EntroyCalibrator::readCalibrationCache(std::size_t &length)
	{
		calibrationCache.clear();
		std::ifstream input(calibTablePath, std::ios::binary);
		input >> std::noskipws;
		if (readCache && input.good())
			std::copy(std::istream_iterator<char>(input), std::istream_iterator<char>(),
				std::back_inserter(calibrationCache));

		length = calibrationCache.size();
		return length ? &calibrationCache[0] : nullptr;
	}

	void int8EntroyCalibrator::writeCalibrationCache(const void *cache, std::size_t length)
	{
		std::ofstream output(calibTablePath, std::ios::binary);
		output.write(reinterpret_cast<const char*>(cache), length);
	}
}
有了这个类,所有的问题都解决了,接下来只需要在解析ONNX模型之后利用这个类进行INT8量化就可以了。
带注释的代码解析如下:
// ONNX模型转为TensorRT引擎
bool onnxToTRTModel(const std::string& modelFile, // onnx文件的名字
	const std::string& filename,  // TensorRT引擎的名字
	IHostMemory*& trtModelStream) // output buffer for the TensorRT model
{
	// 创建builder
	IBuilder* builder = createInferBuilder(gLogger.getTRTLogger());
	assert(builder != nullptr);
	nvinfer1::INetworkDefinition* network = builder->createNetwork();

	if (!builder->platformHasFastInt8()) return false;

	// 解析ONNX模型
	auto parser = nvonnxparser::createParser(*network, gLogger.getTRTLogger());


	//可选的 - 取消下面的注释可以查看网络中每层的详细信息
	//config->setPrintLayerInfo(true);
	//parser->reportParsingInfo();

	//判断是否成功解析ONNX模型
	if (!parser->parseFromFile(modelFile.c_str(), static_cast<int>(gLogger.getReportableSeverity())))
	{
		gLogError << "Failure while parsing ONNX file" << std::endl;
		return false;
	}


	// 建立推理引擎
	builder->setMaxBatchSize(BATCH_SIZE);
	builder->setMaxWorkspaceSize(1 << 30);

	nvinfer1::int8EntroyCalibrator *calibrator = nullptr;
	if (calibFile.size()>0) calibrator = new nvinfer1::int8EntroyCalibrator(BATCH_SIZE, calibFile, "F:/TensorRT-6.0.1.5/data/v3tiny/calib.table");


	//builder->setFp16Mode(true);
	std::cout << "setInt8Mode" << std::endl;
	if (!builder->platformHasFastInt8())
		std::cout << "Notice: the platform do not has fast for int8" << std::endl;
	builder->setInt8Mode(true);
	builder->setInt8Calibrator(calibrator);
	/*if (gArgs.runInInt8)
	{
		samplesCommon::setAllTensorScales(network, 127.0f, 127.0f);
	}*/
	//samplesCommon::setAllTensorScales(network, 1.0f, 1.0f);
	cout << "start building engine" << endl;
	ICudaEngine* engine = builder->buildCudaEngine(*network);
	cout << "build engine done" << endl;
	assert(engine);
	if (calibrator) {
		delete calibrator;
		calibrator = nullptr;
	}
	// 销毁模型解释器
	parser->destroy();

	// 序列化引擎
	trtModelStream = engine->serialize();

	// 保存引擎
	nvinfer1::IHostMemory* data = engine->serialize();
	std::ofstream file;
	file.open(filename, std::ios::binary | std::ios::out);
	cout << "writing engine file..." << endl;
	file.write((const char*)data->data(), data->size());
	cout << "save engine file done" << endl;
	file.close();

	// 销毁所有相关的东西
	engine->destroy();
	network->destroy();
	builder->destroy();

	return true
剩下的内容就是一些预处理和NMS后处理,这里就不再赘述了,执行完程序后就会在指定路径下生成INT8量化的Table文件以及INT8量化后的TRT序列化文件,后面就可以直接加载这个文件进行推理了。所有完整细节请看我的提供的完整源码。
5. 1050Ti的速度测试
| YOLOV3-Tiny TRT模型 | Inference Time |
|---|---|
| FP32 | 17ms |
| INT8 | 4ms |
在1050Ti上运行了20个Loop测试了速度,发现前向推理的速度有4倍提升,同时TRT序列化文件的大小也减少了4倍左右。
6. 源码获取
在GiantPandaCV公众号后台回复 INT8 获取完整CPP文件。注意TensorRT版本为6.0。
公众号二维码:

7. 附录
- TensorRT INT8量化官方PPT: http://on-demand.gputechconf.com/gtc/2017/presentation/s7310-8-bit-inference-with-tensorrt.pdf
- https://github.com/NVIDIA/TensorRT/tree/release/6.0/samples/opensource/sampleINT8
欢迎关注GiantPandaCV, 在这里你将看到独家的深度学习分享,坚持原创,每天分享我们学习到的新鲜知识。( • ̀ω•́ )✧
有对文章相关的问题,或者想要加入交流群,欢迎添加BBuf微信:


 8803
8803


 被折叠的 条评论
为什么被折叠?
被折叠的 条评论
为什么被折叠?
 到【灌水乐园】发言


