


数组
指针

指针处理数组元素:
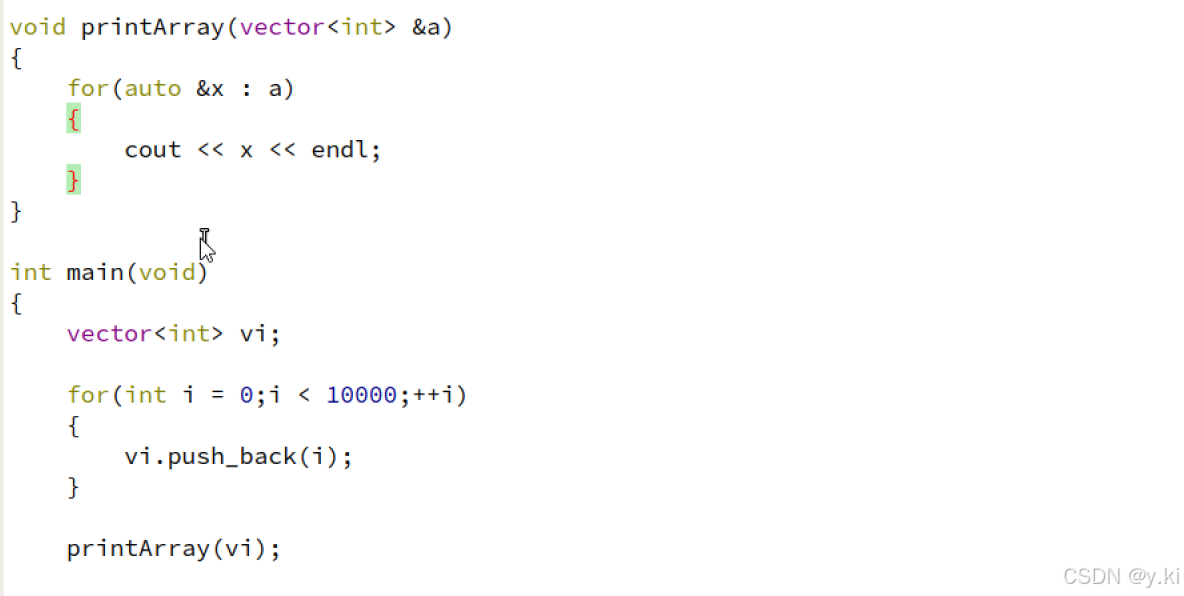
🙋♂️练习:实现数组的打印
(1)
(2)
#include <iostream> #include <cstdlib> using namespace std; bool fn(int) { return true; } void printArray(int *a,int len, bool(*pfn)(int)) { for(int i = 0;i <len; ++i) { if(pfn(a[i])) { cout << a[i] << endl; } } } int intcmp(const void *p1,const void *p2) { int *q1 = reinterpret_cast<int *>(const_cast<void*>(p1)); int *q2 = reinterpret_cast<int *>(const_cast<void*>(p2)); return *q1 - *q2; } int main() { int a[] = {1,2,0,4,5,6,-1,8,-3,0}; int len = sizeof(a)/sizeof(*a); printArray(a,len,fn); return 0; }🙋♂️练习:实现快速排序
另一种方式 lamdalamda:短小函数就地编写
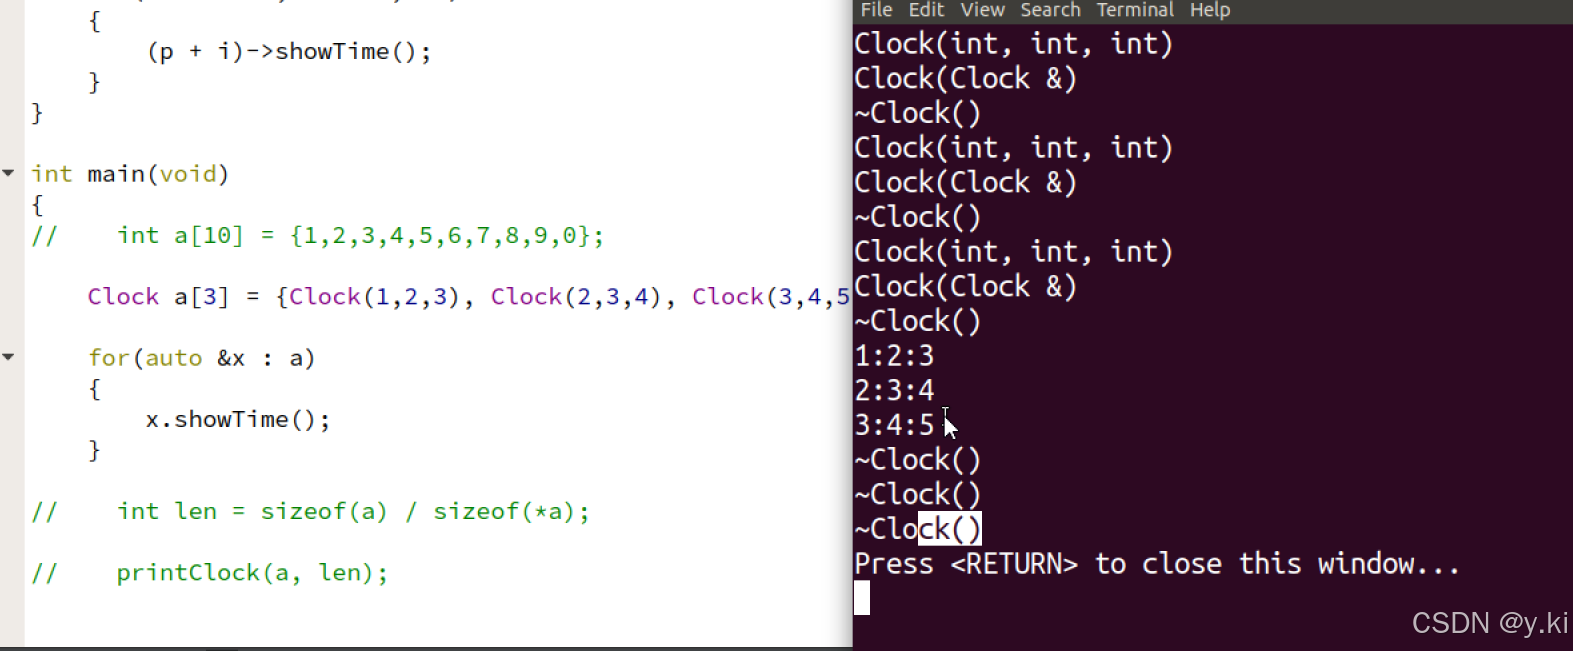
(4)二维数组的打印


指针型函数
定义:一个指针可以指向函数
数据类型 * 函数名(参数名)
{
函数体
}
作用:降低程序耦合性

降低耦合性:
int add(int a,int b) { return a+b; } bool div3(int n) { return n%3==0; } bool div2(int n) { return n%2==0; } bool fn(int) { return true; } void printArray(int *a,int len,bool (*pfn)(int)) { for(int i = 0;i<len;i++) { if(pfn(a[i])) { cout << a[i]<<endl; } } } int main() { int (*p)(int ,int)=nullptr; int a[]={1,10,2,7,3,5,6,8,9}; int len=sizeof(a)/sizeof(*a); printArray(a,len,div3); //printArray(a,len,add); //printArray(a,len,div2); return 0; }🙋♂️练习:实现斐波那契数列
数列的前几项是:0, 1, 1, 2, 3, 5, 8, 13, 21, 34, ...
int fib(int n)//feibonaqieshulie { if(1 == n || 2 == n) { return 1; } else { return fib(n-1) + fib(n-2); } } void printArray(int *a,int len) { for(int i = 0;i< len; ++i) { cout << *(a+i) << endl; } } int main(void) { int n = 10; int *p = new int[n]; for(int j = 0; j< n ;++j) { p[j] = fib(j+1); } printArray(p,n); }🙋♂️练习:实现容量的扩展 fib
#include <cstring>
#include <iostream>
#include <cstdlib>
using namespace std;

int fib(int n)//fib
{
    if(1 == n || 2 == n)
    {
        return 1;
    }
    else
    {
        return fib(n-1) + fib(n-2);
    }
}
void printArray(int *a,int len)
{
    for(int i = 0;i< len; ++i)
    {
        cout << *(a+i) << endl;
    }
}
int main(void)
{
    int n = 10;
    int *p = new int[n];
    for(int i = 0; i < n; ++i)
    {
        p[i] = fib(i+1);
    }
    printArray(p,n);

    int m= 20;
    int *q = new int[m];
    memcpy(q,p,n*sizeof(int));
    delete[]p;
    p = q;
    for(int i = 0;i<m;++i)
    {
        p[i] = fib(i+1);
    }
    printArray(p,m);
    delete []p;
    p = q = nullptr;
    delete p;
    return 0;
}


动态内存分配
关键词 new delete
MyClass* myObject = new MyClass(); // 动态分配内存并调用默认构造函数,没有给出参数类表
delete myObject; //会自动调用析构函数
// 释放内存,否则会导致动态内存的内存无法收回导致程序占据内存越来越大,则内存泄漏
// 这时delete仅仅释放了myObject指向的空间,并调用了析构函数,之后myObject就会变成空指针,即它指向的内存已经被释放,但指针的值没有改变。因此,一个常见的做法是将指针设置为nullptr,以避免野指针(dangling pointer)的问题:
myObject = nullptr;


==== int * p = new int () ; // 初始化
==== int * p = new int [ ] ;
int * point ;
point = new int (2) ;
delete point ;
// ( )则是赋值的意思,动态分配了用于存放int型数据的内存空间,并将2存入空间,然后将首地址赋给指针point
int *point;
point = new int [ 2 ];
delete[ ] point ;
//如果只是delete point 可能会造成内存泄漏
// [ ] 则表示分配了一个整型数组,其中包含了两个元素
简述malloc free 与new delete 差异
1. 所属语言及类型
- malloc和free:它们是C语言标准库中的函数。
- new和delete:它们是C++中的操作符,不是函数。
2. 内存管理单位
- malloc和free:以字节为单位进行内存管理,需要手动指定需要分配或释放的字节数。
- new和delete:以对象为单位进行内存管理,无需手动计算需要分配或释放的字节数,编译器会自动计算。
3. 返回值及类型转换
- malloc:返回
void*类型的指针,需要显式地进行类型转换。 - new:返回分配对象的指针,不需要显式地进行类型转换。
4. 构造函数与析构函数的调用
- malloc和free:不会调用构造函数和析构函数。
- new和delete:会自动调用构造函数和析构函数。
5. 初始化
- malloc:分配的内存不会自动初始化,其内容是未定义的。
- new:分配内存的同时可以调用构造函数进行初始化。
6. 错误处理
- malloc:失败时返回
NULL。 - new:失败时会抛出
std::bad_alloc异常。
7. 数组处理
- malloc和free:对于数组,需要手动计算总字节数并分配,释放时也是通过
free。 - new和delete:对于数组,使用
new[]分配,delete[]释放。
8. 类型安全
- malloc和free:由于返回的是
void*类型,存在类型不匹配的风险。 - new和delete:确保类型安全,因为它们返回的是具体类型的指针。
9. 性能和效率
- new和delete:作为C++的内置操作符,它们在执行时可能更高效,因为它们与C++的运行时环境紧密集成。
- malloc和free:虽然它们在C中广泛使用,但在C++中可能不如
new和delete高效,特别是在处理对象时。
10. 使用建议
- 在C++中,推荐使用
new和delete进行内存管理,因为它们提供了更好的类型安全性和自动的构造函数/析构函数调用。
如果在C++中需要与C代码交互或处理非对象类型的内存分配,可以考虑使用malloc和free,但应谨慎处理类型转换和内存初始化问题。
字符串 string类

🙋♂️练习:实现append,assign
string类的成员函数有很多,每个函数都有多种重载形式
- string append (const char *s) // 将字符串s添加在本串尾

append追加的重载函数

- string assign ( const char * s) // 赋值,将s所指向的字符串赋值给本对象

assign重载

- unsigned int length( )const ; // 返回字符串的长度(字符个数)

完整代码: (1)
#include <iostream>
#include <cstring>
using namespace std;
//实现hello!world打印
class String
{
public:
    String(const char *p)
    {
        m_p = new char[strlen(p) + 1];
        strcpy(m_p,p);
    }
    void show()const //修饰this
    {
        cout<<m_p<<endl;
    }
    // 追加
    void append(const char *p)//存在两个参数还有this->m_p
    {
        char *q = new char[strlen(m_p) + strlen(p) + 1];
        strcpy(q,m_p);
        strcat(q,p);
        delete []m_p;
        m_p = q;
    }
 #if 0
   // 追加重载
    void append(const String &other)
    {
        //this //other
        char *p = new char[strlen(this->m_p) + strlen(other.m_p) + 1];
        strcpy(p,this->m_p);
        strcat(p,other.m_p);
        delete [] this->m_p;
        this->m_p = p;
    }
#endif
    size_t length()const
    {
        return strlen(m_p);
    }
private:
    char *m_p;
};
int main()
{
    String s("Hello!");
    s.append("world");
    s.show();;
   // cout << "Hello World!" << endl;
    return 0;
}

#if 0
int main()
{
    String s("Hello!");
    String s1("world");
    s.append(s1);
    s.show();;
    return 0;
}
#endif
(2)
#include <iostream>
#include <cstring>
using namespace std;

//实现赋值将hello->china
class String
{
public:
    String(const char *p)
    {
        m_p = new char[strlen(p) + 1];
        strcpy(m_p,p);
    }
    void show()const //修饰this
    {
        cout<<m_p<<endl;
    }
    void assign(const char *p)
    {
        char *q = new char[strlen(p) + 1];
        strcpy(q,p); //将china放到新空间
        delete []m_p;
        m_p = q;
    }
// 重载
#if 0
     void assign(const String &other)
    {
        if(this != &other)
        {
          char *q = new char[strlen(other.m_p) +1 ];
          strcpy(q,other.m_p);
          delete []this->m_p;
          this->m_p = q;
        }
    }
#endif
    size_t length()const
    {
        return strlen(m_p);
    }
private:
    char *m_p;
};
int main()
{
    String s("Hello!");
    s.assign("China");//赋值
    s.show();;
    return 0;
}
#if 0
int main()
{
    String s("Hello!");
    String s1("China");
    s.assign(s1);//赋值
    s.show();;
    return 0;
}
#endif
深复制与浅复制构造
- 浅复制构造
定义:浅复制构造仅复制对象成员的值,包括指针成员的值,但不复制指针所指向的内存区域。这意味着,原对象和新对象中的指针成员将指向同一块内存区域。
- 深复制构造
定义:深复制构造不仅复制对象成员的值,还复制指针成员所指向的内存区域的内容到新的内存区域,并更新新对象的指针成员以指向这块新的内存区域
- 浅复制构造新对象会和原对象共享同一块内存,所以当其中一个对象被销毁时候调用的析构函数会将动态分配的内存释放,这是另一个对象的指针就会变成悬空指针,这时就会导致内存访问失败,但是深复制构造函数不会存在这个问题,因为新的ptr会指向一块新的区域,该区域原来的ptr指向的副本,所以它们各自独立。
(先销毁ptr1时调用析构,析构函数会使开辟的空间销毁,随后当销毁ptrz时候析构函数会将相同的空间销毁两次,虽然可以实现但是会报错,这时候就要将浅复制构造变为深复制构造,再开辟一个空间)


List
list 的构造
- 实现头插
- 获得结点个数
- 实现头删
- 实现尾插
- 实现尾删
- 清除


完整代码:
#include <iostream>
#include <cstring>
using namespace std;

struct Node
{
    Node(int value =0,Node *p=nullptr):data(value),next(p){}
    int data;
    Node *next;
};
class List
{
public:
    List():pHead(nullptr){}
    List(const List &other ):pHead(nullptr)
    {
        Node *p = other.pHead;
        while(p != nullptr)
        {
            this->push_back((p->data));
            p = p->next;
        }
    }


    void push_front(int n)
    {
        Node *pNew =new Node(n);
        pNew->next=pHead;
        pHead= pNew;
    }
    size_t size() const
    {
        size_t cout=0;
        Node *p=pHead;
        while(p)//p!=nullptr
        {
            cout ++;
            p=p->next;
    }
        return cout;
    }
    void push_back(int n)
    {
        if(isEmpty())
        {
            push_front(n);
        }
        else
        {
            Node *pNew = new Node(n);
            Node *p=pHead;
            while(p->next)
            {
                p=p->next;
            }
            p->next=pNew;
        }
    }
    void pop_front(void)
    {
        if(!isEmpty())
        {
            Node *p=pHead;
            pHead=p->next;
            delete p;
        }
    }
    void pop_back(void)
    {
        if(size() >= 2)
        {
            Node *p =pHead;
            while(p->next->next != nullptr)
            {
                p = p->next;
            }
            delete p->next;
            p->next = nullptr;
        }
        else
        {
            pop_front();
        }
    }
    void clean(void)
    {
        while(!isEmpty())
        {
            pop_front();
        }
    }
    bool isEmpty() const
    {
        return pHead == nullptr;
    }
    void show()
    {
        Node *p=pHead;
        while(p)
        {
            cout<<p->data<<",";
            p=p->next;
        }
        cout <<"\b\n";
    }

private:
    Node *pHead;

};
int main()
{
    List l;
    cout<<"size = "<<l.size()<<endl;
    cout<<"isEnpty = "<<l.isEmpty()<<endl;
    //头插
    l.push_front(1);
    l.push_front(2);
    l.push_front(3);

    //尾插
    l.push_back(4);

    //头删
    l.pop_front();

    //尾删
    l.pop_back();

    //清除
    l.clean();

    l.show();
    cout<<"size = "<<l.size()<<endl;
    cout<<"isEnpty = "<<l.isEmpty()<<endl;
    return 0;
} 


 882
882

 被折叠的 条评论
为什么被折叠?
被折叠的 条评论
为什么被折叠?
 到【灌水乐园】发言


