


如何在不使用 Git 的情况下生成神经网络结构图
网上大部分资料都建议先安装 MiKTeX、Git 和 PlotNeuralNet,然后通过 Git 执行一些命令来生成神经网络结构图。但其实,不使用 Git 也可以正确生成 LaTeX 文件并编译为 PDF 文件。
参考资料
卷积神经网络工具PlotNeuralNet在Windows安装并使用
使用PlotNeuralNet绘制深度学习网络图
PlotNeuralNet_2_概览与优化
PlotNeuralNet 是一个基于 LaTeX 的工具,用于绘制深度学习网络的结构图,它依赖于 LaTeX 环境,因此需要先安装 LaTeX
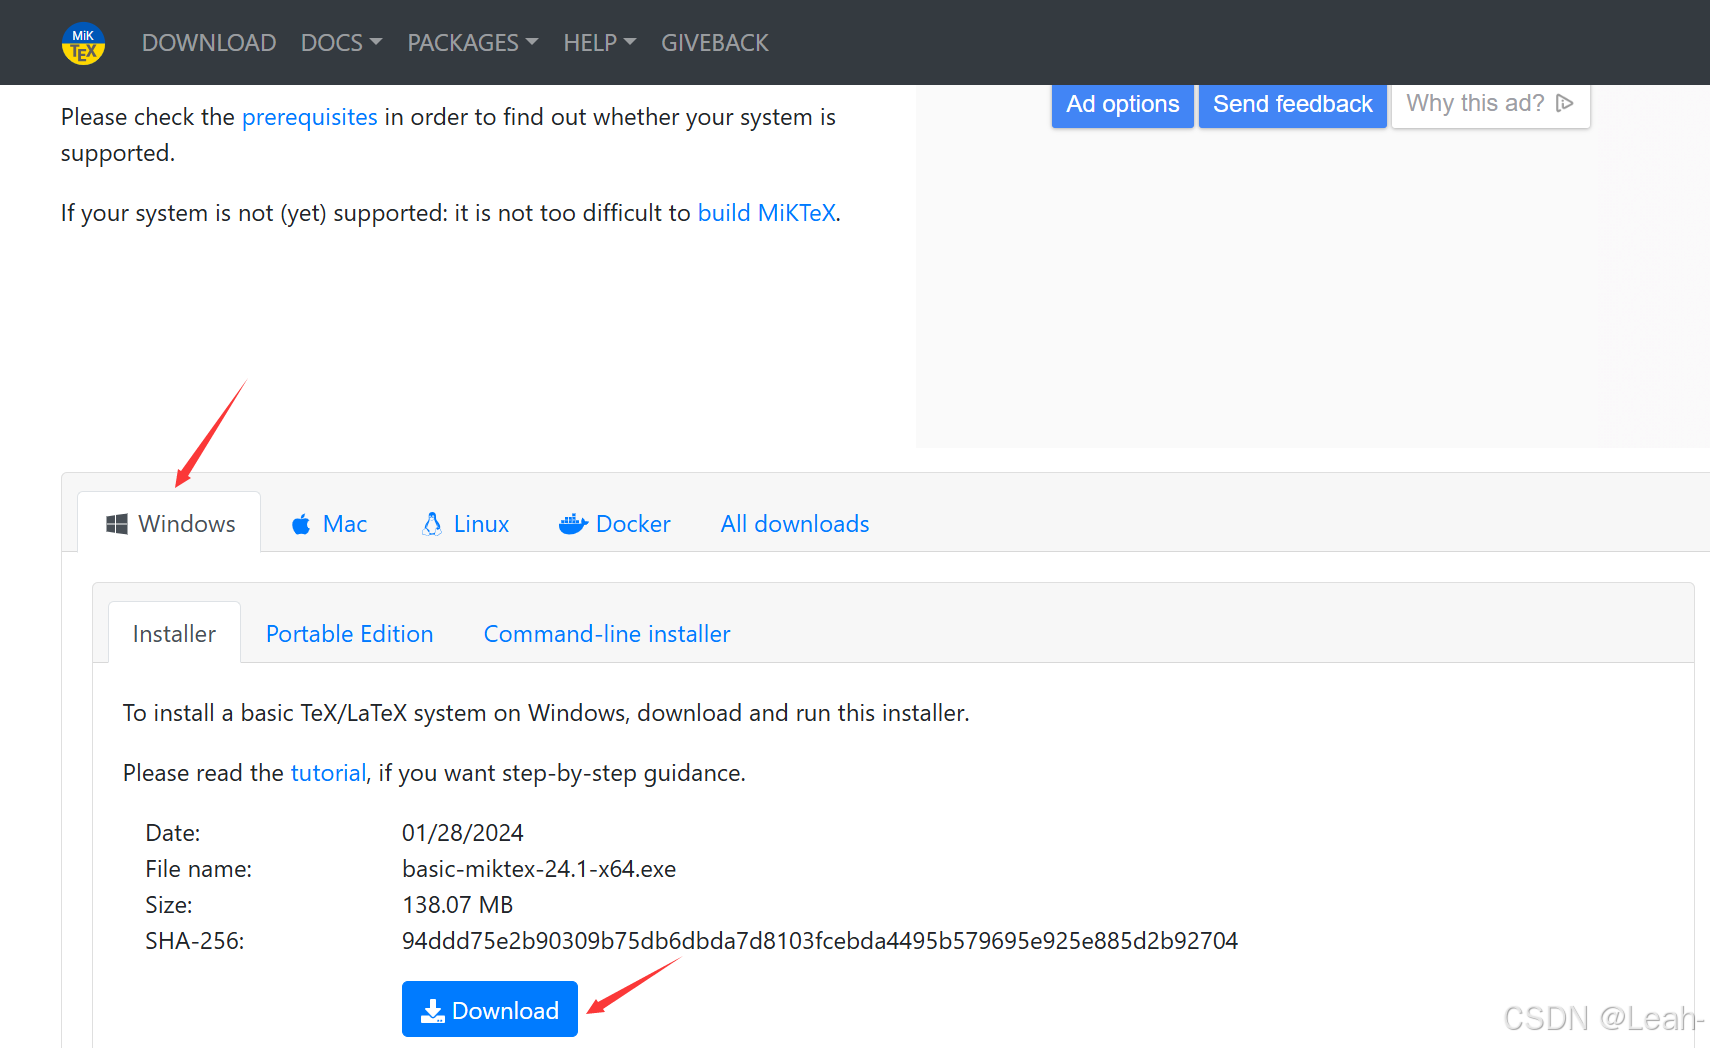
一、安装 LaTeX 环境
二、下载 PlotNeuralNet
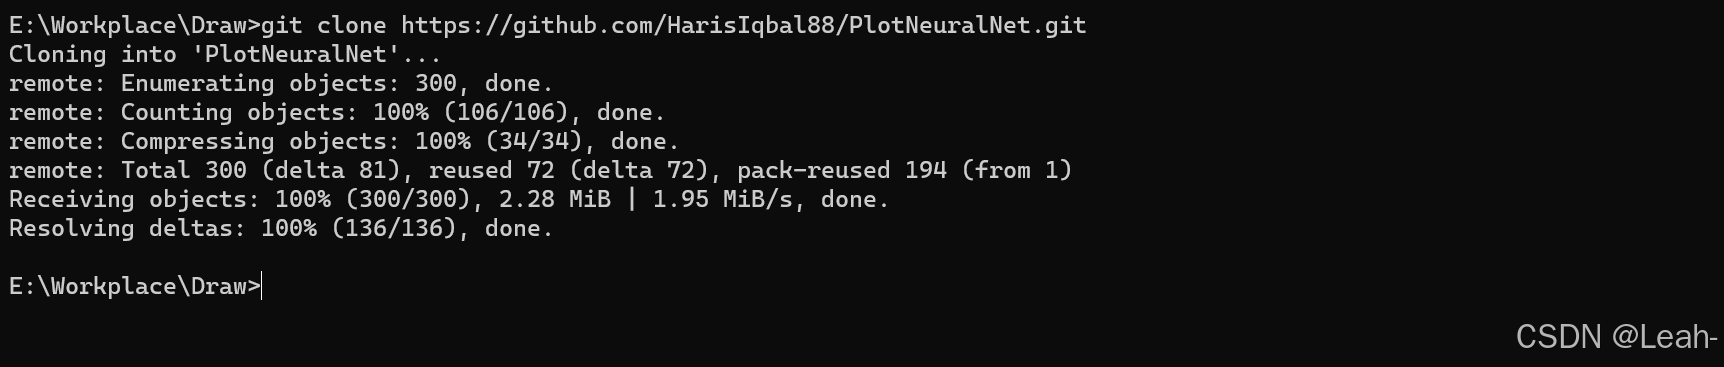
先创建一个文件夹,使用cmd进入,输入以下命令(git是我很早以前装的,你可以直接下载解压PlotNeuralNet到创建的文件夹中)
git clone https://github.com/HarisIqbal88/PlotNeuralNet.git
三、创建网络结构文件
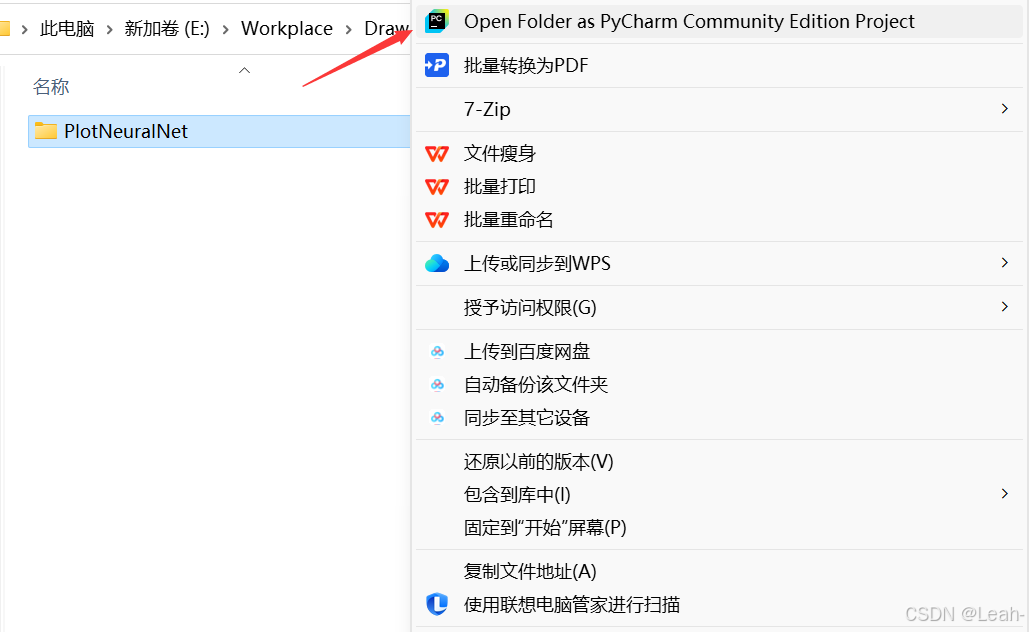
1.使用pycharm打开该文件
2.创建Python文件
创建一个文件夹,再创建一个 Python文件(例如 test.py),并使用 pycore.tikzeng 模块定义网络结构
确保文件结构是这样的,不然可能会导致 LaTeX 找不到 init.tex 文件,从而引发错误
PlotNeuralNet/
├── layers/
│ ├── init.tex
│ └── …
├── my_project/
│ ├── test.py
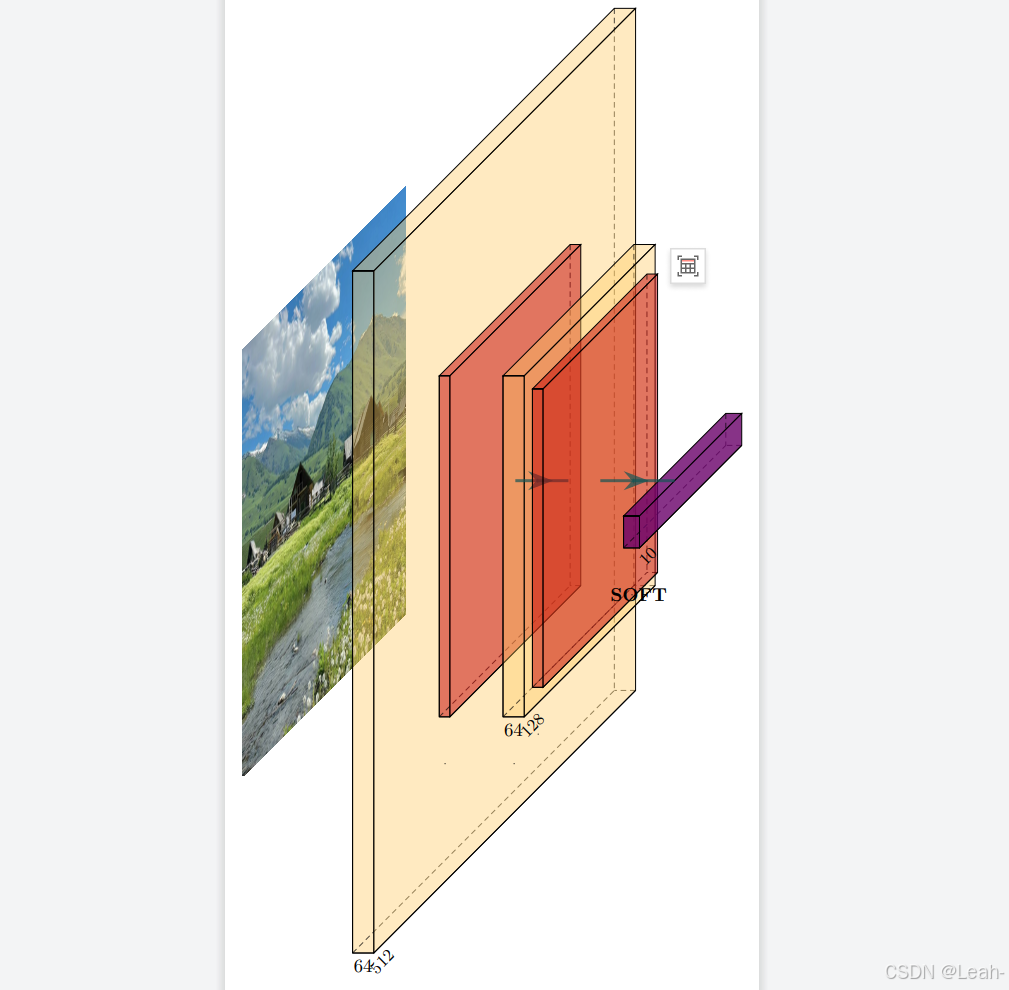
运行之前,你需要在当前目录下放入一张图片

import sys
from pycore.tikzeng import *

arch = [
    to_head('..'),
    to_cor(),
    to_begin(),

    # 定义网络结构
    to_input('input.jpg', name="input"),
    to_Conv("conv1", 512, 64, offset="(0,0,0)", to="(0,0,0)", height=64, depth=64, width=2),
    to_Pool("pool1", offset="(0,0,0)", to="(conv1-east)"),
    to_Conv("conv2", 128, 64, offset="(1,0,0)", to="(pool1-east)", height=32, depth=32, width=2),
    to_connection("pool1", "conv2"),
    to_Pool("pool2", offset="(0,0,0)", to="(conv2-east)", height=28, depth=28, width=1),
    to_SoftMax("soft1", 10, "(3,0,0)", "(pool1-east)", caption="SOFT"),
    to_connection("pool2", "soft1"),

    to_end()
]

def main():
    namefile = str(sys.argv[0]).split('.')[0]
    to_generate(arch, namefile + '.tex')

if __name__ == '__main__':
    main()
3.运行脚本生成 LaTeX文件
运行test.py就会生成对应的 test.tex 文件
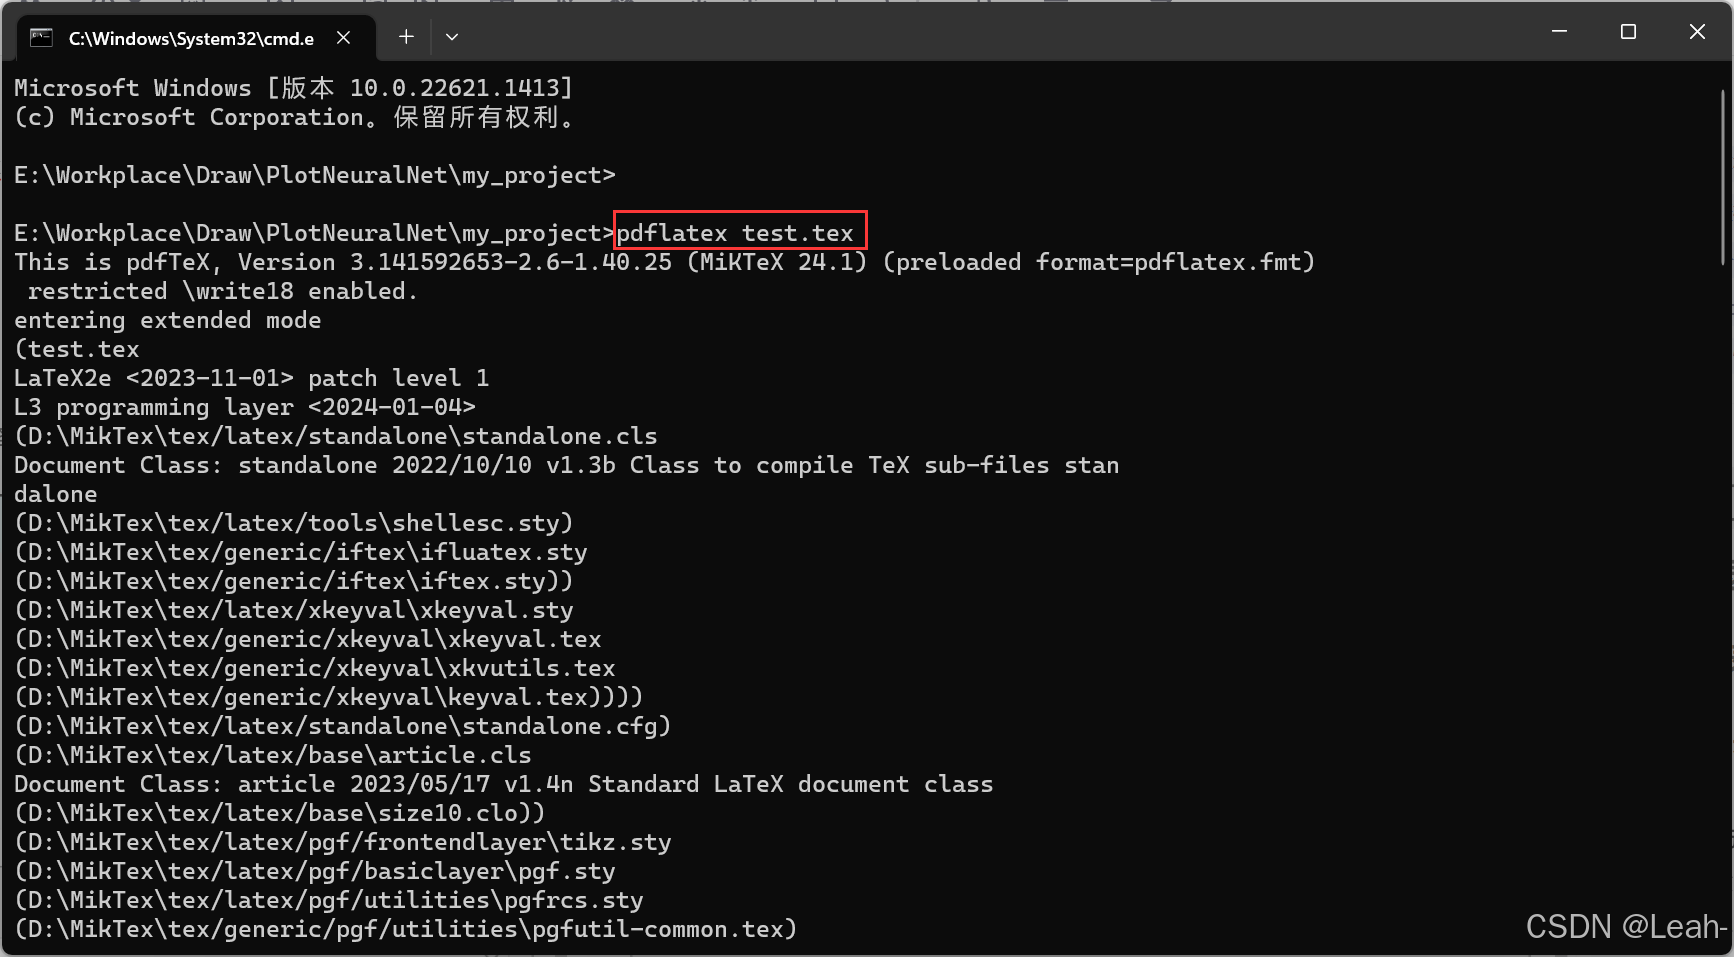
4.编译 LaTeX文件为 PDF
使用cmd进入到当前文件夹,执行以下命令
pdflatex test.tex
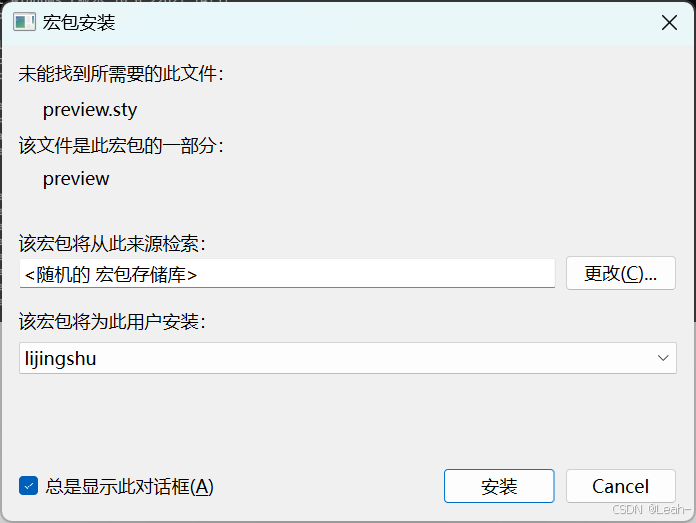
运行过程中会弹出宏包安装框,选择安装就可以了
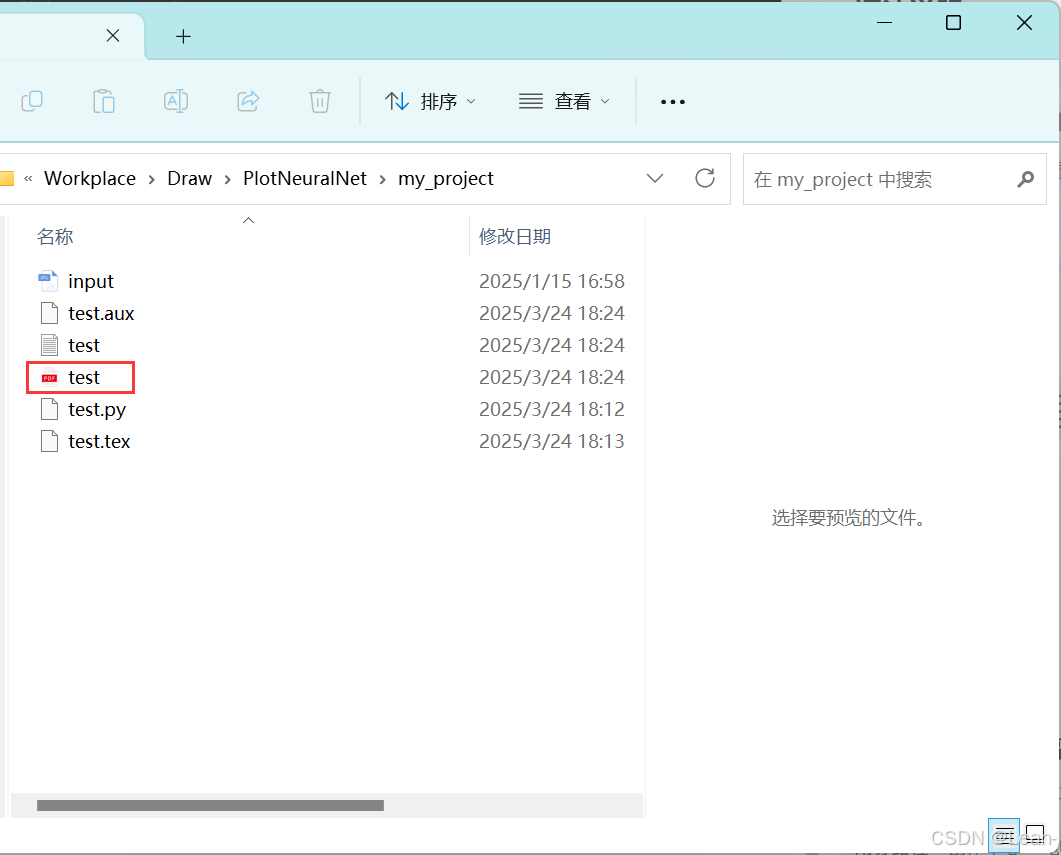
5.查看生成的PDF文件
超级简单的方法(融合3、4)
可以使用以下代码直接生成 LaTeX 文件并编译为 PDF 文件,同时清理不必要的文件。
import subprocess
import sys

from pycore.tikzeng import *

arch = [
    to_head('..'),
    to_cor(),
    to_begin(),

    # 定义网络结构
    .....
    to_end()
]

def main():
    # 获取当前脚本的文件名(不包含扩展名)
    filename = os.path.basename(__file__).split('.')[0]
    # 生成 LaTeX 文件
    to_generate(arch, filename + '.tex')
    # 编译 LaTeX 文件为 PDF
    try:
        subprocess.run(['pdflatex', filename + '.tex'], check=True)
    except subprocess.CalledProcessError as e:
        print(f"Error occurred while running pdflatex: {e}")
    os.remove(filename + '.aux')
    os.remove(filename + '.log')
    os.remove(filename + '.tex')
if __name__ == '__main__':
    main()


 3714
3714

 被折叠的 条评论
为什么被折叠?
被折叠的 条评论
为什么被折叠?
 到【灌水乐园】发言


