


自定义粒子系统示例(一)
自定义粒子系统示例(一)的代码如程序清单11-5所示:
/* 自定义粒子系统示例1 */
void particleSystem_11_5(const string &strDataFolder)
{
	osg::ref_ptr<osgViewer::Viewer> viewer = new osgViewer::Viewer();
	osg::ref_ptr<osg::GraphicsContext::Traits> traits = new osg::GraphicsContext::Traits;
	traits->x = 40;
	traits->y = 40;
	traits->width = 600;
	traits->height = 480;
	traits->windowDecoration = true;
	traits->doubleBuffer = true;
	traits->sharedContext = 0;

	osg::ref_ptr<osg::GraphicsContext> gc = osg::GraphicsContext::createGraphicsContext(traits.get());

	osg::ref_ptr<osg::Camera> camera = viewer->getCamera();
	camera->setGraphicsContext(gc.get());
	camera->setViewport(new osg::Viewport(0, 0, traits->width, traits->height));
	GLenum buffer = traits->doubleBuffer ? GL_BACK : GL_FRONT;
	camera->setDrawBuffer(buffer);
	camera->setReadBuffer(buffer);

	osg::ref_ptr<osg::Group> root = new osg::Group();

	// 自定义粒子系统加入场景
	root->addChild(createParticleScene(strDataFolder));

	// 优化场景数据
	osgUtil::Optimizer optimize;
	optimize.optimize(root.get());

	viewer->setSceneData(root.get());

	viewer->realize();
	viewer->run();
}

// 创建自定义粒子系统
osg::ref_ptr<osg::Group> createParticleScene(const string &strDataFolder)
{
	osg::ref_ptr<osg::Group> root = new osg::Group();

	// 创建粒子系统模板
	osgParticle::Particle ptemplate;
	ptemplate.setLifeTime(2);// 设置声明周期
	ptemplate.setSizeRange(osgParticle::rangef(0.75, 3.0));// 设置粒子大小变化范围
	ptemplate.setAlphaRange(osgParticle::rangef(0.0, 1.0));// 设置粒子Alpha变化范围
	ptemplate.setColorRange(osgParticle::rangev4(osg::Vec4(1.0, 0.5, 0.3, 1.0),
		osg::Vec4(0.0, 0.7, 1.0, 0.0)));// 设置粒子颜色变化范围
	ptemplate.setRadius(0.05);// 设置半径
	ptemplate.setMass(0.05);// 设置重量

	// 创建粒子系统
	osg::ref_ptr<osgParticle::ParticleSystem> ps = new osgParticle::ParticleSystem();

	string strClrPath = strDataFolder + "Images\\smoke.rgb";
	ps->setDefaultAttributes(strClrPath, false, false);// 设置材质,是否放射粒子,是否添加光照
	ps->setDefaultParticleTemplate(ptemplate);// 加入模板

	// 创建发射器和计数器,调整每一帧增加的粒子的数目
	osg::ref_ptr<osgParticle::RandomRateCounter> counter = new osgParticle::RandomRateCounter();
	counter->setRateRange(100.0,100.0);// 设置每秒增加的粒子的个数

	// 设置一个点放置器
	osg::ref_ptr<osgParticle::PointPlacer> placer = new osgParticle::PointPlacer();
	placer->setCenter(osg::Vec3(0.0, 0.0, 0.0));// 设置位置

	// 创建弧度发射器
	osg::ref_ptr<osgParticle::RadialShooter> shooter = new osgParticle::RadialShooter();
	shooter->setInitialSpeedRange(100, 0);// 设置发射器速度变化范围

	// 创建粒子放射器(包括计数器、放射器和发射器)
	osg::ref_ptr<osgParticle::ModularEmitter> emitter = new osgParticle::ModularEmitter();
	emitter->setParticleSystem(ps.get());// 关联粒子系统
	emitter->setCounter(counter.get());// 关联计数器
	emitter->setPlacer(placer.get());// 关联点放置器
	emitter->setShooter(shooter.get());// 关联发射器
	root->addChild(emitter.get());// 加入场景


	// 创建重力模拟对象
	osg::ref_ptr<osgParticle::AccelOperator> ap = new osgParticle::AccelOperator();
	ap->setToGravity(-1.0);// 设置重力加速度,默认值为9.80665

	// 创建空气阻力模拟
	osg::ref_ptr<osgParticle::FluidFrictionOperator> ffo = new osgParticle::FluidFrictionOperator();
	// FluidViscosity为1.8e-5,FluidDensity为1.2929
	ffo->setFluidToAir();// 设置空气属性

	// 创建标准编程器对象,控制粒子在生命周期中的更新
	osg::ref_ptr<osgParticle::ModularProgram> program = new osgParticle::ModularProgram();
	program->setParticleSystem(ps.get());// 关联粒子系统
	program->addOperator(ap.get());// 关联重力
	program->addOperator(ffo.get());// 关联空气阻力
	root->addChild(program.get());// 添加到场景

	// 添加更新器,实现每帧粒子的管理
	osg::ref_ptr<osgParticle::ParticleSystemUpdater> psu = new osgParticle::ParticleSystemUpdater();
	psu->addParticleSystem(ps.get());// 关联粒子系统


	osg::ref_ptr<osg::Geode> geode = new osg::Geode;
	geode->addDrawable(ps.get());
	root->addChild(geode.get());// 加入到场景中
	root->addChild(psu.get());

	return root.get();
}
运行程序,截图如图11-7所示。
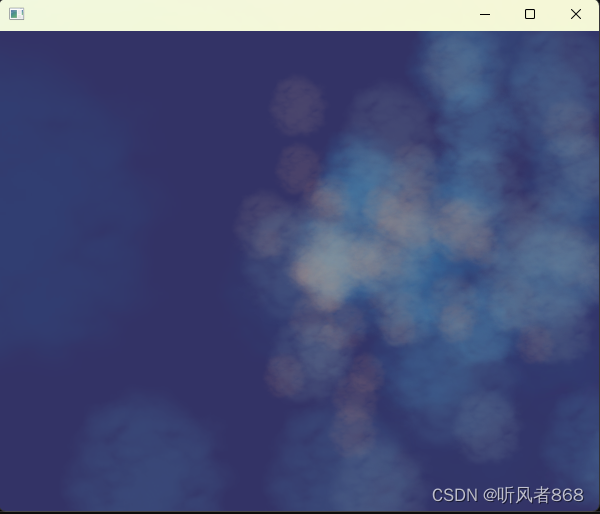
图11-7自定义粒子系统示例(一)截图


 185
185


 被折叠的 条评论
为什么被折叠?
被折叠的 条评论
为什么被折叠?
 到【灌水乐园】发言


