


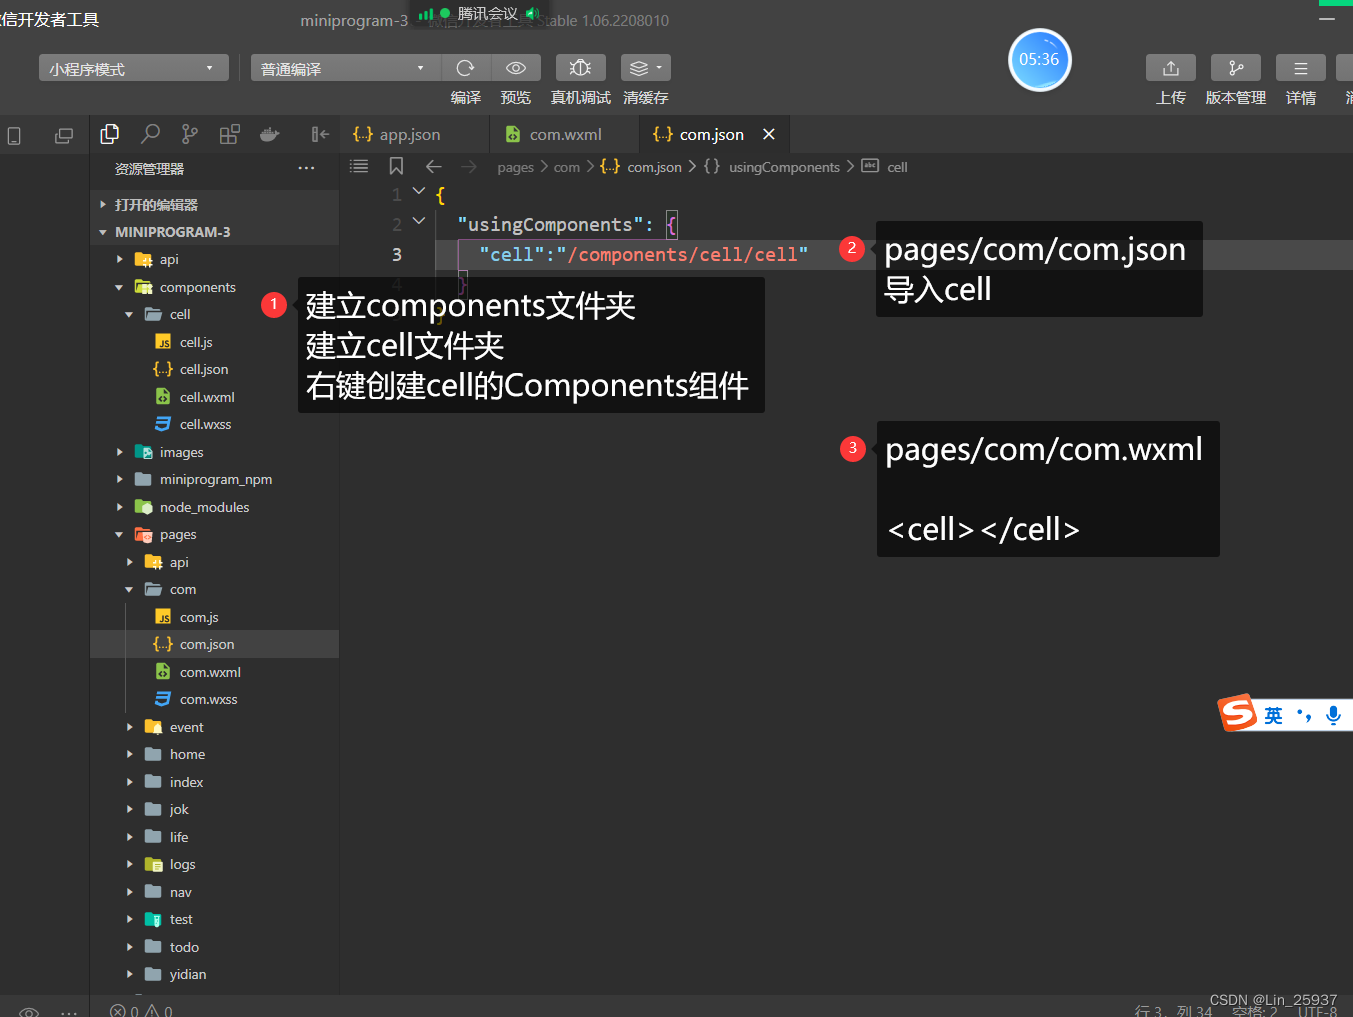
1.组件的创建和使用
1.首先新键一个存放组件的文件夹components,
2.在文件夹内创建一个组件的文件夹(cell)
3.右击cell文件夹选择components组件
4.在要使用的页面dejson中usingComponents中导入组件:”cell“:“components/cell.cell”
5.在使用组件的页面通过标签引入
注意:cell要和json中注册组件的名字相同
2.组件的样式隔离
在组件的js中options对象中进行设置
 options:{
    // 样式隔离:apply-shared 父影响子,shared父子相互影响, isolated相互隔离
    styleIsolation:"isolated",

},
3.定义外部类实现组件样式的隔离和复用
1.在组件的js中使用externalClass属性,定义租金按的类名
2.在组件的wxhml页面使用
3.在使用组件的页面 通过类名选择器进行命名类名,然后就可以通过类名在使用组件的wxcs页面进行定义样式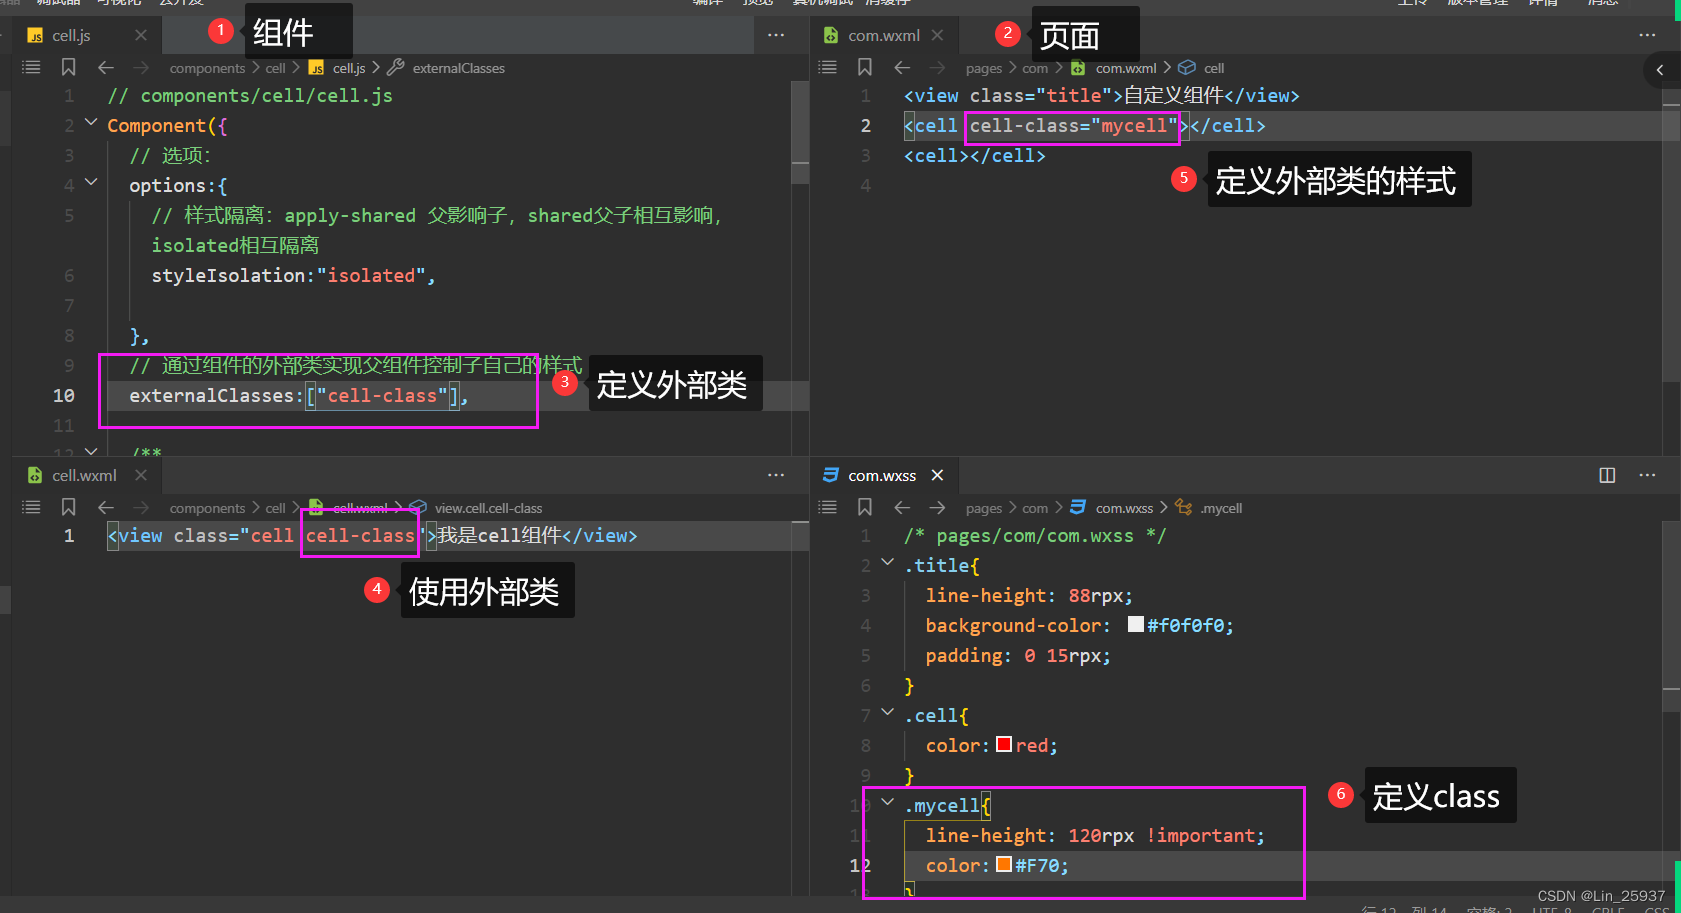
4. 组件的默认插槽和自定义插槽
子组件
<view><slot></slot></view>
父组件
<cell>
      <text>插槽内容</text>
</cell>
2.自定义多插槽
子组件,并在子组件的option中定义options:{ multipleSlots:true}
<view>
    <slot name="pre"></slot>
    <slot name="next"></slot>
</view>
父组件
<cell>
    <text slot="pre"> 🚒</text>
    <text slot="next">🥗</text>
</cell>
5.组件的传参
子传参父:triggerEvent
父传子:property
6.定义组件item
props
    title 标题
    icon 图标
    tip 提示
    url 跳转链接
    open-type 打开方式
slot
    right
    left 插槽
event:click事件
外部类
    itemClass整体
    titleClass标题
7.登陆功能的实现
login.js
Page({

  /**
   * 页面的初始数据
   */
  data: {
    "userInfo":{},
  },
  getProfile(){
    var that = this;
    wx.getUserProfile({
      desc: '用户头像信息',
      success:(result)=>{
        console.log(result);
        that.login(result.userInfo)
      }
    })
  },

  /**
   * 生命周期函数--监听页面加载
   */
  onLoad(options) {
    this.login()
  },
login(info={}){
  var that=this
 wx.login({
   success: (res) => {
     console.log(res)
     wx.request({
      url: 'https://www.520mg.com/start/wxloginb.php',
      data:{
        code:res.code,
        // appid:"wx2faa984a2b2f43da",
        appid:"wxf40ef1486cbdb7b0",
        AppSecret:"8725dbb3cb80dedb5e3a55654aedcfac",
        // AppSecret:"be7b5ff3f8539c4f48402619ff5424a",
        ...info
      },
      success:res=>{
        console.log(res.data);
        wx.setStorageSync('userInfo', res.data)
        that.setData({userInfo:res.data})
      },
      fail(err){
        console.log(err);
      }
     })
   },
 })
},
  /**
   * 生命周期函数--监听页面初次渲染完成
   */
  onReady() {

  },
login.wxml
<view wx:if="userInfo.avatarUrl">
  <image src="{{userInfo.avatarUrl}}" style="width: 88rpx; height: 88rpx;" mode=""/>
  <view>
    {{userInfo.nickName}}
  </view>
</view>
<view>
  <button bindtap="getProfile" size="mini">获取用户头像</button>
</view>


 586
586


 被折叠的 条评论
为什么被折叠?
被折叠的 条评论
为什么被折叠?
 到【灌水乐园】发言


