


1.SurfaceView简介:
SurfaceView与普通的View的区别就是View视图必须在当前UI线程中进行,这也是在更新View组件时总要采用Handler处理的原因;但SurfeceView不会存在这个问题,它的绘图是由SurfaceHolder来完成的,SurfaceHolder会启动新的线程去更新SurfaceView的绘制,不会阻塞主UI线程。一般而言,如果程序中或游戏界面中的动画元素较多,而且很多动画元素都需要通过定时器来控制,就可以考虑使用SurfaceView而不是View。
2.SurfaceView的使用:
使用SurfaceView时,需要在新建线程去更新UI。其使用步骤如下:
1.用findViewById获取SurfaceView实例
2.用其getHolder方法取得holder实例
3.利用holder的holder.lockCanvas()封锁并获取Canvas实例
4.在Canvas上绘制相应图形
5.用holder.unlockCanvasAndPost(canvas)方法解锁并将Canvas显示到SurfaceView上面
使用场景:
设想一个在surface模拟下雪的场景
1. 在layout设定一个继承自SurfaceView的View.
2. 这个View起名SnowSurfaceView.
3. 模拟下雪实际是多个雪花图片, 从屏幕上方到下方的动态绘制, 而且本次绘制之前要清除上次的绘制内容(否则图片会连成一条竖线),
同时考虑超出屏幕范围的雪花要重置x和y坐标, 保证回到屏幕内(雪花飘到屏幕下方, 要重新回到上面去,接着飘落)
4.然后就根据使用流程开始写代码
<1> 获取holder. 在SnowSurfaceView的构造方法中
mHolder = this.getHolder();
mHolder.setFormat(PixelFormat.TRANSLUCENT);
mHolder.addCallback(this);int widthMode = MeasureSpec.getMode(widthMeasureSpec);
if (widthMode == MeasureSpec.EXACTLY) {
mViewWidth = MeasureSpec.getSize(widthMeasureSpec);
}<4>画雪花方法
private void drawView() {
        if (mHolder == null) {
            return;
        }
        Canvas canvas = mHolder.lockCanvas();
        if (canvas == null) {
            return;
        }
        canvas.drawColor(Color.TRANSPARENT, PorterDuff.Mode.CLEAR);
        drawSnow(canvas);
        mHolder.unlockCanvasAndPost(canvas);
    }
<5>开启画雪花的线程
    public void start() {
        new Thread(){
            @Override
            public void run() {
                while (true) {
                    try {
                        updatePara();
                        drawView();
                        Thread.sleep(20);
                    }
                    catch (Exception ex) {
                        ex.printStackTrace();
                    }
                }
            }
        }.start();
    }
3. 指引界面的实现,参考showtipsview
(1)透明圆圈实际是先绘制一层半透明灰, 然后设置画刷属性setXfermode PorterDuff.Mode.CLEAR
绘制一个透明的圆圈即可.
	protected void onDraw(Canvas canvas) {
		super.onDraw(canvas);

		/*
		 * Draw circle and transparency background
		 */

		/*
		 * Since bitmap needs the canva's size, it wont be load at init()
		 * To prevent the DrawAllocation issue on low memory devices, the bitmap will be instantiate only when its null
		 */
		if (bitmap == null) {
			bitmap = Bitmap.createBitmap(canvas.getWidth(), canvas.getHeight(), Bitmap.Config.ARGB_8888);
			temp = new Canvas(bitmap);
		}

		if (background_color != 0)
			paint.setColor(background_color);
		else
			paint.setColor(Color.parseColor("#000000"));

		paint.setAlpha(background_alpha);
		temp.drawRect(0, 0, temp.getWidth(), temp.getHeight(), paint);

		transparentPaint.setColor(getResources().getColor(android.R.color.transparent));
		transparentPaint.setXfermode(porterDuffXfermode);

		int x = showhintPoints.x;
		int y = showhintPoints.y;
		temp.drawCircle(x, y, radius, transparentPaint);

		canvas.drawBitmap(bitmap, 0, 0, bitmapPaint);

		circleline.setStyle(Paint.Style.STROKE);
		if (circleColor != 0)
			circleline.setColor(circleColor);
		else
			circleline.setColor(Color.RED);

		circleline.setAntiAlias(true);
		circleline.setStrokeWidth(3);
		canvas.drawCircle(x, y, radius, circleline);
	}
(2)如何确定圆圈的位置
<1>先传递进需要透明显示的button
	public void setTarget(View v) {
		targetView = v;
}show就是调用的方法, 这个是在activity的主线程进行调用的.
public void show(final Activity activity) {
		if (isDisplayOneTime() && showTipsStore.hasShown(getDisplayOneTimeID())) {
			setVisibility(View.GONE);
			((ViewGroup) ((Activity) getContext()).getWindow().getDecorView()).removeView(ShowTipsView.this);
			return;
		} else {
			if (isDisplayOneTime())
				showTipsStore.storeShownId(getDisplayOneTimeID());
		}

		new Handler().postDelayed(new Runnable() {
			@Override
			public void run() {
				((ViewGroup) activity.getWindow().getDecorView()).addView(ShowTipsView.this);

				ShowTipsView.this.setVisibility(View.VISIBLE);
				Animation fadeInAnimation = AnimationUtils.loadAnimation(getContext(), R.anim.fade_in);
				ShowTipsView.this.startAnimation(fadeInAnimation);
                                //视图测量之后就可以获取到button的坐标信息
				final ViewTreeObserver observer = targetView.getViewTreeObserver();
				observer.addOnGlobalLayoutListener(new OnGlobalLayoutListener() {
					@Override
					public void onGlobalLayout() {

						if (isMeasured)
							return;

						if (targetView.getHeight() > 0 && targetView.getWidth() > 0) {
							isMeasured = true;

						}

						if (custom == false) {
							int[] location = new int[2];
							targetView.getLocationInWindow(location);
							int x = location[0] + targetView.getWidth() / 2;
							int y = location[1] + targetView.getHeight() / 2;
							// Log.d("FRED", "X:" + x + " Y: " + y);

							Point p = new Point(x, y);

							showhintPoints = p;
							radius = targetView.getWidth() / 2;
						} else {
							int[] location = new int[2];
							targetView.getLocationInWindow(location);
							int x = location[0] + showhintPoints.x;
							int y = location[1] + showhintPoints.y;
							// Log.d("FRED", "X:" + x + " Y: " + y);

							Point p = new Point(x, y);

							showhintPoints = p;

						}

						invalidate();

						createViews();

					}
				});
			}
		}, getDelay());
(3)调用show方法
protected void onCreate(Bundle savedInstanceState) {
super.onCreate(savedInstanceState);
setContentView(R.layout.activity_main);
Button btn_one = (Button) findViewById(R.id.button1);
Button btn_two = (Button) findViewById(R.id.button2);
// ShowTipsView
ShowTipsView showtips = new ShowTipsBuilder(this)
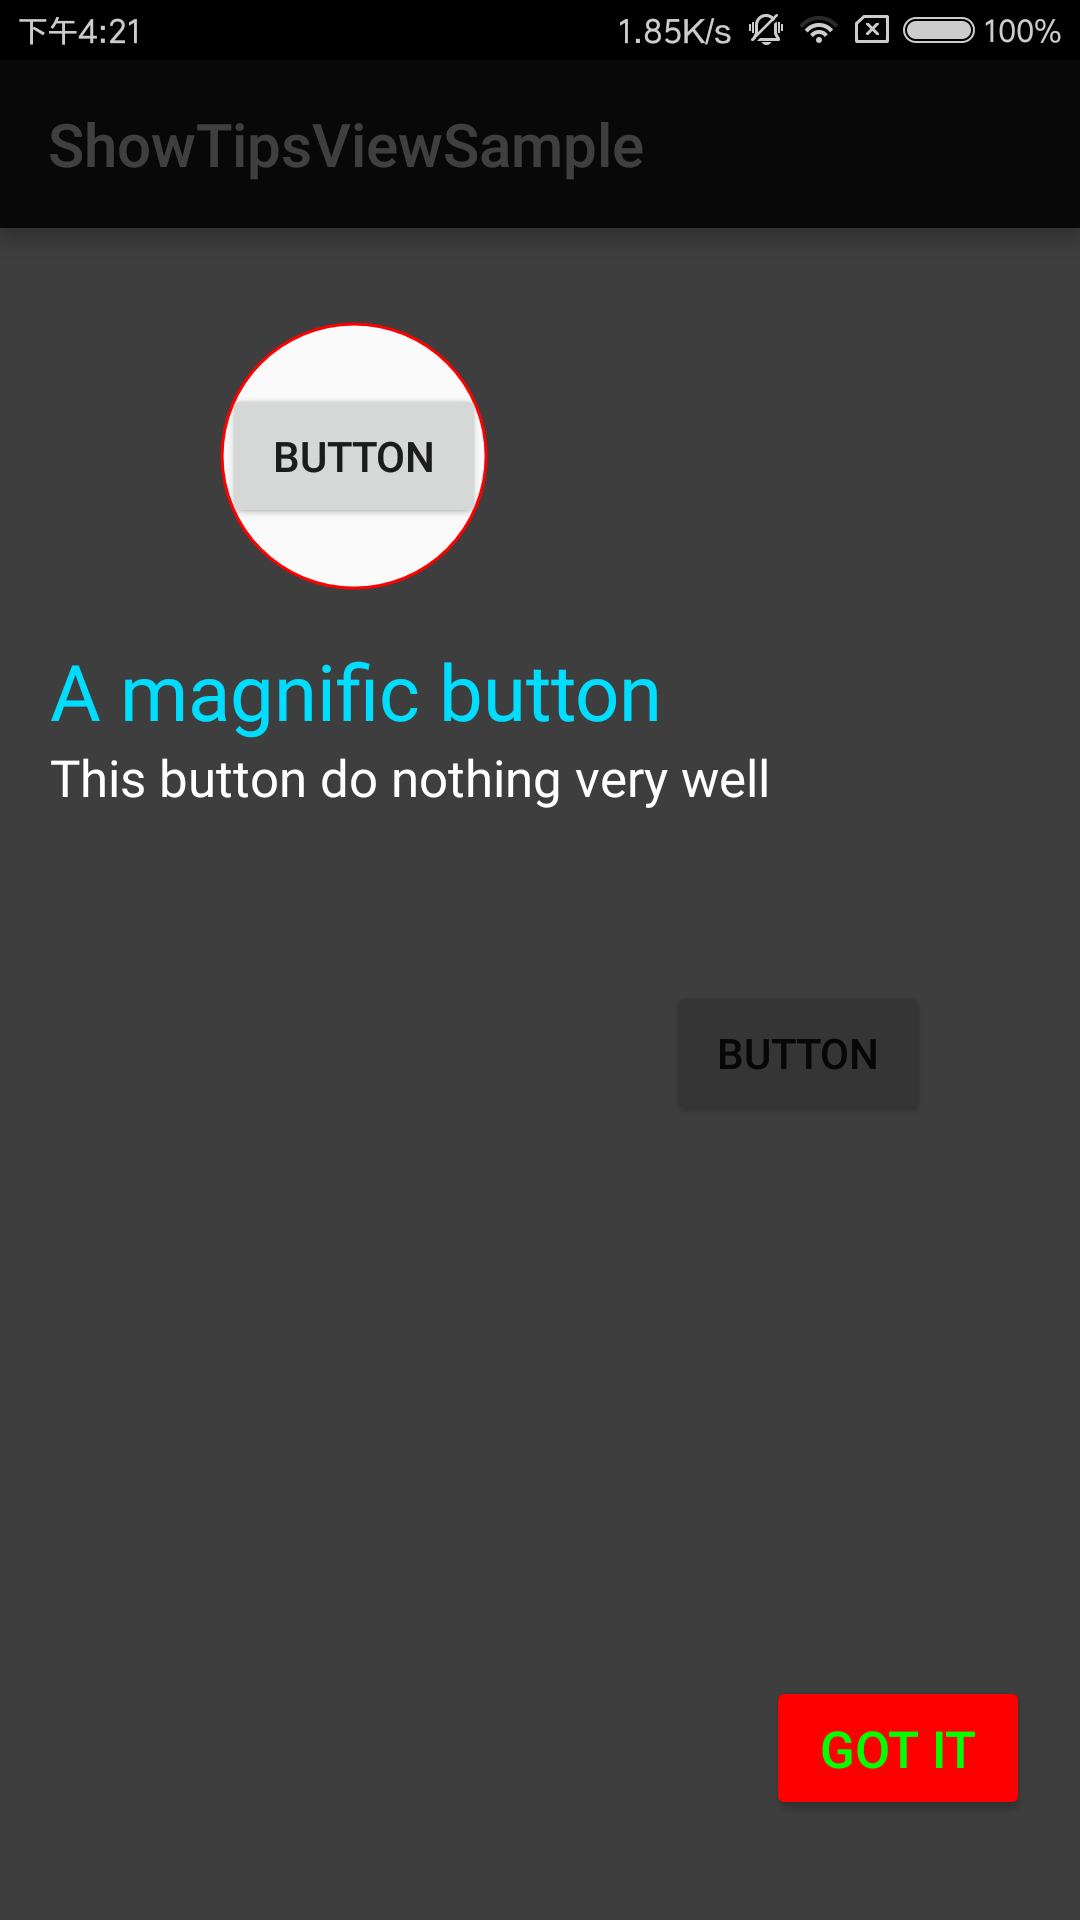
.setTarget(btn_one).setTitle("A magnific button")
.setDescription("This button do nothing very well")
.setDelay(1000)
.setBackgroundAlpha(128)
.setCloseButtonColor(Color.RED)
.setCloseButtonTextColor(Color.GREEN)
.build();
showtips.show(this);
}(4)右下角红色button的实现, 以及Text的添加, 就是通过动态代码将控件添加到当前SurfaceView中
	private void createViews() {
		this.removeAllViews();

		RelativeLayout texts_layout = new RelativeLayout(getContext());

		LayoutParams params = new LayoutParams(LayoutParams.MATCH_PARENT, LayoutParams.WRAP_CONTENT);
		/*
		 * Title
		 */
		TextView textTitle = new TextView(getContext());
		textTitle.setText(getTitle());
		if (getTitle_color() != 0)
			textTitle.setTextColor(getTitle_color());
		else
			textTitle.setTextColor(getResources().getColor(android.R.color.holo_blue_bright));
		textTitle.setId(123);
		textTitle.setTextSize(26);

		// Add title to this view
		texts_layout.addView(textTitle);

		/*
		 * Description
		 */
		TextView text = new TextView(getContext());
		text.setText(getDescription());
		if (getDescription_color() != 0)
			text.setTextColor(getDescription_color());
		else
			text.setTextColor(Color.WHITE);
		text.setTextSize(17);
		params = new LayoutParams(LayoutParams.MATCH_PARENT, LayoutParams.WRAP_CONTENT);
		params.addRule(RelativeLayout.BELOW, 123);
		text.setLayoutParams(params);

		texts_layout.addView(text);

		params = new LayoutParams(LayoutParams.MATCH_PARENT, LayoutParams.WRAP_CONTENT);
		LayoutParams paramsTexts = new LayoutParams(LayoutParams.MATCH_PARENT, LayoutParams.WRAP_CONTENT);

		if (screenY / 2 > showhintPoints.y) {
			// textBlock under the highlight circle
			paramsTexts.height = (showhintPoints.y + radius) - screenY;
			paramsTexts.topMargin = (showhintPoints.y + radius);
			texts_layout.setGravity(Gravity.START | Gravity.TOP);

			texts_layout.setPadding(50, 50, 50, 50);
		} else {
			// textBlock above the highlight circle
			paramsTexts.height = showhintPoints.y - radius;

			texts_layout.setGravity(Gravity.START | Gravity.BOTTOM);

			texts_layout.setPadding(50, 100, 50, 50);
		}

		texts_layout.setLayoutParams(paramsTexts);
		this.addView(texts_layout);

		/*
		 * Close button
		 */
		Button btn_close = new Button(getContext());
		btn_close.setId(4375);
		btn_close.setText(getButtonText());
		btn_close.setTextColor(buttonTextColor == 0 ? Color.WHITE : buttonTextColor);

		if(closeButtonDrawableBG != null)
		{
			btn_close.setBackgroundDrawable(closeButtonDrawableBG);
		}

		if(buttonColor != 0){
			btn_close.getBackground().setColorFilter(buttonColor, PorterDuff.Mode.MULTIPLY);
		}

		btn_close.setTextSize(17);
		btn_close.setGravity(Gravity.CENTER);

		params = new LayoutParams(LayoutParams.WRAP_CONTENT, LayoutParams.WRAP_CONTENT);

		params.addRule(RelativeLayout.ALIGN_PARENT_BOTTOM);
		params.addRule(RelativeLayout.ALIGN_PARENT_RIGHT);
		params.rightMargin = 50;
		params.bottomMargin = 100;

		btn_close.setLayoutParams(params);
		btn_close.setOnClickListener(new OnClickListener() {

			@Override
			public void onClick(View v) {
				if (getCallback() != null)
					getCallback().gotItClicked();

				setVisibility(View.GONE);
				((ViewGroup) ((Activity) getContext()).getWindow().getDecorView())
						.removeView(ShowTipsView.this);

			}
		});
		this.addView(btn_close);

	}


 1394
1394

 被折叠的 条评论
为什么被折叠?
被折叠的 条评论
为什么被折叠?
 到【灌水乐园】发言


