


一、下载源码包
1.1 通过QT官网下载 Qt everywhere 源码包
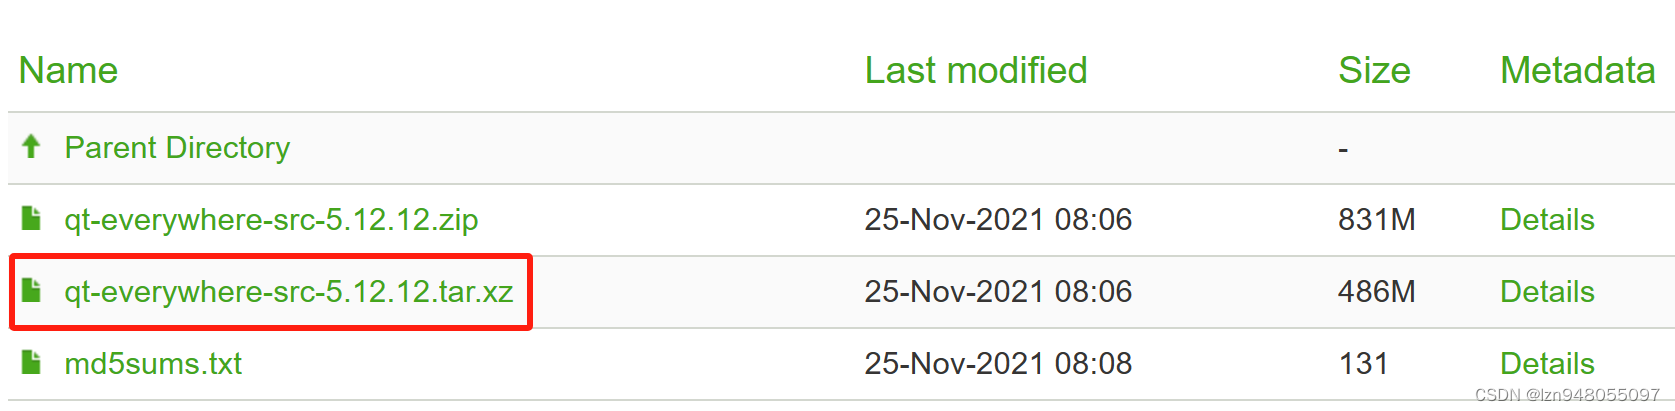
解压 qt-everywhere-src
tar xf qt-everywhere-src-5.12.12.tar.xz
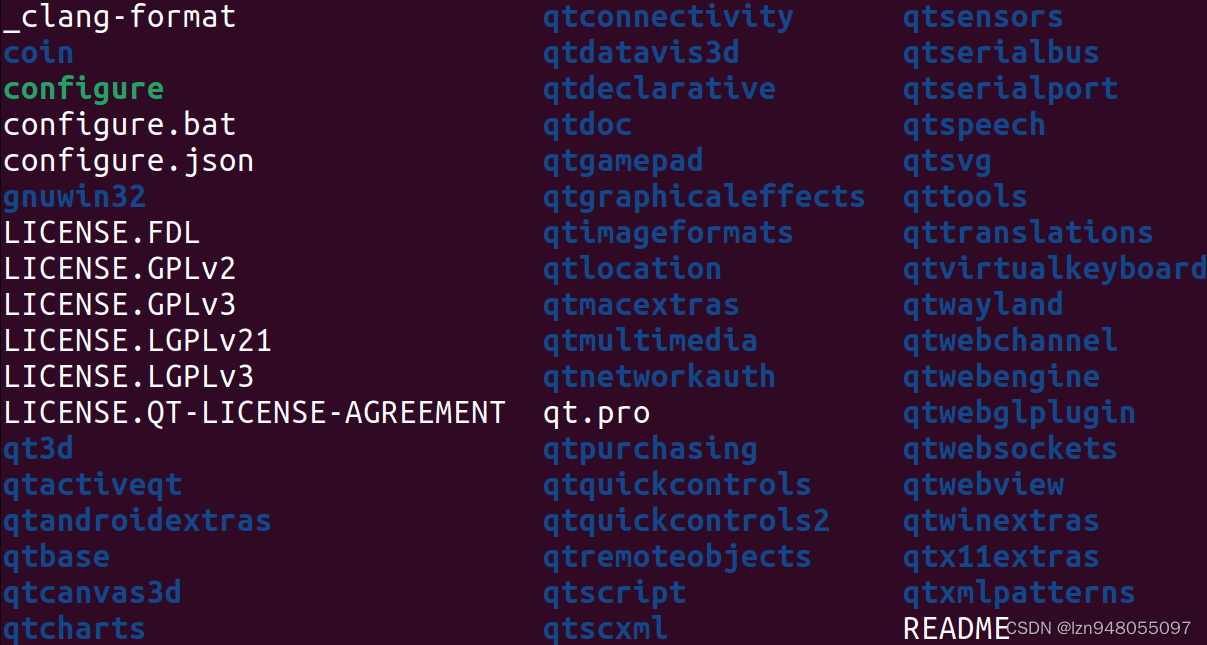
qt-everywhere-src 可以认为是支持 QT 开发的 SDK 包,下图是解压后 qt-everywhere-src-5.12.12 中的文件。
1.2 下载tslib
在 tslib官网 摘录的介绍:
TSLIB 是一个跨平台库,提供对触摸屏设备的访问 以及将筛选器应用于其输入事件的能力。
在 Linux 上它支持所有使用输入事件驱动程序的现代设备,并包括多点触控支持。
从 github 上 下载 tslib 发布的源码
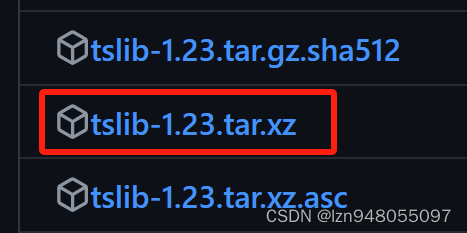
解压 tslib 源码包
tar xf tslib-1.23.tar.xz
二、安装构建所需的工具
2.1 安装 automake 工具
sudo apt-get install autoconf automake libtool
2.2 安装 pkg-config 包
sudo apt-get install pkg-config
如果没有安装 pkg-config 包,在进行 3.1.1 时会出现如下报错:
test@test-virtual-machine:~/ThirdParty/tslib-1.23$ ./autogen.sh
libtoolize: putting auxiliary files in '.'.
libtoolize: copying file './ltmain.sh'
libtoolize: putting macros in AC_CONFIG_MACRO_DIRS, 'm4/internal'.
libtoolize: copying file 'm4/internal/libtool.m4'
libtoolize: copying file 'm4/internal/ltoptions.m4'
libtoolize: copying file 'm4/internal/ltsugar.m4'
libtoolize: copying file 'm4/internal/ltversion.m4'
libtoolize: copying file 'm4/internal/lt~obsolete.m4'
configure.ac:73: warning: The macro `AC_HEADER_STDC' is obsolete.
configure.ac:73: You should run autoupdate.
./lib/autoconf/headers.m4:704: AC_HEADER_STDC is expanded from...
configure.ac:73: the top level
configure.ac:88: warning: The macro `AC_TYPE_SIGNAL' is obsolete.
configure.ac:88: You should run autoupdate.
./lib/autoconf/types.m4:776: AC_TYPE_SIGNAL is expanded from...
configure.ac:88: the top level
configure:14316: error: possibly undefined macro: AC_MSG_ERROR
      If this token and others are legitimate, please use m4_pattern_allow.
      See the Autoconf documentation.
autoreconf: error: /usr/bin/autoconf failed with exit status: 1
三、编译与安装
目标设备环境:
root@test:~# lsb_release -a
No LSB modules are available.
Distributor ID: Ubuntu
Description:    Ubuntu 18.04.6 LTS
Release:        18.04
Codename:       bionic
root@test:~# uname -a
Linux 4.4.194 #129 SMP Mon Nov 6 18:25:59 CST 2023 armv7l armv7l armv7l GNU/Linux
进行交叉编译设备的环境:
test@test-virtual-machine:~$ lsb_release -a
No LSB modules are available.
Distributor ID:	Ubuntu
Description:	Ubuntu 22.04.4 LTS
Release:	22.04
Codename:	jammy
test@test-virtual-machine:~$ uname -a
Linux test-virtual-machine 6.5.0-35-generic #35~22.04.1-Ubuntu SMP PREEMPT_DYNAMIC Tue May  7 09:00:52 UTC 2 x86_64 x86_64 x86_64 GNU/Linux
3.1 编译安装 tslib
3.1.1 构建 tslib 的 configure
cd tslib-1.23
./autogen.sh
3.1.2 新建一个文件夹,tslib 将会安装在这里
mkdir arm-tslib
3.1.3 配置生成 Makefile
上一步新建的文件夹,在这里做了配置。
./configure --host=arm-linux-gnueabihf ac_cv_func_malloc_0_nonnull=yes --cache-file=arm-linux.cache -prefix=/home/test/ThirdParty/tslib-1.23/arm-tslib
3.1.4 执行 make 进行编译
make -j4
3.1.5 安装 tslib
make install
安装完成后,就可以发现 arm-tslib 中有文件生成。
3.2 编译安装 Qt everywhere
3.2.1 新建一个文件夹,Qt everywhere 将会安装在这里
cd qt-everywhere-src-5.12.12
mkdir arm-qt
3.2.2 配置 configure
gedit autoconfigure.sh
#!/bin/sh
./configure \
	-prefix /home/test/ThirdParty/qt-everywhere-src-5.12.12/arm-qt \
	-confirm-license \
	-opensource \
	-skip qtlocation \
	-shared \
	-release \
	-make libs \
	-xplatform linux-arm-gnueabi-g++ \
	-optimized-qmake \
	-pch \
	-qt-sqlite \
	-qt-libjpeg \
	-qt-libpng \
	-qt-zlib \
	-c++std c++11 \
	-no-opengl \
	-no-sse2 \
	-no-openssl \
	-no-cups \
	-no-glib \
	-no-dbus \
	-no-xcb \
	-no-separate-debug-info \
	-no-fontconfig \
	-nomake examples -nomake tools -nomake tests -no-iconv \
	-tslib \
	-I/home/test/ThirdParty/tslib-1.23/arm-tslib/include \
	-L/home/test/ThirdParty/tslib-1.23/arm-tslib/lib
exit
在 autoconfigure.sh 中如未添加配置 “ -skip qtlocation ” 会在 make install 时出现报错 。(具体情况点这里)
执行如下命令,可以了解 configure 支持哪些参数的配置:
./configure -help
3.2.3 配置 QMAKE 参数
执行下面的指令,编辑 mkspecs/linux-arm-gnueabi-g++ 下的 qmake.conf 。
注意: 由于 Qt 是跨平台的,所以 mkspecs 下有很多平台选择 。之所以选择 linux-arm-gnueabi-g++ ,是因为前面 autoconfigure.sh 里的参数 -xplatform 配置为了 linux-arm-gnueabi-g++ 。
gedit qtbase/mkspecs/linux-arm-gnueabi-g++/qmake.conf
#
# qmake configuration for building with arm-linux-gnueabi-g++
#

MAKEFILE_GENERATOR      = UNIX
CONFIG                 += incremental
QMAKE_INCREMENTAL_STYLE = sublib

include(../common/linux.conf)
include(../common/gcc-base-unix.conf)
include(../common/g++-unix.conf)

# RK3288 & IMX6ULL - armv7l
QT_QPA_DEFAULT_PLATFORM = linuxfb
QMAKE_CFLAGS += -O2 -march=armv7-a -mtune=cortex-a7 -mfpu=neon -mfloat-abi=hard
QMAKE_CXXFLAGS += -O2 -march=armv7-a -mtune=cortex-a7 -mfpu=neon -mfloat-abi=hard


# modifications to g++.conf
QMAKE_CC                = /opt/ToolChain/gcc-linaro-6.2.1-2016.11-x86_64_arm-linux-gnueabihf/bin/arm-linux-gnueabihf-gcc
QMAKE_CXX               = /opt/ToolChain/gcc-linaro-6.2.1-2016.11-x86_64_arm-linux-gnueabihf/bin/arm-linux-gnueabihf-g++
QMAKE_LINK              = /opt/ToolChain/gcc-linaro-6.2.1-2016.11-x86_64_arm-linux-gnueabihf/bin/arm-linux-gnueabihf-g++
QMAKE_LINK_SHLIB        = /opt/ToolChain/gcc-linaro-6.2.1-2016.11-x86_64_arm-linux-gnueabihf/bin/arm-linux-gnueabihf-g++

# modifications to linux.conf
QMAKE_AR                = /opt/ToolChain/gcc-linaro-6.2.1-2016.11-x86_64_arm-linux-gnueabihf/bin/arm-linux-gnueabihf-ar cqs
QMAKE_OBJCOPY           = /opt/ToolChain/gcc-linaro-6.2.1-2016.11-x86_64_arm-linux-gnueabihf/bin/arm-linux-gnueabihf-objcopy
QMAKE_NM                = /opt/ToolChain/gcc-linaro-6.2.1-2016.11-x86_64_arm-linux-gnueabihf/bin/arm-linux-gnueabihf-nm -P
QMAKE_STRIP             = /opt/ToolChain/gcc-linaro-6.2.1-2016.11-x86_64_arm-linux-gnueabihf/bin/arm-linux-gnueabihf-strip

QMAKE_INCDIR += /home/test/ThirdParty/tslib-1.23/arm-tslib/include
QMAKE_LIBDIR += /home/test/ThirdParty/tslib-1.23/arm-tslib/lib
load(qt_config)
3.2.4 执行 autoconfigure.sh 配置
chmod +x autoconfigure.sh
./autoconfigure.sh
编译时报错如下所示
error: ‘numeric_limits’ is not a member of ‘std’
网上有的 blog 说是由于 C++ 标准没有设置成 C++11 之后的标准,但是在 3.2.2 时就指定了 C++ 标准为 C++11,而且环境中的 x86_64 g++ 与 arm g++ 都是支持 C++11 的。
test@test-virtual-machine:~$ g++ -std=c++11 -E - < /dev/null
cc1: warning: command-line option ‘-std=c++11’ is valid for C++/ObjC++ but not for C
# 0 "<stdin>"
# 0 "<built-in>"
# 0 "<command-line>"
# 1 "/usr/include/stdc-predef.h" 1 3 4
# 0 "<command-line>" 2
# 1 "<stdin>"
test@test-virtual-machine:~$ arm-linux-gnueabihf-g++ -std=c++11 -E - < /dev/null
cc1: warning: command line option '-std=c++11' is valid for C++/ObjC++ but not for C
# 1 "<stdin>"
# 1 "<built-in>"
# 1 "<command-line>"
# 31 "<command-line>"
# 1 "/opt/ToolChain/gcc-linaro-6.2.1-2016.11-x86_64_arm-linux-gnueabihf/arm-linux-gnueabihf/libc/usr/include/stdc-predef.h" 1 3 4
# 32 "<command-line>" 2
# 1 "<stdin>"
另外还有一种说法——报错的原因是文件中未包含头文件:
#include <limits>
包含上头文件后,解决报错。
3.2.5 执行 make 编译
make -j4
有报错,问题原因依旧,包含 limits 即可。
3.2.6 执行 make install 安装
make install
有报错,看起来是 bash shell 没找到 python ,日志如下:

环境中有python3:
test@test-virtual-machine:~/ThirdParty/qt-everywhere-src-5.12.12$ python --version
Command 'python' not found, did you mean:
  command 'python3' from deb python3
  command 'python' from deb python-is-python3
test@test-virtual-machine:~/ThirdParty/qt-everywhere-src-5.12.12$ python2 --version
Command 'python2' not found, but can be installed with:
sudo apt install python2
test@test-virtual-machine:~/ThirdParty/qt-everywhere-src-5.12.12$ python3 --version
Python 3.10.12
不用再安装python,使用 python3 设置Python替代版本,即可解决问题。
test@test-virtual-machine:~/ThirdParty/qt-everywhere-src-5.12.12$ sudo update-alternatives --install /usr/bin/python python /usr/bin/python3 1
update-alternatives: using /usr/bin/python3 to provide /usr/bin/python (python) in auto mode
有报错,还是未包含 limits 的问题。
之后再执行 make install 安装即可。
至此 tslib、Qt everywhere 算是编译安装完了。
四、配置交叉编译环境
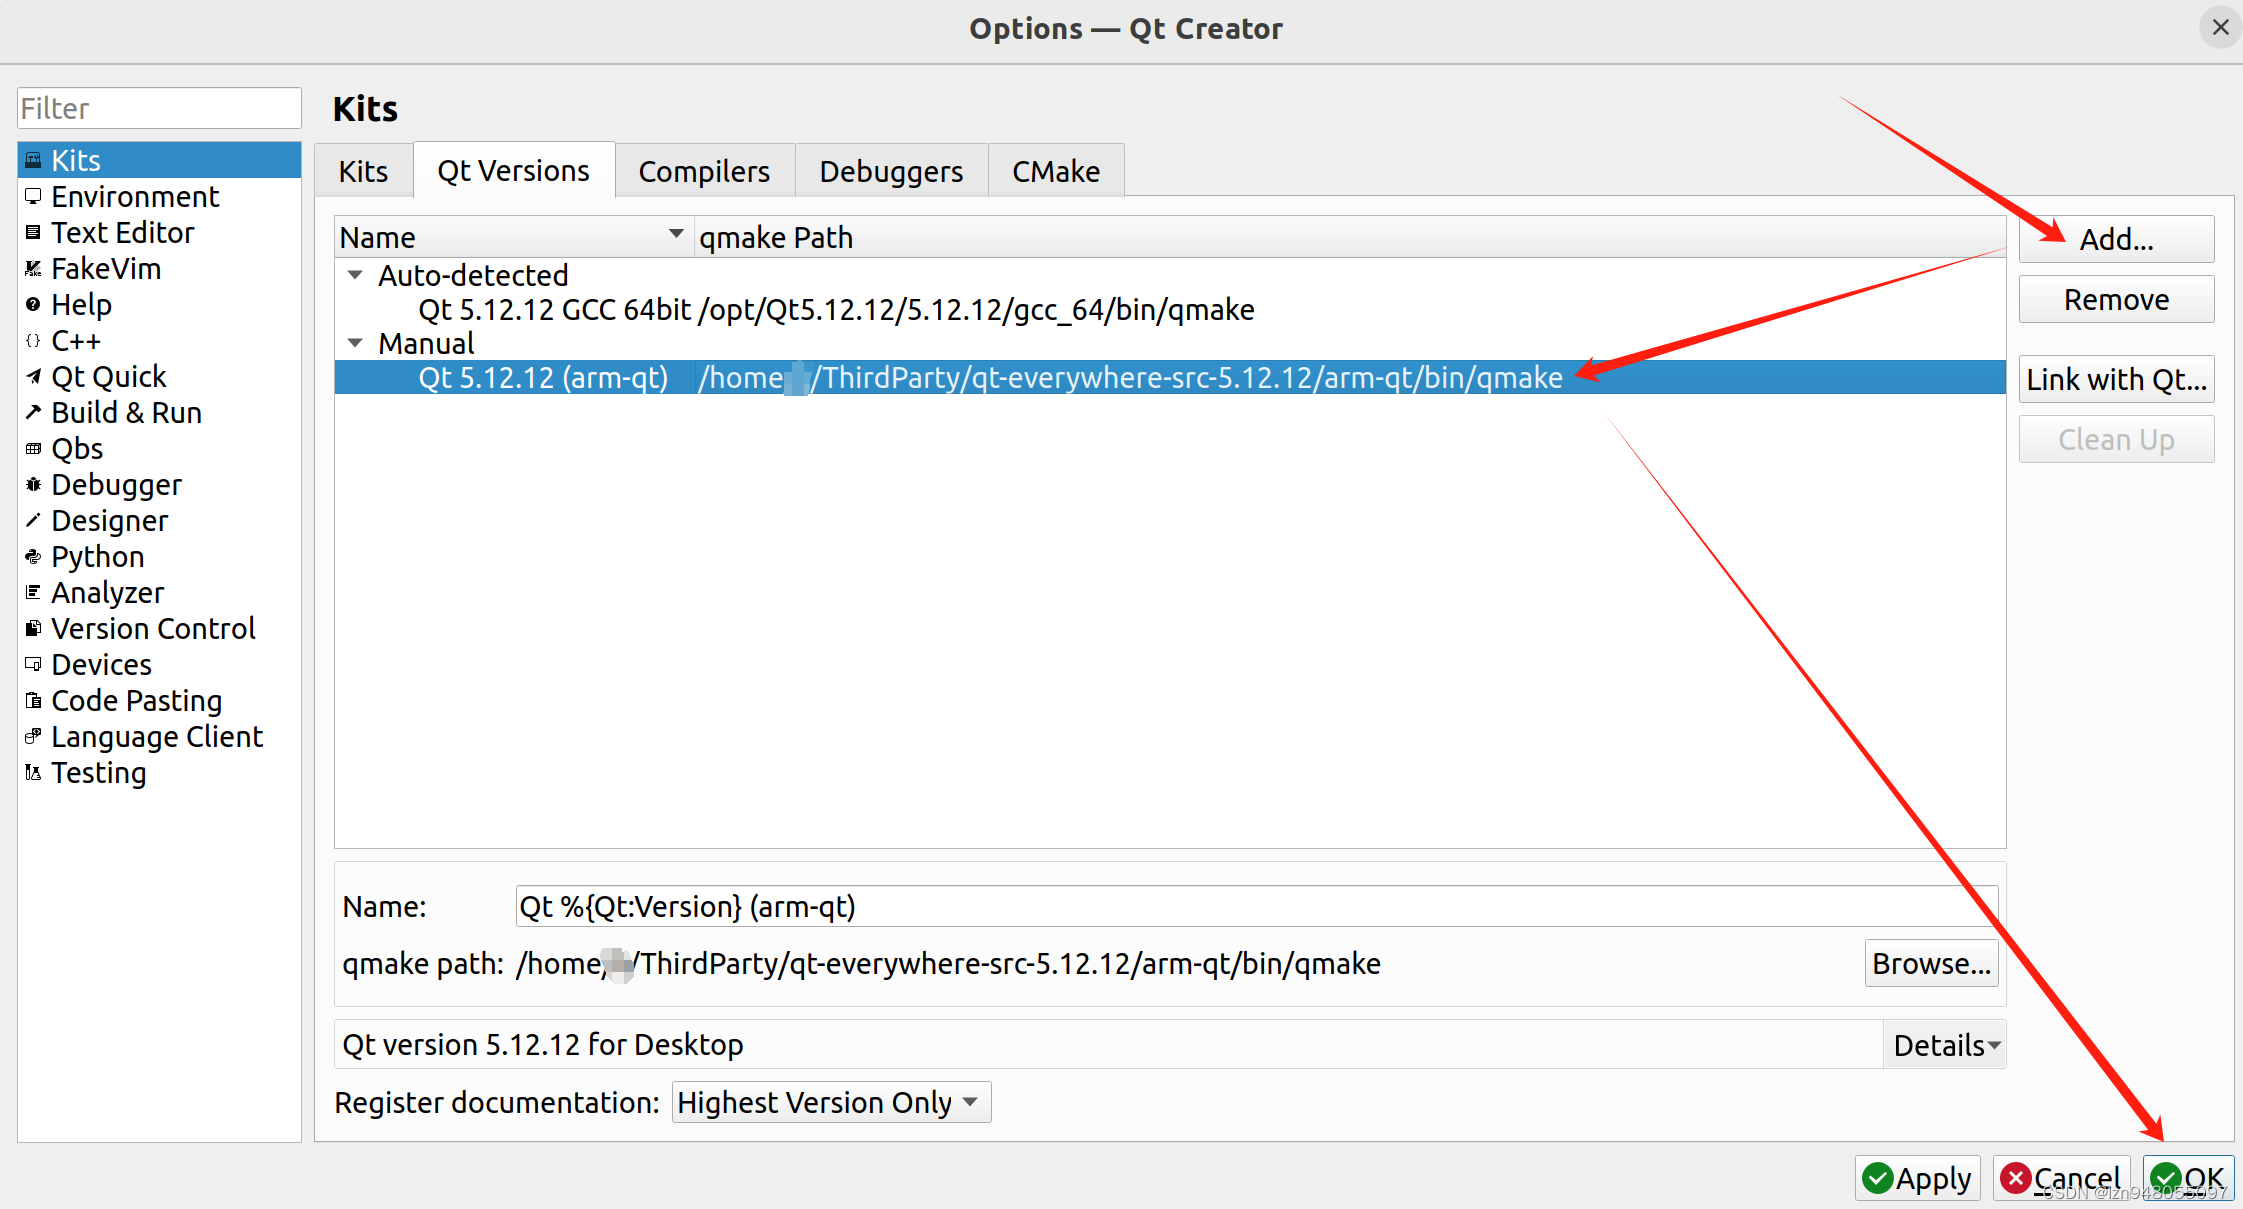
4.1 在 Qt Creator 上进行交叉编译配置
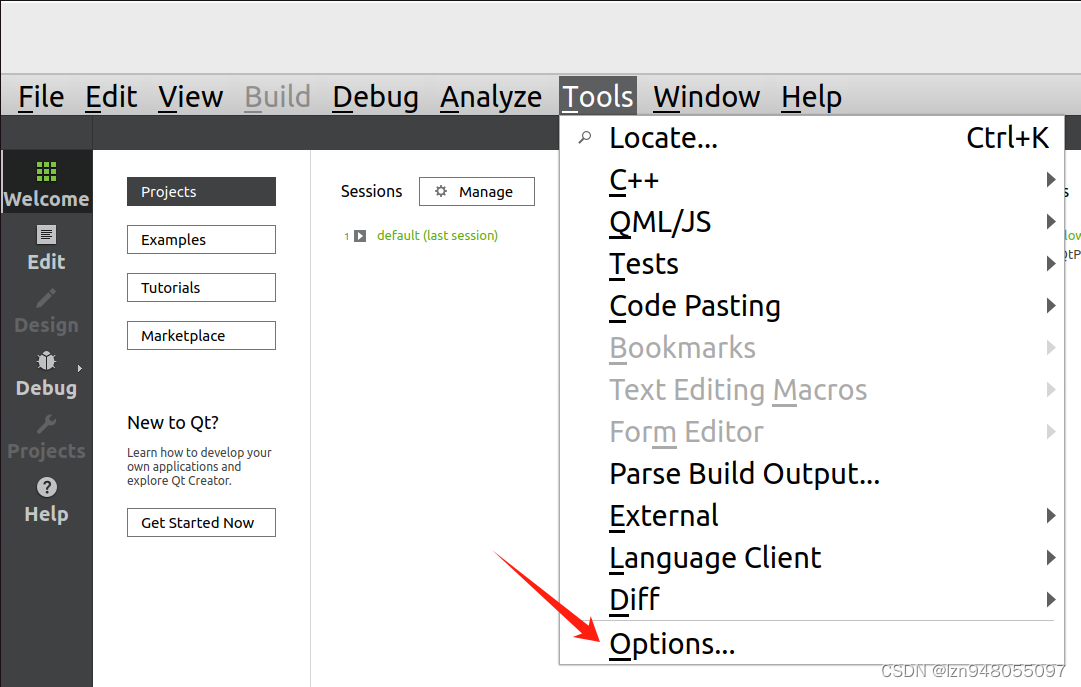


添加交叉编译的qmake,注意 qmake 是在 Qt everywhere 的安装路径中,而qmake也是一个可执行文件。
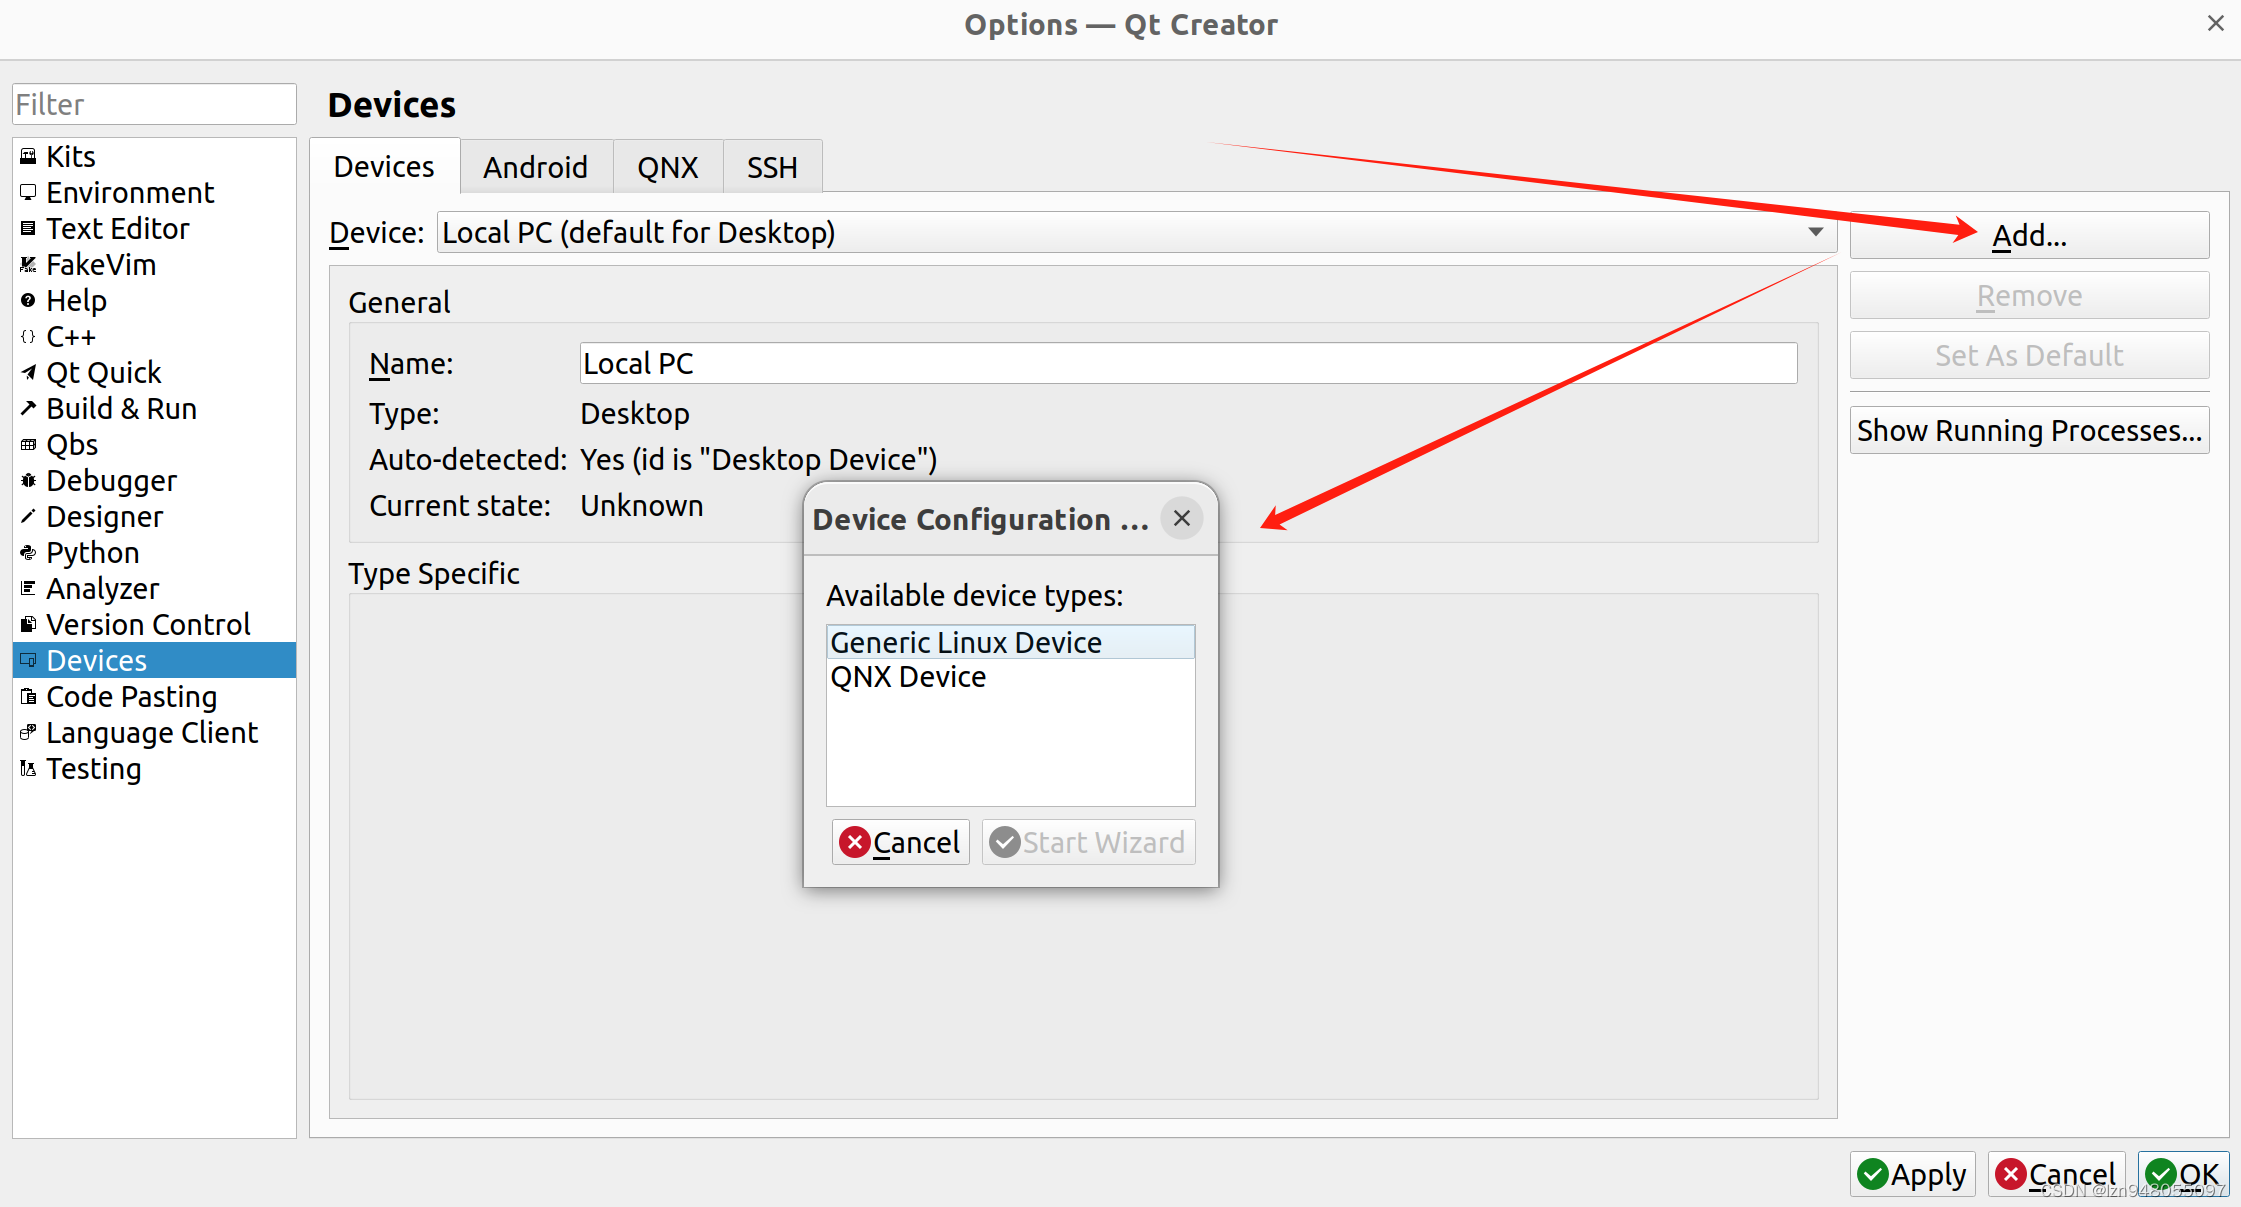
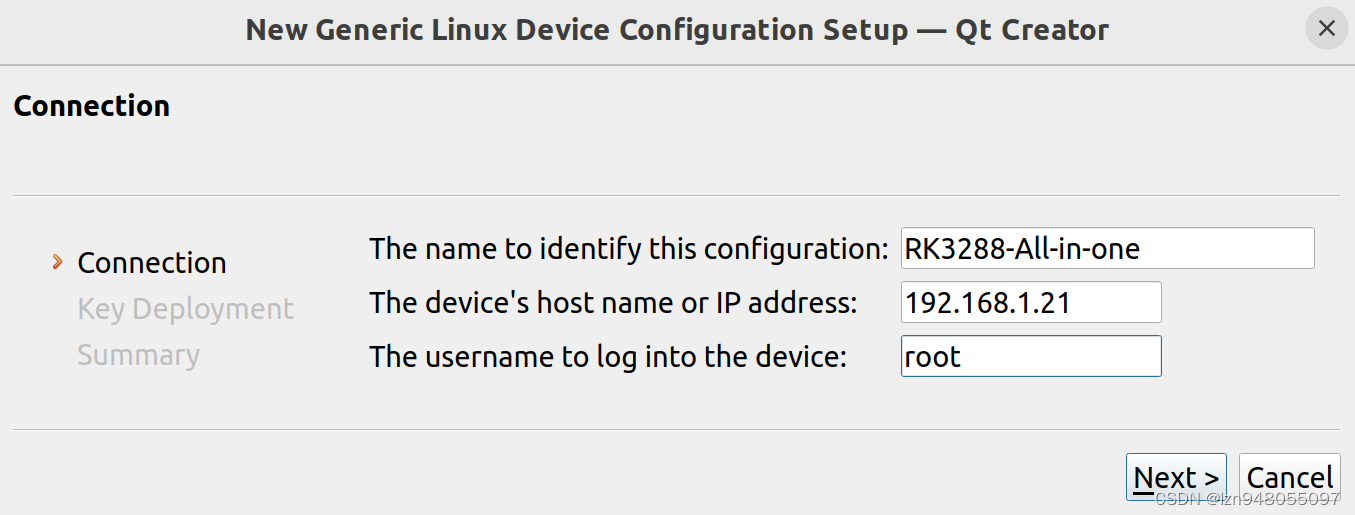
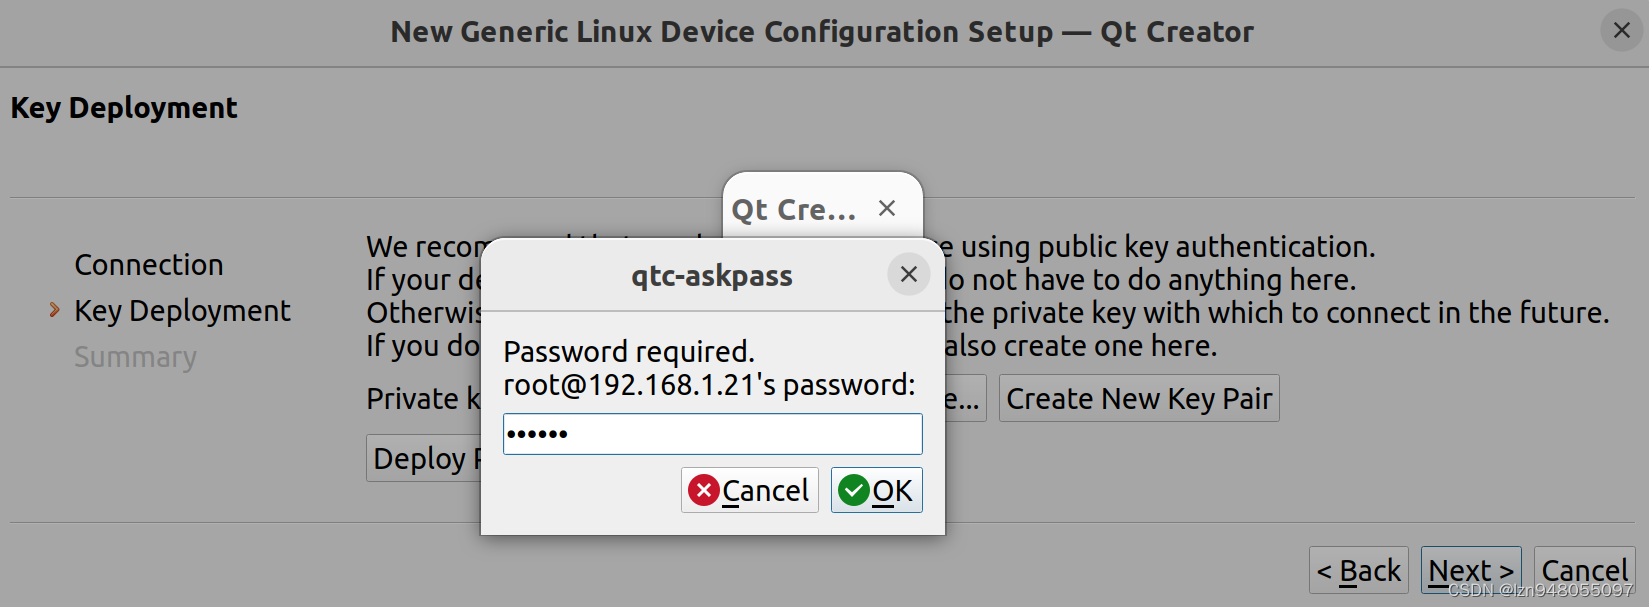
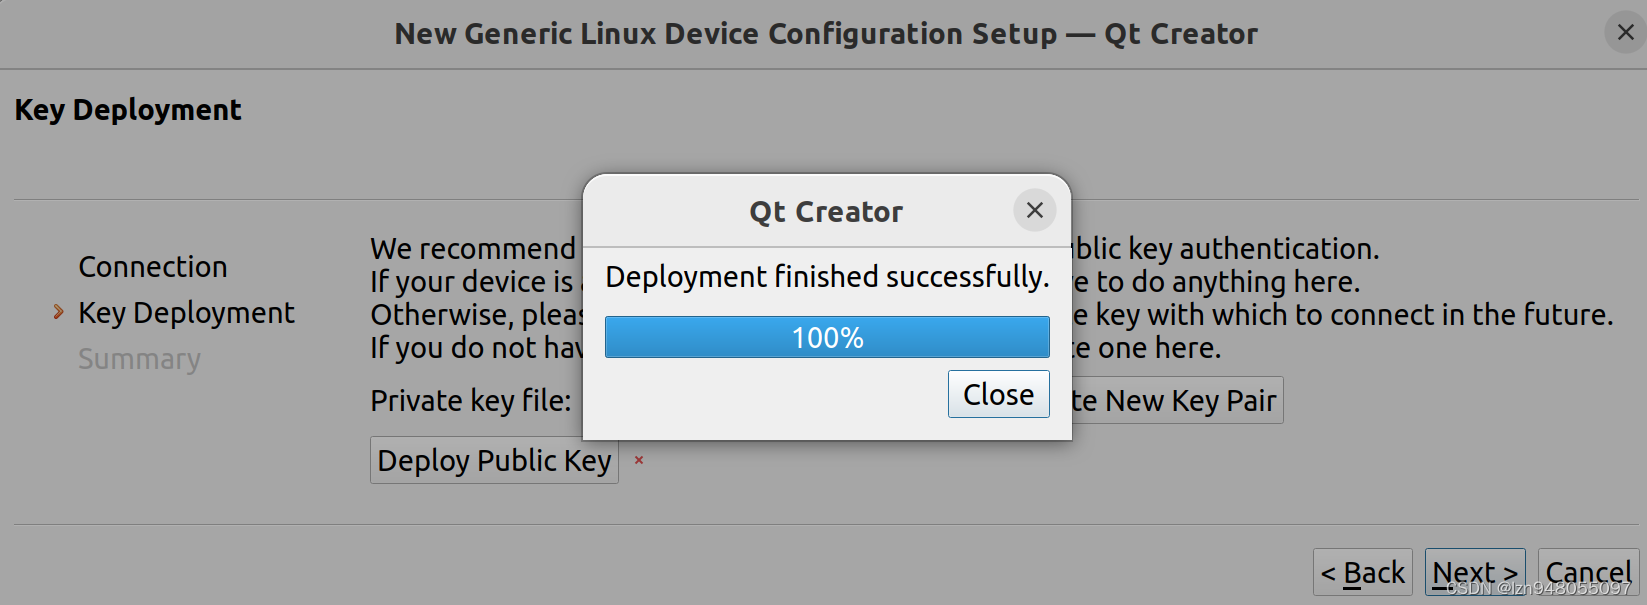
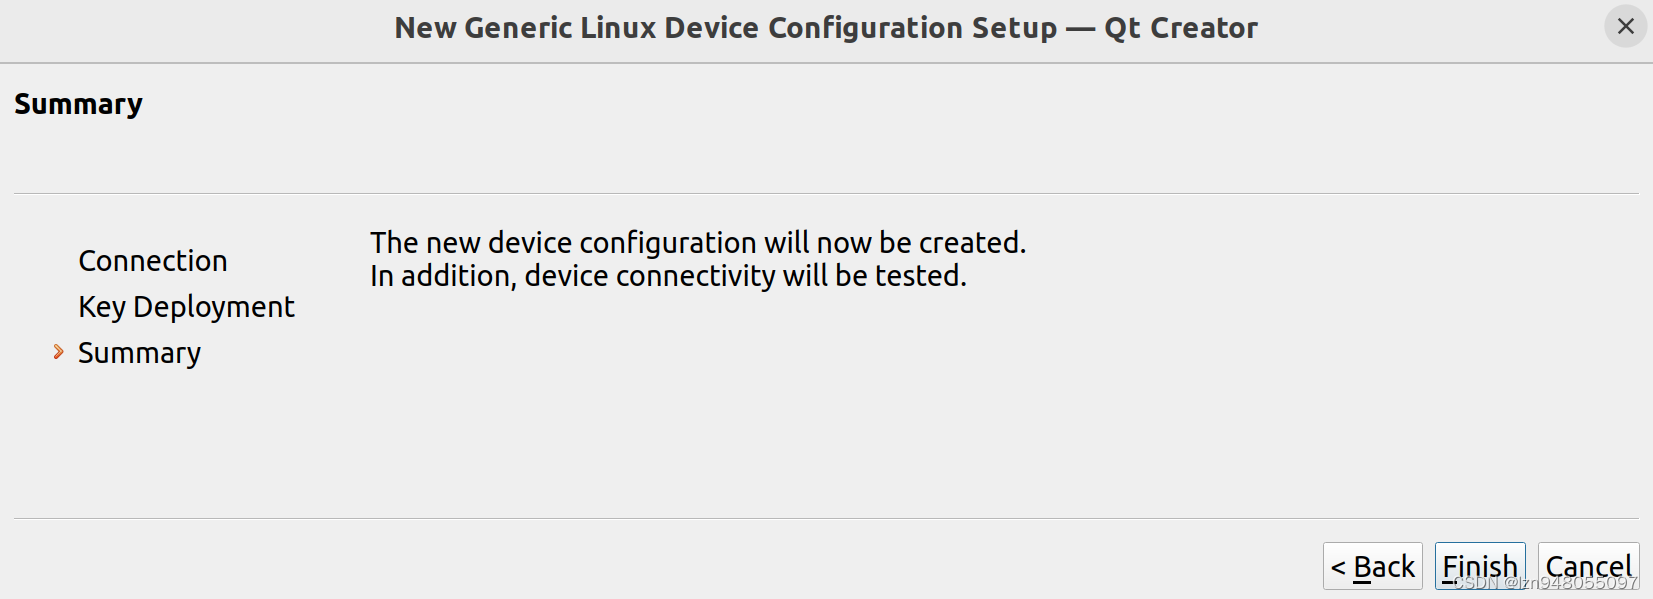
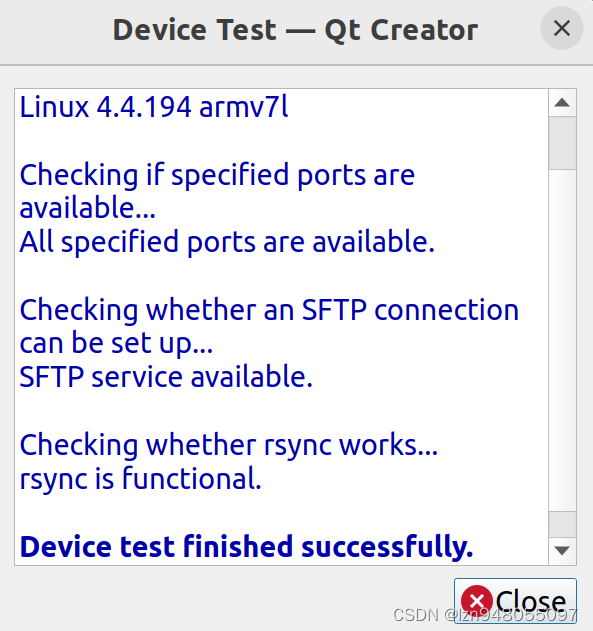
添加设备:
注意:这里要添加的目标设备中需要安装的有ssh
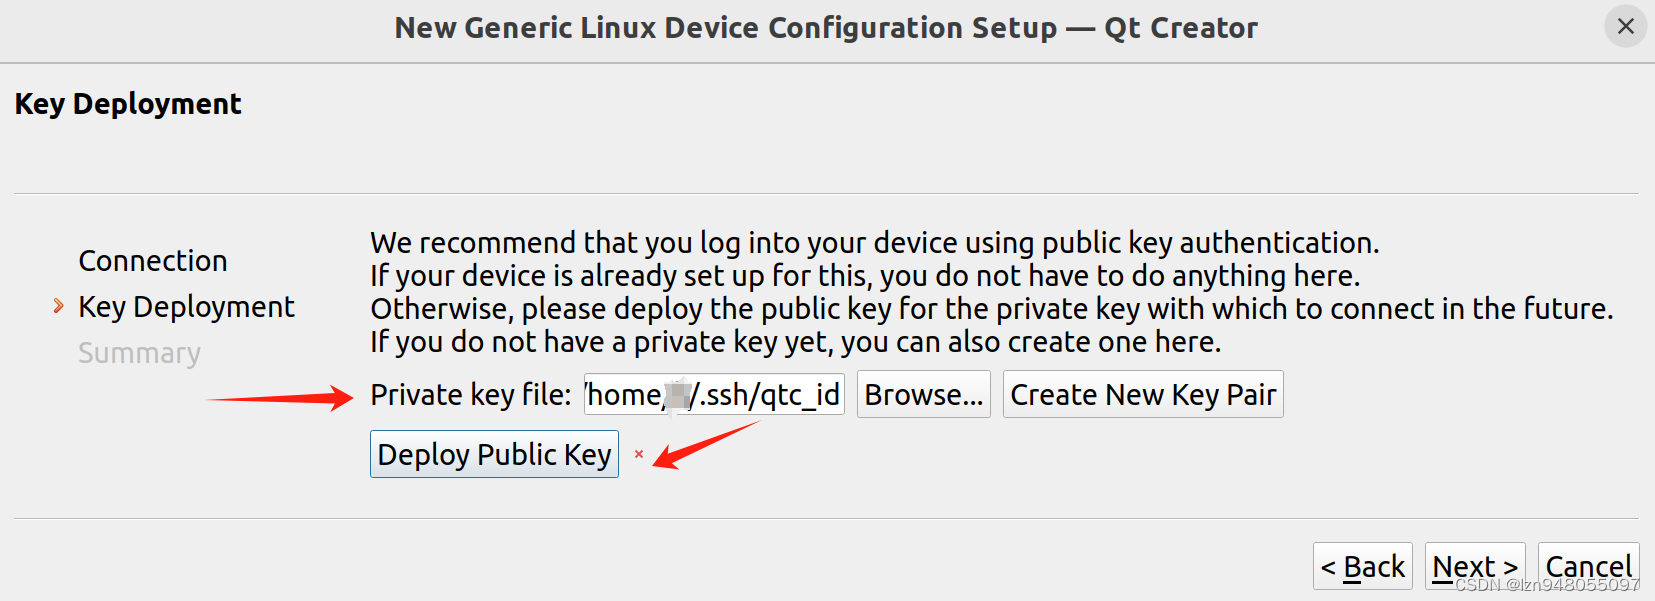
如果没有私钥与公钥,点击 Create New Key Pair 生成即可。
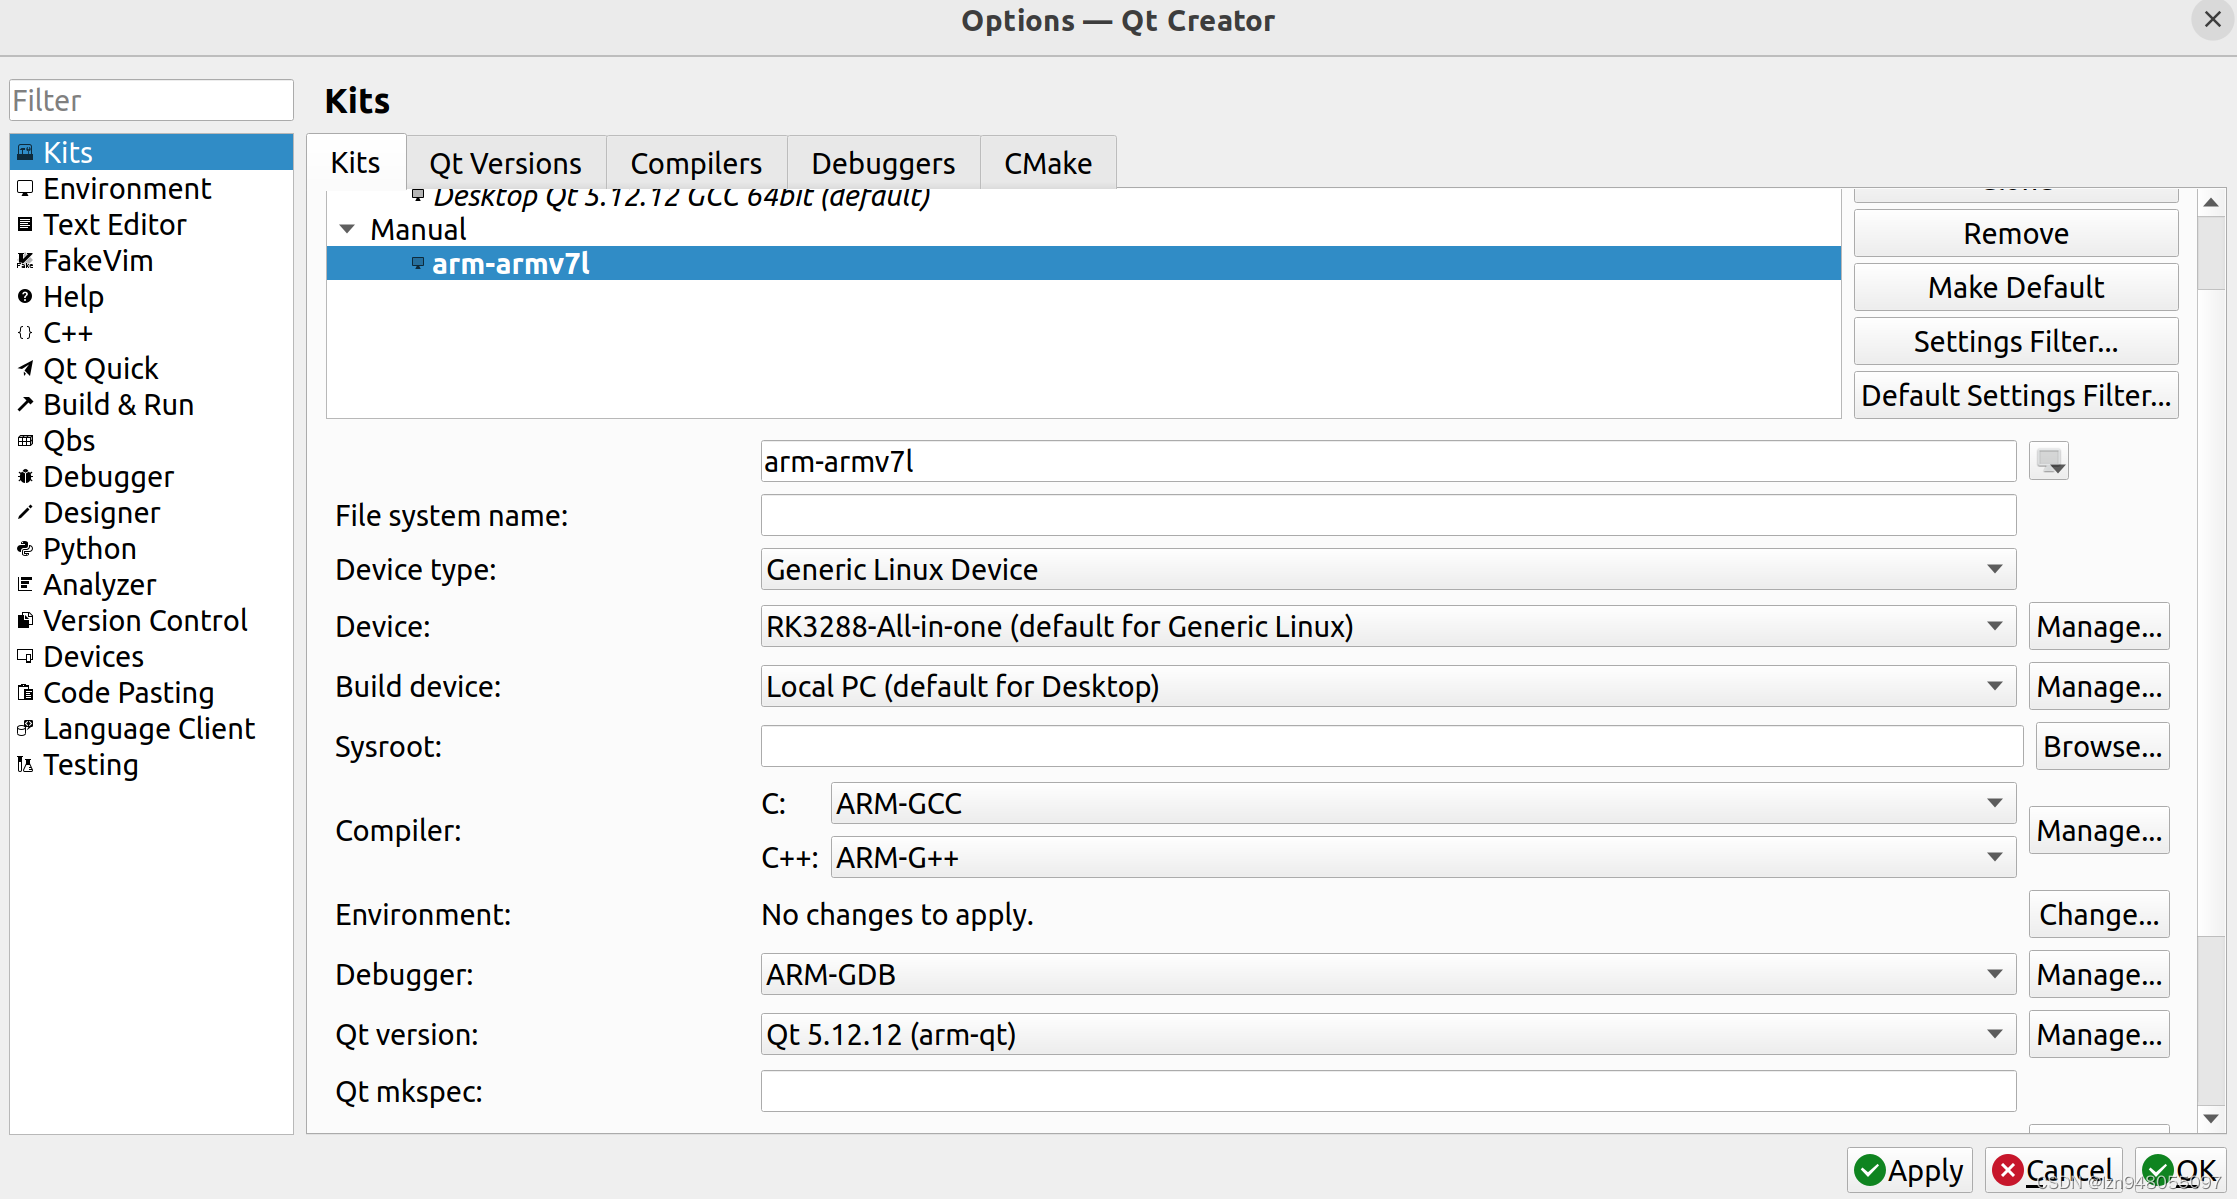
配置交叉编译套件
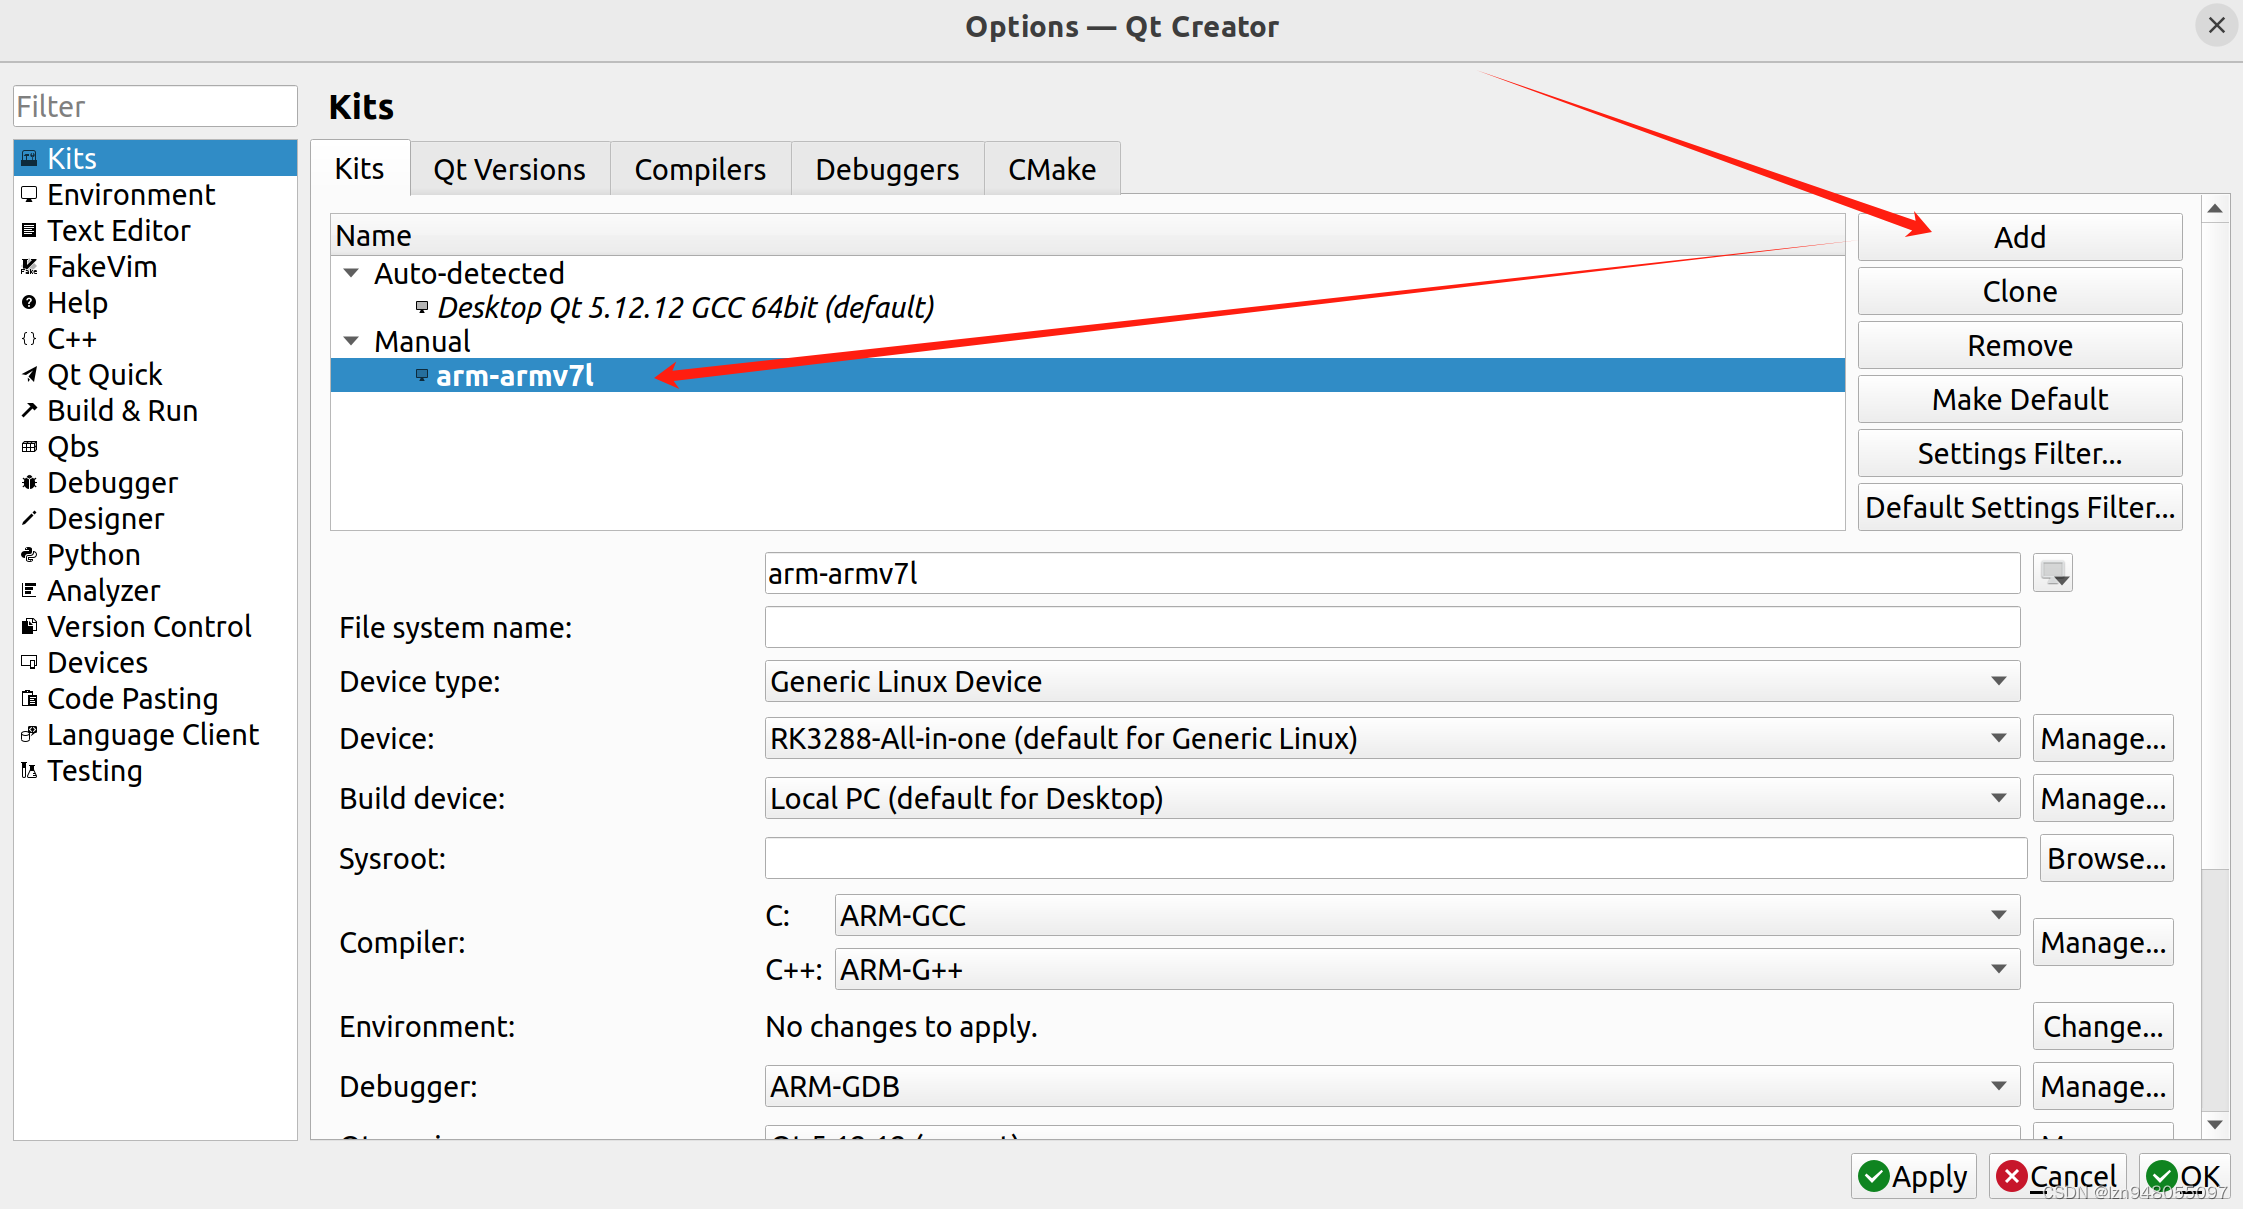
交叉编译套件配置信息如下:
4.2 在目标设备上进行环境配置
4.2.1 将 tslib 与 Qt everywhere 的安装目录拷贝到目标机上
安装目录的压缩解压命令:
tar -cvf arm-tslib.tar arm-tslib/*
tar -xvf arm-tslib.tar
tar -cvf arm-qt.tar arm-qt/*
tar -xvf arm-qt.tar
4.2.2 在目标设备配置环境
在 /etc/profile 中配置 tslib 相关的环境参数
export T_ROOT=/opt/arm-tslib
export PATH=$PATH:$T_ROOT/bin
export LD_LIBRARY_PATH=$T_ROOT/lib:$LD_LIBRARY_PATH
export TSLIB_CONSOLEDEVICE=none
export TSLIB_FBDEVICE=/dev/fb0
export TSLIB_TSDEVICE=/dev/input/event1
export TSLIB_CALIBFILE=/etc/pointercal
export TSLIB_CONFFILE=$T_ROOT/etc/ts.conf
export TSLIB_PLUGINDIR=$T_ROOT/lib/ts/
在 /etc/profile 中配置 Qt everywhere 相关的环境参数
export QT_ROOT=/opt/arm-qt
export QT_QPA_GENERIC_PLUGINS=tslib:/dev/input/event1
export QT_QPA_FONTDIR=/opt/arm-qt/lib/fonts
export QT_QPA_PLATFORM_PLUGIN_PATH=$QT_ROOT/plugins
export QT_QPA_PLATFORM=linuxfb:fb=/dev/fb0:size=1024x600:offset=0x0
export QT_PLUGIN_PATH=$QT_ROOT/plugins
export LD_LIBRARY_PATH=$QT_ROOT/lib:$QT_ROOT/plugins/platforms:$LD_LIBRARY_PATH
export QT_DEBUG_PLUGINS=1
使修改的环境变量生效,之后可通过 env 命令验证。
source /etc/profile
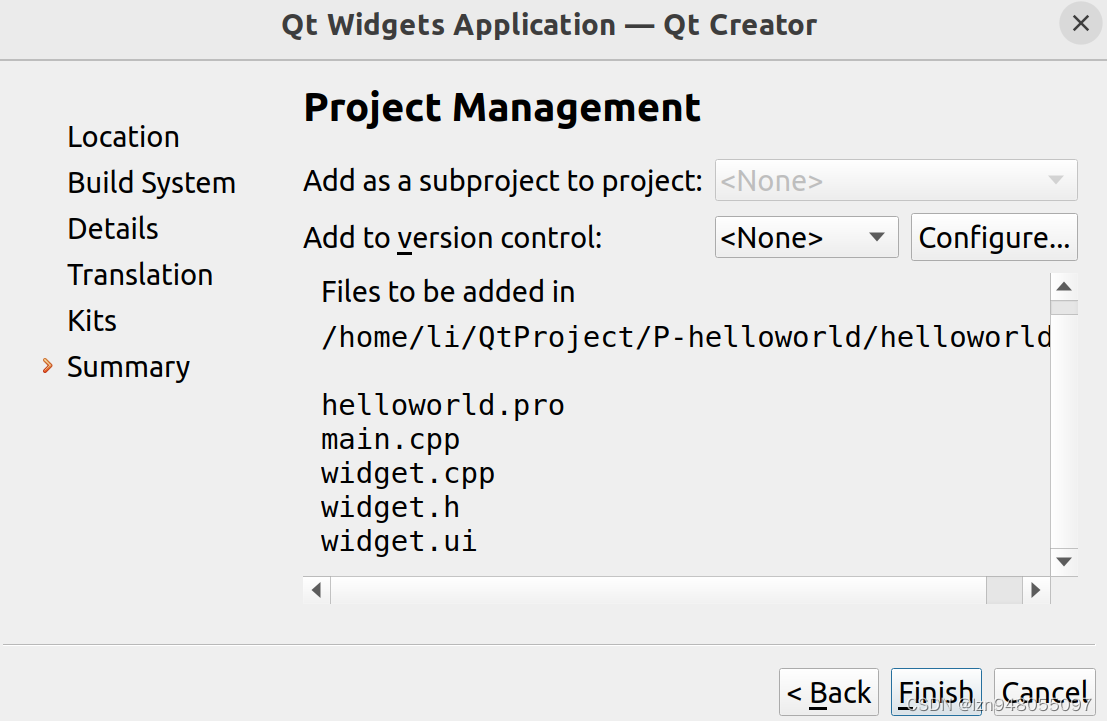
在 Qt Creator 中新建项目:
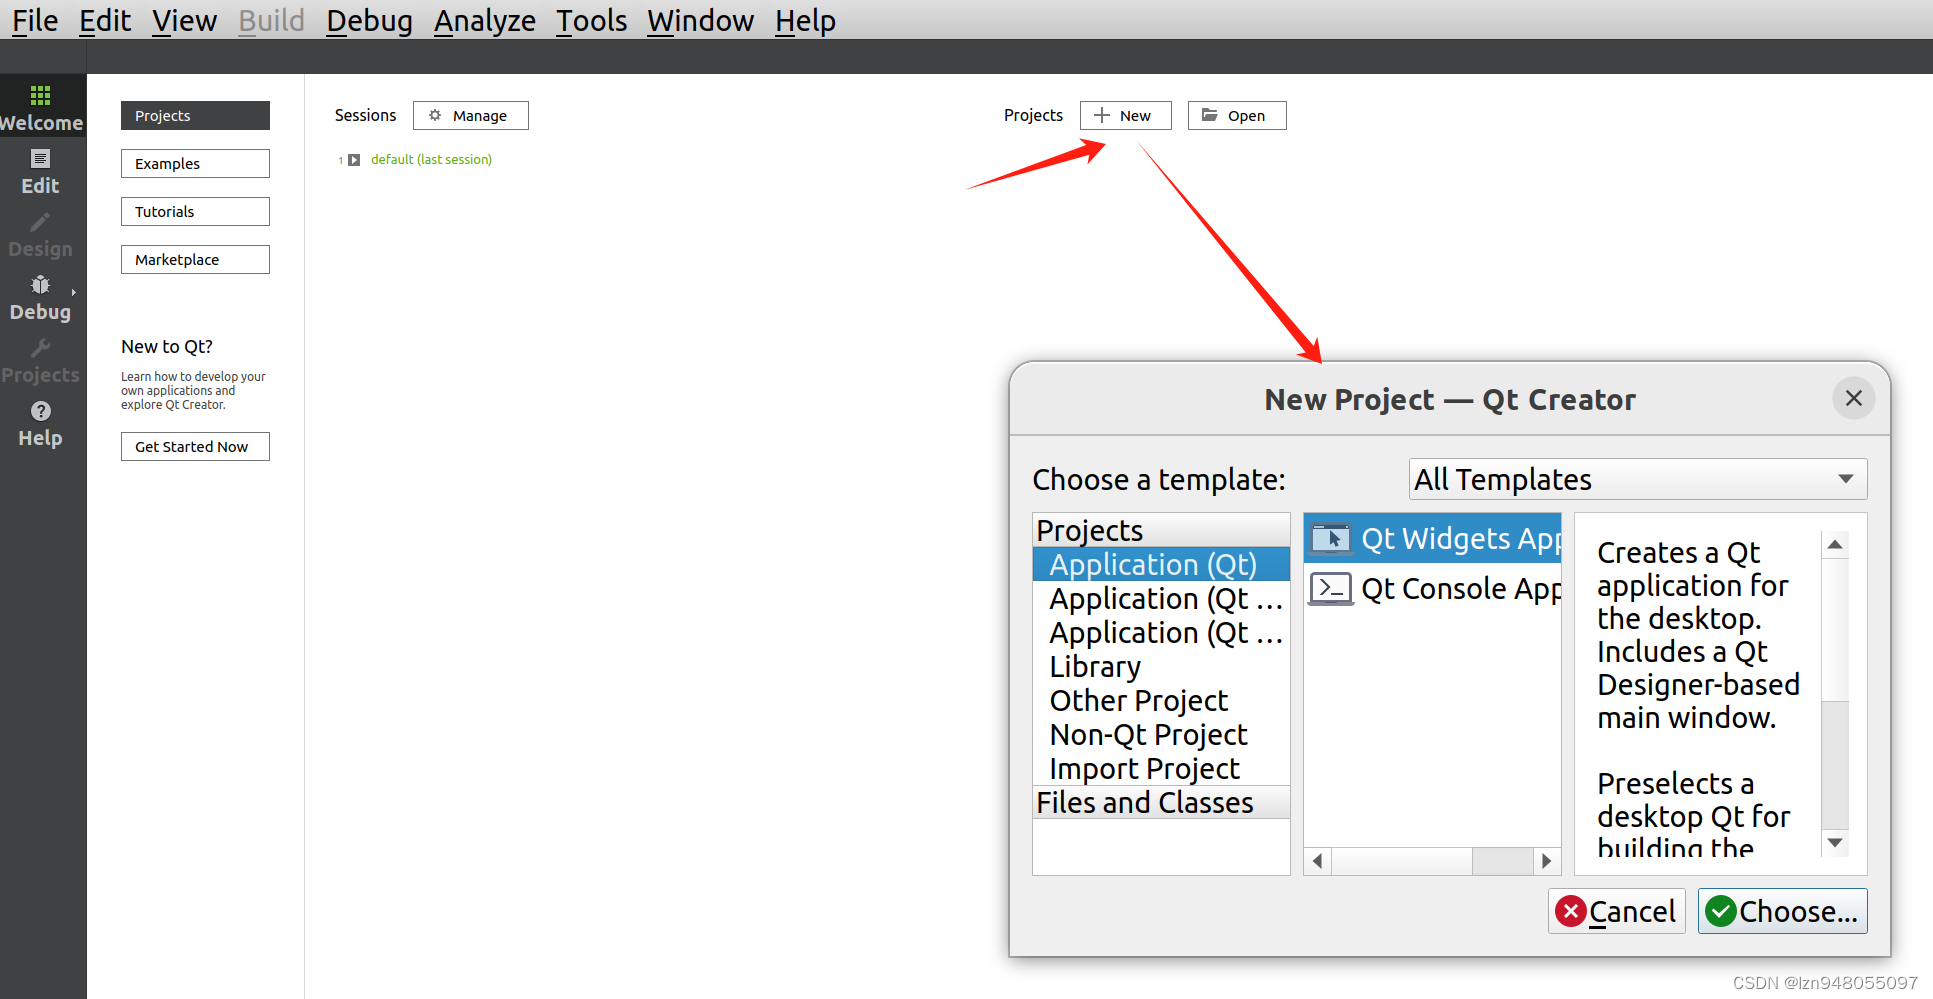
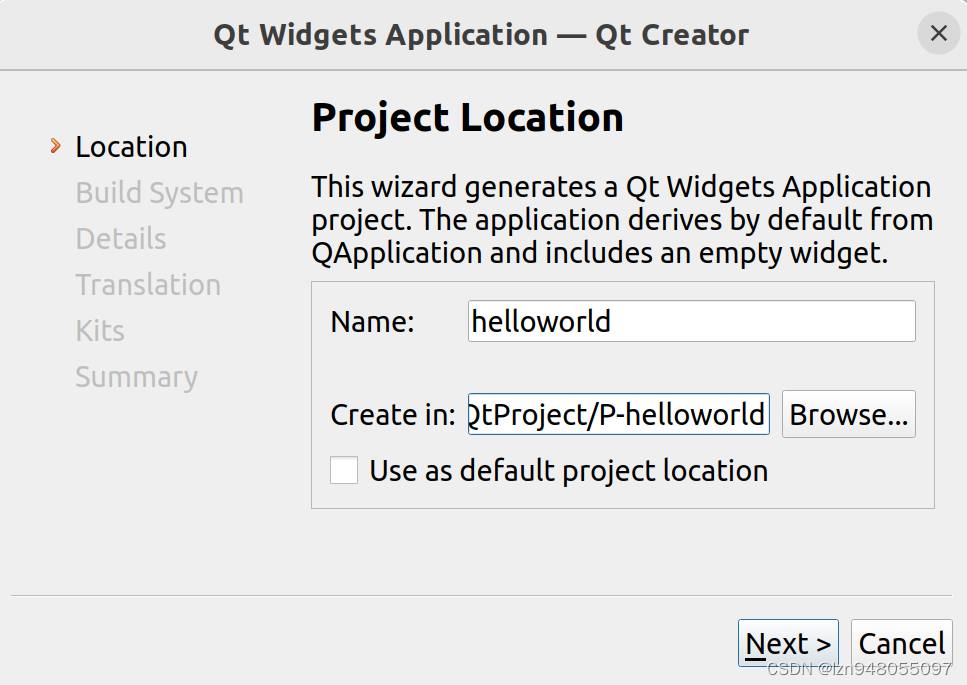

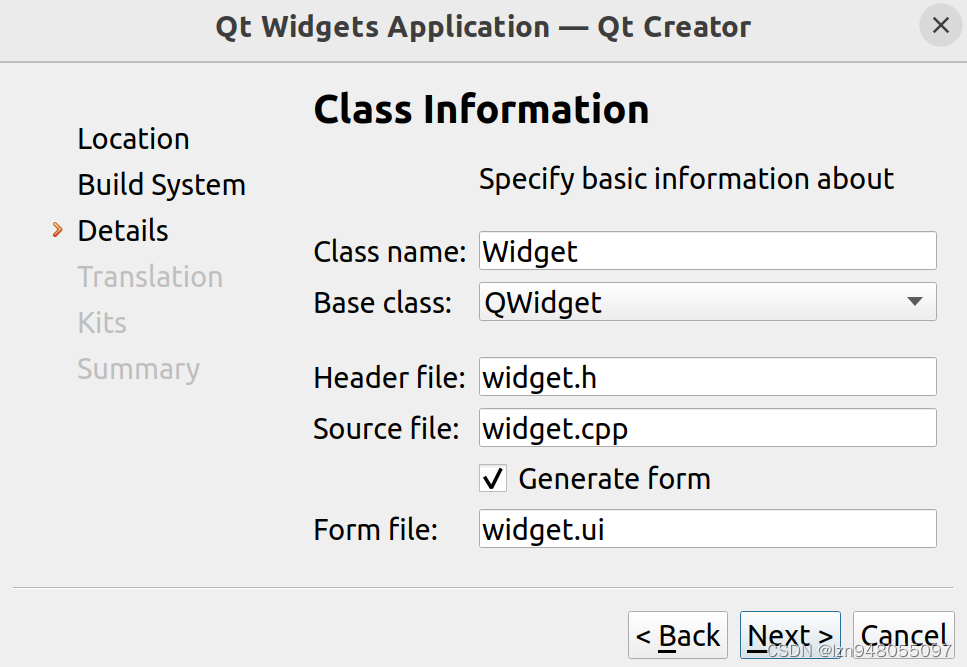
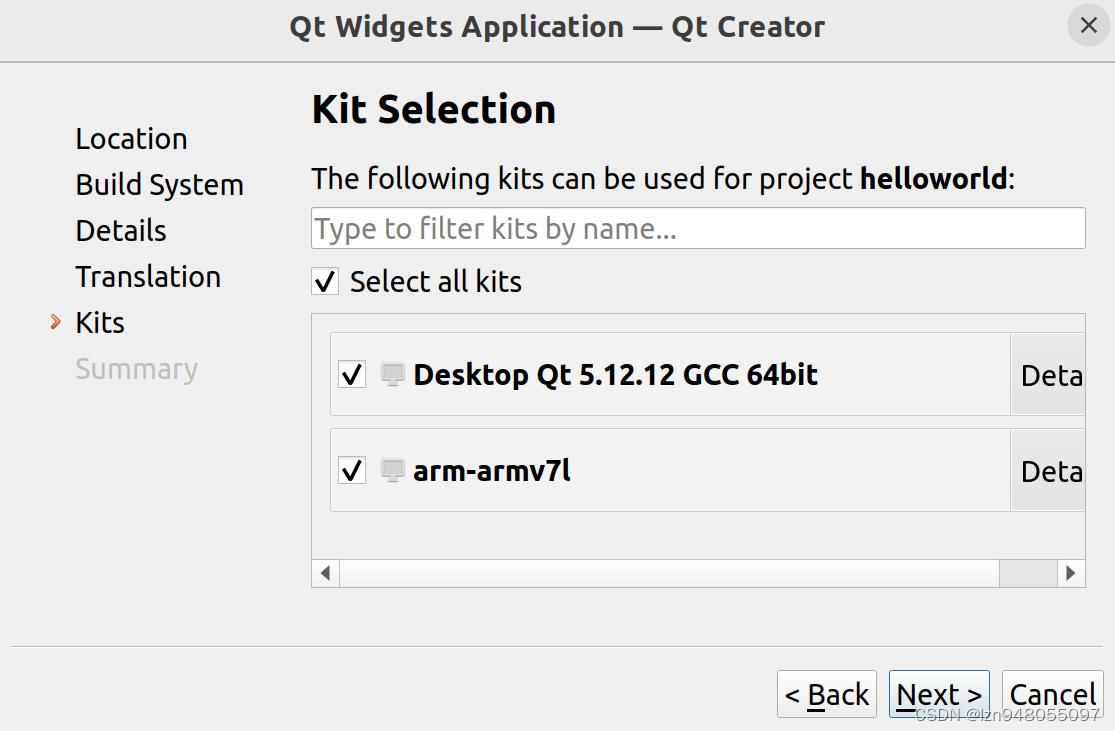
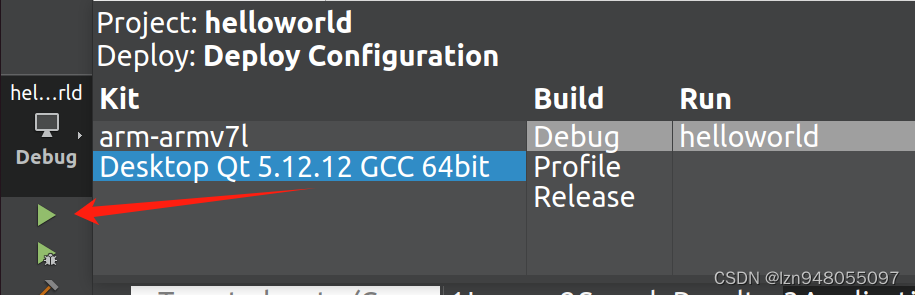
这里选择两个套件:
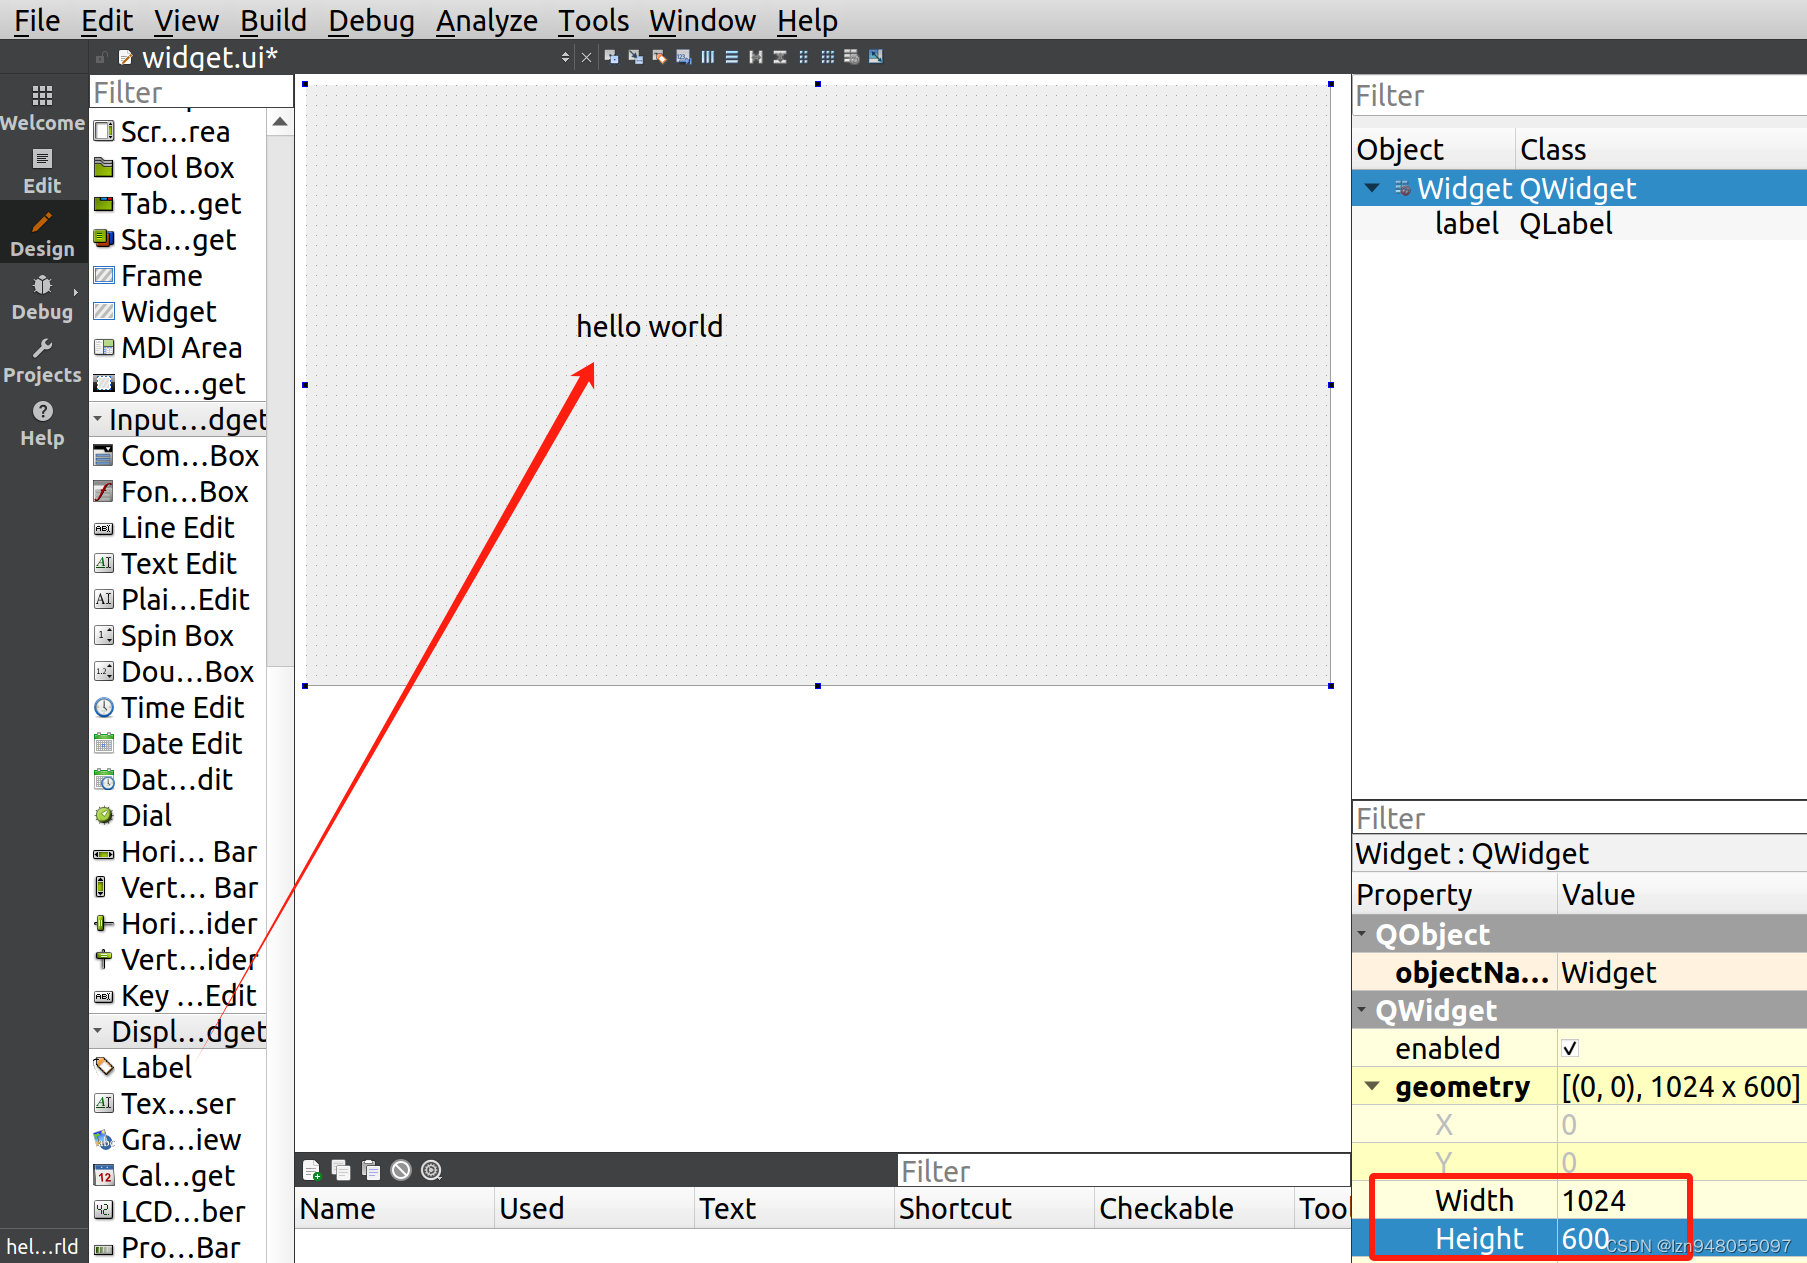
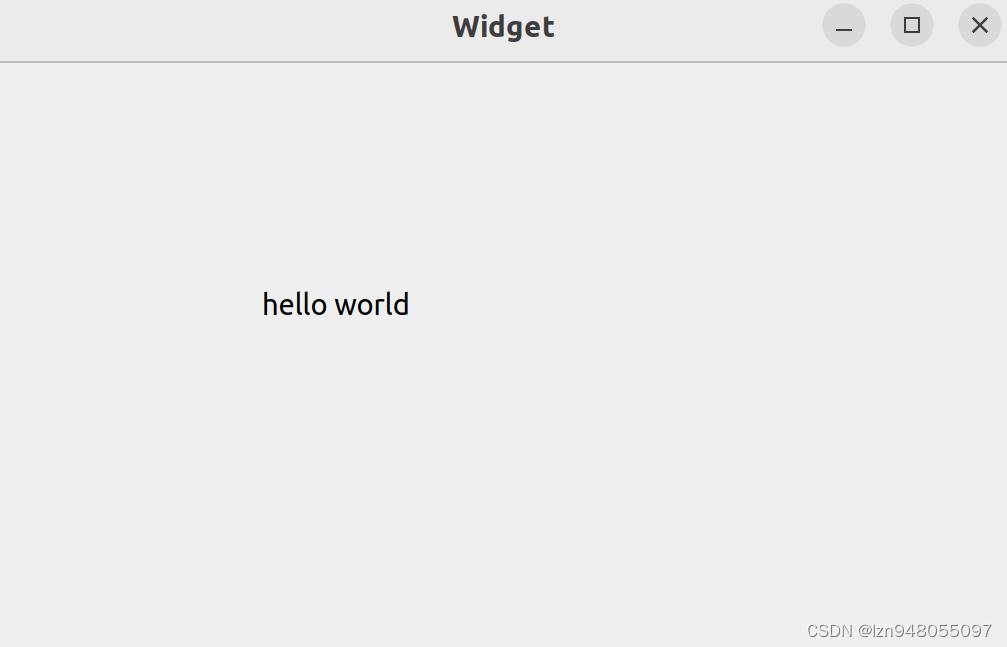
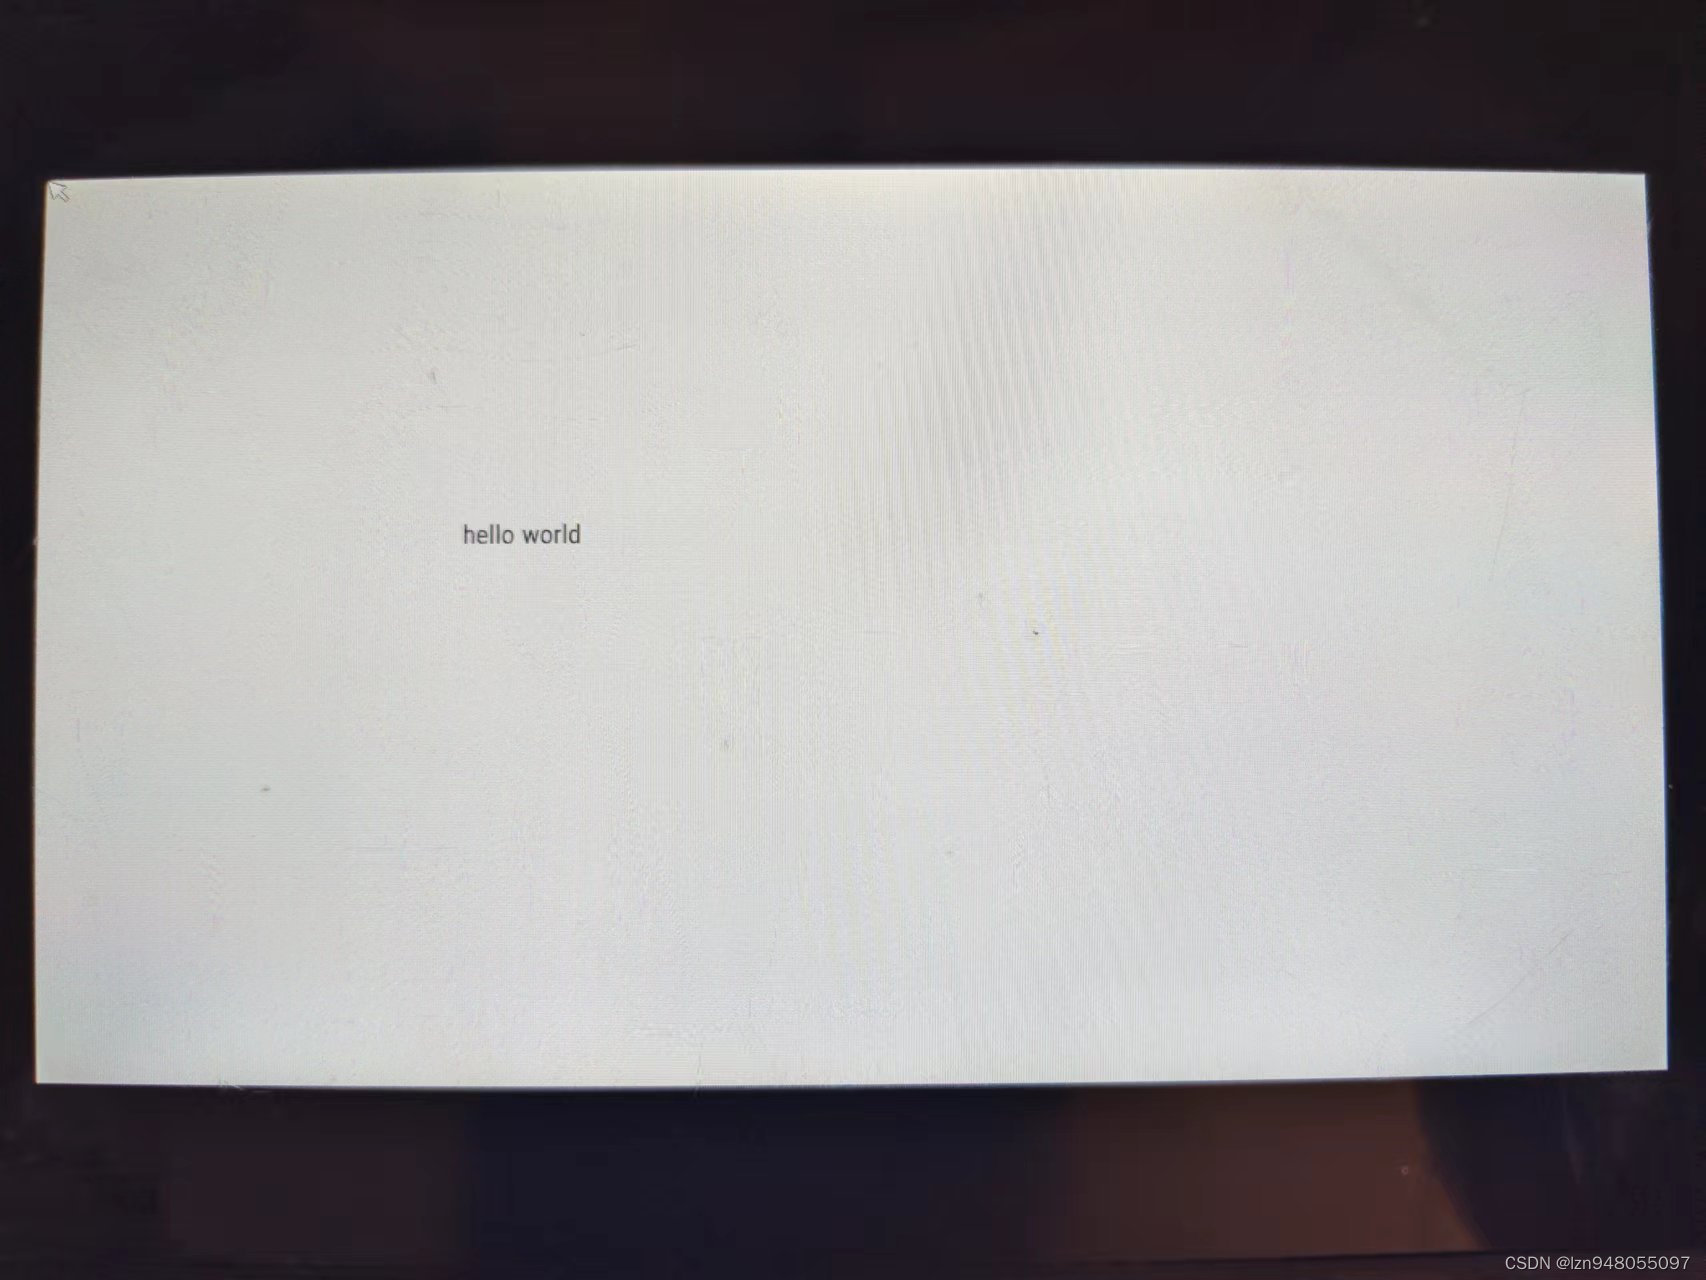
通过控件 label 显示 hello world , 由于目标设备 lcd 屏的像素宽高为 1024 * 600,据此调整页面大小。
选择 Desktop Qt 5.12.12 GCC 64bit 套件进行编译运行,看效果。
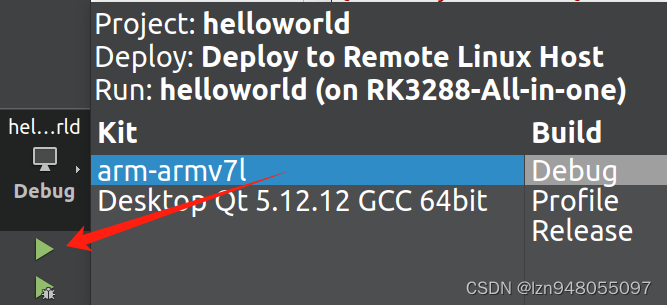
选择 arm-armv7l 套件进行编译运行,即可在目标设备的 lcd 屏上看到显示。
目标设备 lcd 变为白屏没有 hello world 显示,与预期不符,且Qt Creator 报错,报错日志如下。
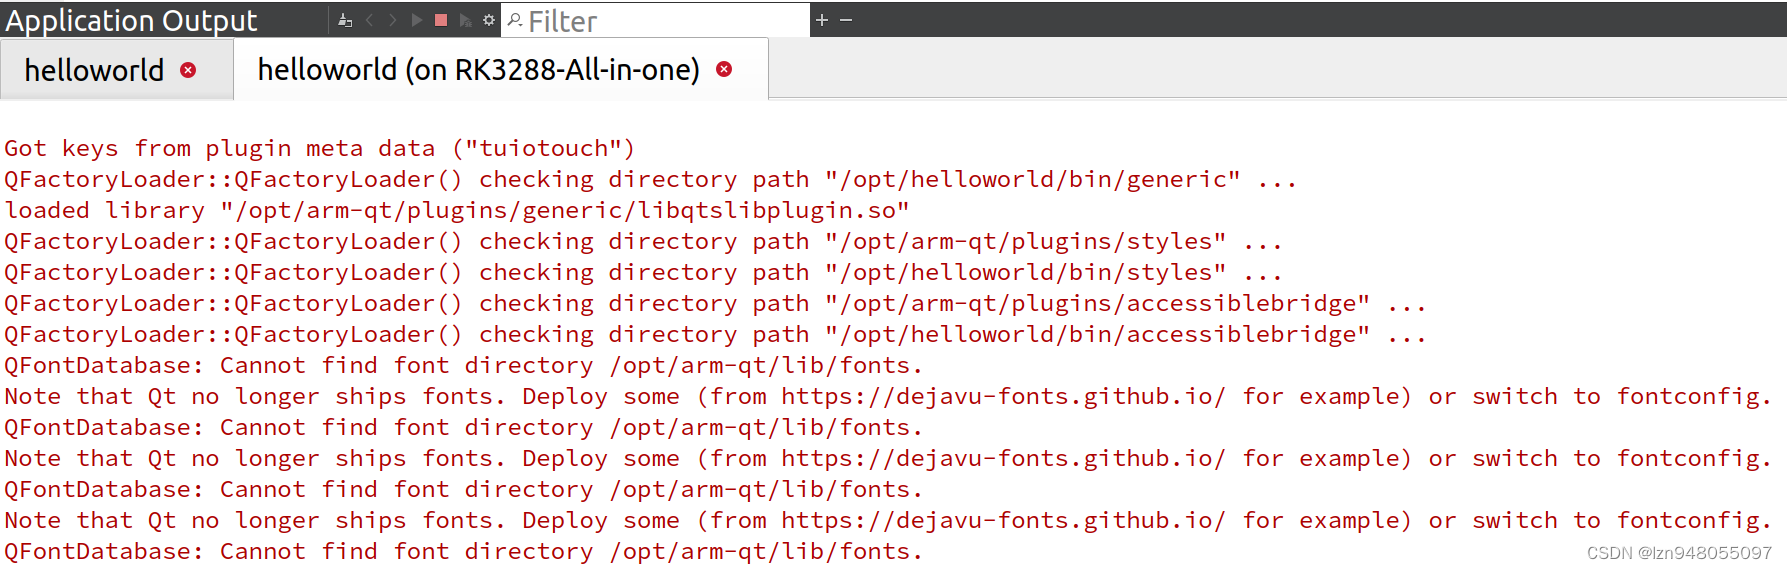
看起来是找不到 opt/arm-qt/lib/fonts 这个文件。fonts 是一个文件夹,其中应存放字库文件。在 win11 的 C:\Windows\Fonts 中有很多字库,找一个放进来使用即可。
重新编译运行,目标设备 lcd 显示符合预期:
— END —
参考:
armlinux 移植qt
error: possibly undefined macro: AC_MSG_ERROR
linux如何查看编译器支持的C++版本


 1156
1156


 被折叠的 条评论
为什么被折叠?
被折叠的 条评论
为什么被折叠?
 到【灌水乐园】发言


