


1. createVNode()、render()
1.1 初步使用 createVNode()、render()
Vue3 插件当时也涉及到了 createVNode()、render()
h 函数本质上是用了 Vue 内置函数 —— createVNode()、render() 实现的
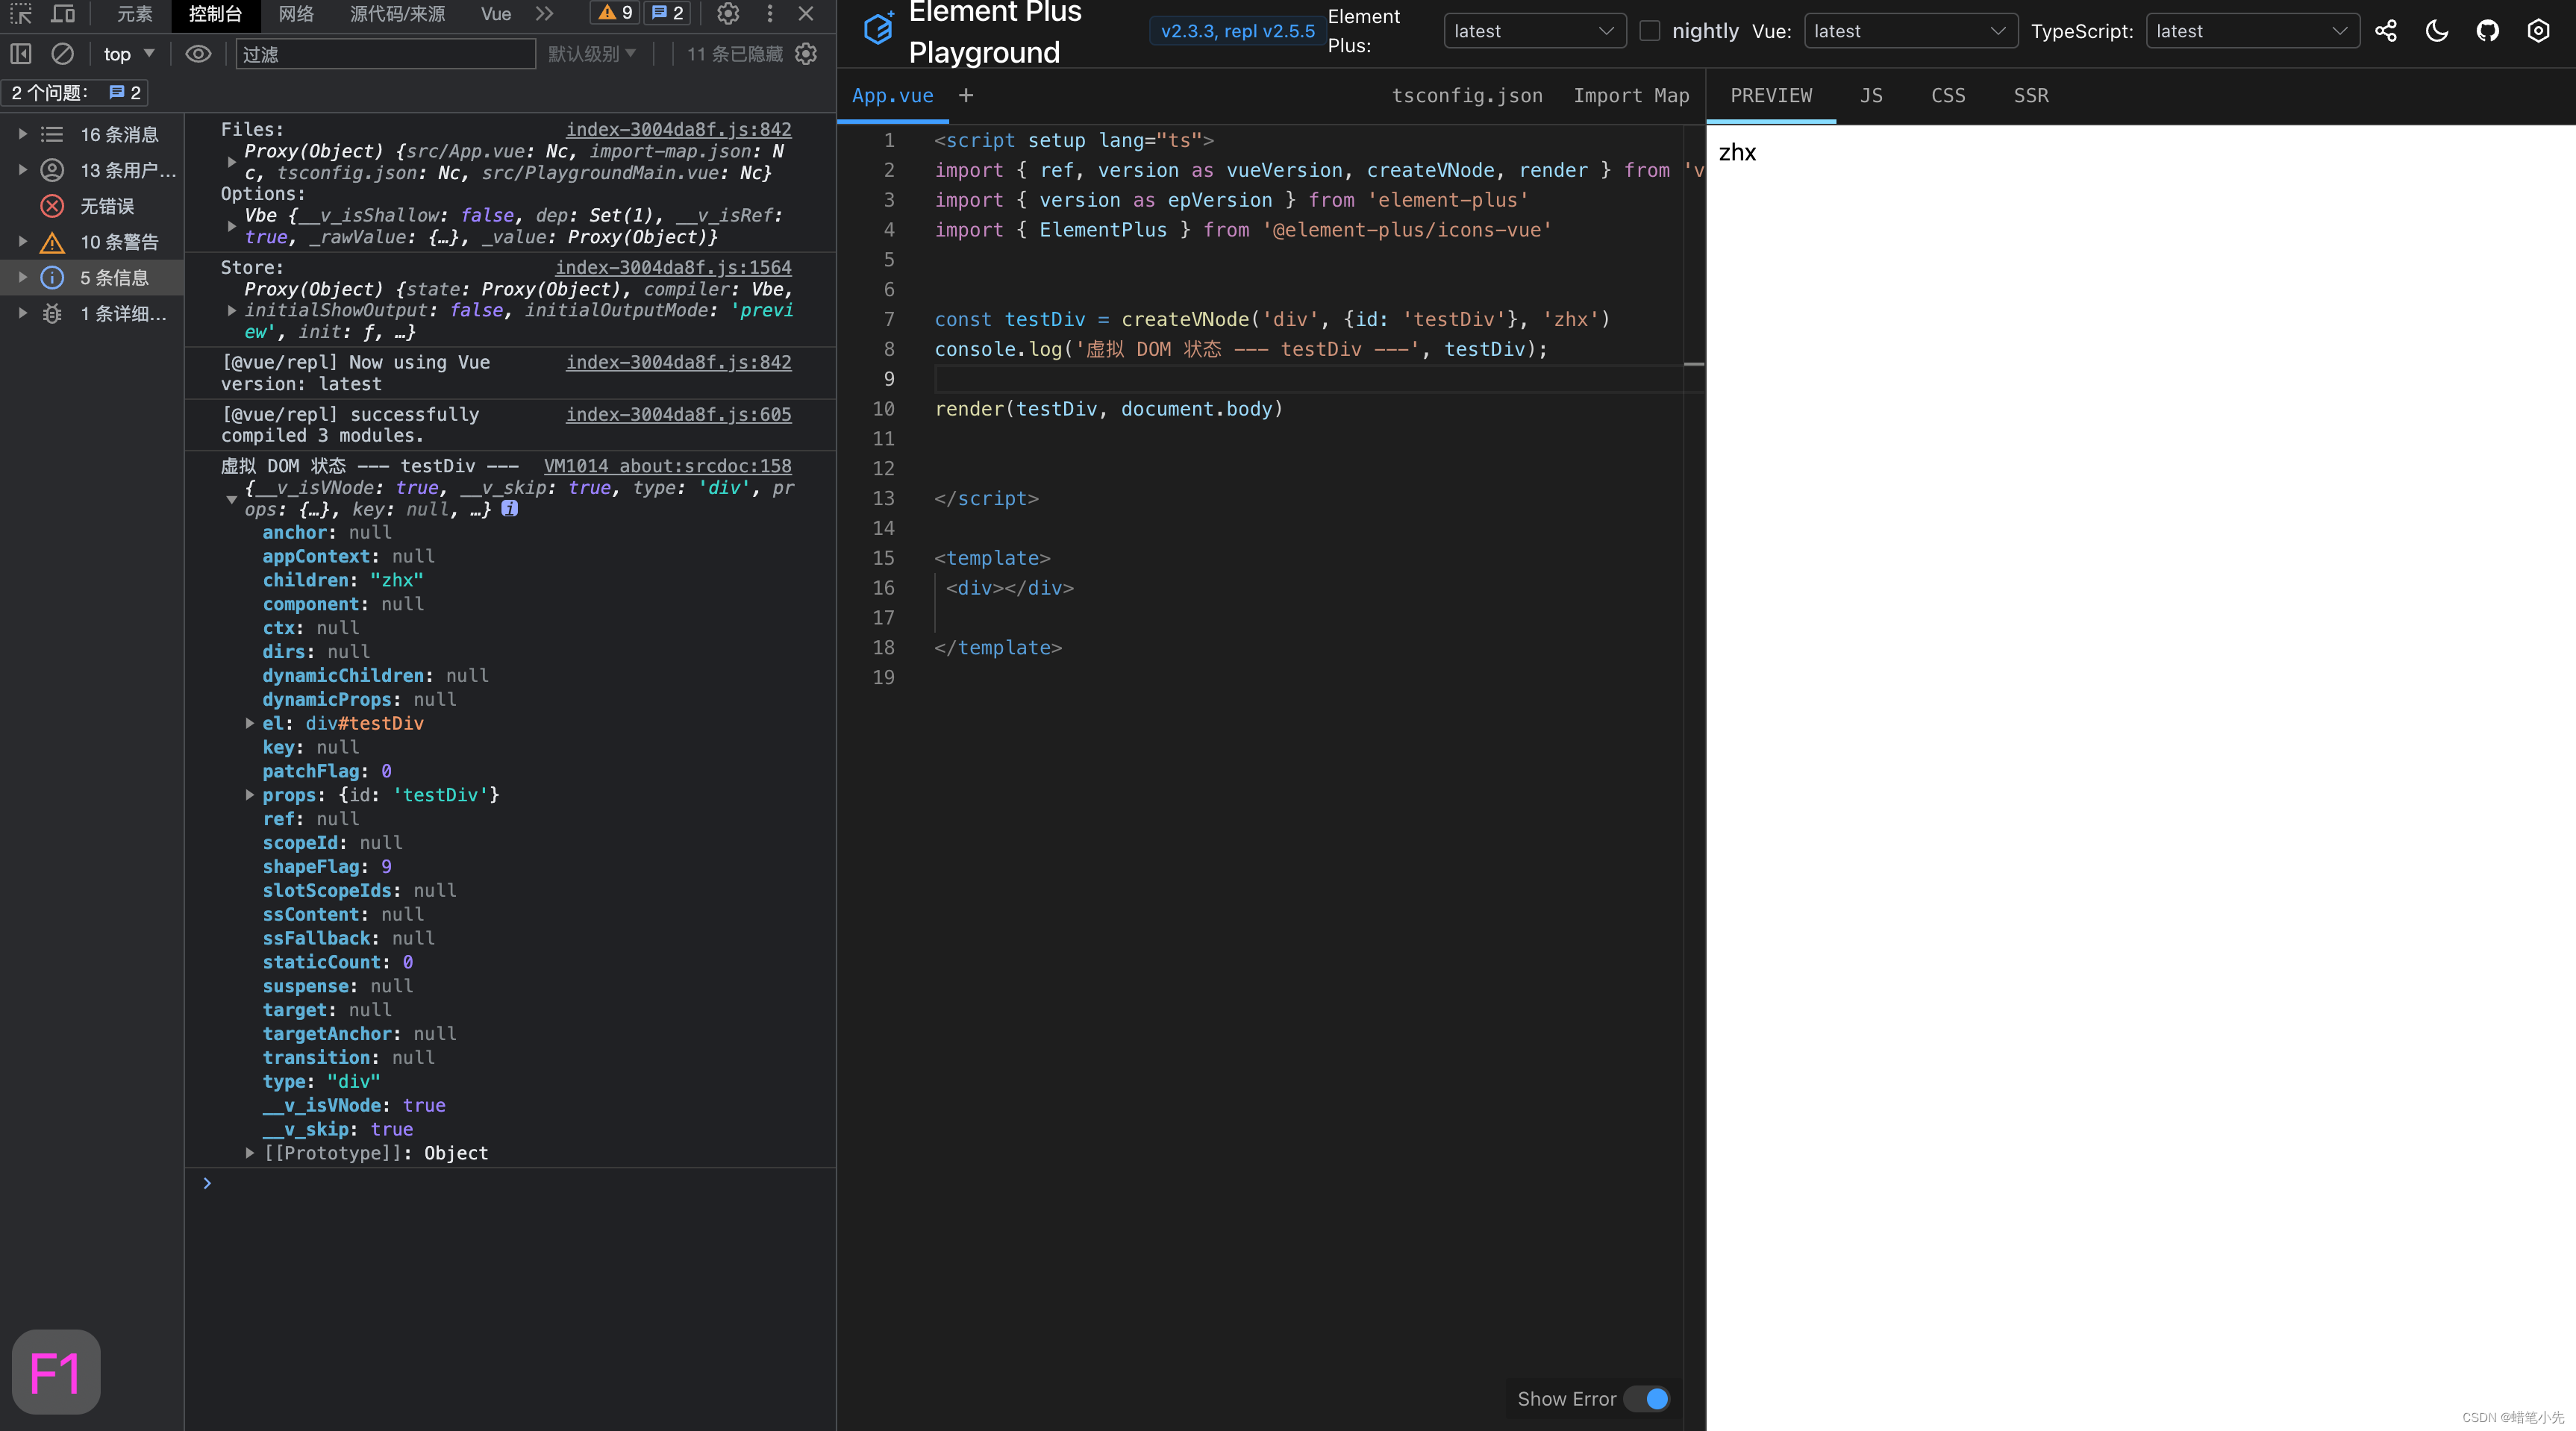
从 vue 中,引入 createVNode, render 函数
使用 createVNode() 创建虚拟 DOM 节点
使用 render() 渲染虚拟 DOM 节点
createVNode —— 创建虚拟 DOM:
@param 参数1 创建元素类型,必选
@param 参数2 创建元素属性
@paran 参数3 创建元素内容
render —— 渲染虚拟 DOM:
@param 参数1 要被渲染的虚拟 DOM,必选
@param 参数2 要渲染的位置,必选
测试代码:
<template>
  <div>
  </div>
</template>

<script lang="ts" setup>
import { createVNode, render } from 'vue'

/**
 * createVNode —— 创建虚拟 DOM
 * @param 参数1 创建元素类型,必选
 * @param 参数2 创建元素属性
 * @paran 参数3 创建元素内容
 * @description 虚拟 DOM 创建完成后,需要使用 render 函数,才能在页面中渲染
 */
const testDiv = createVNode('div', { id: "myDivId" }, 'Lyrelion');
console.log('虚拟 DOM 状态 --- testDiv ---', testDiv);

/**
 * render —— 渲染虚拟 DOM
 * @param 参数1 要被渲染的虚拟 DOM,必选
 * @param 参数2 要渲染的位置,必选
 * @description 虚拟 DOM 创建完成后,需要使用 render 函数,才能在页面中渲染
 */
render(testDiv, document.body);
</script>
结果如下,可以看到,我给 div 添加的 id、innerHTML,在虚拟 DOM 中都体现了
1.2 h 函数源码分析
位置:packages\runtime-core\src\h.ts
// “h” 是 “createVNode” 的用户友好的版本,适用于手动编写的渲染函数
// 编译器生成的代码使用 “createVNode”,因为
// 1.它是单态的,避免了额外的呼叫开销
// 2.它允许为优化指定 patchFlags
// 没有 props 的命名槽,需要显式 “null” 以避免歧义
可以看到最后的 h 函数方法中,一直在使用 createVNode()
import {
  VNode,
  VNodeProps,
  createVNode,
  VNodeArrayChildren,
  Fragment,
  Text,
  Comment,
  isVNode
} from './vnode'

...
...
...

// “h” 是 “createVNode” 的用户友好的版本,适用于手动编写的渲染函数
// 编译器生成的代码使用 “createVNode”,因为
// 1.它是单态的,避免了额外的呼叫开销
// 2.它允许为优化指定 patchFlags

/*
// type only
h('div')
// type + props
h('div', {})
// type + omit props + children
// Omit props does NOT support named slots
h('div', []) // array
h('div', 'foo') // text
h('div', h('br')) // vnode
h(Component, () => {}) // default slot
// type + props + children
h('div', {}, []) // array
h('div', {}, 'foo') // text
h('div', {}, h('br')) // vnode
h(Component, {}, () => {}) // default slot
h(Component, {}, {}) // named slots
// 没有 props 的命名槽,需要显式 “null” 以避免歧义
h(Component, null, {})
**/

...
...
...

// Actual implementation
export function h(type: any, propsOrChildren?: any, children?: any): VNode {
  const l = arguments.length
  if (l === 2) {
    if (isObject(propsOrChildren) && !isArray(propsOrChildren)) {
      // single vnode without props
      if (isVNode(propsOrChildren)) {
        return createVNode(type, null, [propsOrChildren])
      }
      // props without children
      return createVNode(type, propsOrChildren)
    } else {
      // omit props
      return createVNode(type, null, propsOrChildren)
    }
  } else {
    if (l > 3) {
      children = Array.prototype.slice.call(arguments, 2)
    } else if (l === 3 && isVNode(children)) {
      children = [children]
    }
    return createVNode(type, propsOrChildren, children)
  }
}
2. 使用 h 函数的几种方法
2.1 h 函数 接收的参数
type —— 元素的类型,必选
propsOrChildren —— 数据对象(props、attrs、dom、class、style、…)
children —— 子节点,可以包含混合的 VNode 和 字符串
除类型 type 之外,所有参数都是可选的
2.2 h 函数 使用方法
// 除类型之外的所有参数都是可选的
h('div')
h('div', { id: 'foo' })

// 属性和内容,都可以在第二个参数中使用
// Vue 会自动选择正确的分配方式
h('div', { class: 'bar', innerHTML: 'hello' })

// 可以添加 .prop 和 .attr 等修饰符
// 分别带有 “.” 和 “^” 前缀
h('div', { '.name': 'some-name', '^width': '100' })

// class、style 可以是对象,也可以是数组
h('div', { class: [foo, { bar }], style: { color: 'red' } })

// 定义事件需要加 on,如 onXxx
h('div', { onClick: () => {} })

// 子集可以是字符串
h('div', { id: 'foo' }, 'hello')

// 如果没有props,可以省略 props
h('div', 'hello')
h('div', [h('span', 'hello')])

// 子数组可以包含混合的 VNode 和 字符串
h('div', ['hello', h('span', 'hello')])
3. 通过 h 函数实现 button 组件
3.1 使用 props 接收传入组件的参数
定义一个箭头函数,该函数返回一个 h 函数
箭头函数默认接收两个参数 props、ctx,就跟 setup 接收的两个参数作用一样
第一个参数 div 就是元素类型
第二个参数 { class: ‘my-div’ } 就是 数据对象(props、attrs、dom、class、style、…)
第三个参数 props.text 子节点,此处就是一段文字
<template>
  <Btn text="zhx"></Btn>
</template>

<script setup lang='ts'>
import { h } from 'vue';

type Props = {
  text: string
}

// 按钮组件 —— 定义一个箭头函数,返回 h 函数
const Btn = (props: Props, ctx: any) => {
  return h('div', {
    class: 'my-div',
  }, props.text)
}

</script>

<style scoped>
  .my-div {
    display: flex;
    justify-content: center;
    align-items: center;
    width: 110px;
    height: 55px;
    background: red;
    border-radius: 10px;
    color: #fff
  }
</style>

3.2 使用 emit 向组件外发送事件
emit 添加事件的时候,一定要带上 on 前缀
<template>
  <Btn text="zhx" @on-click="getNum"></Btn>
</template>

<script setup lang='ts'>
import { h } from 'vue';

type Props = {
  text: string
}

// 按钮组件 —— 定义一个箭头函数,返回 h 函数
const Btn = (props: Props, ctx: any) => {
  return h('div', {
    class: 'my-div',
    onClick: () => {
      ctx.emit('on-click', 123)
    }
  }, props.text)
}

const getNum = (num: number) => {
  console.log(num);
}

</script>
3.3 使用 ctx.slots.default() 在组件内定义插槽
<template>
  <Btn @on-click="getNum">
        <template #default>
            zhx-slots
        </template>
  </Btn>
</template>

<script setup lang='ts'>
import { h } from 'vue';

type Props = {
  text?: string
}

// 按钮组件 —— 定义一个箭头函数,返回 h 函数
const Btn = (props: Props, ctx: any) => {
  return h('div', {
    class: 'my-div',
    onClick: () => {
      ctx.emit('on-click', 123)
    }
  }, ctx.slots.default())
}

const getNum = (num: number) => {
  console.log(num);
}

</script>


 1111
1111


 被折叠的 条评论
为什么被折叠?
被折叠的 条评论
为什么被折叠?
 到【灌水乐园】发言


