


手把手教你windows运行音频口型同步评价指标LSE-C,LSE-D
1、说明
LSE-C和LSE-D是wav2lip中利用syncnet网络提出的新指标,可以用于评价视频中认罪嘴型和音频是否同步。
LSE-C (Lip Sync Error Confidence):音频同步置信度,越高同步效果越好
LSE-D(Lip Sync Error Distance):音频同步距离,越低同步效果越好
wav2lip代码地址:Wav2Lip/evaluation at master · Rudrabha/Wav2Lip (github.com)
syncnet代码地址:joonson/syncnet_python: Out of time: automated lip sync in the wild (github.com)
2、环境准备
(1)这个论文提出的评价指标是根据syncnet网络计算的,所以需要先下载syncnet源码:
git clone https://github.com/joonson/syncnet_python.git (2)下载完毕后,准备conda环境
conda create -n syncnet python=3.9.0
conda activate syncnet
安装requirements.txt文件中的依赖,我的电脑cuda环境是11.8,直接安装源码中requirements.txt会出错,经过试验,最终确定如下依赖版本:
torch==1.11.0
torchvision==0.12.0
numpy==1.22.4
scipy==1.13.1
scenedetect==0.6.0
opencv-contrib-python
python_speech_features
执行安装requirements.txt
pip install -r requirements.txt最终我的conda环境中包含以下依赖:

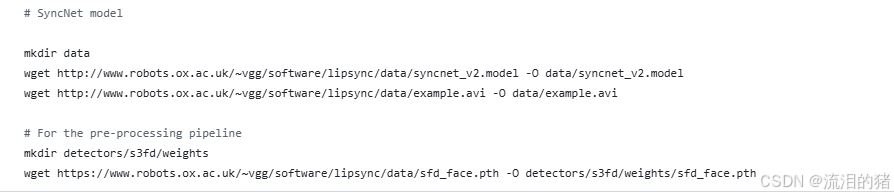
(3)下载模型,源代码中指出需要下载一个syncnet_v2.model和example.avi到data目录下,下载sfd_face.pth到 detectors/s3fd/weights目录下。
附上模型夸克网盘地址,可以直接下载放到相应位置:我用夸克网盘分享了「syncnet」,点击链接即可保存。
链接:https://pan.quark.cn/s/1d51334fa74e
提取码:ufGh
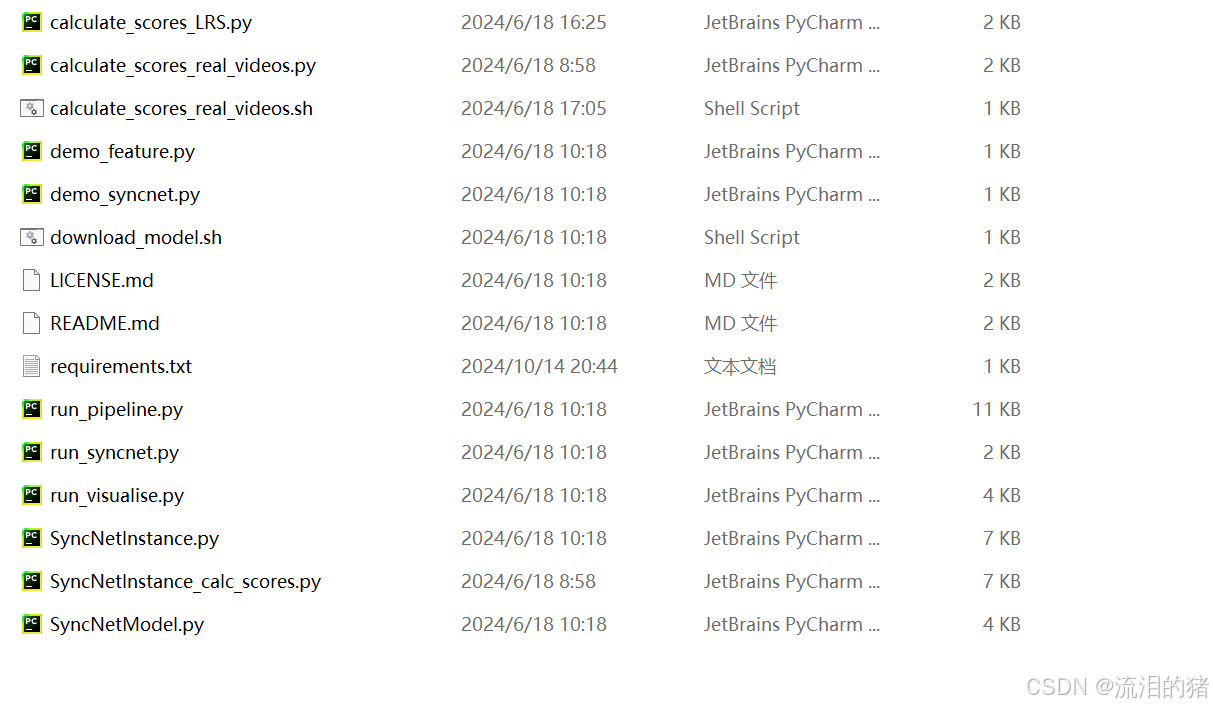
(4)复制wav2lip中python文件到syncnet代码中,将wav2lip源码中的evaluation/score_LSE目录下的python文件复制到syncnet源码根目录中,复制后syncnet中有如下文件
3、代码运行
将需要检测的视频路径写入到下面的命令中,依次执行以下两条命令,计算的LSE-D和LSE-C保存在根目录下all_scores.txt中
python run_pipeline.py --videofile /path/to/your/video --reference wav2lip --data_dir tmp_dir
python calculate_scores_real_videos.py --videofile /path/to/you/video --reference wav2lip --data_dir tmp_dir >> all_scores.txt


 8778
8778

 被折叠的 条评论
为什么被折叠?
被折叠的 条评论
为什么被折叠?
 到【灌水乐园】发言


