Vue3 Element Plus 封装 el-select - 附完整示例

Element Plus

基于 Vue 3,面向设计师和开发者的组件库

目录

Element Plus

效果

一、介绍

 1、官方文档

2、官方示例

二、准备工作

1、安装依赖包

 2、示例版本 

三、使用步骤

1、element-plus自动导入

Vite

1、绑定值

2、远程搜索

3、change事件,子组件传值给父组件,更新值

四、完整示例

目录结构

Index.vue

Example.vue

  欢迎扫描下方二维码关注VX公众号


效果

一、介绍

 1、官方文档

一个 Vue 3 UI 框架 | Element Plus

一个 Vue 3 UI 框架 | Element PlusA Vue 3 based component library for designers and developersicon-default.png?t=N7T8https://element-plus.org/zh-CN/

2、官方示例

二、准备工作

1、安装依赖包

# NPM
$ npm install element-plus --save

# Yarn
$ yarn add element-plus

# pnpm
$ pnpm install element-plus

 2、示例版本 

"element-plus": "^2.4.4",

三、使用步骤

1、element-plus自动导入

首先你需要安装unplugin-vue-components 和 unplugin-auto-import这两款插件

npm install -D unplugin-vue-components unplugin-auto-import

然后把下列代码插入到你的 Vite 或 Webpack 的配置文件中

Vite
// vite.config.ts
import { defineConfig } from 'vite'
import AutoImport from 'unplugin-auto-import/vite'
import Components from 'unplugin-vue-components/vite'
import { ElementPlusResolver } from 'unplugin-vue-components/resolvers'

export default defineConfig({
  // ...
  plugins: [
    // ...
    AutoImport({
      resolvers: [ElementPlusResolver()],
    }),
    Components({
      resolvers: [ElementPlusResolver()],
    }),
  ],
})

注:完整引入 / 按需导入 / 手动导入等方式请参照下方链接配置

快速开始 | Element Plus

1、绑定值

父组件:      v-model:vModel="value"

子组件:      v-model="vModel"

注:这里的父组件务必在v-model后面加上:vModel,选中值时用于更新值
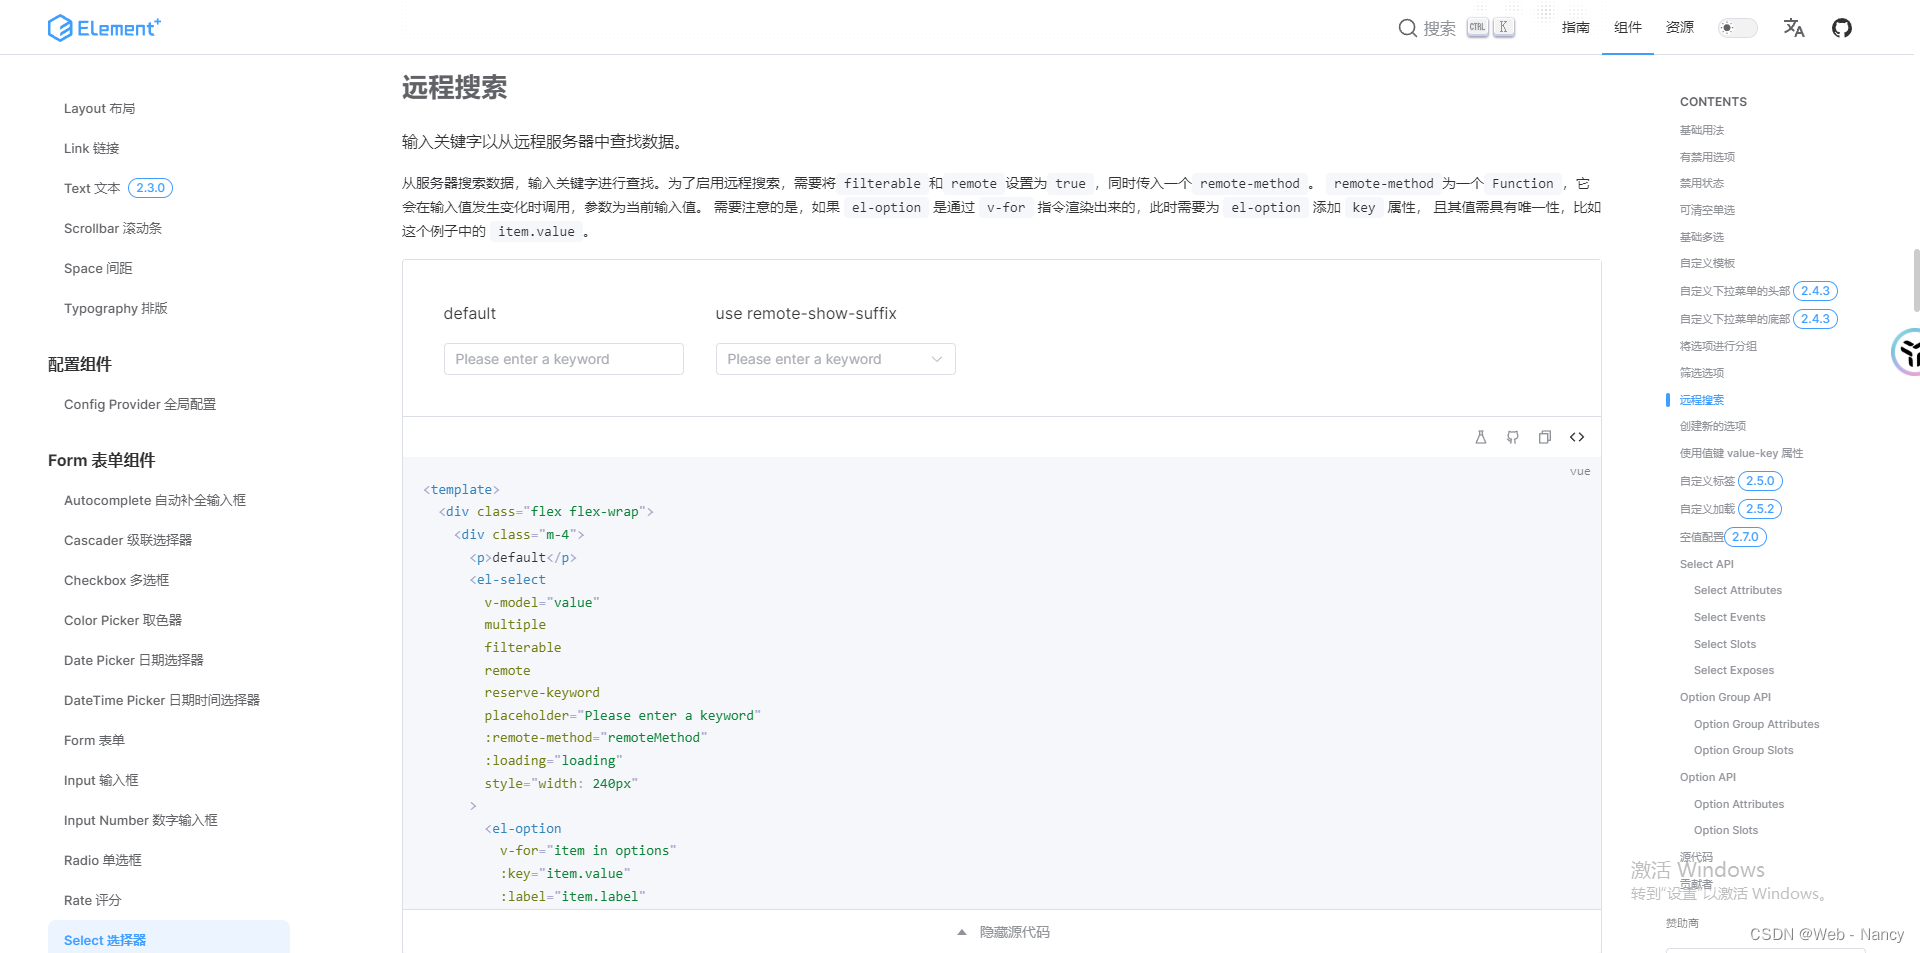
2、远程搜索

输入关键字以从远程服务器中查找数据。

从服务器搜索数据,输入关键字进行查找。为了启用远程搜索,需要将filterableremote设置为true,同时传入一个remote-method。 remote-method为一个Function,它会在输入值发生变化时调用,参数为当前输入值。 需要注意的是,如果 el-option 是通过 v-for 指令渲染出来的,此时需要为 el-option 添加 key 属性, 且其值需具有唯一性,比如这个例子中的 item.id具体示例在文末的完整示例部分展示。

3、change事件,子组件传值给父组件,更新值

选中值发生变化时触发。

将选中值的lable显示在数据框,在本示例中用的name,可根据实际情况做调整。具体示例在文末的完整示例部分展示。

emit('update:vModel', val);

注:这里务必保证与父组件的绑定值(v-model:vModel="value")是相一致的,用于子组件向父组件传值更新值

四、完整示例

目录结构

src

--components

----select

------Index.vue

--views

----Example.vue

Index.vue

<template>
	<el-select
		v-model="vModel"
		filterable
		remote
		reserve-keyword
		:placeholder="props.placeholder"
		remote-show-suffix
		:remote-method="remoteMethod"
		@change="handleChange"
	>
		<el-option v-for="item in props.options" :key="item.id" :label="item.name" :value="item.id" />
	</el-select>
</template>

<script setup lang="ts" name="selectSearch">
import { ref, defineProps, watch, defineExpose } from 'vue';
const props = defineProps({
	vModel: {
		type: String,
		default: () => '',
		require: true,
	},
	placeholder: {
		type: String,
		default: () => '',
		require: true,
	},
	options: {
		type: Array,
		default: () => [],
		required: true,
	},
});

const vModel = ref('');

watch(
	() => props.options,
	(newValue, oldValue) => {},
	{ immediate: true, deep: true }
);

watch(
	() => props.vModel,
	(newValue, oldValue) => {
		vModel.value = props.vModel;
	},
	{ immediate: true, deep: true }
);

// 定义子组件向父组件传值/事件
const emit = defineEmits(['update:vModel', 'remote-method']);

const remoteMethod = (query?: string) => {
	emit('remote-method', query);
};

const handleChange = (val: string) => {
	emit('update:vModel', val);
};
</script>

Example.vue

<template>
  <div>
    <SelectSearch
      ref="selectSearch"
      v-model:vModel="value"
      :placeholder="placeholder"
      :options="data"
      @remote-method="remoteMethod"
      @update:vModel="handleUpDate"
    />
  </div>
</template>

<script setup lang="ts" name="example">
import { ref, defineAsyncComponent, onMounted } from 'vue';

// 引入组件
const SelectSearch = defineAsyncComponent(() => import('../components/select/Index.vue'));

// 定义变量
const value = ref('');
const data = ref([]) as any;
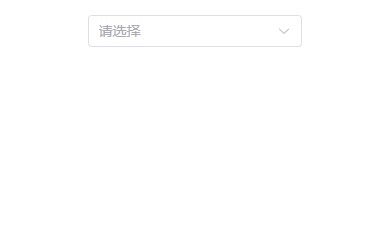
const placeholder = ref('请选择');

onMounted(() => {
  // 真实项目是根据请求接口获取数据
  data.value = [
    {
      id: '111',
      name: '数据A'
    },
    {
      id: '555',
      name: '数据D'
    },
    {
      id: '666',
      name: '数据F'
    }
  ]
})


// 可搜索下拉框
const remoteMethod = (query: string) => {
  // 真实项目是根据query参数请求接口获取数据 
  data.value = [
    {
      id: '111',
      name: '数据A'
    },
    {
      id: '222',
      name: '数据B'
    },
    {
      id: '333',
      name: '数据C'
    }
  ]
};

const handleUpDate = (v: any) => {
	data.value.map((item: { id: any; name: any }) => {
		if (item.id === v) value.value = item.name;
	});
	value.value = v;
};
</script>

  欢迎扫描下方二维码关注VX公众号

<think>嗯,用户问的是如何在el-select里设置自己输入,也就是允许用户输入自定义的选项。首先,我需要回忆一下Element UI的文档。记得el-select组件有一个属性叫做allow-create,这个属性可以让用户输入新的选项。但是可能用户不太清楚具体怎么用,或者有没有其他的方法。 然后,可能需要考虑用户的实际使用场景。比如,他们是否在使用Vue 2还是Vue 3,因为Element PlusElement UI有些差异。不过通常来说,allow-create在两者中都是可用的。不过,可能需要提醒用户需要配合filterable使用,因为allow-create单独使用可能不会生效。 另外,用户提到的“设置自己输入”可能还涉及到如何处理用户输入的值,比如是否要实时添加到选项中,或者是否需要后端保存。这时候可能需要提到@change事件或者@blur事件来捕获输入的值,并动态更新options数组。 还有可能用户遇到了一些问题,比如输入后选项没有显示,或者样式问题。这时候需要检查是否有正确的tag显示,或者是否在el-option中漏掉了必要的绑定。例如,使用v-for循环时,key和value是否正确绑定。 另外,可能需要提到multiple属性,因为如果用户希望多选的情况下允许输入,可能需要同时设置multiple和allow-create。这时候用户输入的选项会以标签的形式出现,并且可以随时删除。 还有可能用户希望自定义输入选项的样式或者验证输入的内容,这时候可能需要使用slot或者自定义方法对输入进行校验。比如,使用no-match-msg提示用户输入不符合条件,或者通过validator函数限制输入的内容。 最后,可能需要给出一个完整的代码示例,包括模板部分和脚本部分,展示如何结合allow-create、filterable以及动态更新选项的方法。同时提醒用户注意版本兼容性,比如Element UI的版本是否支持某些属性,或者是否需要引入额外的样式或插件。</think>在Element UI的`el-select`组件中实现自定义输入功能,可以通过以下两种方式实现: --- ### 方案一:官方推荐方式(使用`allow-create`属性) ```html <el-select v-model="selectedValue" filterable allow-create default-first-option @change="handleInput" > <el-option v-for="item in options" :key="item.value" :label="item.label" :value="item.value" /> </el-select> ``` **关键配置说明**: - `filterable`:启用搜索过滤功能(必需) - `allow-create`:允许创建新条目(核心属性) - `default-first-option`:自动选择第一个匹配选项 - `@change`事件:处理自定义输入的值 **数据逻辑处理**: ```javascript data() { return { selectedValue: &#39;&#39;, options: [ { value: &#39;option1&#39;, label: &#39;选项1&#39; }, { value: &#39;option2&#39;, label: &#39;选项2&#39; } ] } }, methods: { handleInput(val) { if (!this.options.some(item => item.value === val)) { this.options.push({ value: val, label: val }) } } } ``` --- ### 方案二:组合`input`事件实现自由输入(更灵活) ```html <el-select v-model="selectedValue" filterable @input="handleFreeInput" > <el-option v-for="item in dynamicOptions" :key="item.value" :label="item.label" :value="item.value" /> </el-select> ``` **数据处理逻辑**: ```javascript data() { return { selectedValue: &#39;&#39;, baseOptions: [/* 基础选项 */], dynamicOptions: [/* 动态选项 */] } }, methods: { handleFreeInput(val) { if (val && !this.dynamicOptions.some(item => item.value === val)) { this.dynamicOptions = [ ...this.baseOptions, { value: val, label: `${val}(自定义)` } ] } } } ``` --- ### 进阶功能增强 1. **输入验证**(限制输入格式): ```javascript handleInput(val) { if (/^[a-zA-Z0-9_-]{3,10}$/.test(val)) { // 符合规则才添加 } else { this.$message.error(&#39;请输入3-10位字母数字组合&#39;) } } ``` 2. **服务端同步**(保存自定义选项): ```javascript async handleInput(val) { try { const res = await axios.post(&#39;/api/save-option&#39;, { value: val }) this.options = res.data.updatedOptions } catch (error) { console.error(&#39;保存失败&#39;, error) } } ``` 3. **样式优化**(高亮自定义项): ```css .el-select-dropdown__item.custom-option { color: #67C23A; font-style: italic; } ``` --- ### 常见问题排查 1. **输入不生效**: - 检查是否遗漏`filterable`属性 - 确认Element UI版本 ≥ 2.0.0(早期版本无此功能) - 查看控制台是否有Vue警告(常见于v-model类型不匹配) 2. **输入值重复**: ```javascript // 使用Set去重 this.options = [...new Set([...this.options, newValue])] ``` 3. **移动端适配**: 添加`@blur`事件处理: ```html <el-select @blur="handleBlur"> ``` --- ### 不同场景推荐方案 | 场景 | 推荐方案 | 特点 | |-------|---------|------| | 简单输入 | 方案一 | 开箱即用,配置简单 | | 复杂验证 | 方案二 | 灵活控制输入流程 | | 服务端交互 | 方案二+axios | 便于异步处理 | | 多选模式 | 方案一+multiple | 支持标签式展示 | 通过上述配置,可以实现既能选择已有选项,又能自由输入新值的增强型选择器。根据实际需求选择方案,若需要更复杂的交互,可结合`el-input`组件进行二次封装
评论
添加红包

请填写红包祝福语或标题

红包个数最小为10个

红包金额最低5元

当前余额3.43前往充值 >
需支付:10.00
成就一亿技术人!
领取后你会自动成为博主和红包主的粉丝 规则
hope_wisdom
发出的红包
实付
使用余额支付
点击重新获取
扫码支付
钱包余额 0

抵扣说明:

1.余额是钱包充值的虚拟货币,按照1:1的比例进行支付金额的抵扣。
2.余额无法直接购买下载,可以购买VIP、付费专栏及课程。

余额充值