【Github远程连接问题解决】git Key is already in use问题解决(本地远程连接 添加SSH-key时)

文章讲述了在已有一个SSHkey的情况下,如何在GitHub上添加新的SSHkey以避免gitKeyisalreadyinuse的错误。关键在于理解问题本质是本地key被占用,并提供了详细的步骤,包括创建新的SSHkey,将新key的公钥内容添加到GitHub账户中,从而实现本地和远程的新连接。

摘要生成于 C知道 ,由 DeepSeek-R1 满血版支持, 前往体验 >

一、问题发现

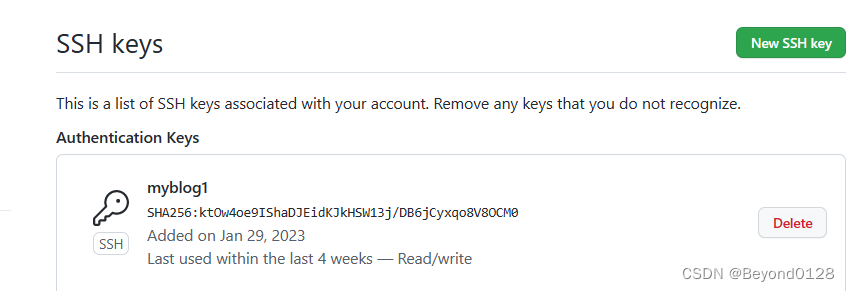
由于我之前已经使用过GitHub托管了个人的博客web,因此在Github上已经有了SSH keys,所以只能新添加新的ssh。
在这里插入图片描述
但是,当我添加新的SSH的时候,突然发现,出现了“git Key is already in use”的报错。

当我去网上搜索这个问题的时候,发现有很多人都遇到了,但是解决的方案不是非常的详细甚至是无用的。后来,无意之间的尝试,就发现了问题的本质所在,因此所记分享。

二、问题核心

其实最本质的问题,就是在同一个本地repository下的所用的key被占用,也就是说想要在同一个GitHub账户上创建本地和远程连接的话,需要在本地创建一个新的key。

那如何创建一个新的key呢,下面就浅浅的分享一下,真的挺简单的。

三、具体步骤

1.首先安装Git
链接: Git的安装教程

2.安装好之后,根据自己情况。

  • 如果是新手或者是第一次操作本地远程连接,只需要在任意地方右击选择
    在这里插入图片描述
  • 如果是之前已经创建成功过SSH Keys的话(如图)
    在这里插入图片描述
    需要找到本地电脑中的C盘的这个路径,然后右击选择Git Bash here
    在这里插入图片描述
    此时的路径是这样的
    在这里插入图片描述

3.打开之后,输入ssh-keygen -t rsa -b 4096 -C "your email"(此处的your email是你GitHub注册时候用的mail)

  • 同样的,如果你是第一次创立远程连接,只需要连敲三次回车;

  • 如果你是已经有过远程连接,一定要注意!!这里需要创立一个新的本地key;
    敲完一次回车后会出现该命令,需要输入新的本地key的名称(这个根据自己需求起就行);
    在这里插入图片描述
    然后再敲回车,会出现这个(是设置密码的),一般不用管,只需要再连续敲两次回车就行
    在这里插入图片描述
    在这里插入图片描述

如果输出这个结果就证明本地key创建成功了。

4.此时可以本地查看,查找如图路径

  • 如果是第一次创立的,如图查找即可
    在这里插入图片描述
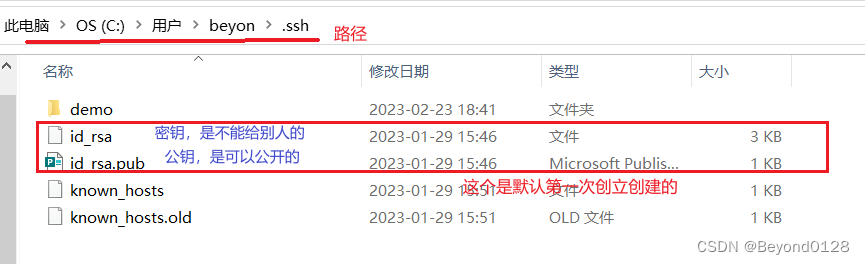
  • 如果已经有过远程连接,如图,会出现含有自己命名的公钥和私钥出现
    在这里插入图片描述
    ok!本地Git操作结束

5.打开Github
如果你没有Github账户可以看这个: 注册Github

点击右上角头像,选择settings
在这里插入图片描述
选择SSH and GPG keys

在这里插入图片描述
选择右上角绿色的New SSH key

6.将刚刚的公钥.pub里面的内容全部复制过来(如果打不开,可以右击用记事本打开)
在这里插入图片描述
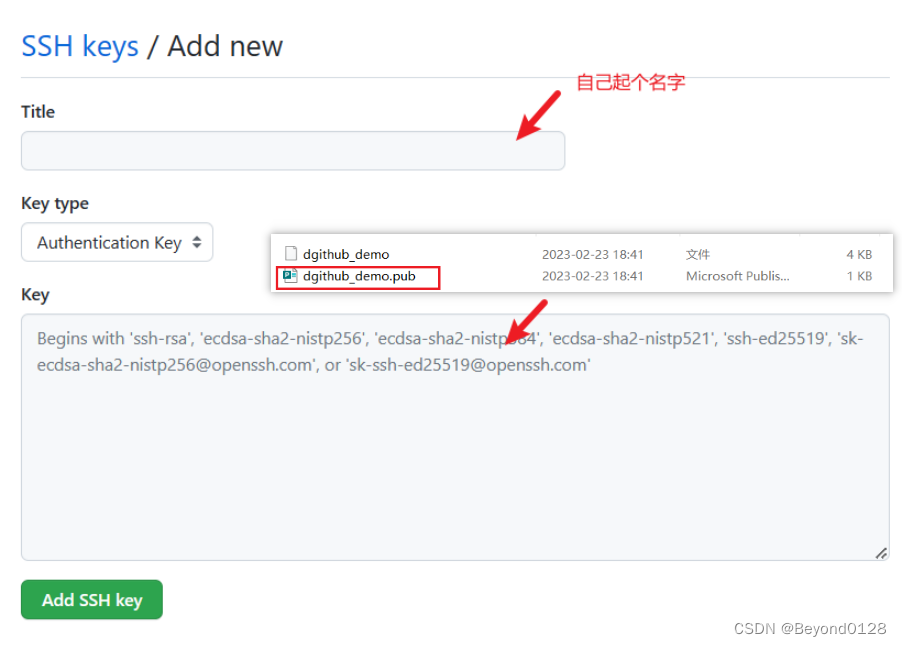
然后点击Add SSH key创建就可以了
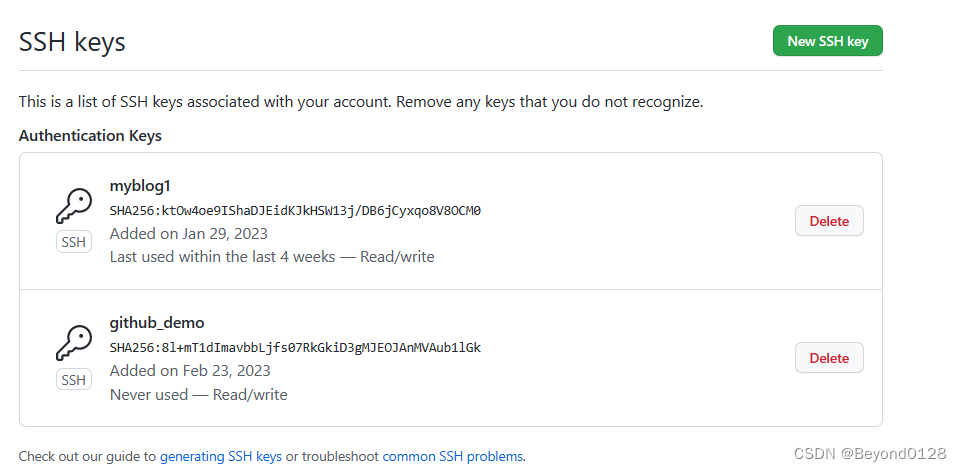
7.返回查看,创建成功(有多个)
在这里插入图片描述

### WebGoat Installation and Usage on Linux For installing and using WebGoat on a Linux environment, the process involves several key steps that ensure proper setup of this educational tool designed to teach web application security lessons. #### Prerequisites Before proceeding with the installation of WebGoat, it is necessary to have Java installed since WebGoat runs as a Java application. One can verify if Java is already present by executing `java -version` in the terminal. If not available, install OpenJDK or Oracle JDK depending upon preference[^1]. ```bash sudo apt update && sudo apt install default-jdk ``` #### Downloading WebGoat The latest version of WebGoat should be downloaded from its official GitHub repository or website. This ensures obtaining an up-to-date copy which includes recent fixes and features added by developers. ```bash wget https://github.com/WebGoat/WebGoat/releases/download/8.0/webgoat-server-8.0.jar ``` #### Running WebGoat Once downloaded, running WebGoat requires specifying sufficient heap space for optimal performance during exercises. Use the command below where `-Xmx512m` allocates memory accordingly: ```bash java -jar webgoat-server-8.0.jar --spring.profiles.active=WebGoat ``` This starts the server locally at port 8080 typically unless specified otherwise within configuration files or through additional parameters passed along while invoking java jar file execution. #### Accessing WebGoat Interface After starting successfully without errors, open any modern browser navigating towards `http://localhost:8080/WebGoat`. Here users will find instructions guiding them further into creating accounts before diving straight into learning modules covering various aspects related specifically but not limited only around OWASP Top Ten vulnerabilities found commonly across insecure applications today. #### Configuration Adjustments (Optional) Depending on network settings or requirements outside standard localhost deployment scenarios, adjustments might need making inside properties files located under resources folder bundled together alongside executable JAR archive provided officially via downloads section mentioned earlier above here too.
评论
添加红包

请填写红包祝福语或标题

红包个数最小为10个

红包金额最低5元

当前余额3.43前往充值 >
需支付:10.00
成就一亿技术人!
领取后你会自动成为博主和红包主的粉丝 规则
hope_wisdom
发出的红包
实付
使用余额支付
点击重新获取
扫码支付
钱包余额 0

抵扣说明:

1.余额是钱包充值的虚拟货币,按照1:1的比例进行支付金额的抵扣。
2.余额无法直接购买下载,可以购买VIP、付费专栏及课程。

余额充值