


 本文详细指导如何从官网下载并配置IntelOpenVINOToolkitforVS2019,包括设置开发环境、添加库目录和动态链接库,以及提供了一个简单的代码示例以测试InferenceEngine功能。
1.官网下载
链接:Download the Intel Distribution of OpenVINO Toolkit
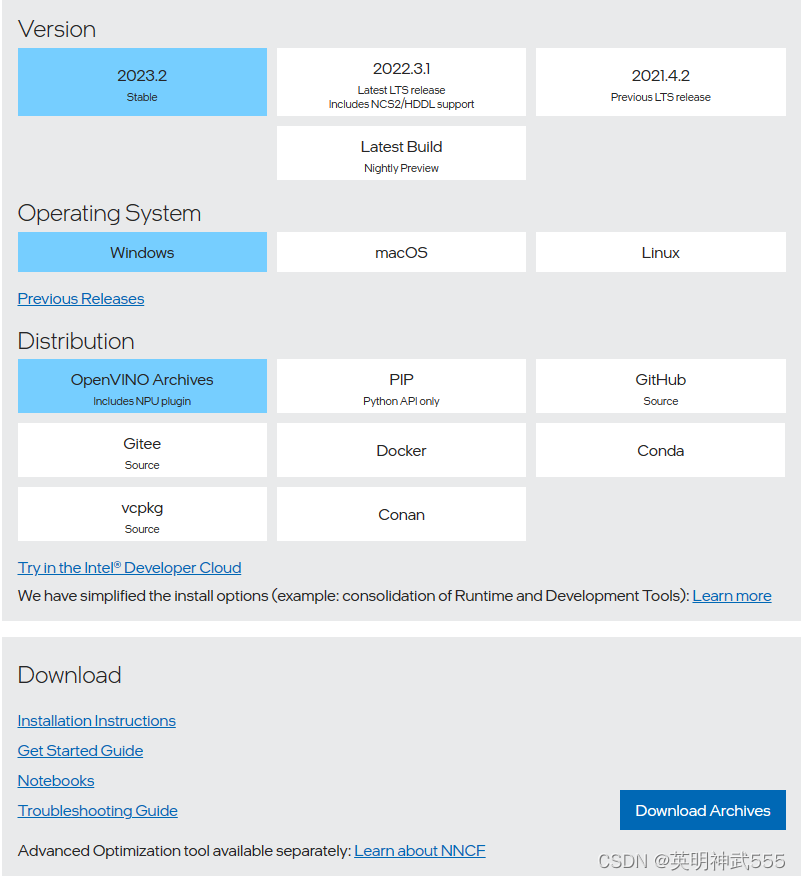
点击download Archives
 下载 zip 解压到指定目录
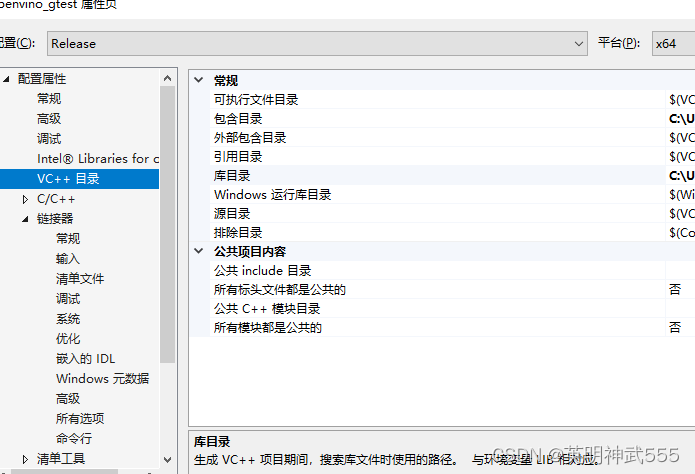
2.配置vs2019
创建一个C++ 新项目
右键项目属性
切记注意debug/release x86/x64
点击VC++目录,分别配置
包含目录:w_openvino_toolkit_windows_2023.2.0.13089.cfd42bd2cb0_x86_64\runtime\include;
库目录:w_openvino_toolkit_windows_2023.2.0.13089.cfd42bd2cb0_x86_64\runtime\lib\intel64\Release;
点击连接器/输入 openvino.lib;
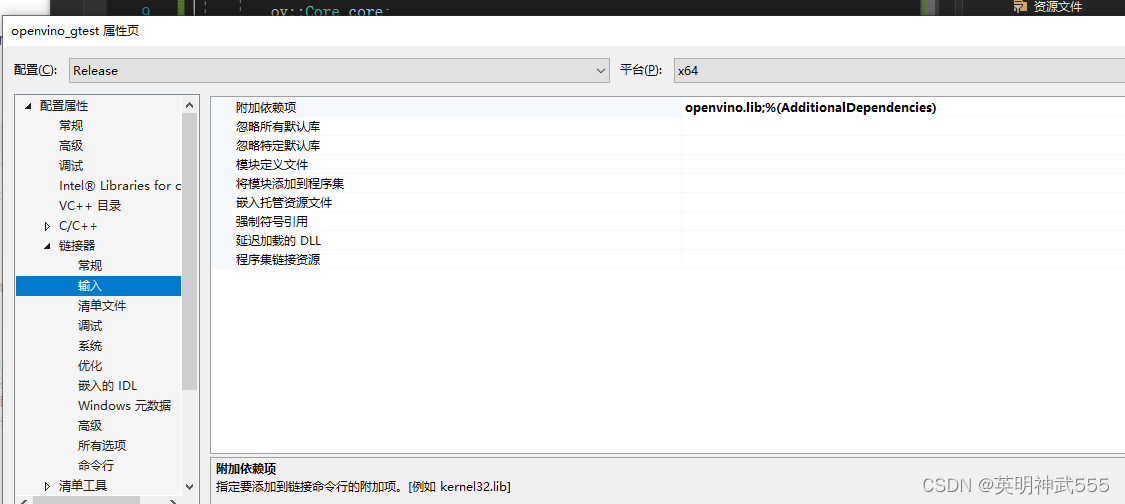
右键项目 ,在文件资源管理器打开文件夹,在此目录下放入以下dll
openvino.dll,openvino_auto_batch_plugin.dll,openvino_auto_plugin.dll,openvino_intel_cpu_plugin.dll,openvino_intel_gpu_plugin.dll,openvino_ir_frontend.dll
以上动态库均在“w_openvino_toolkit_windows_2023.2.0.13089.cfd42bd2cb0_x86_64\runtime\bin\intel64\Release”此目录下
测试代码:
#pragma once
#include <openvino/openvino.hpp>
using namespace std;
int main() {
try {
// 1. 初始化 Inference Engine 核心
ov::Core core;
std::shared_ptr<ov::Model> model = core.read_model(".xml");//模型路径
ov::CompiledModel compiled_model = core.compile_model(model, "AUTO");
//此处可以使用"AUTO","CPU","GPU"
cout << "OK" << endl;
}
catch (const std::exception& error) {
std::cerr << "Error: " << error.what() << std::endl;
return 1;
}
return 0;
}


 796
796

 被折叠的 条评论
为什么被折叠?
被折叠的 条评论
为什么被折叠?
 到【灌水乐园】发言


