


动态路由的设置
- 登入后获取后端返回的路由,并存入localStorage中
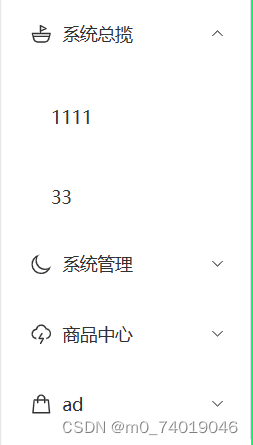
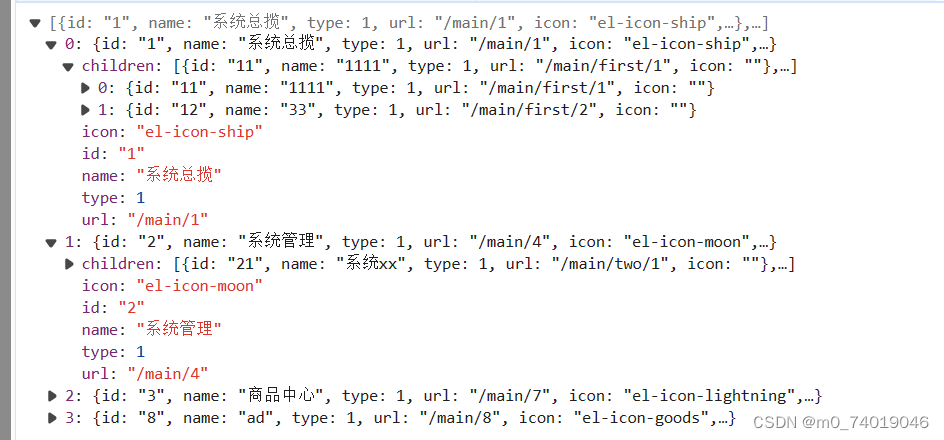
  const menu = [
        {
          id: "1",
          name: "系统总揽",
          type: 1,
          url: "/main/1",
          icon: "el-icon-ship",
          children: [
            { id: "11", name: "1111", type: 1, url: "/main/first/1", icon: "" },
            { id: "12", name: "33", type: 1, url: "/main/first/2", icon: "" }
          ]
        },

        {
          id: "2",
          name: "系统管理",
          type: 1,
          url: "/main/4",
          icon: "el-icon-moon",
          children: [
            { id: "21", name: "系统xx", type: 1, url: "/main/two/1", icon: "" },
            { id: "22", name: "系统11", type: 1, url: "/main/two/2", icon: "" }
          ]
        },

        {
          id: "3",
          name: "商品中心",
          type: 1,
          url: "/main/7",
          icon: "el-icon-lightning",
          children: [
            {
              id: "31",
              name: "系统zz",
              type: 1,
              url: "/main/three/1",
              icon: ""
            },
            {
              id: "32",
              name: "系统cc",
              type: 1,
              url: "/main/three/2",
              icon: ""
            }
          ]
        },
        {
          id: "8",
          name: "ad",
          type: 1,
          url: "/main/8",
          icon: "el-icon-goods",
          children: [
            { id: "9", name: "qqq", type: 1, url: "/main/four/1", icon: "" },
            { id: "10", name: "打算", type: 1, url: "/main/four/2", icon: "" }
          ]
        }
      ]
       // 存入pinia中
       this.userMenu = menu
       //封装的localStorage
      localCache.setCache("userMenu", menu)
- 获取本地的路由文件
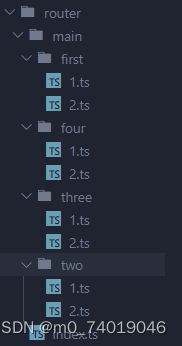
   function getlocalRoute(){
       //routerRoute本地路由
      const routerRoute: RouteRecordRaw[] = []
      //  1.获取 router/xx/xx.ts文件   import.meta.glob() vite提供的
      const route: Record<string, any> = import.meta.glob(
        "../../router/**/*.ts",
        { eager: true }
      )
     //2.把所有的路由添加到routerRoute中
      for (const key in route) {
        const module = route[key]
        console.log(module)
        routerRoute.push(module.default)
      }
      return    routerRoute
  }
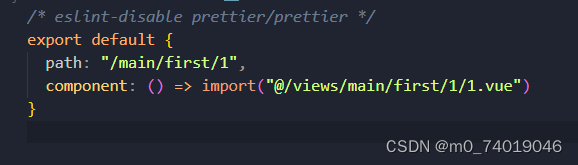
通过 import.meta.glob() 导入的路由
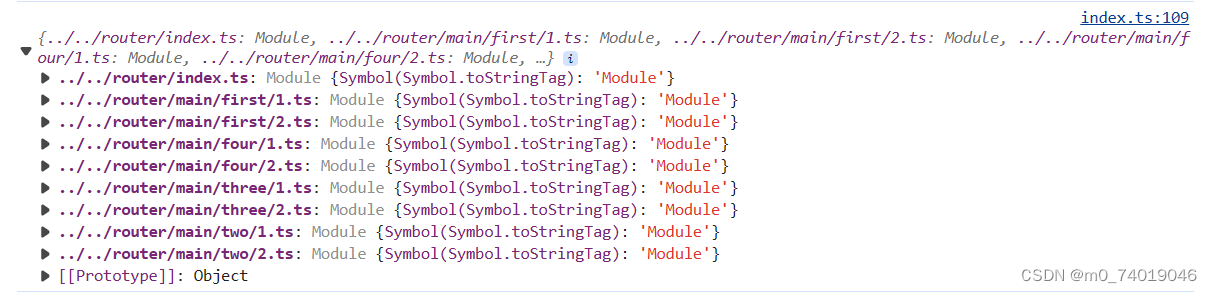
default就是路由对象
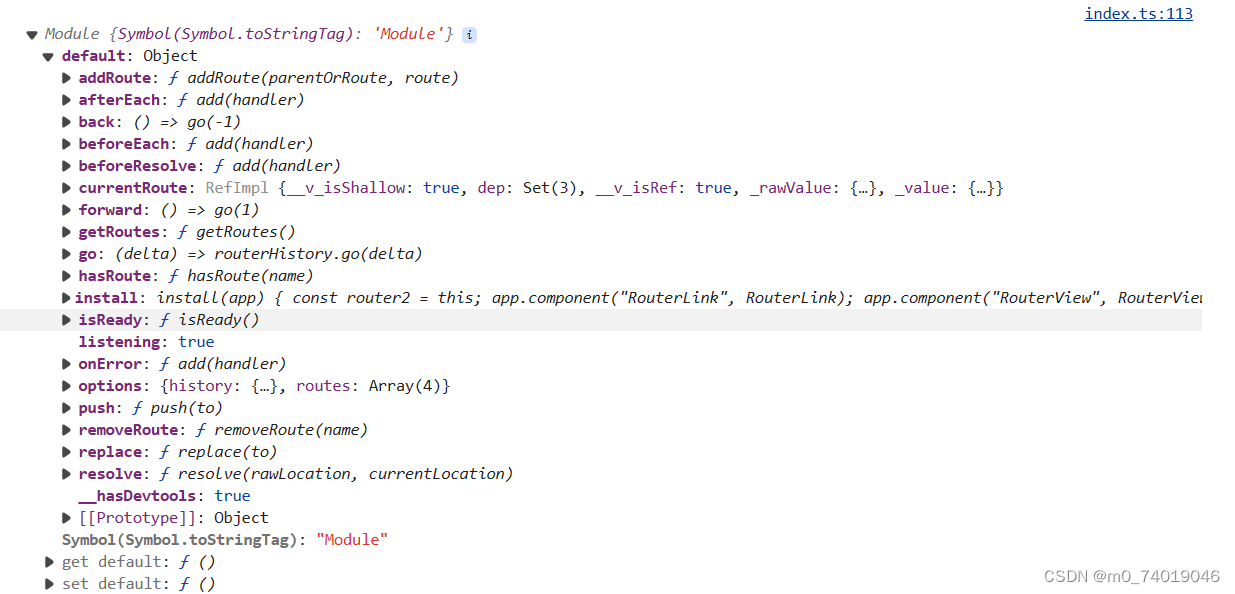
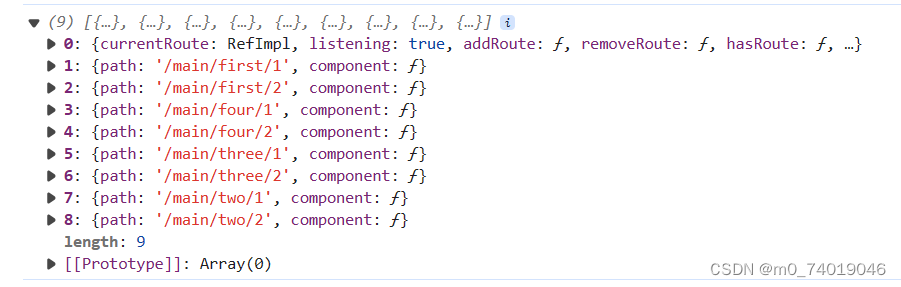
routerRoute:
3. 添加路由
  let isFirst = true
  function (userMenu:any){
      //本地路由
      const localRoute = getlocalRoute()
      const routes:RouteRecordRaw[] = []
      // 匹配路由
      for(const menu of userMenu){
         for(const subMenu of menu.children ){
         //匹配到的子路由
         //route的结构:{path: '/main/first/1', component: ƒ}
           const route =  localRoute.find((item) => item.path == subMenu.url)
           // 记录第一个路由,进入主页后会跳转到这个路由
           if(route && isFirst){
              isFirst = false
              // 封装的  localStorage
            localCache.setCache("first", myRoute)
           }
           if(route){
              //给1级路由重定向到它的第一个子路由(只需要添加1次)
              //如果 routerRoute里没有加过1级路由的话就需要添加1级路由,并重定向到他的第一个路由
              if(!routes.find((item) => item.path == menu.url)){
              // 这里的redirect:不能是 menu.children[0],有可能它没有第一个子路由的权限
               routes.push({ path:menu.url, redirect: route .path })
              }
              // 添加路由
              routes.push(route)
           }
        }
     }
     return   routes
  }
 //最终再添加到main下:
   router.addRoute("main", routes)
因为获取本地的路由文件刷新后会消失,在pinia中设置一个方法用来在页面刷新后重新加载路由loadLocal 具体操作和上面添加路由的方式相同。
刷新页面后,会重新加载 pinia, 在pinia加载完后再加载本地数据,添加路由
import { createPinia } from "pinia"
import useLoginStore from "./login/index"
import type { App } from "vue"
const pinia = createPinia()
function store(app: App<Element>) {
  //pinia加载完后才能使用store里面state、action和getters
  app.use(pinia)
  //pinia加载完后 加载本地数据,添加路由
  const login = useLoginStore()
  login.loadLocal()
}
export default store
面包屑的使用
<div class="home">
    <el-breadcrumb :separator-icon="ArrowRight">
      <template v-for="item in menuList" :key="item.name">
        <el-breadcrumb-item :to="item.path">{{ item.name }}</el-breadcrumb-item>
      </template>
    </el-breadcrumb>
  </div>
<script setup lang="ts">
  const store = useLoginStore()
  const route = useRoute()
  const fun = () => {
  const list: any[] = []
  for (let menu of store.userMenu) {
    for (let child of menu.children) {
      //   获取面包屑路由,并添加路由
      //当前点击的路由== 子路由
      if (child.url == route.path) {
        console.log(child.url)
        // 1级路由,之前注册时设置1级路由会重定向到它的第一个子路由
        list.push({ name: menu.name, path: menu.url })
        //子路由 当前点击的路由
        list.push({ name: child.name, path: child.url })
      }
    }
  }
  //list [1级路由,子路由]
  return list
}
// 当点击的路由变化时会匹配新的面包屑的路由
const menuList = computed(() => {
  return fun()
})
</script>
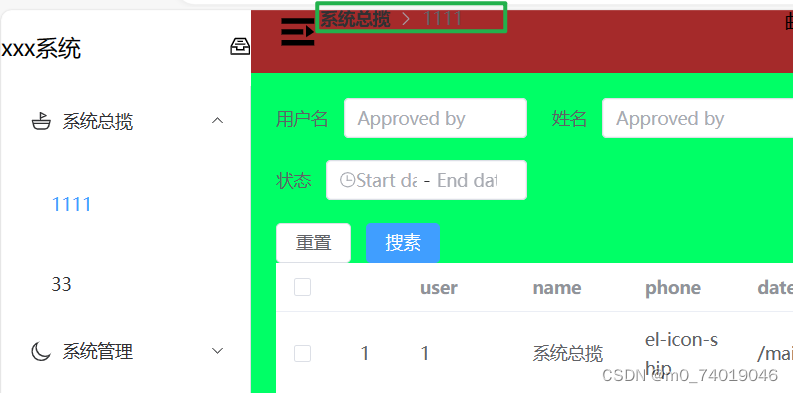
路由的高亮
 <div class="main-menu">
    <el-row class="tac">
      <el-col>
        <el-menu
          :default-active="defaultActive"
          class="el-menu-vertical-demo"
          :unique-opened="true"
        >
          <template v-for="item in menu" :key="item.id">
            <el-sub-menu :index="item.id + ''">
              <template #title>
                <el-icon
                  ><component :is="item.icon.split('-icon-')[1]"
                /></el-icon>
                <span>{{ item.name }}</span>
              </template>
              <template v-for="child in item.children" :key="child.id">
                <el-menu-item-group>
                  <el-menu-item :index="child.id" @click="cli(child)">{{
                    child.name
                  }}</el-menu-item>
                </el-menu-item-group>
              </template>
            </el-sub-menu>
          </template>
        </el-menu>
      </el-col>
    </el-row>
  </div>
//拿到所有路由
const loginStore = useloginStore()
const menu = loginStore.userMenu
//当前进入页面的路由
const route = useRoute()
// 点击对应的菜单或输入路径后,对应的路由要高亮
const active = () => {
  for (const item of loginStore.userMenu) {
    console.log(route.path)
    for (const child of item.children) {
      //子路由 == 用户输入的路由
      if (child.url === route.path) {
        console.log(child.id)
        return child.id + ""
      }
    }
  }
  // 返回的默认路由
  return "11"
}

let defaultActive = computed(() => {
  const defaults = active()
  return defaults
})
封装模块
配置项
const searchconfig = {
  formItems: [
    { type: "input", prop: "name", label: "部门名称", placeholder: "xxx" },
    { type: "date-picker", prop: "date", label: "时间", placeholder: "xxx" },
    { type: "input", prop: "leader", label: "领导", placeholder: "xxx" },
    {
      type: "select",
      prop: "selects",
      label: "选择",
      placeholder: "xxx",
      options: [
        { label: "1", value: 1 },
        { label: "2", value: 2 }
      ]
    }
  ]
}
export default searchconfig
遍历配置项
  <div class="home">;;
    <div>
      <pageSerach @search="cli" :searchConfig="searchRef"></pageSerach>
    </div>
    <div>
      <pageContent :contentConfig="contentconfig">
        <template #name="scope">
          <span>xxx:{{ scope.row[scope.prop] }}</span>
        </template>
        <template #id="scope">
          <span>xxx:{{ scope.row[scope.prop] }}</span>
        </template>
      </pageContent>
    </div>
    <div>
      <pageBottom></pageBottom>
    </div>
  </div>
如果有些配置是从后端传入的,例如option的value,可以这样添加:
const searchRef = computed(() => {
  // 从后端获取option的值,再给 searchconfig 里的option添加值
  console.log("xx")
  searchconfig.formItems.forEach((item) => {
    if (item.prop == "selects") {
      item?.options?.push({ label: "3", value: 3 })
    }
  })
  return searchconfig
})


 3959
3959


 被折叠的 条评论
为什么被折叠?
被折叠的 条评论
为什么被折叠?
 到【灌水乐园】发言


