


1. 写在前面
由于课程需要,本文记录了ROS实现机器人导航避障仿真的大概流程,至于相关原理则没有进行记录。
参考资料和参考视频如下,供想钻研原理的读者研究学习:
2. 环境配置
本笔记所记载的项目均基于Ubuntu 20.04环境下开发学习。
2.1 ROS安装
这里使用的是国内大佬小鱼的一键安装源来进行安装。
打开终端,输入:
sudo wget http://fishros.com/install -O fishros && . fishros
接着按照提示选择对应的选项,并坐等安装吧。这里我选择安装了1、3和7,大家也可根据自己的需求来安装对应的项目。
注:推荐安装Vs code,可以在vs code里面使用终端,对之后的配置很有帮助,很方便。

2.2 测试ROS
打开第一个终端窗口,输入并运行 roscore。
roscore
出现如下图的情况,就证明运行成功。

再打开第二个终端,输入:
rosrun turtlesim turtlesim_node
出现如下图的情况,就证明运行成功。

再打开第三个终端,输入:
rosrun turtlesim turtle_teleop_key
此时鼠标点击第三个终端窗口,即可用键盘方向键控制海龟进行移动。

2.3 安装完成
经过以上步骤,已经安装完成!对了,若想停止这些终端,可以按ctrl+c来进行进程的停止。
3. Navigation导航准备
这里主要介绍一下整个导航代码及程序的大致框架。URDF 用于创建机器人模型、Rviz 可以显示机器人感知到的环境信息,Gazebo 用于仿真,可以模拟外界环境,以及机器人的一些传感器。不同的是,这里用xacro来辅助编写urdf文件。有关二者的关系,大家可以自行百度,这里不再阐述。
3.1 导航功能实现框图
ROS 官方为了提供了一张导航功能包集的图示,该图中囊括了 ROS 导航的一些关键技术:
相关原理见:ROS导航框图说明

3.2 导航依赖包安装
为了实现导航功能,需要安装一些必要的依赖包。打开终端,输入以下命令安装:
sudo apt-get install ros-noetic-arbotix	# 安装Arbotix
sudo apt install ros-noetic-gmapping	# 安装gmapping
sudo apt install ros-noetic-map-server	# 安装map_server
sudo apt-get install ros-noetic-teleop-twist-keyboard # 安装键盘节点控制
sudo apt-get install ros-noetic-navigation # 安装导航依赖包
sudo apt-get install ros-noetic-amcl 	   # 安装acml
3.3 建立工作目录
在终端内输入:
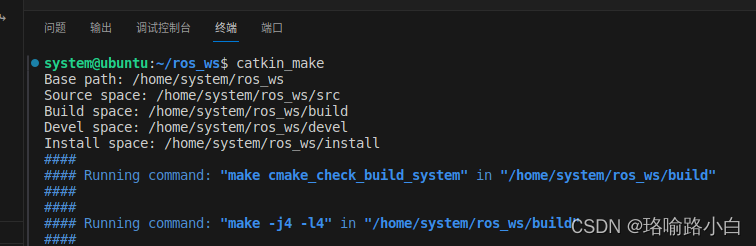
mkdir -p ros_ws/src   # 建立ros工作目录
cd ros_ws
catkin_make
code .
运行完之后会自动打开VS code窗口,此时工作文件夹呈现在窗口的左边栏。
(推荐安装VS code的两个有关插件:ROS、catkin_tool)


我们要做的就是在工作目录的src文件夹下新建功能包,并导入对应的依赖包。
3.4 建立功能包
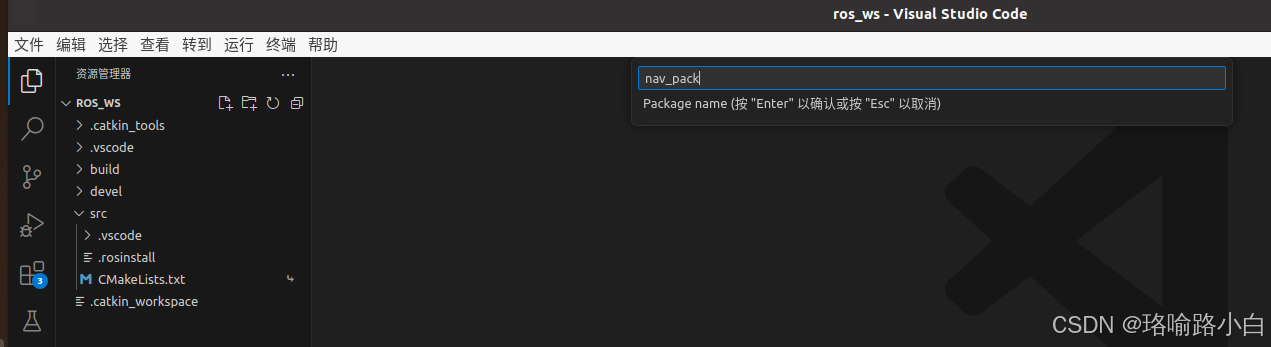
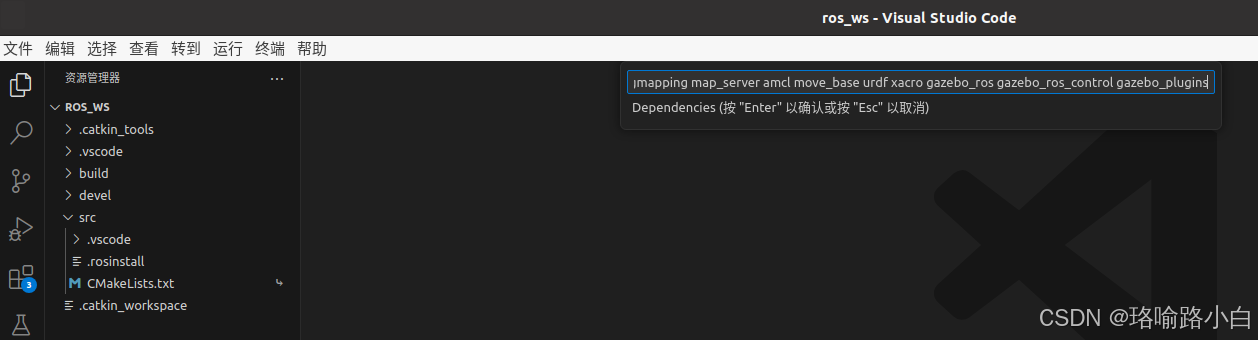
右键src,选择Create Catkin Package,此时VS会依次提示填写Package name、Dependencies。这里我填写的参数如下:

Package name——nav_pack
Dependencies——gmapping map_server amcl move_base urdf xacro gazebo_ros gazebo_ros_control gazebo_plugins
3.5 新建相关文件夹
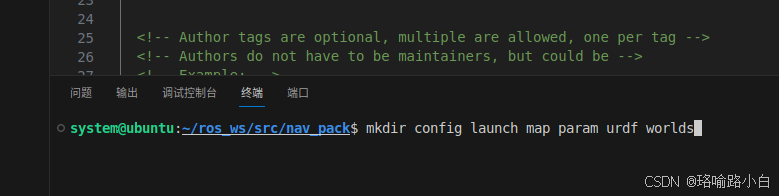
在上述的nav_pack中新建config、launch、map、param、urdf、worlds文件夹以待备用。
也可以进入nav_pack的终端,输入:
mkdir config launch map param urdf worlds
3.6 小车代码编写
3.6.1 车体编写
在urdf文件夹新建car_base.urdf.xacro,复制以下代码:
<!--
    使用 xacro 优化 URDF 版的小车底盘实现:

    实现思路:
    1.将一些常量、变量封装为 xacro:property
      比如:PI 值、小车底盘半径、离地间距、车轮半径、宽度 ....
    2.使用 宏 封装驱动轮以及支撑轮实现,调用相关宏生成驱动轮与支撑轮

-->
<!-- 根标签,必须声明 xmlns:xacro -->
<robot name="my_base" xmlns:xacro="http://www.ros.org/wiki/xacro">
    <!-- 封装变量、常量 -->
    <!-- PI 值设置精度需要高一些,否则后续车轮翻转量计算时,可能会出现肉眼不能察觉的车轮倾斜,从而导致模型抖动 -->
    <xacro:property name="PI" value="3.1415926"/>
    <!-- 宏:黑色设置 -->
    <material name="black">
        <color rgba="0.0 0.0 0.0 1.0" />
    </material>
    <!-- 底盘属性 -->
    <xacro:property name="base_footprint_radius" value="0.001" /> <!-- base_footprint 半径  -->
    <xacro:property name="base_link_radius" value="0.1" /> <!-- base_link 半径 -->
    <xacro:property name="base_link_length" value="0.08" /> <!-- base_link 长 -->
    <xacro:property name="earth_space" value="0.015" /> <!-- 离地间距 -->
    <xacro:property name="base_link_m" value="0.5" /> <!-- 质量  -->

    <!-- 底盘 -->
    <link name="base_footprint">
      <visual>
        <geometry>
          <sphere radius="${base_footprint_radius}" />
        </geometry>
      </visual>
    </link>

    <link name="base_link">
      <visual>
        <geometry>
          <cylinder radius="${base_link_radius}" length="${base_link_length}" />
        </geometry>
        <origin xyz="0 0 0" rpy="0 0 0" />
        <material name="yellow">
          <color rgba="0.5 0.3 0.0 0.5" />
        </material>
      </visual>
      <collision>
        <geometry>
          <cylinder radius="${base_link_radius}" length="${base_link_length}" />
        </geometry>
        <origin xyz="0 0 0" rpy="0 0 0" />
      </collision>
      <xacro:cylinder_inertial_matrix m="${base_link_m}" r="${base_link_radius}" h="${base_link_length}" />

    </link>


    <joint name="base_link2base_footprint" type="fixed">
      <parent link="base_footprint" />
      <child link="base_link" />
      <origin xyz="0 0 ${earth_space + base_link_length / 2 }" />
    </joint>
    <gazebo reference="base_link">
        <material>Gazebo/Yellow</material>
    </gazebo>

    <!-- 驱动轮 -->
    <!-- 驱动轮属性 -->
    <xacro:property name="wheel_radius" value="0.0325" /><!-- 半径 -->
    <xacro:property name="wheel_length" value="0.015" /><!-- 宽度 -->
    <xacro:property name="wheel_m" value="0.05" /> <!-- 质量  -->

    <!-- 驱动轮宏实现 -->
    <xacro:macro name="add_wheels" params="name flag">
      <link name="${name}_wheel">
        <visual>
          <geometry>
            <cylinder radius="${wheel_radius}" length="${wheel_length}" />
          </geometry>
          <origin xyz="0.0 0.0 0.0" rpy="${PI / 2} 0.0 0.0" />
          <material name="black" />
        </visual>
        <collision>
          <geometry>
            <cylinder radius="${wheel_radius}" length="${wheel_length}" />
          </geometry>
          <origin xyz="0.0 0.0 0.0" rpy="${PI / 2} 0.0 0.0" />
        </collision>
        <xacro:cylinder_inertial_matrix m="${wheel_m}" r="${wheel_radius}" h="${wheel_length}" />

      </link>

      <joint name="${name}_wheel2base_link" type="continuous">
        <parent link="base_link" />
        <child link="${name}_wheel" />
        <origin xyz="0 ${flag * base_link_radius} ${-(earth_space + base_link_length / 2 - wheel_radius) }" />
        <axis xyz="0 1 0" />
      </joint>

      <gazebo reference="${name}_wheel">
        <material>Gazebo/Red</material>
      </gazebo>

    </xacro:macro>
    <xacro:add_wheels name="left" flag="1" />
    <xacro:add_wheels name="right" flag="-1" />
    <!-- 支撑轮 -->
    <!-- 支撑轮属性 -->
    <xacro:property name="support_wheel_radius" value="0.0075" /> <!-- 支撑轮半径 -->
    <xacro:property name="support_wheel_m" value="0.03" /> <!-- 质量  -->

    <!-- 支撑轮宏 -->
    <xacro:macro name="add_support_wheel" params="name flag" >
      <link name="${name}_wheel">
        <visual>
            <geometry>
                <sphere radius="${support_wheel_radius}" />
            </geometry>
            <origin xyz="0 0 0" rpy="0 0 0" />
            <material name="black" />
        </visual>
        <collision>
            <geometry>
                <sphere radius="${support_wheel_radius}" />
            </geometry>
            <origin xyz="0 0 0" rpy="0 0 0" />
        </collision>
        <xacro:sphere_inertial_matrix m="${support_wheel_m}" r="${support_wheel_radius}" />
      </link>

      <joint name="${name}_wheel2base_link" type="continuous">
          <parent link="base_link" />
          <child link="${name}_wheel" />
          <origin xyz="${flag * (base_link_radius - support_wheel_radius)} 0 ${-(base_link_length / 2 + earth_space / 2)}" />
          <axis xyz="1 1 1" />
      </joint>
      <gazebo reference="${name}_wheel">
        <material>Gazebo/Red</material>
      </gazebo>
    </xacro:macro>

    <xacro:add_support_wheel name="front" flag="1" />
    <xacro:add_support_wheel name="back" flag="-1" />


</robot>
3.6.2 车相机编写
在urdf文件夹新建car_camera.urdf.xacro,复制以下代码:
<!-- 摄像头相关的 xacro 文件 -->
<robot name="my_camera" xmlns:xacro="http://wiki.ros.org/xacro">
    <!-- 摄像头属性 -->
    <xacro:property name="camera_length" value="0.01" /> <!-- 摄像头长度(x) -->
    <xacro:property name="camera_width" value="0.025" /> <!-- 摄像头宽度(y) -->
    <xacro:property name="camera_height" value="0.025" /> <!-- 摄像头高度(z) -->
    <xacro:property name="camera_x" value="0.08" /> <!-- 摄像头安装的x坐标 -->
    <xacro:property name="camera_y" value="0.0" /> <!-- 摄像头安装的y坐标 -->
    <xacro:property name="camera_z" value="${base_link_length / 2 + camera_height / 2}" /> <!-- 摄像头安装的z坐标:底盘高度 / 2 + 摄像头高度 / 2  -->

    <xacro:property name="camera_m" value="0.01" /> <!-- 摄像头质量 -->

    <!-- 摄像头关节以及link -->
    <link name="camera">
        <visual>
            <geometry>
                <box size="${camera_length} ${camera_width} ${camera_height}" />
            </geometry>
            <origin xyz="0.0 0.0 0.0" rpy="0.0 0.0 0.0" />
            <material name="black" />
        </visual>
        <collision>
            <geometry>
                <box size="${camera_length} ${camera_width} ${camera_height}" />
            </geometry>
            <origin xyz="0.0 0.0 0.0" rpy="0.0 0.0 0.0" />
        </collision>
        <xacro:Box_inertial_matrix m="${camera_m}" l="${camera_length}" w="${camera_width}" h="${camera_height}" />
    </link>

    <joint name="camera2base_link" type="fixed">
        <parent link="base_link" />
        <child link="camera" />
        <origin xyz="${camera_x} ${camera_y} ${camera_z}" />
    </joint>
    <gazebo reference="camera">
        <material>Gazebo/Blue</material>
    </gazebo>
</robot>
3.6.3 车雷达编写
在urdf文件夹新建car_laser.urdf.xacro,复制以下代码:
<!--
    小车底盘添加雷达
-->
<robot name="my_laser" xmlns:xacro="http://wiki.ros.org/xacro">

    <!-- 雷达支架 -->
    <xacro:property name="support_length" value="0.15" /> <!-- 支架长度 -->
    <xacro:property name="support_radius" value="0.01" /> <!-- 支架半径 -->
    <xacro:property name="support_x" value="0.0" /> <!-- 支架安装的x坐标 -->
    <xacro:property name="support_y" value="0.0" /> <!-- 支架安装的y坐标 -->
    <xacro:property name="support_z" value="${base_link_length / 2 + support_length / 2}" /> <!-- 支架安装的z坐标:底盘高度 / 2 + 支架高度 / 2  -->

    <xacro:property name="support_m" value="0.02" /> <!-- 支架质量 -->

    <link name="support">
        <visual>
            <geometry>
                <cylinder radius="${support_radius}" length="${support_length}" />
            </geometry>
            <origin xyz="0.0 0.0 0.0" rpy="0.0 0.0 0.0" />
            <material name="red">
                <color rgba="0.8 0.2 0.0 0.8" />
            </material>
        </visual>

        <collision>
            <geometry>
                <cylinder radius="${support_radius}" length="${support_length}" />
            </geometry>
            <origin xyz="0.0 0.0 0.0" rpy="0.0 0.0 0.0" />
        </collision>

        <xacro:cylinder_inertial_matrix m="${support_m}" r="${support_radius}" h="${support_length}" />

    </link>

    <joint name="support2base_link" type="fixed">
        <parent link="base_link" />
        <child link="support" />
        <origin xyz="${support_x} ${support_y} ${support_z}" />
    </joint>

    <gazebo reference="support">
        <material>Gazebo/White</material>
    </gazebo>

    <!-- 雷达属性 -->
    <xacro:property name="laser_length" value="0.05" /> <!-- 雷达长度 -->
    <xacro:property name="laser_radius" value="0.03" /> <!-- 雷达半径 -->
    <xacro:property name="laser_x" value="0.0" /> <!-- 雷达安装的x坐标 -->
    <xacro:property name="laser_y" value="0.0" /> <!-- 雷达安装的y坐标 -->
    <xacro:property name="laser_z" value="${support_length / 2 + laser_length / 2}" /> <!-- 雷达安装的z坐标:支架高度 / 2 + 雷达高度 / 2  -->

    <xacro:property name="laser_m" value="0.1" /> <!-- 雷达质量 -->

    <!-- 雷达关节以及link -->
    <link name="laser">
        <visual>
            <geometry>
                <cylinder radius="${laser_radius}" length="${laser_length}" />
            </geometry>
            <origin xyz="0.0 0.0 0.0" rpy="0.0 0.0 0.0" />
            <material name="black" />
        </visual>
        <collision>
            <geometry>
                <cylinder radius="${laser_radius}" length="${laser_length}" />
            </geometry>
            <origin xyz="0.0 0.0 0.0" rpy="0.0 0.0 0.0" />
        </collision>
        <xacro:cylinder_inertial_matrix m="${laser_m}" r="${laser_radius}" h="${laser_length}" />
    </link>

    <joint name="laser2support" type="fixed">
        <parent link="support" />
        <child link="laser" />
        <origin xyz="${laser_x} ${laser_y} ${laser_z}" />
    </joint>
    <gazebo reference="laser">
        <material>Gazebo/Black</material>
    </gazebo>
</robot>
3.6.4 车惯性矩阵编写
在urdf文件夹新建car_head.urdf.xacro,复制以下代码:
<robot name="base" xmlns:xacro="http://wiki.ros.org/xacro">
    <!-- Macro for inertia matrix -->
    <xacro:macro name="sphere_inertial_matrix" params="m r">
        <inertial>
            <mass value="${m}" />
            <inertia ixx="${2*m*r*r/5}" ixy="0" ixz="0"
                iyy="${2*m*r*r/5}" iyz="0"
                izz="${2*m*r*r/5}" />
        </inertial>
    </xacro:macro>

    <xacro:macro name="cylinder_inertial_matrix" params="m r h">
        <inertial>
            <mass value="${m}" />
            <inertia ixx="${m*(3*r*r+h*h)/12}" ixy = "0" ixz = "0"
                iyy="${m*(3*r*r+h*h)/12}" iyz = "0"
                izz="${m*r*r/2}" />
        </inertial>
    </xacro:macro>

    <xacro:macro name="Box_inertial_matrix" params="m l w h">
       <inertial>
               <mass value="${m}" />
               <inertia ixx="${m*(h*h + l*l)/12}" ixy = "0" ixz = "0"
                   iyy="${m*(w*w + l*l)/12}" iyz= "0"
                   izz="${m*(w*w + h*h)/12}" />
       </inertial>
   </xacro:macro>
</robot>
3.6.5 车组装编写
在urdf文件夹新建car.urdf.xacro,复制以下代码:
<!-- 组合小车底盘与摄像头与雷达 -->
<robot name="my_car_camera" xmlns:xacro="http://wiki.ros.org/xacro">
    <!-- 包含惯性矩阵文件 -->
    <xacro:include filename="car_head.urdf.xacro" />
    <!-- 包含底盘/摄像头/雷达的xacro文件 -->
    <xacro:include filename="car_base.urdf.xacro" />
    <xacro:include filename="car_camera.urdf.xacro" />
    <xacro:include filename="car_laser.urdf.xacro" />
</robot>
3.7 地图编写
此处编写地图文件,以便在后续gazebo中显示。
在worlds文件夹新建box_house.world文件,复制以下代码:
<sdf version='1.7'>
<world name='default'>
<light name='sun' type='directional'>
<cast_shadows>1</cast_shadows>
<pose>0 0 10 0 -0 0</pose>
<diffuse>0.8 0.8 0.8 1</diffuse>
<specular>0.2 0.2 0.2 1</specular>
<attenuation>
<range>1000</range>
<constant>0.9</constant>
<linear>0.01</linear>
<quadratic>0.001</quadratic>
</attenuation>
<direction>-0.5 0.1 -0.9</direction>
<spot>
<inner_angle>0</inner_angle>
<outer_angle>0</outer_angle>
<falloff>0</falloff>
</spot>
</light>
<model name='ground_plane'>
<static>1</static>
<link name='link'>
<collision name='collision'>
<geometry>
<plane>
<normal>0 0 1</normal>
<size>100 100</size>
</plane>
</geometry>
<surface>
<contact>
<collide_bitmask>65535</collide_bitmask>
<ode/>
</contact>
<friction>
<ode>
<mu>100</mu>
<mu2>50</mu2>
</ode>
<torsional>
<ode/>
</torsional>
</friction>
<bounce/>
</surface>
<max_contacts>10</max_contacts>
</collision>
<visual name='visual'>
<cast_shadows>0</cast_shadows>
<geometry>
<plane>
<normal>0 0 1</normal>
<size>100 100</size>
</plane>
</geometry>
<material>
<script>
<uri>file://media/materials/scripts/gazebo.material</uri>
<name>Gazebo/Grey</name>
</script>
</material>
</visual>
<self_collide>0</self_collide>
<enable_wind>0</enable_wind>
<kinematic>0</kinematic>
</link>
</model>
<gravity>0 0 -9.8</gravity>
<magnetic_field>6e-06 2.3e-05 -4.2e-05</magnetic_field>
<atmosphere type='adiabatic'/>
<physics type='ode'>
<max_step_size>0.001</max_step_size>
<real_time_factor>1</real_time_factor>
<real_time_update_rate>1000</real_time_update_rate>
</physics>
<scene>
<ambient>0.4 0.4 0.4 1</ambient>
<background>0.7 0.7 0.7 1</background>
<shadows>1</shadows>
</scene>
<wind/>
<spherical_coordinates>
<surface_model>EARTH_WGS84</surface_model>
<latitude_deg>0</latitude_deg>
<longitude_deg>0</longitude_deg>
<elevation>0</elevation>
<heading_deg>0</heading_deg>
</spherical_coordinates>
<model name='box_house'>
<pose>-1.97643 0.059964 0 0 -0 0</pose>
<link name='Wall_1'>
<collision name='Wall_1_Collision'>
<geometry>
<box>
<size>13 0.15 2.5</size>
</box>
</geometry>
<pose>0 0 1.25 0 -0 0</pose>
<surface>
<contact>
<ode/>
</contact>
<bounce/>
<friction>
<torsional>
<ode/>
</torsional>
<ode/>
</friction>
</surface>
<max_contacts>10</max_contacts>
</collision>
<visual name='Wall_1_Visual'>
<pose>0 0 1.25 0 -0 0</pose>
<geometry>
<box>
<size>13 0.15 2.5</size>
</box>
</geometry>
<material>
<script>
<uri>file://media/materials/scripts/gazebo.material</uri>
<name>Gazebo/CeilingTiled</name>
</script>
<ambient>1 1 1 1</ambient>
</material>
<meta>
<layer>0</layer>
</meta>
</visual>
<pose>0 3.925 0 0 -0 0</pose>
<self_collide>0</self_collide>
<enable_wind>0</enable_wind>
<kinematic>0</kinematic>
</link>
<link name='Wall_2'>
<collision name='Wall_2_Collision'>
<geometry>
<box>
<size>8 0.15 2.5</size>
</box>
</geometry>
<pose>0 0 1.25 0 -0 0</pose>
<surface>
<contact>
<ode/>
</contact>
<bounce/>
<friction>
<torsional>
<ode/>
</torsional>
<ode/>
</friction>
</surface>
<max_contacts>10</max_contacts>
</collision>
<visual name='Wall_2_Visual'>
<pose>0 0 1.25 0 -0 0</pose>
<geometry>
<box>
<size>8 0.15 2.5</size>
</box>
</geometry>
<material>
<script>
<uri>file://media/materials/scripts/gazebo.material</uri>
<name>Gazebo/Bricks</name>
</script>
<ambient>1 1 1 1</ambient>
</material>
<meta>
<layer>0</layer>
</meta>
</visual>
<pose>6.425 -0 0 0 -0 -1.5708</pose>
<self_collide>0</self_collide>
<enable_wind>0</enable_wind>
<kinematic>0</kinematic>
</link>
<link name='Wall_3'>
<collision name='Wall_3_Collision'>
<geometry>
<box>
<size>13 0.15 2.5</size>
</box>
</geometry>
<pose>0 0 1.25 0 -0 0</pose>
<surface>
<contact>
<ode/>
</contact>
<bounce/>
<friction>
<torsional>
<ode/>
</torsional>
<ode/>
</friction>
</surface>
<max_contacts>10</max_contacts>
</collision>
<visual name='Wall_3_Visual'>
<pose>0 0 1.25 0 -0 0</pose>
<geometry>
<box>
<size>13 0.15 2.5</size>
</box>
</geometry>
<material>
<script>
<uri>file://media/materials/scripts/gazebo.material</uri>
<name>Gazebo/CeilingTiled</name>
</script>
<ambient>1 1 1 1</ambient>
</material>
<meta>
<layer>0</layer>
</meta>
</visual>
<pose>0 -3.925 0 0 -0 3.14159</pose>
<self_collide>0</self_collide>
<enable_wind>0</enable_wind>
<kinematic>0</kinematic>
</link>
<link name='Wall_4'>
<collision name='Wall_4_Collision'>
<geometry>
<box>
<size>8 0.15 2.5</size>
</box>
</geometry>
<pose>0 0 1.25 0 -0 0</pose>
<surface>
<contact>
<ode/>
</contact>
<bounce/>
<friction>
<torsional>
<ode/>
</torsional>
<ode/>
</friction>
</surface>
<max_contacts>10</max_contacts>
</collision>
<visual name='Wall_4_Visual'>
<pose>0 0 1.25 0 -0 0</pose>
<geometry>
<box>
<size>8 0.15 2.5</size>
</box>
</geometry>
<material>
<script>
<uri>file://media/materials/scripts/gazebo.material</uri>
<name>Gazebo/Wood</name>
</script>
<ambient>1 1 1 1</ambient>
</material>
<meta>
<layer>0</layer>
</meta>
</visual>
<pose>-6.425 -0 0 0 -0 1.5708</pose>
<self_collide>0</self_collide>
<enable_wind>0</enable_wind>
<kinematic>0</kinematic>
</link>
<static>1</static>
</model>
<model name='unit_box'>
<pose>-7.27143 3.09748 0.5 0 -0 0</pose>
<link name='link'>
<inertial>
<mass>1</mass>
<inertia>
<ixx>0.166667</ixx>
<ixy>0</ixy>
<ixz>0</ixz>
<iyy>0.166667</iyy>
<iyz>0</iyz>
<izz>0.166667</izz>
</inertia>
<pose>0 0 0 0 -0 0</pose>
</inertial>
<collision name='collision'>
<geometry>
<box>
<size>1 1 1</size>
</box>
</geometry>
<surface>
<contact>
<ode/>
</contact>
<bounce/>
<friction>
<torsional>
<ode/>
</torsional>
<ode/>
</friction>
</surface>
<max_contacts>10</max_contacts>
</collision>
<visual name='visual'>
<geometry>
<box>
<size>1 1 1</size>
</box>
</geometry>
<material>
<script>
<name>Gazebo/Grey</name>
<uri>file://media/materials/scripts/gazebo.material</uri>
</script>
</material>
</visual>
<self_collide>0</self_collide>
<enable_wind>0</enable_wind>
<kinematic>0</kinematic>
</link>
</model>
<model name='unit_cylinder'>
<pose>-4.57746 0.509886 0.5 0 -0 0</pose>
<link name='link'>
<inertial>
<mass>1</mass>
<inertia>
<ixx>0.145833</ixx>
<ixy>0</ixy>
<ixz>0</ixz>
<iyy>0.145833</iyy>
<iyz>0</iyz>
<izz>0.125</izz>
</inertia>
<pose>0 0 0 0 -0 0</pose>
</inertial>
<collision name='collision'>
<geometry>
<cylinder>
<radius>0.5</radius>
<length>1</length>
</cylinder>
</geometry>
<surface>
<contact>
<ode/>
</contact>
<bounce/>
<friction>
<torsional>
<ode/>
</torsional>
<ode/>
</friction>
</surface>
<max_contacts>10</max_contacts>
</collision>
<visual name='visual'>
<geometry>
<cylinder>
<radius>0.5</radius>
<length>1</length>
</cylinder>
</geometry>
<material>
<script>
<name>Gazebo/Grey</name>
<uri>file://media/materials/scripts/gazebo.material</uri>
</script>
</material>
</visual>
<self_collide>0</self_collide>
<enable_wind>0</enable_wind>
<kinematic>0</kinematic>
</link>
</model>
<state world_name='default'>
<sim_time>257 459000000</sim_time>
<real_time>196 129745222</real_time>
<wall_time>1593764309 76438721</wall_time>
<iterations>194518</iterations>
<model name='box_house'>
<pose>-1.97643 0.05996 0 0 -0 0</pose>
<scale>1 1 1</scale>
<link name='Wall_1'>
<pose>-1.97643 3.98496 0 0 -0 0</pose>
<velocity>0 0 0 0 -0 0</velocity>
<acceleration>0 0 0 0 -0 0</acceleration>
<wrench>0 0 0 0 -0 0</wrench>
</link>
<link name='Wall_2'>
<pose>4.44857 0.059964 0 0 0 -1.5708</pose>
<velocity>0 0 0 0 -0 0</velocity>
<acceleration>0 0 0 0 -0 0</acceleration>
<wrench>0 0 0 0 -0 0</wrench>
</link>
<link name='Wall_3'>
<pose>-1.97643 -3.86504 0 0 -0 3.14159</pose>
<velocity>0 0 0 0 -0 0</velocity>
<acceleration>0 0 0 0 -0 0</acceleration>
<wrench>0 0 0 0 -0 0</wrench>
</link>
<link name='Wall_4'>
<pose>-8.40143 0.059964 0 0 -0 1.5708</pose>
<velocity>0 0 0 0 -0 0</velocity>
<acceleration>0 0 0 0 -0 0</acceleration>
<wrench>0 0 0 0 -0 0</wrench>
</link>
</model>
<model name='ground_plane'>
<pose>0 0 0 0 -0 0</pose>
<scale>1 1 1</scale>
<link name='link'>
<pose>0 0 0 0 -0 0</pose>
<velocity>0 0 0 0 -0 0</velocity>
<acceleration>0 0 0 0 -0 0</acceleration>
<wrench>0 0 0 0 -0 0</wrench>
</link>
</model>
<model name='unit_box'>
<pose>-7.27142 3.09748 0.499995 0 1e-05 0</pose>
<scale>1 1 1</scale>
<link name='link'>
<pose>-7.27142 3.09748 0.499995 0 1e-05 0</pose>
<velocity>0 0 0 0 -0 0</velocity>
<acceleration>0.010615 -0.006191 -9.78231 0.012424 0.021225 1.8e-05</acceleration>
<wrench>0.010615 -0.006191 -9.78231 0 -0 0</wrench>
</link>
</model>
<model name='unit_box_0'>
<pose>-4.96407 -2.00353 0.499995 -1e-05 -0 -0</pose>
<scale>1 1 1</scale>
<link name='link'>
<pose>-4.96407 -2.00353 0.499995 -1e-05 -0 -0</pose>
<velocity>0 0 0 0 -0 0</velocity>
<acceleration>0.004709 0.011055 -9.78158 -0.022108 0.009414 1e-06</acceleration>
<wrench>0.004709 0.011055 -9.78158 0 -0 0</wrench>
</link>
</model>
<model name='unit_box_1'>
<pose>3.83312 3.3034 0.499995 0 1e-05 0</pose>
<scale>1 1 1</scale>
<link name='link'>
<pose>3.83312 3.3034 0.499995 0 1e-05 0</pose>
<velocity>0 0 0 0 -0 0</velocity>
<acceleration>0.010615 -0.006191 -9.78231 0.012424 0.021225 1.8e-05</acceleration>
<wrench>0.010615 -0.006191 -9.78231 0 -0 0</wrench>
</link>
</model>
<model name='unit_cylinder'>
<pose>-4.57746 0.509884 0.499998 3e-06 4e-06 -0</pose>
<scale>1 1 1</scale>
<link name='link'>
<pose>-4.57746 0.509884 0.499998 3e-06 4e-06 -0</pose>
<velocity>0 0 0 0 -0 0</velocity>
<acceleration>0 0 -9.8 0 -0 0</acceleration>
<wrench>0 0 -9.8 0 -0 0</wrench>
</link>
</model>
<model name='unit_cylinder_0'>
<pose>-0.988146 2.12658 0.499993 -3e-06 -4e-06 -0</pose>
<scale>1 1 1</scale>
<link name='link'>
<pose>-0.988146 2.12658 0.499993 -3e-06 -4e-06 -0</pose>
<velocity>0 0 0 0 -0 0</velocity>
<acceleration>0 0 -9.8 0 -0 0</acceleration>
<wrench>0 0 -9.8 0 -0 0</wrench>
</link>
</model>
<model name='unit_cylinder_1'>
<pose>-0.890576 -1.90634 0.499997 3e-06 4e-06 -0</pose>
<scale>1 1 1</scale>
<link name='link'>
<pose>-0.890576 -1.90634 0.499997 3e-06 4e-06 -0</pose>
<velocity>0 0 0 0 -0 0</velocity>
<acceleration>0 0 -9.8 0 -0 0</acceleration>
<wrench>0 0 -9.8 0 -0 0</wrench>
</link>
</model>
<light name='sun'>
<pose>0 0 10 0 -0 0</pose>
</light>
</state>
<gui fullscreen='0'>
<camera name='user_camera'>
<pose>-2.68744 -4.4037 20.9537 -0 1.31164 1.40819</pose>
<view_controller>orbit</view_controller>
<projection_type>perspective</projection_type>
</camera>
</gui>
<model name='unit_box_0'>
<pose>-4.96407 -2.00354 0.5 0 -0 0</pose>
<link name='link'>
<inertial>
<mass>1</mass>
<inertia>
<ixx>0.166667</ixx>
<ixy>0</ixy>
<ixz>0</ixz>
<iyy>0.166667</iyy>
<iyz>0</iyz>
<izz>0.166667</izz>
</inertia>
<pose>0 0 0 0 -0 0</pose>
</inertial>
<collision name='collision'>
<geometry>
<box>
<size>1 1 1</size>
</box>
</geometry>
<surface>
<contact>
<ode/>
</contact>
<bounce/>
<friction>
<torsional>
<ode/>
</torsional>
<ode/>
</friction>
</surface>
<max_contacts>10</max_contacts>
</collision>
<visual name='visual'>
<geometry>
<box>
<size>1 1 1</size>
</box>
</geometry>
<material>
<script>
<name>Gazebo/Grey</name>
<uri>file://media/materials/scripts/gazebo.material</uri>
</script>
</material>
</visual>
<self_collide>0</self_collide>
<enable_wind>0</enable_wind>
<kinematic>0</kinematic>
</link>
</model>
<model name='unit_box_1'>
<pose>3.83312 3.3034 0.5 0 -0 0</pose>
<link name='link'>
<inertial>
<mass>1</mass>
<inertia>
<ixx>0.166667</ixx>
<ixy>0</ixy>
<ixz>0</ixz>
<iyy>0.166667</iyy>
<iyz>0</iyz>
<izz>0.166667</izz>
</inertia>
<pose>0 0 0 0 -0 0</pose>
</inertial>
<collision name='collision'>
<geometry>
<box>
<size>1 1 1</size>
</box>
</geometry>
<surface>
<contact>
<ode/>
</contact>
<bounce/>
<friction>
<torsional>
<ode/>
</torsional>
<ode/>
</friction>
</surface>
<max_contacts>10</max_contacts>
</collision>
<visual name='visual'>
<geometry>
<box>
<size>1 1 1</size>
</box>
</geometry>
<material>
<script>
<name>Gazebo/Grey</name>
<uri>file://media/materials/scripts/gazebo.material</uri>
</script>
</material>
</visual>
<self_collide>0</self_collide>
<enable_wind>0</enable_wind>
<kinematic>0</kinematic>
</link>
</model>
<model name='unit_cylinder_0'>
<pose>-0.988144 2.12658 0.5 0 -0 0</pose>
<link name='link'>
<inertial>
<mass>1</mass>
<inertia>
<ixx>0.145833</ixx>
<ixy>0</ixy>
<ixz>0</ixz>
<iyy>0.145833</iyy>
<iyz>0</iyz>
<izz>0.125</izz>
</inertia>
<pose>0 0 0 0 -0 0</pose>
</inertial>
<collision name='collision'>
<geometry>
<cylinder>
<radius>0.5</radius>
<length>1</length>
</cylinder>
</geometry>
<surface>
<contact>
<ode/>
</contact>
<bounce/>
<friction>
<torsional>
<ode/>
</torsional>
<ode/>
</friction>
</surface>
<max_contacts>10</max_contacts>
</collision>
<visual name='visual'>
<geometry>
<cylinder>
<radius>0.5</radius>
<length>1</length>
</cylinder>
</geometry>
<material>
<script>
<name>Gazebo/Grey</name>
<uri>file://media/materials/scripts/gazebo.material</uri>
</script>
</material>
</visual>
<self_collide>0</self_collide>
<enable_wind>0</enable_wind>
<kinematic>0</kinematic>
</link>
</model>
<model name='unit_cylinder_1'>
<pose>-0.890578 -1.90634 0.5 0 -0 0</pose>
<link name='link'>
<inertial>
<mass>1</mass>
<inertia>
<ixx>0.145833</ixx>
<ixy>0</ixy>
<ixz>0</ixz>
<iyy>0.145833</iyy>
<iyz>0</iyz>
<izz>0.125</izz>
</inertia>
<pose>0 0 0 0 -0 0</pose>
</inertial>
<collision name='collision'>
<geometry>
<cylinder>
<radius>0.5</radius>
<length>1</length>
</cylinder>
</geometry>
<surface>
<contact>
<ode/>
</contact>
<bounce/>
<friction>
<torsional>
<ode/>
</torsional>
<ode/>
</friction>
</surface>
<max_contacts>10</max_contacts>
</collision>
<visual name='visual'>
<geometry>
<cylinder>
<radius>0.5</radius>
<length>1</length>
</cylinder>
</geometry>
<material>
<script>
<name>Gazebo/Grey</name>
<uri>file://media/materials/scripts/gazebo.material</uri>
</script>
</material>
</visual>
<self_collide>0</self_collide>
<enable_wind>0</enable_wind>
<kinematic>0</kinematic>
</link>
</model>
</world>
</sdf>
3.8 launch编写——在gazebo中展示地图和小车
在launch文件夹下新建nav_show_car.launch,复制以下代码:
<launch>
    <!-- 将 Urdf 文件的内容加载到参数服务器 -->
    <param name="robot_description" command="$(find xacro)/xacro $(find nav_pack)/urdf/car.urdf.xacro" />
    <!-- 启动 gazebo -->
    <include file="$(find gazebo_ros)/launch/empty_world.launch">
        <arg name="world_name" value="$(find nav_pack)/worlds/box_house.world" />
    </include>

    <!-- 在 gazebo 中显示机器人模型 -->
    <node pkg="gazebo_ros" type="spawn_model" name="model" args="-urdf -model mycar -param robot_description"  />
</launch>
3.9 运行launch文件
在ros_ws的终端下,输入 catkin_make进行编译。接着运行 source devel/setup.bash添加环境变量。最后,输入:
roslaunch nav_pack nav_show_car.launch
运行launch文件。操作如图所示:
运行结果如下所示:
注: 如果出现
RLException: [xxx.launch] is neither a launch file in package [nav_pack] nor is [nav_pack] a launch file name The traceback for the exception was written to the log file
则可以先使用上述“编译+添加环境变量”的命令来解决,之后再roslaunch即可。

4. SLAM绘制地图并利用键盘控制机器人
4.1 launch编写——slam建图
在launch文件夹新建nav_params_slam.launch,复制以下代码:
<launch>
<param name="use_sim_time" value="true"/>
    <node pkg="gmapping" type="slam_gmapping" name="slam_gmapping" output="screen">
      <remap from="scan" to="scan"/>
      <param name="base_frame" value="base_footprint"/><!--底盘坐标系-->
      <param name="odom_frame" value="odom"/> <!--里程计坐标系-->
      <param name="map_update_interval" value="5.0"/>
      <param name="maxUrange" value="16.0"/>
      <param name="sigma" value="0.05"/>
      <param name="kernelSize" value="1"/>
      <param name="lstep" value="0.05"/>
      <param name="astep" value="0.05"/>
      <param name="iterations" value="5"/>
      <param name="lsigma" value="0.075"/>
      <param name="ogain" value="3.0"/>
      <param name="lskip" value="0"/>
      <param name="srr" value="0.1"/>
      <param name="srt" value="0.2"/>
      <param name="str" value="0.1"/>
      <param name="stt" value="0.2"/>
      <param name="linearUpdate" value="1.0"/>
      <param name="angularUpdate" value="0.5"/>
      <param name="temporalUpdate" value="3.0"/>
      <param name="resampleThreshold" value="0.5"/>
      <param name="particles" value="30"/>
      <param name="xmin" value="-50.0"/>
      <param name="ymin" value="-50.0"/>
      <param name="xmax" value="50.0"/>
      <param name="ymax" value="50.0"/>
      <param name="delta" value="0.05"/>
      <param name="llsamplerange" value="0.01"/>
      <param name="llsamplestep" value="0.01"/>
      <param name="lasamplerange" value="0.005"/>
      <param name="lasamplestep" value="0.005"/>
    </node>


</launch>
4.2 gazebo集成代码编写
通过 Gazebo 模拟机器人的传感器,以便在 Rviz 中显示这些传感器感知到的数据。
主要内容包括:
- 运动控制以及里程计信息显示
- 雷达信息仿真以及显示
- 摄像头信息仿真以及显示
- kinect 信息仿真以及显示
4.2.1 camera
在urdf文件夹下新建gazebo文件夹,并在gazebo文件夹中新建camera.urdf.xacro,复制以下代码:
<robot name="my_sensors" xmlns:xacro="http://wiki.ros.org/xacro">
  <!-- 被引用的link -->
  <gazebo reference="camera">
    <!-- 类型设置为 camara -->
    <sensor type="camera" name="camera_node">
      <update_rate>30.0</update_rate> <!-- 更新频率 -->
      <!-- 摄像头基本信息设置 -->
      <camera name="head">
        <horizontal_fov>1.3962634</horizontal_fov>
        <image>
          <width>1280</width>
          <height>720</height>
          <format>R8G8B8</format>
        </image>
        <clip>
          <near>0.02</near>
          <far>300</far>
        </clip>
        <noise>
          <type>gaussian</type>
          <mean>0.0</mean>
          <stddev>0.007</stddev>
        </noise>
      </camera>
      <!-- 核心插件 -->
      <plugin name="gazebo_camera" filename="libgazebo_ros_camera.so">
        <alwaysOn>true</alwaysOn>
        <updateRate>0.0</updateRate>
        <cameraName>/camera</cameraName>
        <imageTopicName>image_raw</imageTopicName>
        <cameraInfoTopicName>camera_info</cameraInfoTopicName>
        <frameName>camera</frameName>
        <hackBaseline>0.07</hackBaseline>
        <distortionK1>0.0</distortionK1>
        <distortionK2>0.0</distortionK2>
        <distortionK3>0.0</distortionK3>
        <distortionT1>0.0</distortionT1>
        <distortionT2>0.0</distortionT2>
      </plugin>
    </sensor>
  </gazebo>
</robot>
4.2.2 kinect
在gazebo文件夹中新建kinect.urdf.xacro,复制以下代码:
<robot name="my_sensors" xmlns:xacro="http://wiki.ros.org/xacro">
    <!-- 使用support当深度相机 -->
    <gazebo reference="support">
      <sensor type="depth" name="camera">
        <always_on>true</always_on>
        <update_rate>20.0</update_rate>
        <camera>
          <horizontal_fov>${60.0*PI/180.0}</horizontal_fov>
          <image>
            <format>R8G8B8</format>
            <width>640</width>
            <height>480</height>
          </image>
          <clip>
            <near>0.05</near>
            <far>8.0</far>
          </clip>
        </camera>
        <plugin name="kinect_camera_controller" filename="libgazebo_ros_openni_kinect.so">
          <cameraName>camera</cameraName>
          <alwaysOn>true</alwaysOn>
          <updateRate>10</updateRate>
          <imageTopicName>rgb/image_raw</imageTopicName>
          <depthImageTopicName>depth/image_raw</depthImageTopicName>
          <pointCloudTopicName>depth/points</pointCloudTopicName>
          <cameraInfoTopicName>rgb/camera_info</cameraInfoTopicName>
          <depthImageCameraInfoTopicName>depth/camera_info</depthImageCameraInfoTopicName>
          <frameName>support</frameName>
          <baseline>0.1</baseline>
          <distortion_k1>0.0</distortion_k1>
          <distortion_k2>0.0</distortion_k2>
          <distortion_k3>0.0</distortion_k3>
          <distortion_t1>0.0</distortion_t1>
          <distortion_t2>0.0</distortion_t2>
          <pointCloudCutoff>0.4</pointCloudCutoff>
        </plugin>
      </sensor>
    </gazebo>

</robot>
4.2.3 laser
在gazebo文件夹中新建laser.urdf.xacro,复制以下代码:
<robot name="my_sensors" xmlns:xacro="http://wiki.ros.org/xacro">

  <!-- 雷达 -->
  <gazebo reference="laser">
    <sensor type="ray" name="rplidar">
      <pose>0 0 0 0 0 0</pose>
      <visualize>true</visualize>
      <update_rate>5.5</update_rate>
      <ray>
        <scan>
          <horizontal>
            <samples>360</samples>
            <resolution>1</resolution>
            <min_angle>-3</min_angle>
            <max_angle>3</max_angle>
          </horizontal>
        </scan>
        <range>
          <min>0.10</min>
          <max>30.0</max>
          <resolution>0.01</resolution>
        </range>
        <noise>
          <type>gaussian</type>
          <mean>0.0</mean>
          <stddev>0.01</stddev>
        </noise>
      </ray>
      <plugin name="gazebo_rplidar" filename="libgazebo_ros_laser.so">
        <topicName>/scan</topicName>
        <frameName>laser</frameName>
      </plugin>
    </sensor>
  </gazebo>

</robot>
4.2.4 move
在gazebo文件夹中新建move.urdf.xacro,复制以下代码:
<robot name="my_car_move" xmlns:xacro="http://wiki.ros.org/xacro">

    <!-- 传动实现:用于连接控制器与关节 -->
    <xacro:macro name="joint_trans" params="joint_name">
        <!-- Transmission is important to link the joints and the controller -->
        <transmission name="${joint_name}_trans">
            <type>transmission_interface/SimpleTransmission</type>
            <joint name="${joint_name}">
                <hardwareInterface>hardware_interface/VelocityJointInterface</hardwareInterface>
            </joint>
            <actuator name="${joint_name}_motor">
                <hardwareInterface>hardware_interface/VelocityJointInterface</hardwareInterface>
                <mechanicalReduction>1</mechanicalReduction>
            </actuator>
        </transmission>
    </xacro:macro>

    <!-- 每一个驱动轮都需要配置传动装置 -->
    <xacro:joint_trans joint_name="left_wheel2base_link" />
    <xacro:joint_trans joint_name="right_wheel2base_link" />

    <!-- 控制器 -->
    <gazebo>
        <plugin name="differential_drive_controller" filename="libgazebo_ros_diff_drive.so">
            <rosDebugLevel>Debug</rosDebugLevel>
            <publishWheelTF>true</publishWheelTF>
            <robotNamespace>/</robotNamespace>
            <publishTf>1</publishTf>
            <publishWheelJointState>true</publishWheelJointState>
            <alwaysOn>true</alwaysOn>
            <updateRate>100.0</updateRate>
            <legacyMode>true</legacyMode>
            <leftJoint>left_wheel2base_link</leftJoint> <!-- 左轮 -->
            <rightJoint>right_wheel2base_link</rightJoint> <!-- 右轮 -->
            <wheelSeparation>${base_link_radius * 2}</wheelSeparation> <!-- 车轮间距 -->
            <wheelDiameter>${wheel_radius * 2}</wheelDiameter> <!-- 车轮直径 -->
            <broadcastTF>1</broadcastTF>
            <wheelTorque>30</wheelTorque>
            <wheelAcceleration>1.8</wheelAcceleration>
            <commandTopic>cmd_vel</commandTopic> <!-- 运动控制话题 -->
            <odometryFrame>odom</odometryFrame>
            <odometryTopic>odom</odometryTopic> <!-- 里程计话题 -->
            <robotBaseFrame>base_footprint</robotBaseFrame> <!-- 根坐标系 -->
        </plugin>
    </gazebo>

</robot>
4.2.5 修改car.urdf.xacro文件
在添加上述gazebo文件之后,还需对它们进行引用。打开先前创建的car.urdf.xacro文件,复制以下代码:
<!-- 组合小车底盘与摄像头与雷达 -->
<robot name="my_car_camera" xmlns:xacro="http://wiki.ros.org/xacro">
    <!-- 包含惯性矩阵文件 -->
    <xacro:include filename="car_head.urdf.xacro" />
    <!-- 包含底盘/摄像头/雷达的xacro文件 -->
    <xacro:include filename="car_base.urdf.xacro" />
    <xacro:include filename="car_camera.urdf.xacro" />
    <xacro:include filename="car_laser.urdf.xacro" />
    <!-- 在gazebo里面显示 -->
    <xacro:include filename="gazebo/laser.urdf.xacro" />
    <xacro:include filename="gazebo/camera.urdf.xacro" />
    <xacro:include filename="gazebo/kinect.urdf.xacro" />
    <xacro:include filename="gazebo/move.urdf.xacro" />
</robot>
4.3 重要!launch编写——nav_main主launch编写
在launch文件夹新建nav_main.launch文件,作为之后的主控launch文件。
之后还会在nav_main.launch文件下进行功能的添加。
复制以下代码:
<launch>
    <!-- 启动机器人状态和关节状态发布节点 -->
    <node pkg="joint_state_publisher" name="joint_state_publisher" type="joint_state_publisher" />
    <node pkg="robot_state_publisher" name="robot_state_publisher" type="robot_state_publisher" />
    <!-- 启动 rivz -->
    <node pkg="rviz" type="rviz" name="rviz" />

    <!-- 引入机器人模型及相关环境 -->
    <include file="$(find nav_pack)/launch/nav_show_car.launch" />
    <!-- 引入gmapping参数,slam建图 -->
    <include file="$(find nav_pack)/launch/nav_params_slam.launch" />

</launch>
4.4 启动SLAM仿真
ros_ws终端中输入以下命令来运行launch。注:可能会遇到同3.9节一样的问题报错,解决方法是一样的,之后将不再赘述。
roslaunch nav_pack nav_main.launch
运行结果如下:

在打开的rviz窗口里面点击左下角的“Add”,添加Map、RobotModel。
Map需订阅Topic,如图所示:

4.5 键盘控制
在上述窗口打开完毕后,新建终端,输入:
rosrun teleop_twist_keyboard teleop_twist_keyboard.py # 调用键盘控制节点
这里的键盘操作是用U、I、O、J、K、L、M、<、>键控制,键盘说明如下:
| 键 | 功能 |
|---|---|
| U | 逆时针前进 |
| I | 前进 |
| O | 顺时针前进 |
| J | 停止并逆时针旋转 |
| K | 停止 |
| L | 停止并顺时针旋转 |
| M | 顺时针后退 |
| < | 后退 |
| > | 逆时针后退 |
控制小车把rviz的地图全扫清楚后,如下图。即可进行下列的保存地图操作。

4.6 保存rviz文件
此处还需要将该rviz文件保存至config目录下,以便后续使用。这里点击左上角的File来保存rviz文件,将文件命名为show并进行在config目录下的保存,保存完毕后可在config文件夹下看到show.rviz文件。
4.7 保存SLAM的地图
在launch文件夹新建nav_save_map.launch,复制以下代码:
<launch>
    <!-- nav是保存的文件名 -->
    <arg name="filename" value="$(find nav_pack)/map/nav" />
    <node name="map_save" pkg="map_server" type="map_saver" args="-f $(arg filename)" />
</launch>
在vs code中新建一个ros_ws路径下的终端,roslaunch刚刚新建的nav_save_map.launch文件,以保存当前rviz显示的地图。命令如下:
roslaunch nav_pack nav_save_map.launch
这里简单说明一下roslaunch命令的格式,即:
roslaunch 功能包包名 launch文件名
保存后会在nav_pack文件夹的map文件夹看到两个名为nav的文件。
5. AMCL机器人自身定位仿真
停止运行上述进程,关闭rviz、gazebo,接下来实现定位的仿真。
5.1 读取保存的地图
在launch文件夹中新建nav_load_map.launch,复制以下代码:
<launch>
    <!-- 设置地图的配置文件 -->
    <arg name="map" default="nav.yaml" />
    <!-- 运行地图服务器,并且加载设置的地图-->
    <node name="map_server" pkg="map_server" type="map_server" args="$(find nav_pack)/map/$(arg map)"/>

</launch>
5.2 新建AMCL定位文件
在launch文件夹中新建nav_amcl.launch,复制以下代码:
<launch>
<node pkg="amcl" type="amcl" name="amcl" output="screen">
  <!-- Publish scans from best pose at a max of 10 Hz -->
  <param name="odom_model_type" value="diff"/><!-- 里程计模式为差分 -->
  <param name="odom_alpha5" value="0.1"/>
  <param name="transform_tolerance" value="0.2" />
  <param name="gui_publish_rate" value="10.0"/>
  <param name="laser_max_beams" value="30"/>
  <param name="min_particles" value="500"/>
  <param name="max_particles" value="5000"/>
  <param name="kld_err" value="0.05"/>
  <param name="kld_z" value="0.99"/>
  <param name="odom_alpha1" value="0.2"/>
  <param name="odom_alpha2" value="0.2"/>
  <!-- translation std dev, m -->
  <param name="odom_alpha3" value="0.8"/>
  <param name="odom_alpha4" value="0.2"/>
  <param name="laser_z_hit" value="0.5"/>
  <param name="laser_z_short" value="0.05"/>
  <param name="laser_z_max" value="0.05"/>
  <param name="laser_z_rand" value="0.5"/>
  <param name="laser_sigma_hit" value="0.2"/>
  <param name="laser_lambda_short" value="0.1"/>
  <param name="laser_lambda_short" value="0.1"/>
  <param name="laser_model_type" value="likelihood_field"/>
  <!-- <param name="laser_model_type" value="beam"/> -->
  <param name="laser_likelihood_max_dist" value="2.0"/>
  <param name="update_min_d" value="0.2"/>
  <param name="update_min_a" value="0.5"/>

  <param name="odom_frame_id" value="odom"/><!-- 里程计坐标系 -->
  <param name="base_frame_id" value="base_footprint"/><!-- 添加机器人基坐标系 -->
  <param name="global_frame_id" value="map"/><!-- 添加地图坐标系 -->

  <param name="resample_interval" value="1"/>
  <param name="transform_tolerance" value="0.1"/>
  <param name="recovery_alpha_slow" value="0.0"/>
  <param name="recovery_alpha_fast" value="0.0"/>
</node>
</launch>
5.3 修改nav_main.launch文件
复制以下代码:
<launch>
    <!-- 启动机器人状态和关节状态发布节点 -->
    <node pkg="joint_state_publisher" name="joint_state_publisher" type="joint_state_publisher" />
    <node pkg="robot_state_publisher" name="robot_state_publisher" type="robot_state_publisher" />
    <!-- 启动 rivz -->
    <node pkg="rviz" type="rviz" name="rviz" args="-d $(find nav_pack)/config/show.rviz"/>
    <!-- <node pkg="rviz" type="rviz" name="rviz" />  -->
    <!-- 引入机器人模型及相关环境 -->
    <include file="$(find nav_pack)/launch/nav_show_car.launch" />
    <!-- 引入gmapping参数,slam建图 -->
    <!-- <include file="$(find nav_pack)/launch/nav_params_slam.launch" /> -->
    <!-- 运行地图服务器,并且加载设置的地图-->
    <include file="$(find nav_pack)/launch/nav_load_map.launch" />
    <!-- 启动AMCL节点 -->
    <include file="$(find nav_pack)/launch/nav_amcl.launch" />

</launch>
5.4 启动launch
roslaunch启动nav_main.launch,命令为
roslaunch nav_pack nav_main.launch
# roslaunch 功能包名 launch文件名
在rviz加载(Add)PoseArray并订阅/particlecloud话题,之后运行键盘控制语句来控制小车。
rosrun teleop_twist_keyboard teleop_twist_keyboard.py
结果如下。箭头越是密集,说明当前机器人处于此位置的概率越高。

6. 路径规划导航
毋庸置疑的,路径规划是导航中的核心功能之一,在ROS的导航功能包集navigation中提供了 move_base 功能包,用于实现此功能。
6.1 路径规划参数文件配置
在param文件夹下,新建base_local_planner_params.yaml、costmap_common_params.yaml、global_costmap_params.yaml、local_costmap_params.yaml四个文件。四个文件的代码如下。
6.1.1 base_local_planner_params.yaml
TrajectoryPlannerROS:

# Robot Configuration Parameters
  max_vel_x: 0.5 # X 方向最大速度
  min_vel_x: 0.1 # X 方向最小速速

  max_vel_theta:  1.0 #
  min_vel_theta: -1.0
  min_in_place_vel_theta: 1.0

  acc_lim_x: 1.0 # X 加速限制
  acc_lim_y: 0.0 # Y 加速限制
  acc_lim_theta: 0.6 # 角速度加速限制

# Goal Tolerance Parameters,目标公差
  xy_goal_tolerance: 0.10
  yaw_goal_tolerance: 0.05

# Differential-drive robot configuration
# 是否是全向移动机器人
  holonomic_robot: false

# Forward Simulation Parameters,前进模拟参数
  sim_time: 0.8
  vx_samples: 18
  vtheta_samples: 20
  sim_granularity: 0.05
6.1.2 costmap_common_params.yaml
#机器人几何参,如果机器人是圆形,设置 robot_radius,如果是其他形状设置 footprint
robot_radius: 0.12 #圆形
# footprint: [[-0.12, -0.12], [-0.12, 0.12], [0.12, 0.12], [0.12, -0.12]] #其他形状

obstacle_range: 3.0 # 用于障碍物探测,比如: 值为 3.0,意味着检测到距离小于 3 米的障碍物时,就会引入代价地图
raytrace_range: 3.5 # 用于清除障碍物,比如:值为 3.5,意味着清除代价地图中 3.5 米以外的障碍物


#膨胀半径,扩展在碰撞区域以外的代价区域,使得机器人规划路径避开障碍物
inflation_radius: 0.2
#代价比例系数,越大则代价值越小
cost_scaling_factor: 3.0

#地图类型
map_type: costmap
#导航包所需要的传感器
observation_sources: scan
#对传感器的坐标系和数据进行配置。这个也会用于代价地图添加和清除障碍物。例如,你可以用激光雷达传感器用于在代价地图添加障碍物,再添加kinect用于导航和清除障碍物。
scan: {sensor_frame: laser, data_type: LaserScan, topic: scan, marking: true, clearing: true}
6.1.3 global_costmap_params.yaml
global_costmap:
  global_frame: map #地图坐标系
  robot_base_frame: base_footprint #机器人坐标系
  # 以此实现坐标变换

  update_frequency: 1.0 #代价地图更新频率
  publish_frequency: 1.0 #代价地图的发布频率
  transform_tolerance: 0.5 #等待坐标变换发布信息的超时时间

  static_map: true # 是否使用一个地图或者地图服务器来初始化全局代价地图,如果不使用静态地图,这个参数为false.
6.1.4 local_costmap_params.yaml
local_costmap:
  global_frame: odom #里程计坐标系
  robot_base_frame: base_footprint #机器人坐标系

  update_frequency: 10.0 #代价地图更新频率
  publish_frequency: 10.0 #代价地图的发布频率
  transform_tolerance: 0.5 #等待坐标变换发布信息的超时时间

  static_map: false  #不需要静态地图,可以提升导航效果
  rolling_window: true #是否使用动态窗口,默认为false,在静态的全局地图中,地图不会变化
  width: 3 # 局部地图宽度 单位是 m
  height: 3 # 局部地图高度 单位是 m
  resolution: 0.05 # 局部地图分辨率 单位是 m,一般与静态地图分辨率保持一致
6.2 导航launch文件编写
在launch文件夹下新建nav_path.launch,复制以下:
<launch>
    <!-- 路径规划 -->
    <node pkg="move_base" type="move_base" respawn="false" name="move_base" output="screen" clear_params="true">
        <rosparam file="$(find nav_pack)/param/costmap_common_params.yaml" command="load" ns="global_costmap" />
        <rosparam file="$(find nav_pack)/param/costmap_common_params.yaml" command="load" ns="local_costmap" />
        <rosparam file="$(find nav_pack)/param/local_costmap_params.yaml" command="load" />
        <rosparam file="$(find nav_pack)/param/global_costmap_params.yaml" command="load" />
        <rosparam file="$(find nav_pack)/param/base_local_planner_params.yaml" command="load" />
    </node>

</launch>
6.3 修改nav_main.launch文件
复制以下:
<launch>
    <!-- 启动机器人状态和关节状态发布节点 -->
    <node pkg="joint_state_publisher" name="joint_state_publisher" type="joint_state_publisher" />
    <node pkg="robot_state_publisher" name="robot_state_publisher" type="robot_state_publisher" />
    <!-- 启动 rivz -->
    <node pkg="rviz" type="rviz" name="rviz" args="-d $(find nav_pack)/config/show.rviz"/>
    <!-- <node pkg="rviz" type="rviz" name="rviz" />  -->
    <!-- 引入机器人模型及相关环境 -->
    <include file="$(find nav_pack)/launch/nav_show_car.launch" />
    <!-- 引入gmapping参数,slam建图 -->
    <!-- <include file="$(find nav_pack)/launch/nav_params_slam.launch" /> -->
    <!-- 运行地图服务器,并且加载设置的地图-->
    <include file="$(find nav_pack)/launch/nav_load_map.launch" />
    <!-- 启动AMCL节点 -->
    <include file="$(find nav_pack)/launch/nav_amcl.launch" />
    <!-- 运行move_base节点 -->
    <include file="$(find nav_pack)/launch/nav_path.launch" />

</launch>
6.4 启动launch
roslaunch启动nav_main.launch。
在rviz中Add两个Map和两个Path,订阅话题如下。
两个Map:

两个Path:

接着即可通过Rviz工具栏的 2D Nav Goal设置目的地实现导航。结果如下:

7. 导航与SLAM建图
导航时需要地图信息,之前导航实现时,是通过 map_server 包的 map_server 节点来发布地图信息的,如果不先通过SLAM建图,那么如何发布地图信息呢?
SLAM建图过程中本身就会时时发布地图信息,所以无需再使用map_server,SLAM已经发布了话题为 /map 的地图消息了,且导航需要定位模块,SLAM本身也是可以实现定位的。
7.1 修改nav_main.launch文件
无需调用map_server的相关节点,只需要启动SLAM节点与move_base节点。
<launch>
    <!-- 启动机器人状态和关节状态发布节点 -->
    <node pkg="joint_state_publisher" name="joint_state_publisher" type="joint_state_publisher" />
    <node pkg="robot_state_publisher" name="robot_state_publisher" type="robot_state_publisher" />
    <!-- 启动 rivz -->
    <node pkg="rviz" type="rviz" name="rviz" args="-d $(find nav_pack)/config/show.rviz"/>
    <!-- <node pkg="rviz" type="rviz" name="rviz" />  -->
    <!-- 引入机器人模型及相关环境 -->
    <include file="$(find nav_pack)/launch/nav_show_car.launch" />
    <!-- 引入gmapping参数,slam建图 -->
    <include file="$(find nav_pack)/launch/nav_params_slam.launch" />
    <!-- 运行地图服务器,并且加载设置的地图-->
    <!-- <include file="$(find nav_pack)/launch/nav_load_map.launch" /> -->
    <!-- 启动AMCL节点 -->
    <include file="$(find nav_pack)/launch/nav_amcl.launch" />
    <!-- 运行move_base节点 -->
    <include file="$(find nav_pack)/launch/nav_path.launch" />

</launch>
7.2 启动launch
roslaunch启动nav_main.launch。运行结果如下:

8. 吐槽在后
Debug真的很累啊……


 1443
1443

 被折叠的 条评论
为什么被折叠?
被折叠的 条评论
为什么被折叠?
 到【灌水乐园】发言


