 SpringAI中MCP服务过滤器鉴权


原文链接:SpringAI(GA):MCP Server 服务鉴权(过滤器版)
[!TIP]
以前写过一篇基于工具粒度的鉴权,改动源码挺大的 MCP 服务鉴权—工具粒度。但有些场景可能不需要那么细,控制在 MCP Server 层面即可,这时可以利用过滤器机制,直接捕获 MCP Client 传递过来的 request 请求,进行校验
实战代码可见:https://github.com/GTyingzi/spring-ai-tutorial 下的 mcp 目录下的 mcp-web-auth-server、mcp-auth-client 模块
过滤器机制

Filter 的特性使得 Filter 可以对请求响应进行包装,修改请求头、请求体、响应头、响应体。由于请求先到达 Filter,Filter 还可以做一些全局性的工作。这里用其做请求头鉴权
pom
<dependencies>
    <dependency>
        <groupId>org.springframework.ai</groupId>
        <artifactId>spring-ai-starter-mcp-server-webflux</artifactId>
    </dependency>
</dependencies>
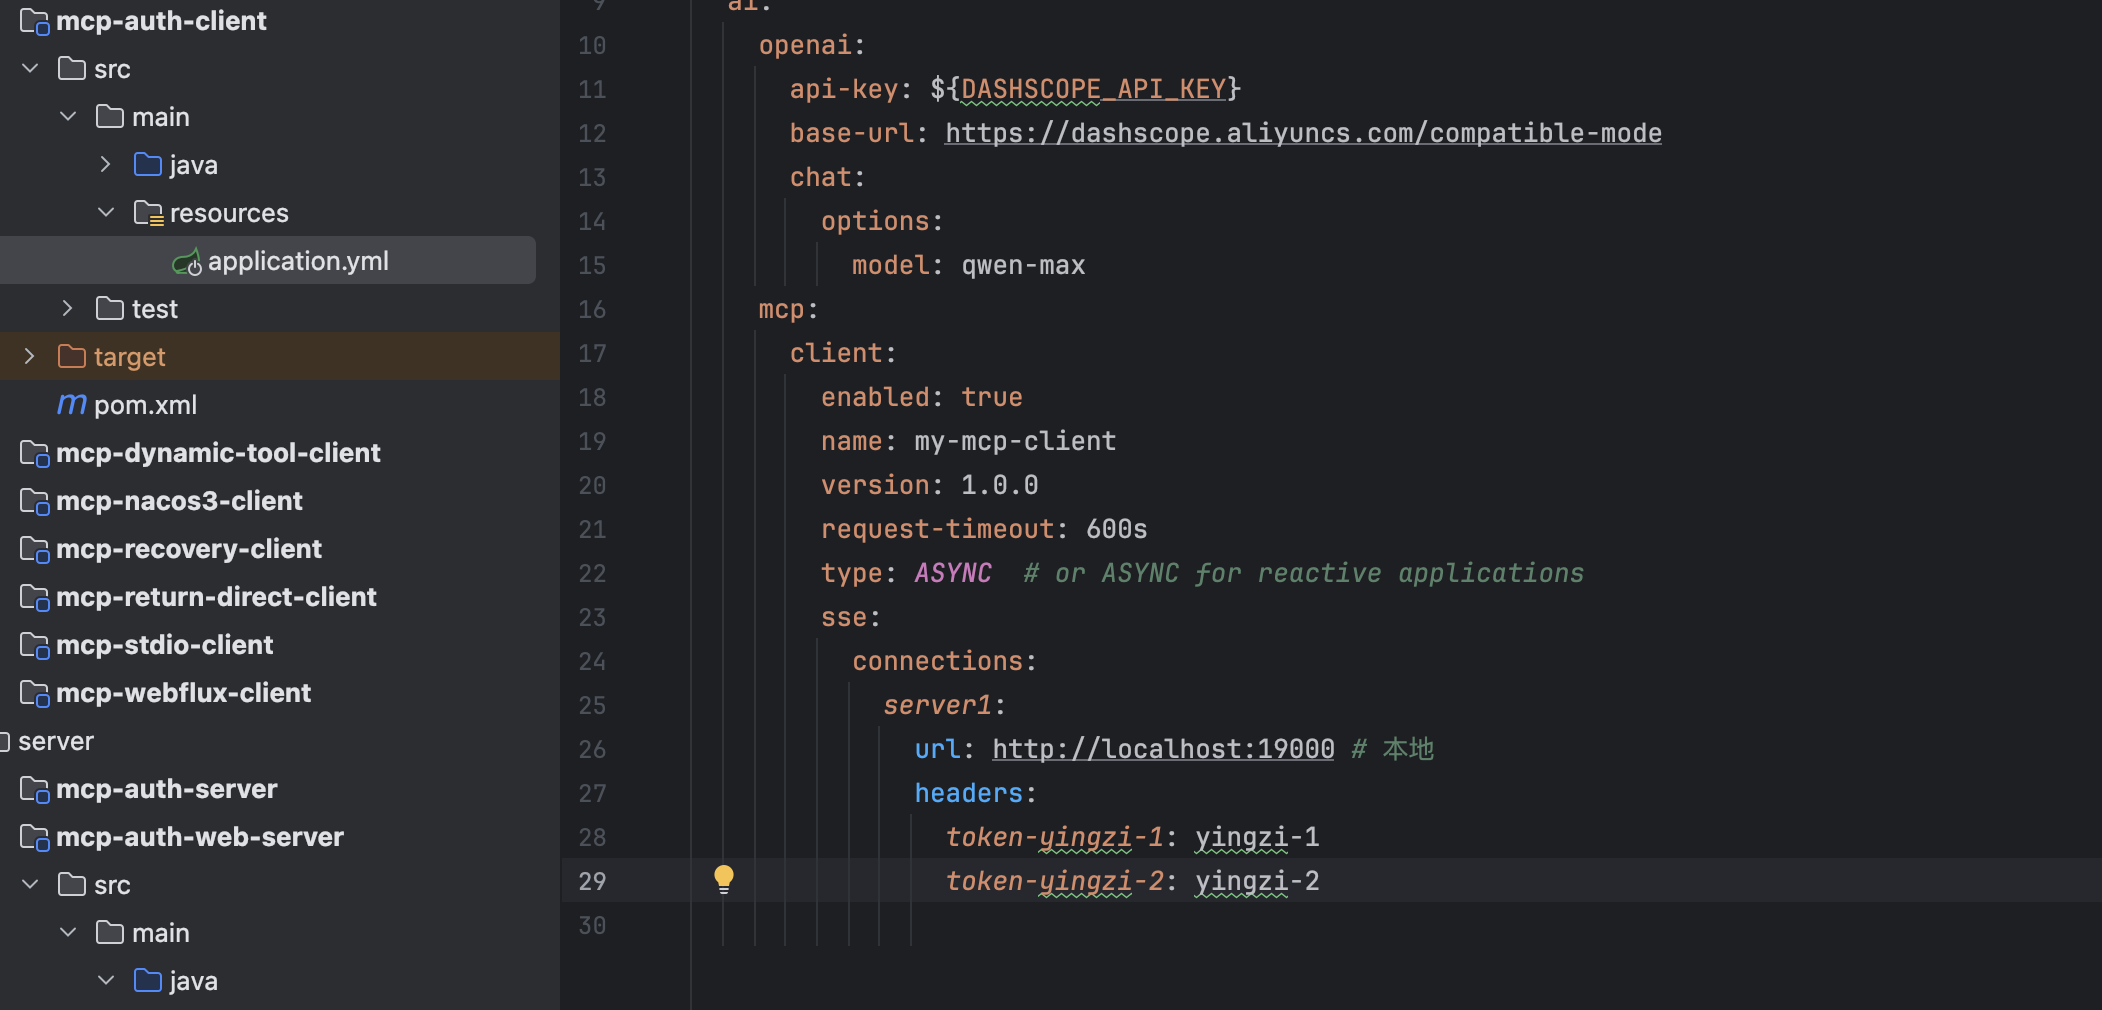
application.yml
server:
  port: 19000

spring:
  application:
    name: mcp-auth-mcp-server
  ai:
    mcp:
      server:
        name: mcp-auth-mcp-server
        version: 1.0.0
        type: ASYNC  # Recommended for reactive applications
        instructions: "This reactive server provides time information tools and resources"
        sse-message-endpoint: /mcp/messages
        capabilities:
          tool: true
          resource: true
          prompt: true
          completion: true
# 调试日志
logging:
  level:
    io:
      modelcontextprotocol:
        client: DEBUG
        spec: DEBUG
        server: DEBUG
filter
package com.spring.ai.tutorial.mcp.server.filter;

import org.slf4j.Logger;
import org.slf4j.LoggerFactory;
import org.springframework.stereotype.Component;
import org.springframework.web.server.ServerWebExchange;
import org.springframework.web.server.WebFilter;
import org.springframework.web.server.WebFilterChain;
import reactor.core.publisher.Mono;

/**
 * @author yingzi
 * @since 2025/9/17
 */
@Component
public class McpServerFilter implements WebFilter {

    private static final String TOKENHEADER = "token-yingzi-1";
    private static final String TOKENVALUE = "yingzi";

    private static final Logger logger = LoggerFactory.getLogger(McpServerFilter.class);

    @Override
    public Mono<Void> filter(ServerWebExchange exchange, WebFilterChain chain) {
        // 获取请求头中的token值
        String token = exchange.getRequest().getHeaders().getFirst(TOKENHEADER);

        // 检查token是否存在且值正确
        if (TOKENVALUE.equals(token)) {
            logger.info("preHandle: 请求的URL: {}", exchange.getRequest().getURI());
            logger.info("preHandle: 请求的TOKEN: {}", token);
            // token验证通过,继续处理请求
            return chain.filter(exchange);
        } else {
            // token验证失败,返回401未授权错误
            logger.warn("Token验证失败: 请求的URL: {}, 提供的TOKEN: {}", exchange.getRequest().getURI(), token);
            exchange.getResponse().setStatusCode(org.springframework.http.HttpStatus.UNAUTHORIZED);
            return exchange.getResponse().setComplete();
        }
    }
}
实现 WebFilter 接口类,设定存在请求头“token-yingzi-1”,且对应值为“yingzi”才放行
tool
package com.spring.ai.tutorial.mcp.server.service;

import org.slf4j.Logger;
import org.slf4j.LoggerFactory;
import org.springframework.ai.tool.annotation.Tool;
import org.springframework.ai.tool.annotation.ToolParam;
import org.springframework.stereotype.Service;

import java.time.ZoneId;
import java.time.ZonedDateTime;
import java.time.format.DateTimeFormatter;

/**
 * @author yingzi
 * @date 2025/5/28 08:55
 */

@Service
public class TimeService {

    private static final Logger logger = LoggerFactory.getLogger(TimeService.class);

    @Tool(description = "Get the time of a specified city.")
    public String  getCityTimeMethod(@ToolParam(description = "Time zone id, such as Asia/Shanghai") String timeZoneId) {
        logger.info("The current time zone is {}", timeZoneId);
        return String.format("The current time zone is %s and the current time is " + "%s", timeZoneId,
                getTimeByZoneId(timeZoneId));
    }

    private String getTimeByZoneId(String zoneId) {

        // Get the time zone using ZoneId
        ZoneId zid = ZoneId.of(zoneId);

        // Get the current time in this time zone
        ZonedDateTime zonedDateTime = ZonedDateTime.now(zid);

        // Defining a formatter
        DateTimeFormatter formatter = DateTimeFormatter.ofPattern("yyyy-MM-dd HH:mm:ss z");

        // Format ZonedDateTime as a string
        String formattedDateTime = zonedDateTime.format(formatter);

        return formattedDateTime;
    }
}
提供一个时间服务
启动类
package com.spring.ai.tutorial.mcp.server;

import com.spring.ai.tutorial.mcp.server.service.TimeService;
import org.springframework.ai.tool.ToolCallbackProvider;
import org.springframework.ai.tool.method.MethodToolCallbackProvider;
import org.springframework.boot.SpringApplication;
import org.springframework.boot.autoconfigure.SpringBootApplication;
import org.springframework.context.annotation.Bean;

/**
 * @author yingzi
 * @since 2025/9/17
 */
@SpringBootApplication
public class AuthWebServerApplication {

    public static void main(String[] args) {
        SpringApplication.run(AuthWebServerApplication.class, args);
    }

    @Bean
    public ToolCallbackProvider timeTools(TimeService timeService) {
        return MethodToolCallbackProvider.builder().toolObjects(timeService).build();
    }
}
启动类,对外提供时间服务的 mcp server
效果
- 首先启动本模块,spring-ai-tutorial 项目的 mcp/server/mcp-auth-web-server 服务
- 再启动带有请求头的 MCP Client 模块,及 spring-ai-tutorial 项目的 mcp/clien/mcp-auth-client 服务
MCP Client 侧传递请求头及其对应的值
这里看到 MCP Server 侧直接 token 验证失败了
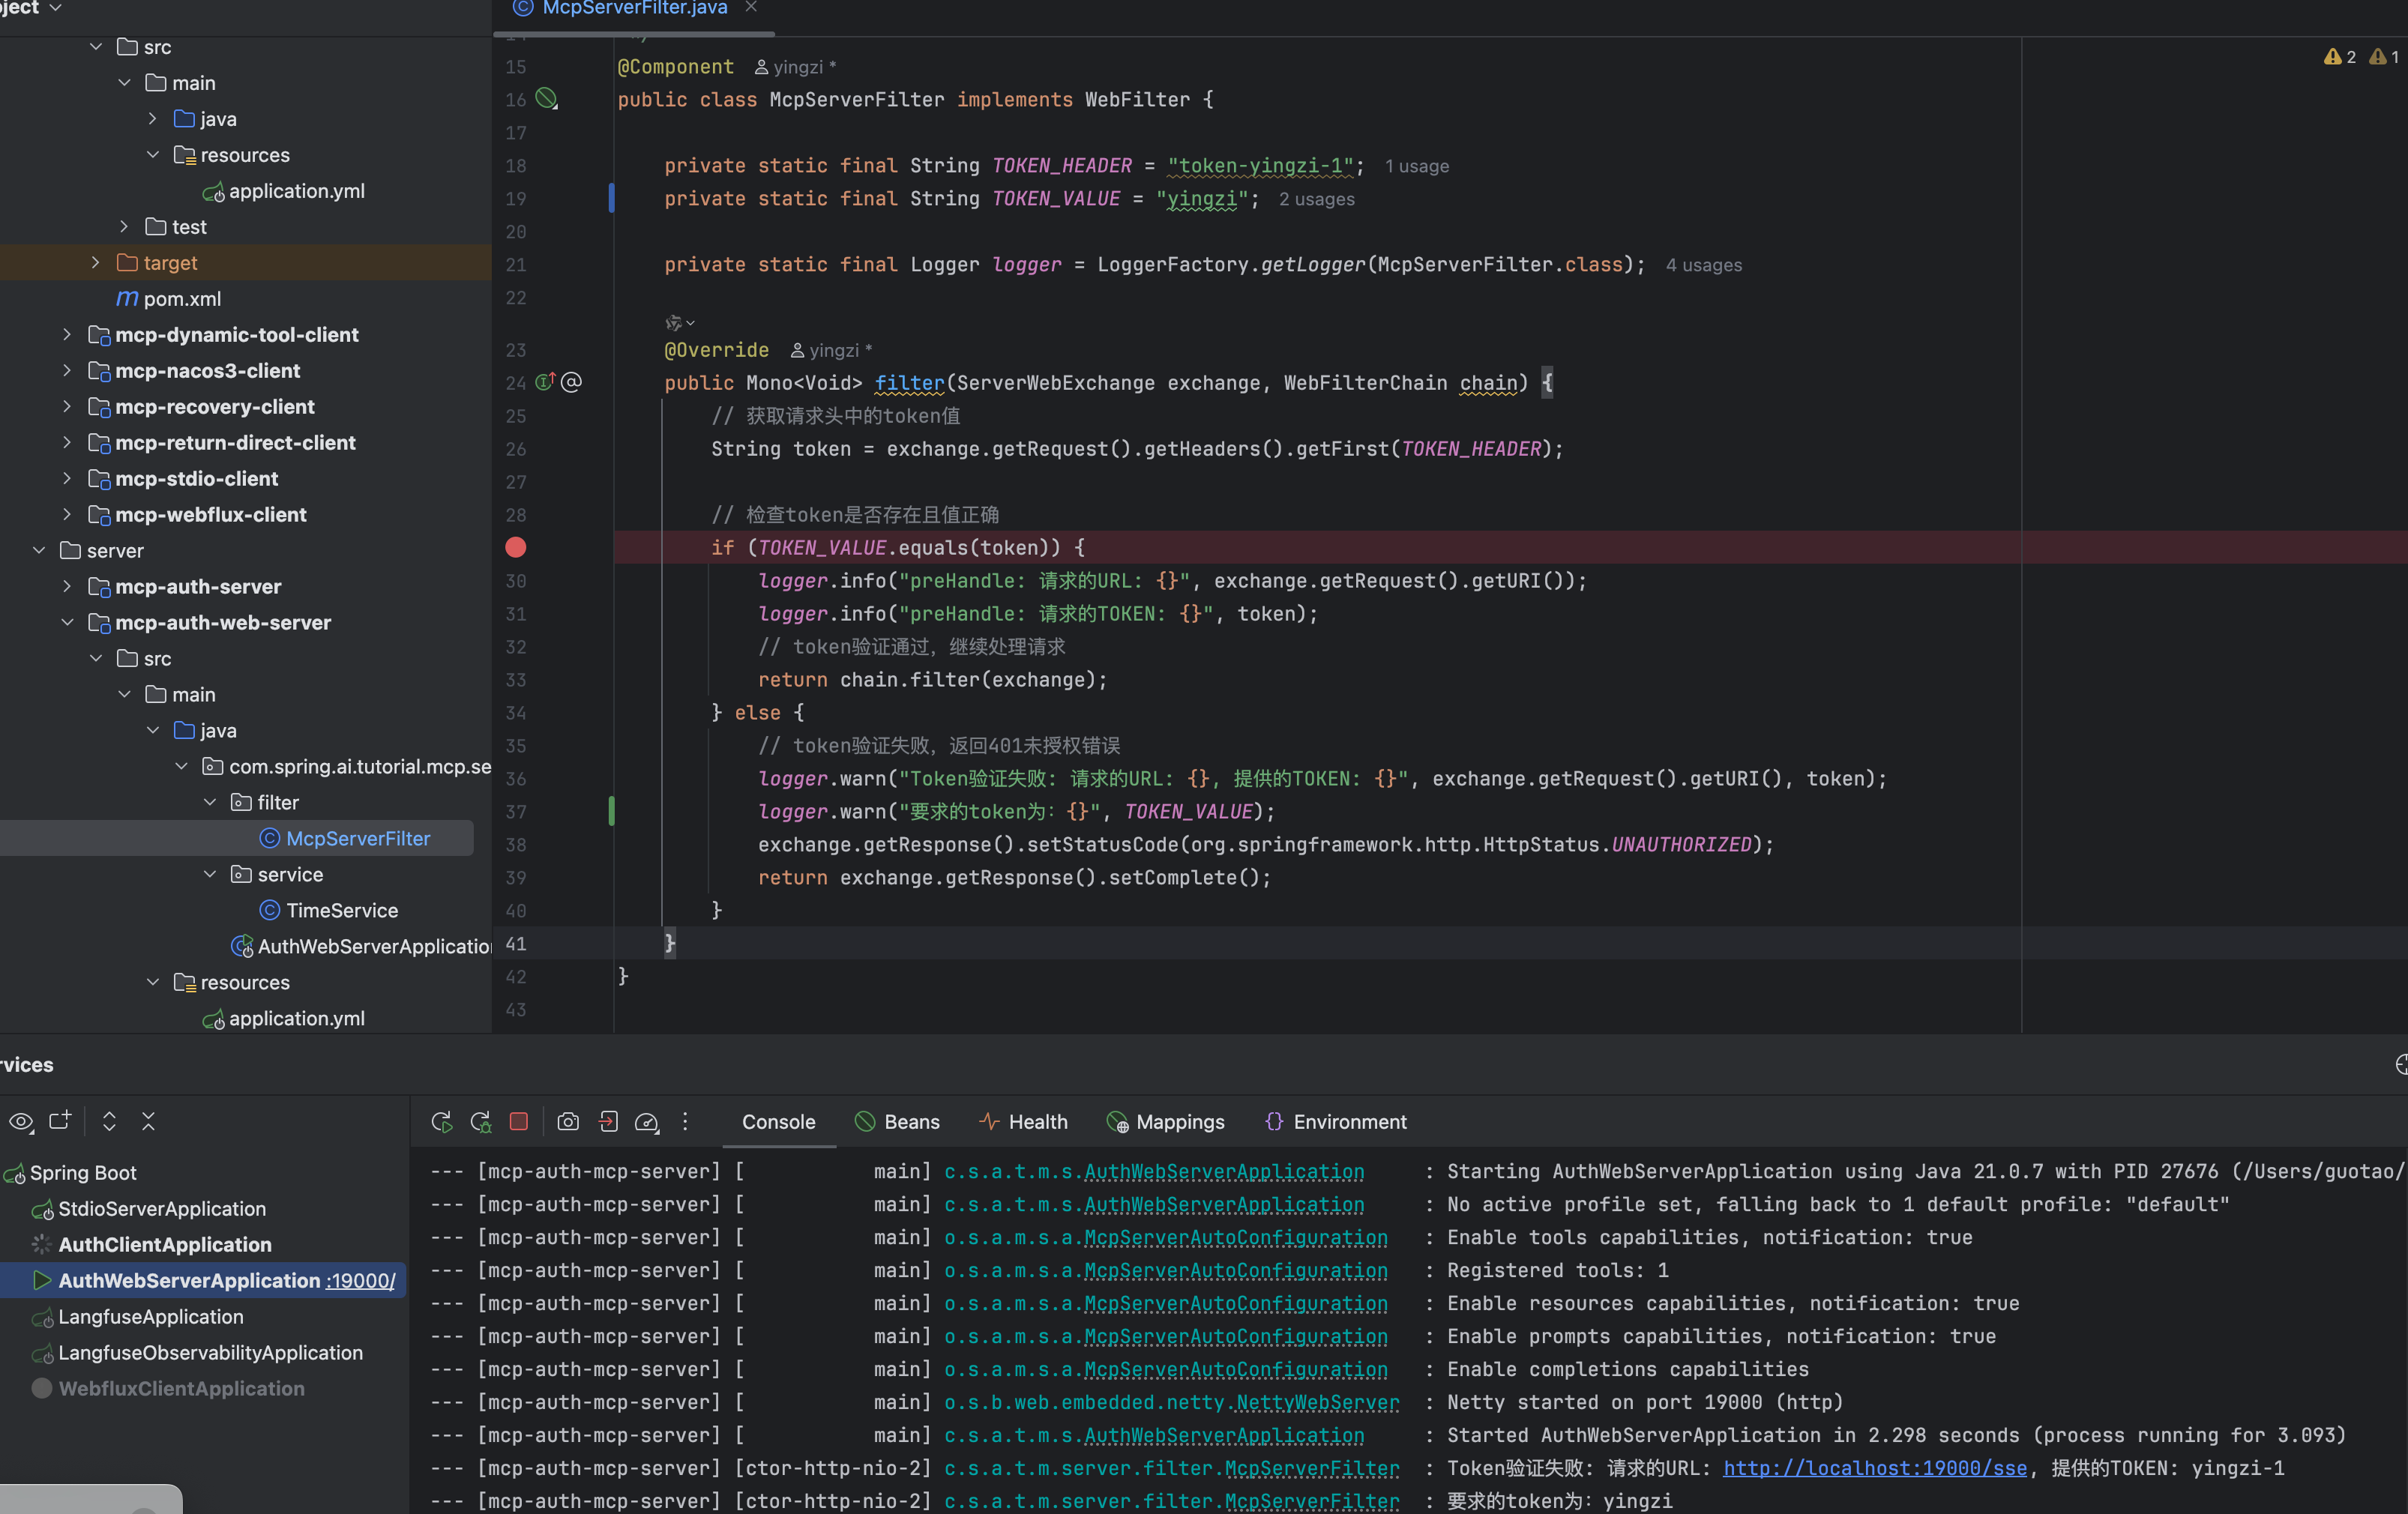
对应的 MCP Client 侧报 401 授权失败

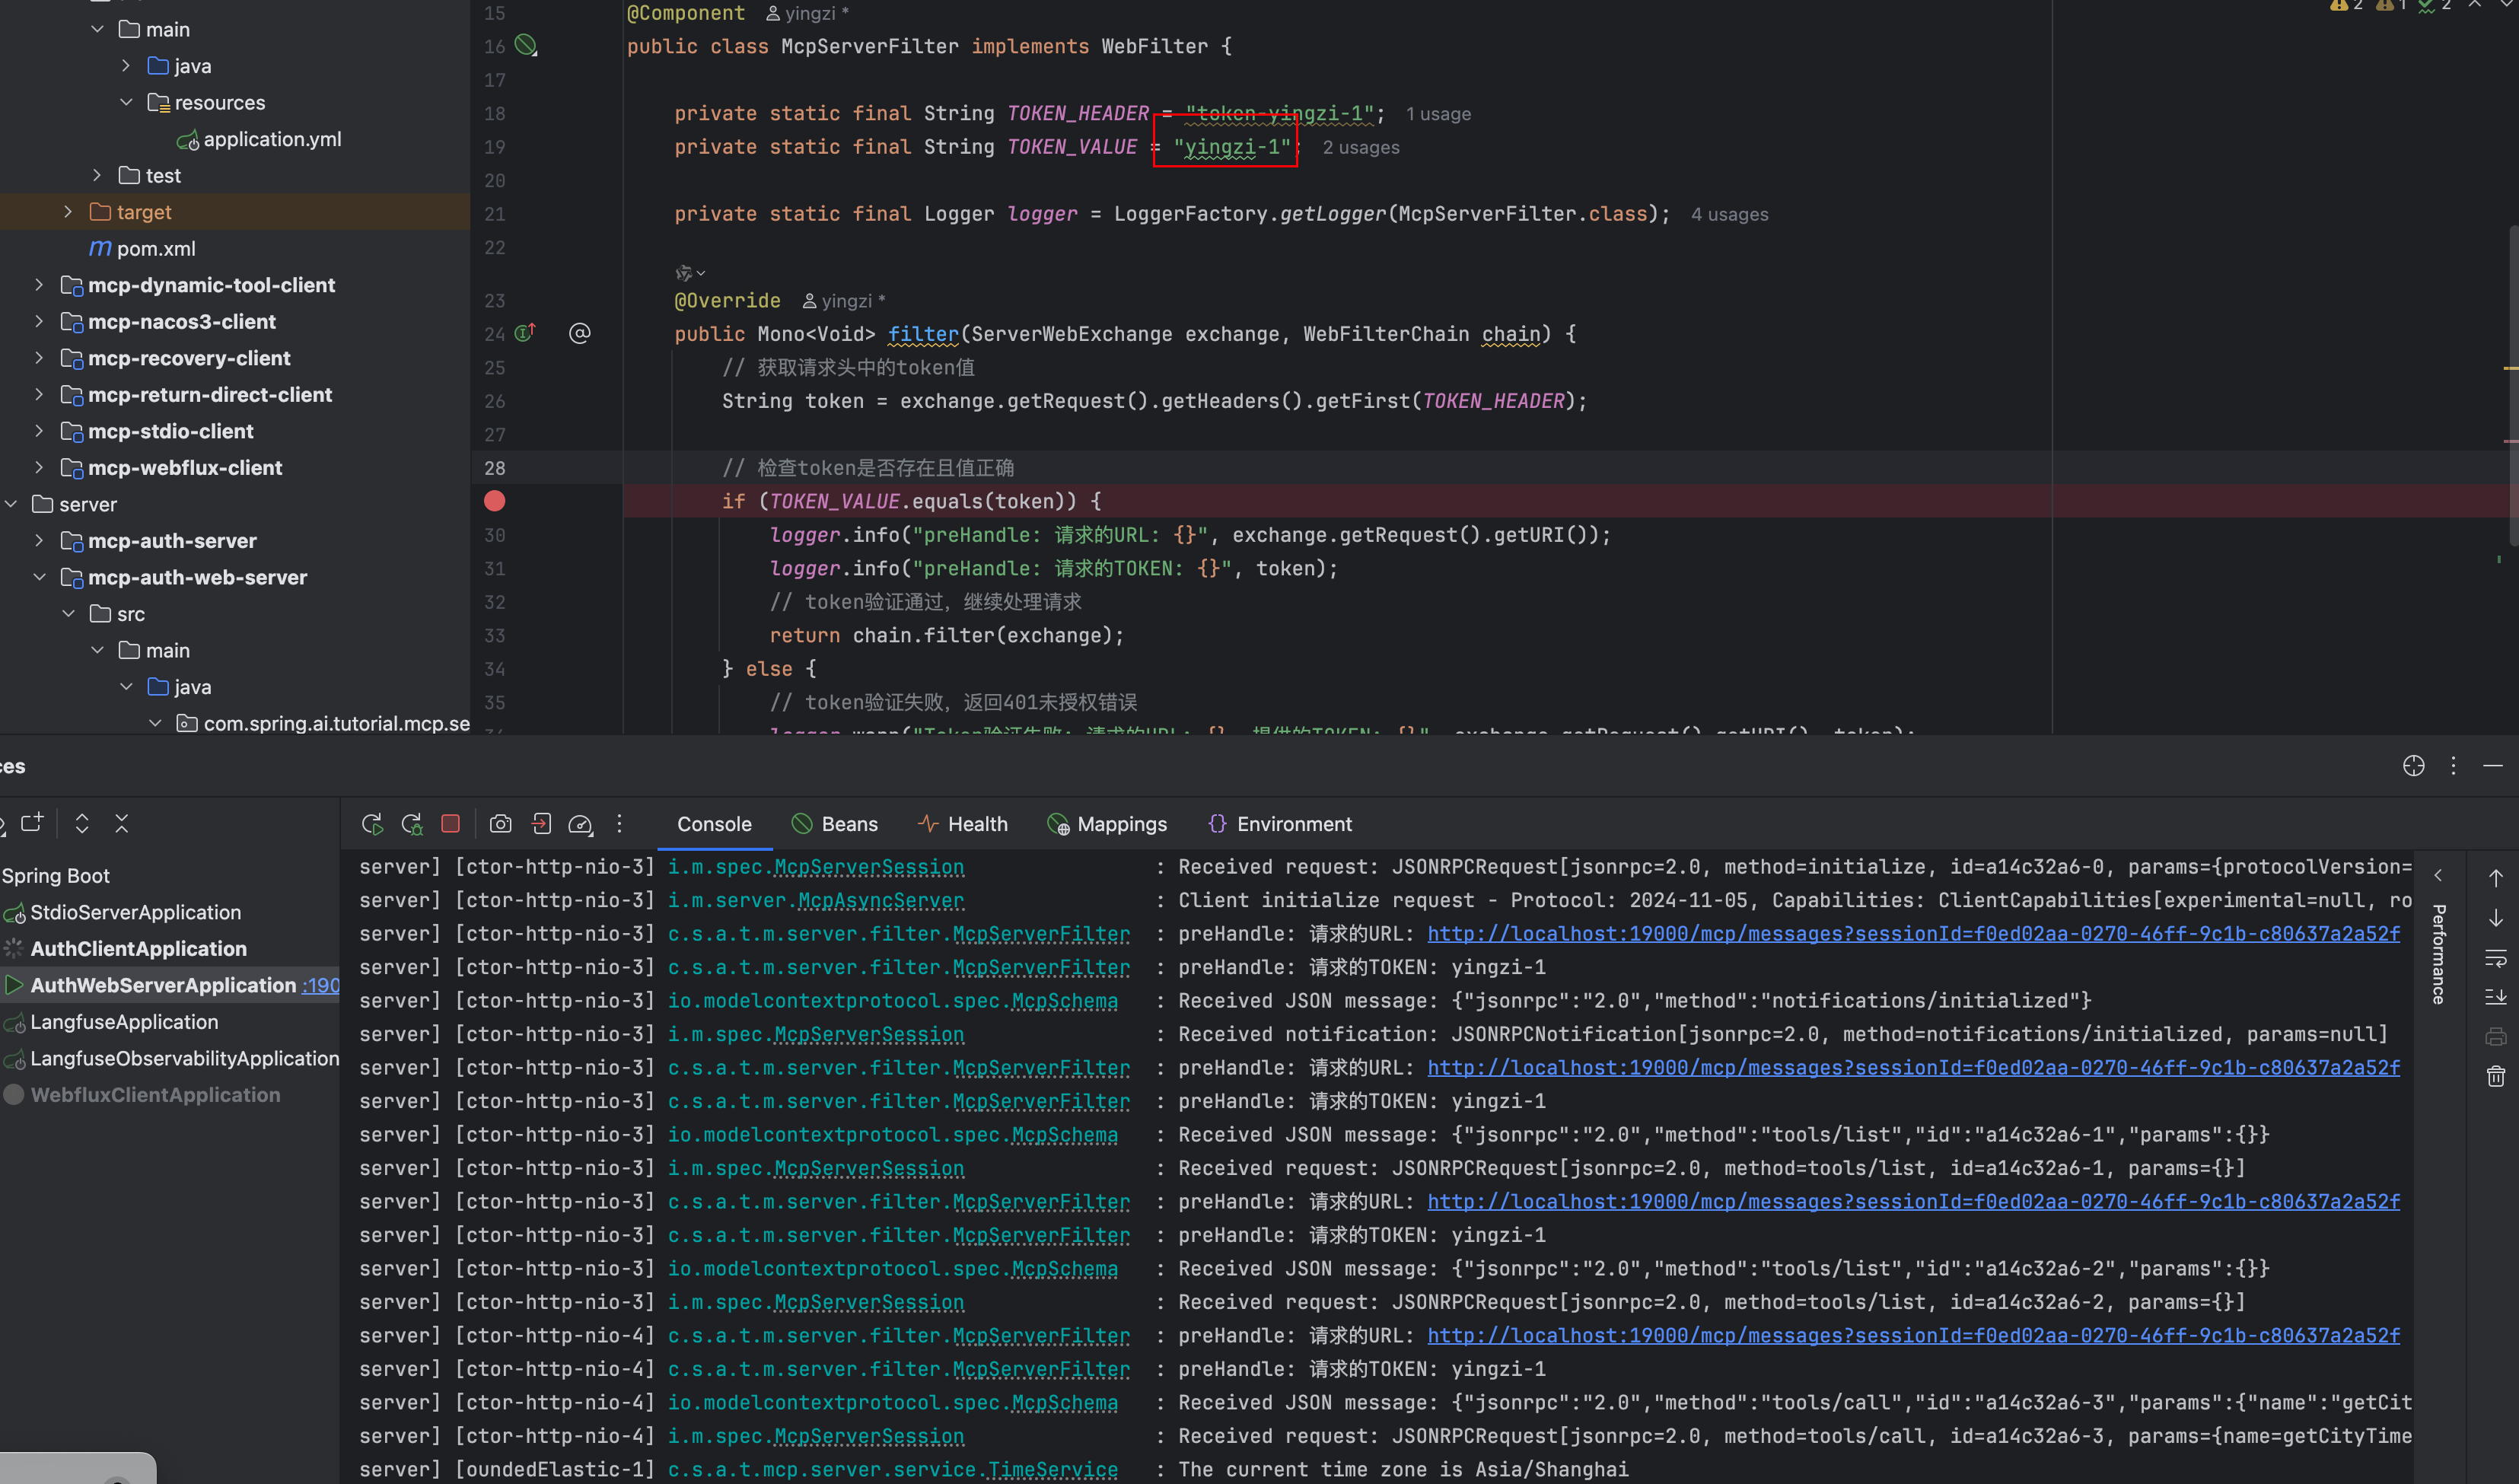
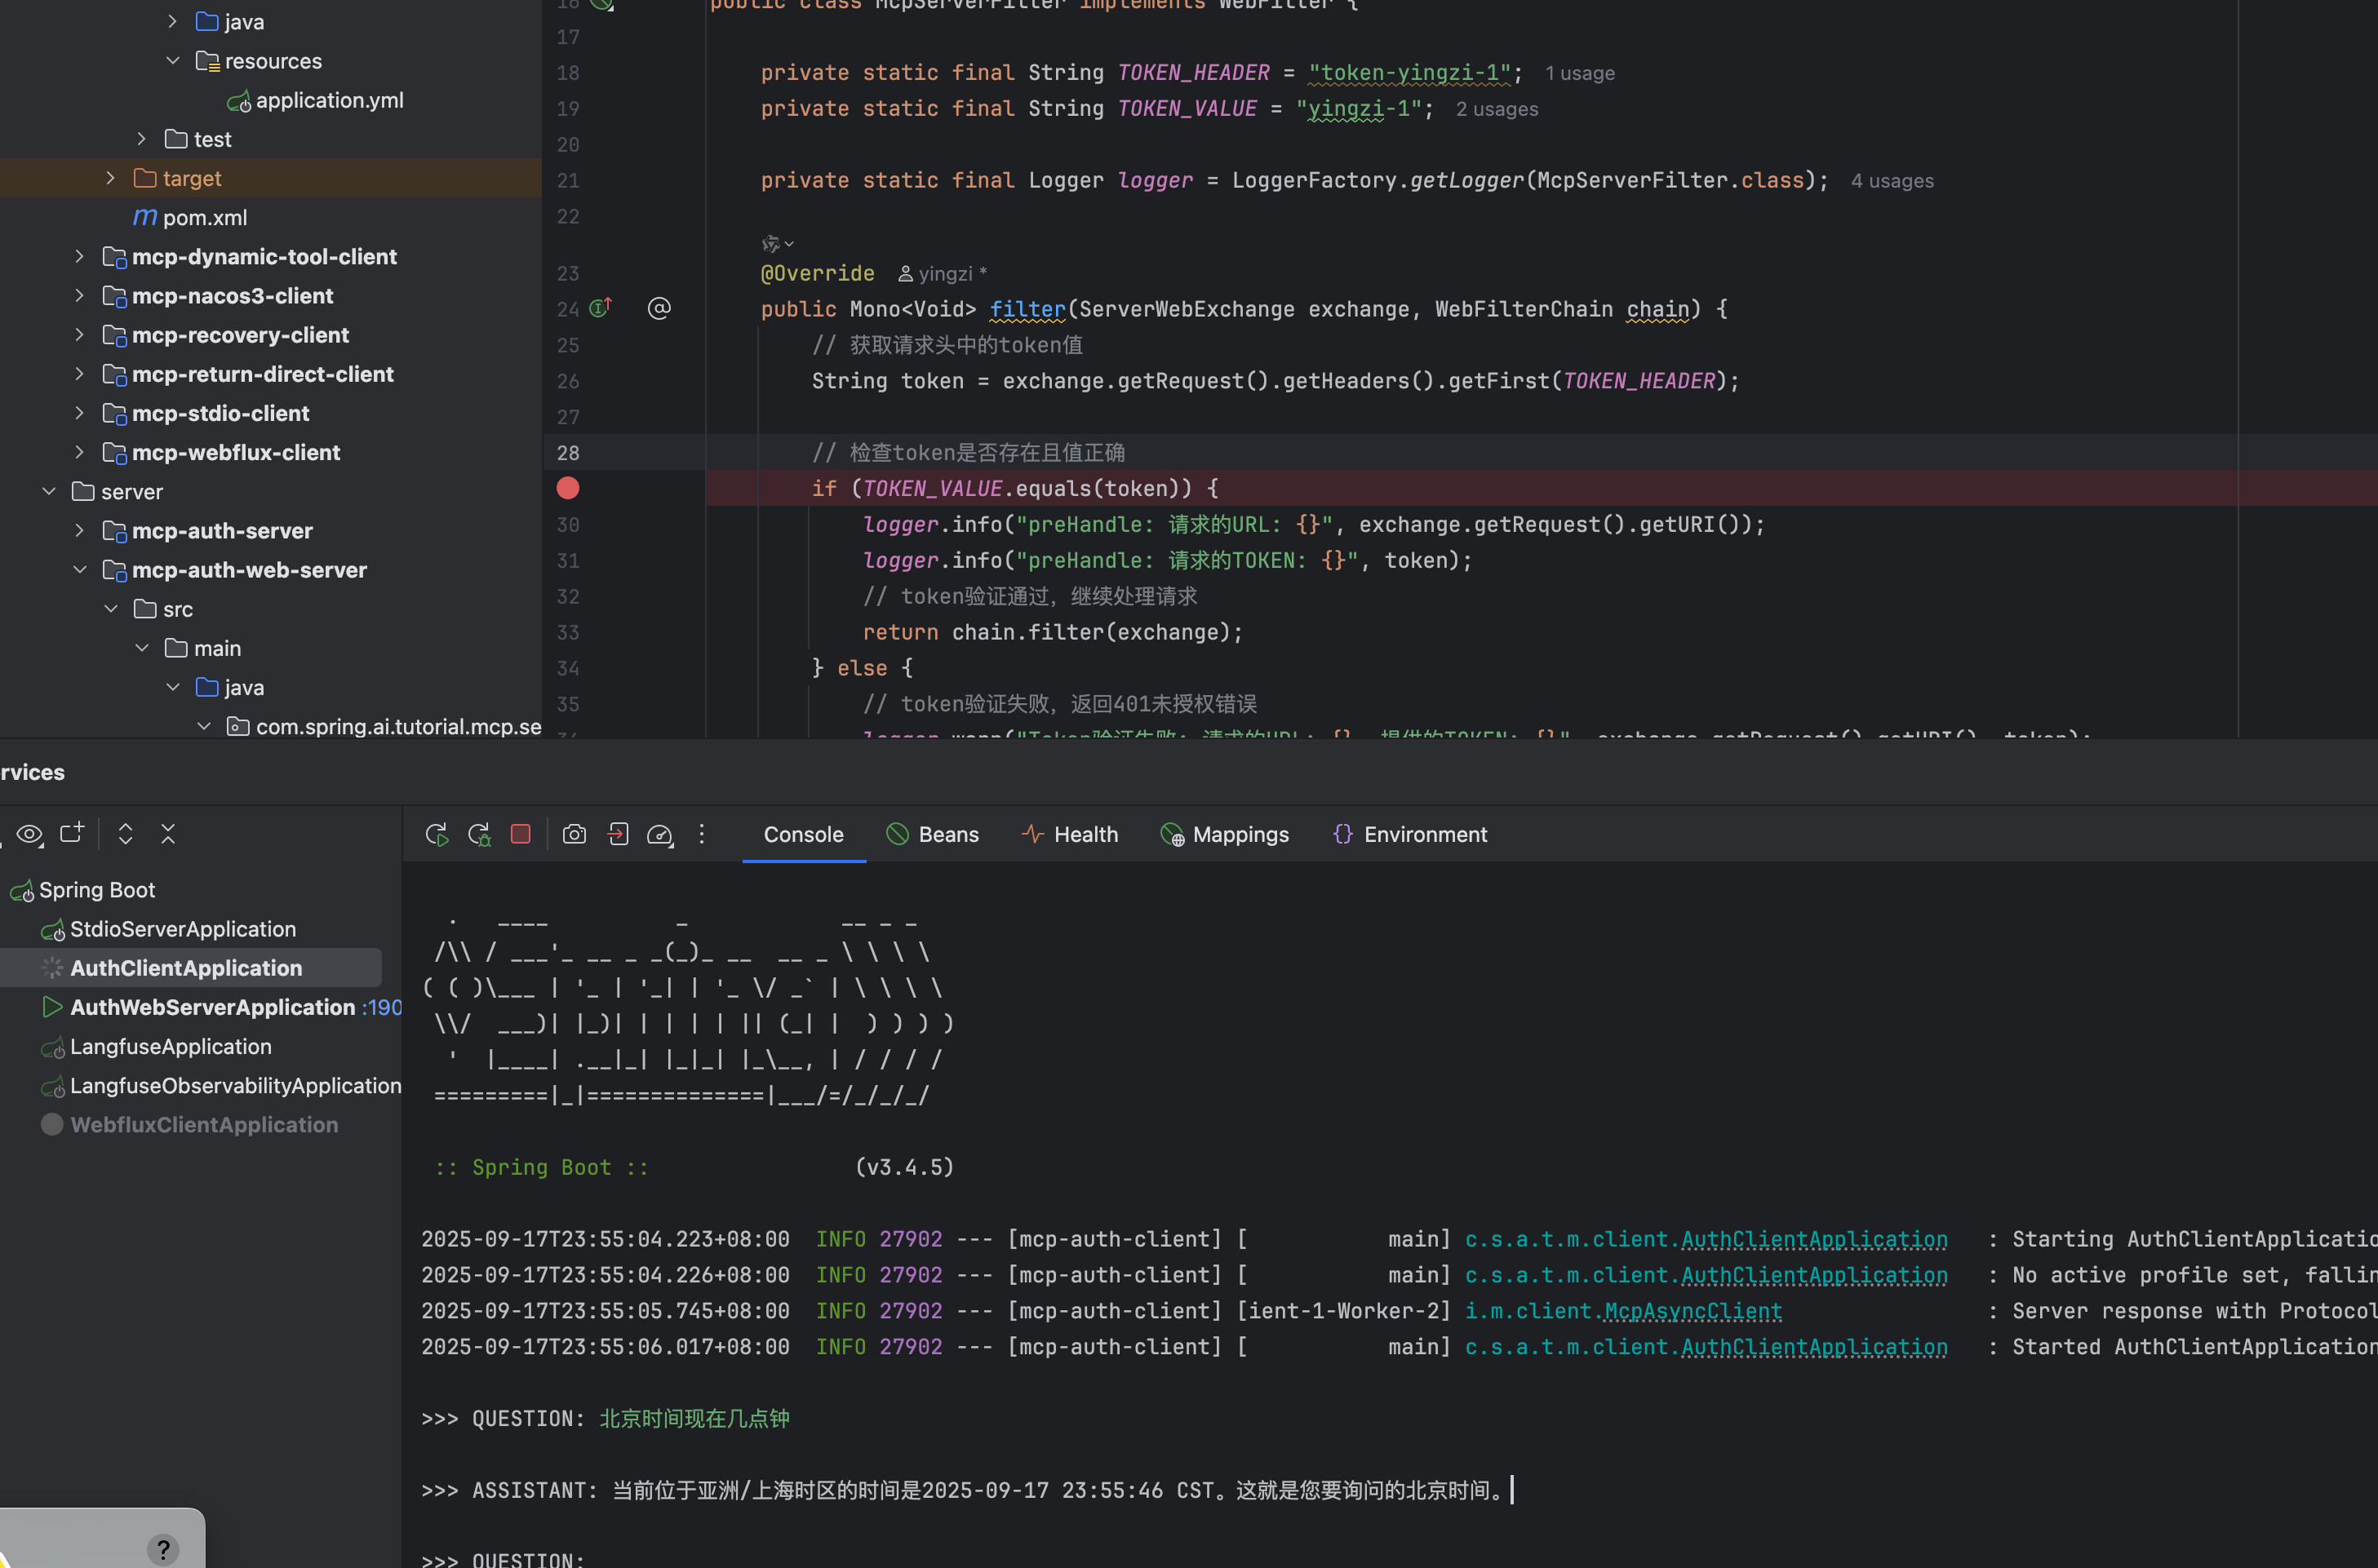
现在让我们把 MCP Server 侧的 TOKENVALUE 改为“yingzi-1”,会发现 MCP Server 验证通过,且 MCP Client 侧正常访问
往期资料
Spring AI + Spring Ai Aliabba系统化学习资料
本教程将采用2025年5月20日正式的GA版,给出如下内容
- 核心功能模块的快速上手教程
- 核心功能模块的源码级解读
- Spring ai alibaba增强的快速上手教程 + 源码级解读
版本:
- JDK21
- SpringBoot3.4.5
- SpringAI 1.0.1
- SpringAI Alibaba 1.0.0.3+
免费渠道:
- 为Spring Ai Alibaba开源社区解决解决有效的issue or 提供有价值的PR,可免费获取上述教程
- 往届微信推文
收费服务:收费69.9元
- 飞书在线云文档
- Spring AI会员群教程代码答疑
- 若Spring AI、Spring AI Alibaba教程内容无法满足业务诉求,可定制提供解决方案,带价私聊
学习交流圈
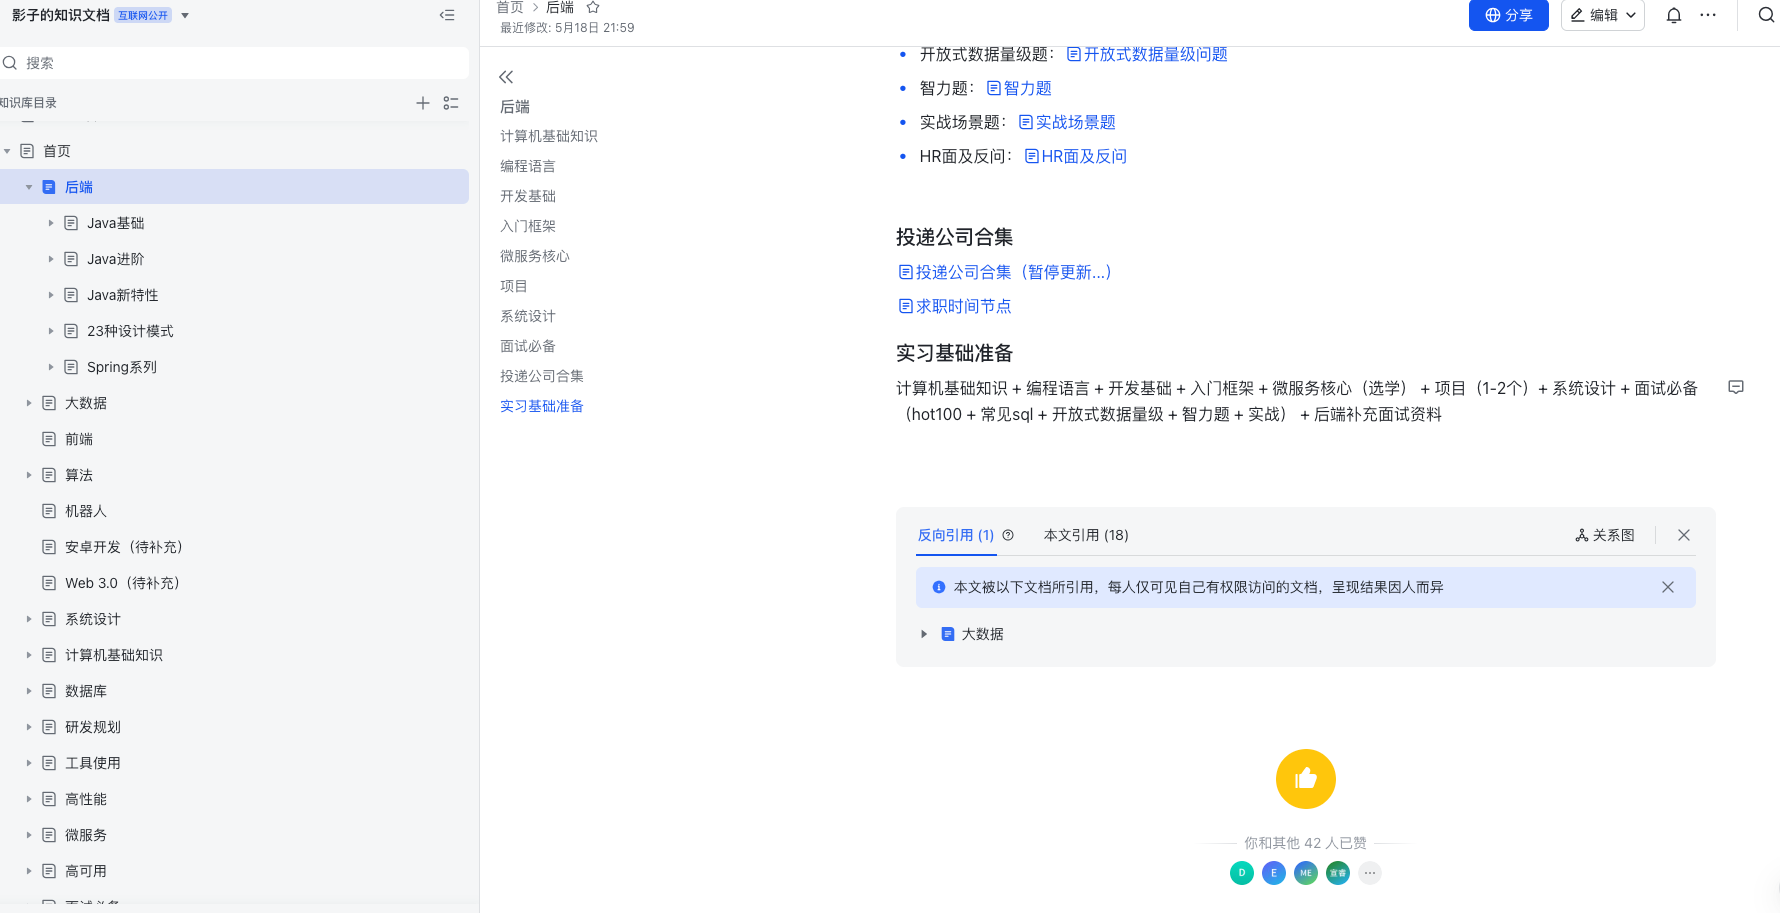
你好,我是影子,曾先后在🐻、新能源、老铁就职,兼任Spring AI Alibaba开源社区的Committer。目前新建了一个交流群,一个人走得快,一群人走得远,另外,本人长期维护一套飞书云文档笔记,涵盖后端、大数据系统化的面试资料,可私信免费获取


 813
813

 被折叠的 条评论
为什么被折叠?
被折叠的 条评论
为什么被折叠?
 到【灌水乐园】发言


