数据增广这个知识点放在炼丹手册里说,总感觉不太搭,不过看到bag of freebies这个词,心想也算是提高训练精度的一种手段,那就和其他knowledge躺在一起吧。
数据增广的目的是增加训练样本的多样性,使得训练的模型具有更强的泛化能力。但是在实际应用中,并非所有的增广方式都适用当前的训练数据,我们需要根据自己的数据集特征来确定应该使用哪几种数据增广方式,常见的方式包括:
- 几何增强
- 色彩增强
- 遮挡增强
- 混叠增强
- 域迁移
先上原图,因为数据增广一般出现在训练过程中,所以在检测任务中部分增广策略需要对图片和标签同时转换:

几何增强
图像翻转包括水平翻转和垂直翻转,水平翻转的变换矩阵为:
![H = \begin {equation}{ \left[\begin{array} {CCC} -1 & 0 & 0\\ 0 & 1 & 0 \\ 0 & 0 & 1 \end{array} \right]} \end{equation}](https://i-blog.csdnimg.cn/blog_migrate/2cab279a384d8111e5f2768132d91a2d.png)
Python代码如下:
def random_horizontal_flip(image, bboxes):
    """
    Randomly horizontal flip the image and correct the box
    :param image: BGR image data shape is [height, width, channel]
    :param bboxes: bounding box shape is [num, 4]
    :return: result
    """
    if random.random() < 0.5:
        _, w, _ = image.shape
        image = image[:, ::-1, :]
        bboxes[:, [0, 2]] = w - bboxes[:, [2, 0]]

    return image, bboxes
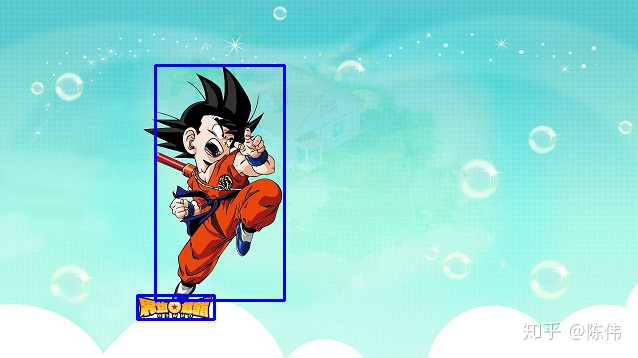
水平翻转效果图:
垂直翻转的变换矩阵为:
![H = \begin {equation}{ \left[\begin{array} {CCC} 1 & 0 & 0\\ 0 & -1 & 0 \\ 0 & 0 & 1 \end{array} \right]} \end{equation}](https://i-blog.csdnimg.cn/blog_migrate/643593f1d7943ec1c1f026cea4d48f8d.png)
Python代码如下:
def random_vertical_flip(image, bboxes):
    """
    Randomly vertical flip the image and correct the box
    :param image: BGR image data shape is [height, width, channel]
    :param bboxes: bounding box shape is [num, 4]
    :return: result
    """
    if random.random() < 0.5:
        h, _, _ = image.shape
        image = image[::-1, :, :]
        bboxes[:, [1, 3]] = h - bboxes[:, [3, 1]]

    return image, bboxes
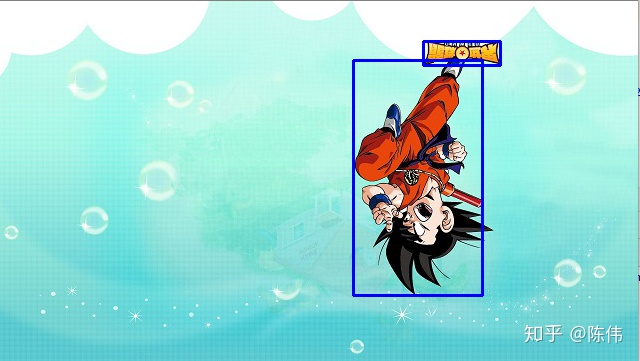
垂直翻转效果图:
图像旋转是指以某个点(默认为图像中心点)为中心进行任意角度的旋转,其变换矩阵为:
![H = \begin {equation}{ \left[\begin{array} {CCC} cos\theta & -sin\theta & 0\\ sin\theta & cos\theta & 0 \\ 0 & 0 & 1 \end{array} \right]} \end{equation}](https://i-blog.csdnimg.cn/blog_migrate/fda23ee9eabf2fde06892218bb99ffb2.png)
Python代码实现如下:
def random_rotate(image, bboxes, angle=5, scale=1.):
    """
    rotate image and bboxes
    :param image: BGR image data shape is [height, width, channel]
    :param bboxes: all bounding box in the image. shape is [x_min, y_min, x_max, y_max]
    :param angle: rotate angle
    :param scale: default is 1
    :return: rotate_image:
             rotate_bboxes:
    """
    height = image.shape[0]
    width = image.shape[1]

    # rotate image
    rangle = np.deg2rad(angle)
    new_width = (abs(np.sin(rangle) * height) + abs(np.cos(rangle) * width)) * scale
    new_height = (abs(np.cos(rangle) * height) + abs(np.sin(rangle) * width)) * scale

    rot_mat = cv2.getRotationMatrix2D((new_width * 0.5, new_height * 0.5), angle, scale)
    rot_move = np.dot(rot_mat, np.array([(new_width-width)*0.5, (new_height-height)*0.5,0]))
    rot_mat[0, 2] += rot_move[0]
    rot_mat[1, 2] += rot_move[1]
    # warpAffine
    rot_image = cv2.warpAffine(image, rot_mat, (int(math.ceil(new_width)), int(math.ceil(new_height))), flags=cv2.INTER_LANCZOS4)

    # rotate bboxes
    rot_bboxes = list()

    for bbox in bboxes:
        xmin = bbox[0]
        ymin = bbox[1]
        xmax = bbox[2]
        ymax = bbox[3]
        point1 = np.dot(rot_mat, np.array([(xmin + xmax) / 2, ymin, 1]))
        point2 = np.dot(rot_mat, np.array([xmax, (ymin + ymax) / 2, 1]))
        point3 = np.dot(rot_mat, np.array([(xmin + xmax) / 2, ymax, 1]))
        point4 = np.dot(rot_mat, np.array([xmin, (ymin + ymax) / 2, 1]))
        # 合并np.array
        concat = np.vstack((point1, point2, point3, point4))
        # 改变array类型
        concat = concat.astype(np.int32)
        # 得到旋转后的坐标
        rx, ry, rw, rh = cv2.boundingRect(concat)
        rx_min = rx
        ry_min = ry
        rx_max = rx + rw
        ry_max = ry + rh
        # 加入list中
        rot_bboxes.append([rx_min, ry_min, rx_max, ry_max])

    return rot_image, rot_bboxes
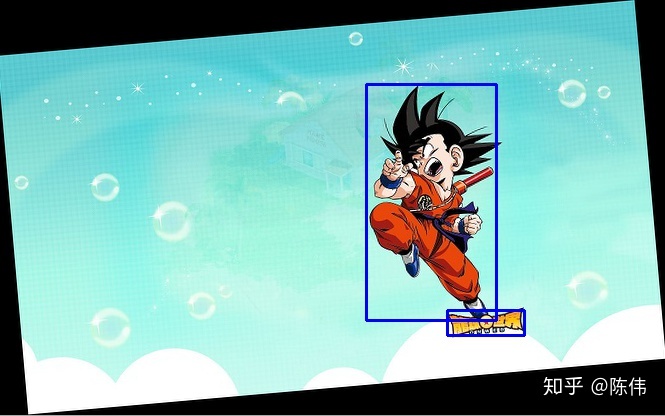
图像旋转效果图:
图像仿射变换是通过一系列原子变换复合实现,具体包括:平移(Translation)、缩放(Scale)、旋转(Rotation)、翻转(Flip)和错切(Shear)。
Python代码实现如下:
def random_affine(image, bboxes, degrees=10, translate=.1, scale=.1, shear=10, border=(0, 0)):
    height = image.shape[0] + border[0] * 2
    width = image.shape[1] + border[1] * 2

    # Rotation and Scale
    R = np.eye(3)
    a = random.uniform(-degrees, degrees)
    # a += random.choice([-180, -90, 0, 90])  # add 90deg rotations to small rotations
    s = random.uniform(1 - scale, 1 + scale)
    # s = 2 ** random.uniform(-scale, scale)
    R[:2] = cv2.getRotationMatrix2D(angle=a, center=(image.shape[1] / 2, image.shape[0] / 2), scale=s)

    # Translation
    T = np.eye(3)
    T[0, 2] = random.uniform(-translate, translate) * image.shape[1] + border[1]  # x translation (pixels)
    T[1, 2] = random.uniform(-translate, translate) * image.shape[0] + border[0]  # y translation (pixels)

    # Shear
    S = np.eye(3)
    S[0, 1] = math.tan(random.uniform(-shear, shear) * math.pi / 180)  # x shear (deg)
    S[1, 0] = math.tan(random.uniform(-shear, shear) * math.pi / 180)  # y shear (deg)

    # Combined rotation matrix
    M = S @ T @ R  # ORDER IS IMPORTANT HERE!!
    if (border[0] != 0) or (border[1] != 0) or (M != np.eye(3)).any():  # image changed
        image = cv2.warpAffine(image, M[:2], dsize=(width, height), flags=cv2.INTER_LINEAR, borderValue=(114, 114, 114))

    # Transform label coordinates
    n = len(bboxes)
    if n:
        # warp points
        xy = np.ones((n * 4, 3))
        xy[:, :2] = bboxes[:, [0, 1, 2, 3, 0, 3, 2, 1]].reshape(n * 4, 2)  # x1y1, x2y2, x1y2, x2y1
        xy = (xy @ M.T)[:, :2].reshape(n, 8)

        # create new boxes
        x = xy[:, [0, 2, 4, 6]]
        y = xy[:, [1, 3, 5, 7]]
        xy = np.concatenate((x.min(1), y.min(1), x.max(1), y.max(1))).reshape(4, n).T

        # reject warped points outside of image
        xy[:, [0, 2]] = xy[:, [0, 2]].clip(0, width)
        xy[:, [1, 3]] = xy[:, [1, 3]].clip(0, height)
        w = xy[:, 2] - xy[:, 0]
        h = xy[:, 3] - xy[:, 1]
        area = w * h
        area0 = (bboxes[:, 2] - bboxes[:, 0]) * (bboxes[:, 3] - bboxes[:, 1])
        ar = np.maximum(w / (h + 1e-16), h / (w + 1e-16))  # aspect ratio
        i = (w > 2) & (h > 2) & (area / (area0 * s + 1e-16) > 0.2) & (ar < 20)

        bboxes = bboxes[i]
        bboxes[:, 0:4] = xy[i]

    return image, bboxes
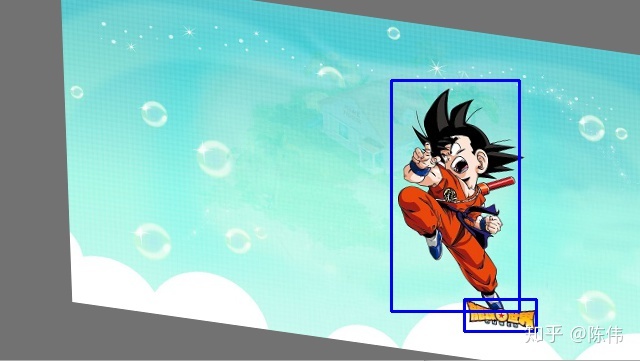
仿射变换效果图:
图像缩放是指对当前图像进行任意尺度的缩放,其变换矩阵为:
![H = \begin {equation}{ \left[\begin{array} {CCC} s_{x} & 0 & 0\\ 0 & s_{y} & 0 \\ 0 & 0 & 1 \end{array} \right]} \end{equation}](https://i-blog.csdnimg.cn/blog_migrate/b5c624314a15ca3c924904675f49bd41.png)
向外缩放时,最终图像尺寸将大于原始图像尺寸,然后从新图像中剪切出一个部分,其大小等于原始图像。向内缩放时,因为会缩小图像大小,迫使我们对超出边界的内容做出假设。这里没有直接使用resize操作,考虑到resize造成目标的特征扭曲,所以实现上改为letterbox resize,保证原始图像的宽高比。
Python代码实现如下:
def letterbox_resize(image, target_size, bboxes, interp=0):
    """
    Resize the image and correct the bbox accordingly.
    :param image: BGR image data shape is [height, width, channel]
    :param bboxes: bounding box shape is [num, 4]
    :param target_size: input size
    :param interp:
    :return: result
    """
    origin_height, origin_width = image.shape[:2]
    input_height, input_width = target_size

    resize_ratio = min(input_width / origin_width, input_height / origin_height)
    resize_width = int(resize_ratio * origin_width)
    resize_height = int(resize_ratio * origin_height)

    image_resized = cv2.resize(image, (resize_width, resize_height), interpolation=interp)
    image_padded = np.full((input_height, input_width, 3), 128, np.uint8)

    dw = int((input_width - resize_width) / 2)
    dh = int((input_height - resize_height) / 2)

    image_padded[dh:resize_height + dh, dw:resize_width + dw, :] = image_resized

    if bboxes is None:
        return image_padded
    else:
        # xmin, xmax, ymin, ymax
        bboxes[:, [0, 2]] = bboxes[:, [0, 2]] * resize_ratio + dw
        bboxes[:, [1, 3]] = bboxes[:, [1, 3]] * resize_ratio + dh
        return image_padded, bboxes
图像缩放效果图:
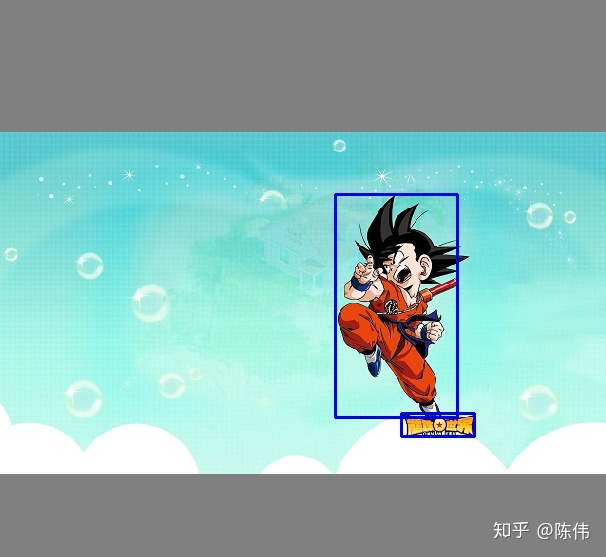
图像裁剪是指采用图像差值方式,对图像进行裁剪缩放,或者先将图像放大然后裁剪出原始图像大小。
Python代码实现如下:
def random_crop(image, bboxes):
    """
    Randomly crop the image and correct the box
    :param image: BGR image data shape is [height, width, channel]
    :param bboxes: bounding box shape is [num, 4]
    :return: result
    """
    if random.random() < 0.5:
        h, w, _ = image.shape
        max_bbox = np.concatenate([np.min(bboxes[:, 0:2], axis=0), np.max(bboxes[:, 2:4], axis=0)], axis=-1)

        max_l_trans = max_bbox[0]
        max_u_trans = max_bbox[1]
        max_r_trans = w - max_bbox[2]
        max_d_trans = h - max_bbox[3]

        crop_xmin = max(0, int(max_bbox[0] - random.uniform(0, max_l_trans)))
        crop_ymin = max(0, int(max_bbox[1] - random.uniform(0, max_u_trans)))
        crop_xmax = max(w, int(max_bbox[2] + random.uniform(0, max_r_trans)))
        crop_ymax = max(h, int(max_bbox[3] + random.uniform(0, max_d_trans)))

        image = image[crop_ymin: crop_ymax, crop_xmin: crop_xmax]

        bboxes[:, [0, 2]] = bboxes[:, [0, 2]] - crop_xmin
        bboxes[:, [1, 3]] = bboxes[:, [1, 3]] - crop_ymin

    return image, bboxes
图像裁剪效果图:

图像平移是将原始图像朝一个方向移动,平移出去的部分用0补齐。
Python代码如下:
def random_translate(image, bboxes):
    """
    translation image and bboxes
    :param image: BGR image data shape is [height, width, channel]
    :param bbox: bounding box_1 shape is [num, 4]
    :return: result
    """
    if random.random() < 0.5:
        h, w, _ = image.shape
        max_bbox = np.concatenate([np.min(bboxes[:, 0:2], axis=0), np.max(bboxes[:, 2:4], axis=0)], axis=-1)

        max_l_trans = max_bbox[0]
        max_u_trans = max_bbox[1]
        max_r_trans = w - max_bbox[2]
        max_d_trans = h - max_bbox[3]

        tx = random.uniform(-(max_l_trans - 1), (max_r_trans - 1))
        ty = random.uniform(-(max_u_trans - 1), (max_d_trans - 1))

        M = np.array([[1, 0, tx], [0, 1, ty]])
        image = cv2.warpAffine(image, M, (w, h))

        bboxes[:, [0, 2]] = bboxes[:, [0, 2]] + tx
        bboxes[:, [1, 3]] = bboxes[:, [1, 3]] + ty

    return image, bboxes
图像平移效果图:

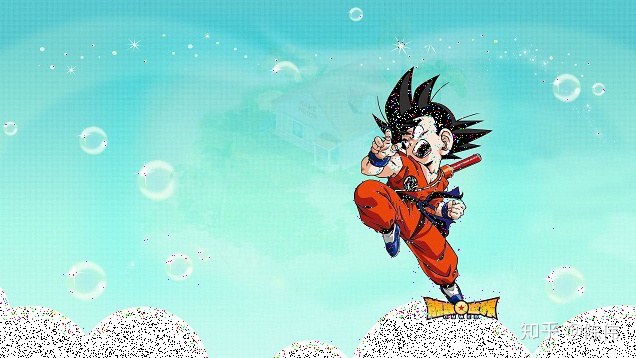
噪声处理是指对图像按像素值添加高斯噪声或者椒盐噪声进行模糊处理,因为当神经网络尝试去学习高频特征的时候很容易过拟合。零均值高斯噪声能有效的扭曲高斯噪声,这也意味着低频部分(通常是想要的部分)也会损毁,但是你的网络能从中学到目标信息。
Python代码实现如下:
def random_noise(image):
    """
    add noise into image
    :param image: BGR image data shape is [height, width, channel]
    :return: result
    """
    shape = image.shape
    noise = np.random.normal(size=(shape[0], shape[1]))

    out = np.zeros_like(image)
    for i in range(3):
        out[:, :, i] = image[:, :, i]+noise
    out[out > 255] = 255
    out[out < 0] = 0
    out = out.astype('uint8')
    return out
添加噪声效果图:
色彩增强
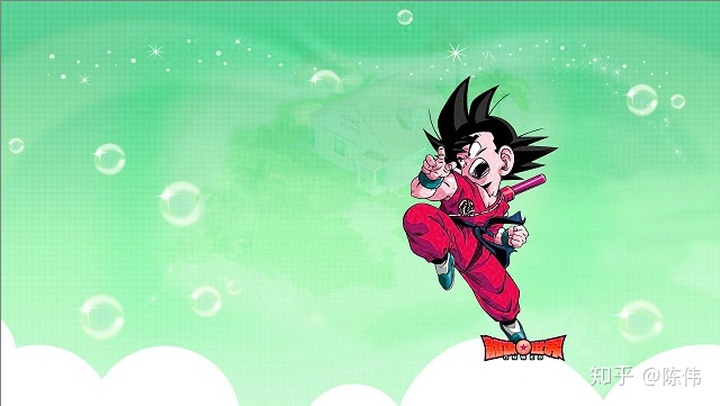
色彩变换主要包括图像亮度、饱和度、对比度变化以及HSV空间增强。
Python代码实现上我整合在了一起:
def random_color_distort(image, brightness=32, hue=18, saturation=0.5, value=0.5):
    """
    randomly distort image color include brightness, hue, saturation, value.
    :param image: BGR image data shape is [height, width, channel]
    :param brightness:
    :param hue:
    :param saturation:
    :param value:
    :return: result
    """
    def random_hue(image_hsv, hue):
        if random.random() < 0.5:
            hue_delta = np.random.randint(-hue, hue)
            image_hsv[:, :, 0] = (image_hsv[:, :, 0] + hue_delta) % 180
        return image_hsv

    def random_saturation(image_hsv, saturation):
        if random.random() < 0.5:
            saturation_mult = 1 + np.random.uniform(-saturation, saturation)
            image_hsv[:, :, 1] *= saturation_mult
        return image_hsv

    def random_value(image_hsv, value):
        if random.random() < 0.5:
            value_mult = 1 + np.random.uniform(-value, value)
            image_hsv[:, :, 2] *= value_mult
        return image_hsv

    def random_brightness(image, brightness):
        if random.random() < 0.5:
            image = image.astype(np.float32)
            brightness_delta = int(np.random.uniform(-brightness, brightness))
            image = image + brightness_delta
        return np.clip(image, 0, 255)

    # brightness
    image = random_brightness(image, brightness)
    image = image.astype(np.uint8)

    # color jitter
    image_hsv = cv2.cvtColor(image, cv2.COLOR_BGR2HSV).astype(np.float32)

    if np.random.randint(0, 2):
        image_hsv = random_value(image_hsv, value)
        image_hsv = random_saturation(image_hsv, saturation)
        image_hsv = random_hue(image_hsv, hue)
    else:
        image_hsv = random_saturation(image_hsv, saturation)
        image_hsv = random_hue(image_hsv, hue)
        image_hsv = random_value(image_hsv, value)

    image_hsv = np.clip(image_hsv, 0, 255)
    image = cv2.cvtColor(image_hsv.astype(np.uint8), cv2.COLOR_HSV2BGR)

    return image
色彩增强效果图如下:
遮挡增强
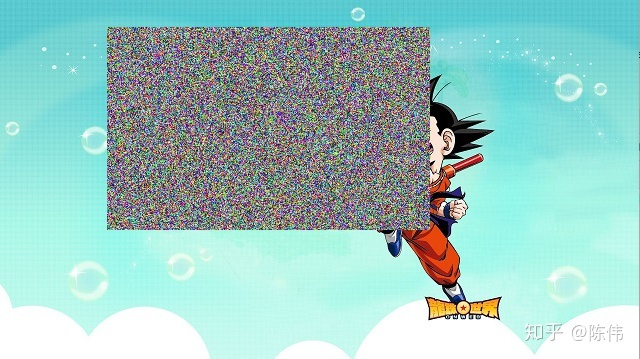
随机擦除(Random Erasing)是用来模拟目标遮挡,试想把物体遮挡一部分后依然能够分类正确,那么肯定会迫使网络利用局部未遮挡的数据进行识别,加大了训练难度,一定程度会提高泛化能力。具体操作是随机选择一个区域,然后采用随机值进行覆盖,模拟遮挡场景。对于目标检测任务有三种随机擦除方法:IRE、ORE、I+ORE
- IRE:对整张图像使用随机擦除
- ORE:对图像中的每一个目标框区域都使用随机擦除
- I+ORE:IRE和ORE的结合。
Python代码实现如下:
def random_erasing(image, s_min=0.02, s_max=0.4, ratio=0.3):
    """
    rotate image and bboxes
    :param image: BGR image data shape is [height, width, channel]
    :param s_min: min erasing area region
    :param s_max: max erasing area region
    :param ratio: min aspect ratio range of earsing region
    :return: result
    """
    assert len(image.shape) == 3, 'image should be a 3 dimension numpy array'
    if random.random() < 0.5:
        while True:
            s = (s_min, s_max)
            r = (ratio, 1 / ratio)

            Se = random.uniform(*s) * image.shape[0] * image.shape[1]
            re = random.uniform(*r)

            He = int(round(math.sqrt(Se * re)))
            We = int(round(math.sqrt(Se / re)))

            xe = random.randint(0, image.shape[1])
            ye = random.randint(0, image.shape[0])

            if xe + We <= image.shape[1] and ye + He <= image.shape[0]:
                image[ye: ye + He, xe: xe + We, :] = np.random.randint(low=0, high=255, size=(He, We, image.shape[2]))
                return image

    return image
随机擦除效果图:
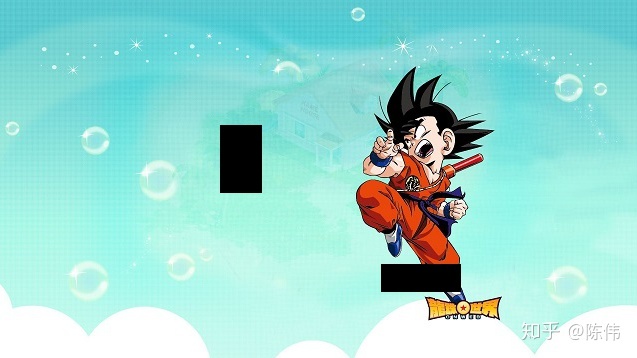
随机切断(Random CutOut)类似于随机擦除(Random Erasing)也是模拟遮挡,但是实现比Random Erasing简单,随机选择一个固定大小的正方形区域,在矩形范围内,所有的值都被设置为0,或者其他纯色值,为了避免填充0值对训练的影响,应该对数据进行中心归一化操作norm到0。在原文中指出区域的大小比形状重要,所以cutout只要是正方形就行。
Python代码实现如下
def CutOut(image, hole_num=2, max_size=(100, 100), min_size=(20, 20), fill_value_mode='zero'):
    """
    cut out mask into image
    :param image: BGR image data shape is [height, width, channel]
    :return: result
    """
    if random.random() < 0.5:
        height, width, _ = image.shape

        if fill_value_mode == 'zero':
            f = np.zeros
            param = {'shape': (height, width, 3)}
        elif fill_value_mode == 'one':
            f = np.one
            param = {'shape': (height, width, 3)}
        else:
            f = np.random.uniform
            param = {'low': 0, 'high': 255, 'size': (height, width, 3)}
        mask = np.ones((height, width, 3), np.int32)

        for index in range(hole_num):
            y = np.random.randint(height)
            x = np.random.randint(width)

            h = np.random.randint(min_size[0], max_size[0] + 1)
            w = np.random.randint(min_size[1], max_size[1] + 1)

            y1 = np.clip(y - h // 2, 0, height)
            y2 = np.clip(y + h // 2, 0, height)
            x1 = np.clip(x - w // 2, 0, width)
            x2 = np.clip(x + w // 2, 0, width)

            mask[y1: y2, x1: x2, :] = 0.

        image = np.where(mask, image, f(**param))

    return np.uint8(image)
CutOut效果图:
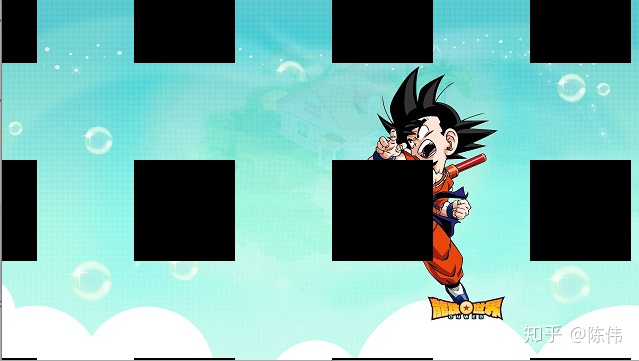
网格掩码(Gridmask)是在CutOut的基础上进行修改,考虑到CutOut容易出现删除掉整个目标,导致信息过多丢失;或者一点目标也没有删除,有失增广意义。所以Gridmask通过生成一个与原图分辨率相同的掩码,并将掩码进行随机翻转,与原图相乘,从而得到增广后的图像,通过超参数控制生成的掩码网格的大小。
Python代码实现如下:
def random_gridmask(image, mode=1, rotate=1, r_ratio=0.5, d_ratio=1):
    """
    rotate image and bboxes
    :param image: BGR image data shape is [height, width, channel]
    :param mode:
    :param rotate:
    :param r_ratio:
    :param d_ratio:
    :return: result
    """
    if random.random() < 0.5:
        h = image.shape[0]
        w = image.shape[1]
        d1 = 2
        d2 = min(h, w)
        hh = int(1.5 * h)
        ww = int(1.5 * w)
        d = np.random.randint(d1, d2)

        if rotate == 1:
            l = np.random.randint(1, d)
        else:
            l = min(max(int(d * r_ratio + 0.5), 1), d - 1)
        mask = np.ones((hh, ww), np.float32)
        st_h = np.random.randint(d)
        st_w = np.random.randint(d)

        for i in range(hh // d):
            s = d * i + st_h
            t = min(s + l, hh)
            mask[s:t, :] *= 0
        for i in range(ww // d):
            s = d * i + st_w
            t = min(s + l, ww)
            mask[:, s:t] *= 0

        r = np.random.randint(rotate)
        mask = Image.fromarray(np.uint8(mask))
        mask = mask.rotate(r)
        mask = np.asarray(mask)
        #  mask = 1*(np.random.randint(0,3,[hh,ww])>0)
        mask = mask[(hh - h) // 2:(hh - h) // 2 + h, (ww - w) // 2:(ww - w) // 2 + w]

        if mode == 1:
            mask = 1 - mask
        mask = np.expand_dims(mask.astype(np.uint8), axis=2)
        mask = np.tile(mask, [1, 1, 3])

        image = image * mask
    return image
网格掩码效果图:
混叠增强
图像混叠主要对batch后的数据进行融合生成一幅图像,需要注意的是:这类数据增广方式不仅对输入进行调整,同时还进行标签的调整以及损失函数的调整。主要包括以下两种:
- Mixup
- Cutmix
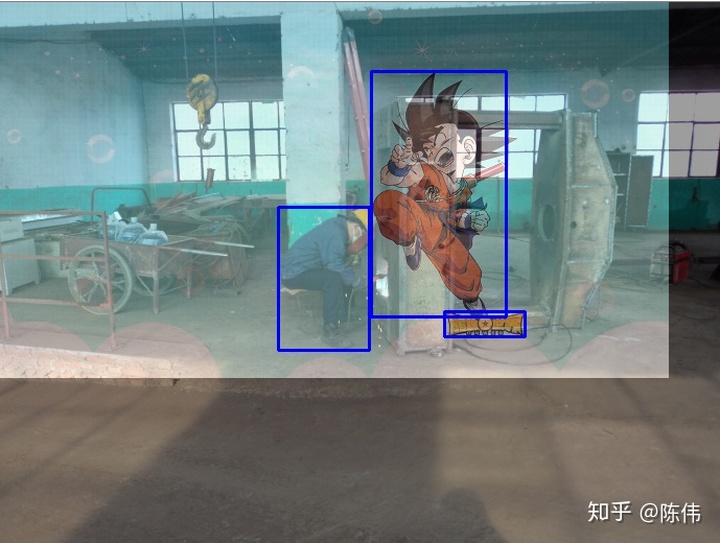
Mixup是指对两幅不同的图像通过blending方式进行混叠,同时标签也需要进行混叠。
Python代码实现如下:
def mix_up(image_1, image_2, bbox_1, bbox_2):
    """
    Overlay images and tags
    :param image_1: BGR image_1 data shape is [height, width, channel]
    :param image_2: BGR image_2 data shape is [height, width, channel]
    :param bbox_1: bounding box_1 shape is [num, 4]
    :param bbox_2: bounding box_2 shape is [num, 4]
    :return:
    """
    height = max(image_1.shape[0], image_2.shape[0])
    width = max(image_1.shape[1], image_2.shape[1])

    mix_image = np.zeros(shape=(height, width, 3), dtype='float32')

    rand_num = np.random.beta(1.5, 1.5)
    rand_num = max(0, min(1, rand_num))

    mix_image[:image_1.shape[0], :image_1.shape[1], :] = image_1.astype('float32') * rand_num
    mix_image[:image_2.shape[0], :image_2.shape[1], :] += image_2.astype('float32') * (1. - rand_num)

    mix_image = mix_image.astype('uint8')

    # the last element of the 2nd dimention is the mix up weight
    bbox_1 = np.concatenate((bbox_1, np.full(shape=(bbox_1.shape[0], 1), fill_value=rand_num)), axis=-1)
    bbox_2 = np.concatenate((bbox_2, np.full(shape=(bbox_2.shape[0], 1), fill_value=1. - rand_num)), axis=-1)
    mix_bbox = np.concatenate((bbox_1, bbox_2), axis=0)
    mix_bbox = mix_bbox.astype(np.int32)

    return mix_image, mix_bbox
Mixup效果图如下:
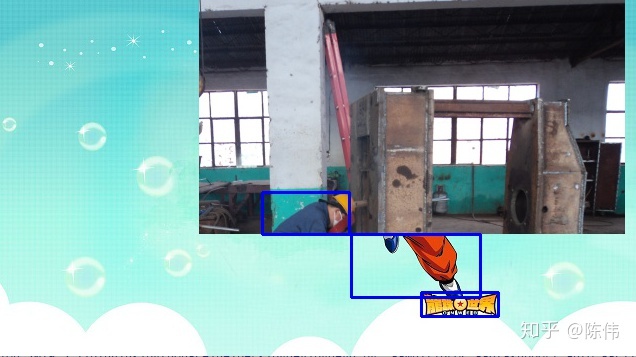
Cutmix是从A图中随机截取一个矩形区域,用该矩形区域的像素替换掉B图中对应的矩形区域,从而形成一张新的组合图片。同时,把标签按照一定的比例(矩形区域所占整张图的面积)进行线性组合计算损失。表达形式如下:


Python实现代码如下:
def rand_bbox(shape, lam):
    height = shape[0]
    width = shape[1]
    cut_ratio = np.sqrt(1. - lam)
    cut_height = np.int(height * cut_ratio)
    cut_width = np.int(width * cut_ratio)

    # uniform
    cx = np.random.randint(width)
    cy = np.random.randint(height)

    bbx1 = np.clip(cx - cut_width // 2, 0, width)
    bby1 = np.clip(cy - cut_height // 2, 0, height)
    bbx2 = np.clip(cx + cut_width // 2, 0, width)
    bby2 = np.clip(cy + cut_height // 2, 0, height)

    return bbx1, bby1, bbx2, bby2

def cut_mix(image_1, image_2, bboxes_1, bboxes_2, beta=1.0):
    # use uniform dist
    lam = np.random.beta(beta, beta)

    image_cutmix = image_1.copy()
    bbx1, bby1, bbx2, bby2 = rand_bbox(image_cutmix.shape, lam)
    image_cutmix[bby1:bby2, bbx1:bbx2, :] = image_2[bby1:bby2, bbx1:bbx2, :]

    # adjust lambda to exactly match pixel ratio
    lam = 1 - ((bbx2 - bbx1) * (bby2 - bby1) / (image_1.shape[0] * image_1.shape[1]))

    for i in range(len(bboxes_1)):
        if bboxes_1[i, 0] > bbx1 and bboxes_1[i, 0] < bbx2 and bboxes_1[i, 1] > bby1 and bboxes_1[i, 1] < bby2 and \
                bboxes_1[i, 2] > bbx1 and bboxes_1[i, 2] < bbx2 and bboxes_1[i, 3] > bby1 and bboxes_1[i, 3] > bby2:
            bboxes_1[i, 0] = np.maximum(bbx1, bboxes_1[i, 0])
            bboxes_1[i, 1] = np.maximum(bby2, bboxes_1[i, 1])
            bboxes_1[i, 2] = np.minimum(bbx2, bboxes_1[i, 2])
            bboxes_1[i, 3] = np.maximum(bby1, bboxes_1[i, 3])
        elif bboxes_1[i, 0] > bbx1 and bboxes_1[i, 0] < bbx2 and bboxes_1[i, 1] < bby1 and bboxes_1[i, 1] < bby2 and \
                bboxes_1[i, 2] > bbx1 and bboxes_1[i, 2] < bbx2 and bboxes_1[i, 3] > bby1 and bboxes_1[i, 3] < bby2:
            bboxes_1[i, 0] = np.maximum(bbx1, bboxes_1[i, 0])
            bboxes_1[i, 1] = np.minimum(bby1, bboxes_1[i, 1])
            bboxes_1[i, 2] = np.minimum(bbx2, bboxes_1[i, 2])
            bboxes_1[i, 3] = np.minimum(bby1, bboxes_1[i, 3])
        elif bboxes_1[i, 0] > bbx1 and bboxes_1[i, 0] < bbx2 and bboxes_1[i, 1] > bby1 and bboxes_1[i, 1] < bby2 and \
             bboxes_1[i, 2] > bbx1 and bboxes_1[i, 2] > bbx2 and bboxes_1[i, 3] > bby1 and bboxes_1[i, 3] < bby2:
            bboxes_1[i, 0] = np.maximum(bbx2, bboxes_1[i, 0])
            bboxes_1[i, 1] = np.maximum(bby1, bboxes_1[i, 1])
            bboxes_1[i, 2] = np.maximum(bbx2, bboxes_1[i, 2])
            bboxes_1[i, 3] = np.minimum(bby2, bboxes_1[i, 3])
        elif bboxes_1[i, 0] < bbx1 and bboxes_1[i, 0] < bbx2 and bboxes_1[i, 1] > bby1 and bboxes_1[i, 1] < bby2 and \
             bboxes_1[i, 2] > bbx1 and bboxes_1[i, 2] < bbx2 and bboxes_1[i, 3] > bby1 and bboxes_1[i, 3] < bby2:
            bboxes_1[i, 0] = np.minimum(bbx1, bboxes_1[i, 0])
            bboxes_1[i, 1] = np.maximum(bby1, bboxes_1[i, 1])
            bboxes_1[i, 2] = np.minimum(bbx1, bboxes_1[i, 2])
            bboxes_1[i, 3] = np.minimum(bby2, bboxes_1[i, 3])
        elif bboxes_1[i, 0] > bbx1 and bboxes_1[i, 0] < bbx2 and bboxes_1[i, 1] > bby1 and bboxes_1[i, 1] < bby2 and \
                bboxes_1[i, 2] > bbx1 and bboxes_1[i, 2] < bbx2 and bboxes_1[i, 3] > bby1 and bboxes_1[i, 3] < bby2:
            bboxes_1[i, 0] = 0
            bboxes_1[i, 1] = 0
            bboxes_1[i, 2] = 0
            bboxes_1[i, 3] = 0

    for i in range(len(bboxes_2)):
        bboxes_2[i, 0] = np.maximum(bbx1, bboxes_2[i, 0])
        bboxes_2[i, 1] = np.maximum(bby1, bboxes_2[i, 1])
        bboxes_2[i, 2] = np.minimum(bbx2, bboxes_2[i, 2])
        bboxes_2[i, 3] = np.minimum(bby2, bboxes_2[i, 3])
        if (bboxes_2[i, 0] > bboxes_2[i, 2]) or (bboxes_2[i, 1] > bboxes_2[i, 3]):
            bboxes_2[i, 0] = 0
            bboxes_2[i, 1] = 0
            bboxes_2[i, 2] = 0
            bboxes_2[i, 3] = 0

    bboxes_cutmix = np.concatenate([bboxes_1, bboxes_2], axis=0)

    # compute output
    # loss = criterion(output, target_a) * lam + criterion(output, target_b) * (1. - lam)
    return image_cutmix, bboxes_cutmix
Cutmix效果图如下:
简单总结下Cutout,Mixup,Cutmix这三种,看上去比较相似,cutout和cutmix就是填充区域像素值的区别;mixup和cutmix是混合两种样本方式上的区别:mixup是将两张图按比例进行插值来混合样本,cutmix是采用cut部分区域再补丁的形式去混合图像,不会有图像混合后不自然的情形:
- Cutout:随机的将样本中的部分区域cut掉,并且填充0像素值,分类的结果不变;
- Mixup:将随机的两张样本按比例混合,分类的结果按比例分配;
- Cutmix:就是将一部分区域cut掉但不填充0像素而是随机填充训练集中的其他数据的区域像素值,分类结果按一定的比例分配
域迁移
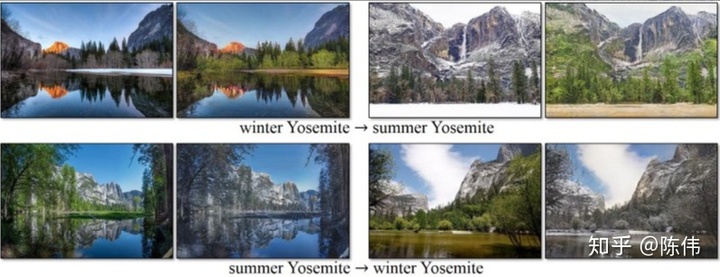
这里主要借助生成对抗网络将一个域的图像转换为另一个域的图像。需要花一定时间调一个神经网络,所以先在这就贴个图理解下意思,下图为将夏季场景与冬季场景相互转换的示例:
以上这些大部分都是传统的图像处理方式达到数据增强的效果,现在也有不少通过监督或者半监督进行增强的手段,相关文章如下,有兴趣的可以深入阅读:
《Modeling Visual Context is Key to Augmenting Object Detection Datasets》:使用目标类实例分割标注的数据进行数据增广的上下文建模
《Adversarial Learning of General Transformations for Data Augmentation》:将仿射变换学习的全局变换与编码器结构学习的局部变换结合
《On Feature Normalization and Data Augmentation》:从特征归一化的角度做数据增强


 321
321

 被折叠的 条评论
为什么被折叠?


