yolov8多batch推理,nms后处理

0. 背景

在高速公路监控视频场景下,图像分辨率大都是1920 * 1080或者2560 * 1440,远处的物体(车辆和行人等)都比较小。考虑需要对图像进行拆分,然后把拆分后的数据统一送入模型中,推理的结果然后再做nms,恢复到原始图片数据中。
这个过程中牵涉到两个方面的内容,一个是多batch推理,一个是nms。

1. 多batch

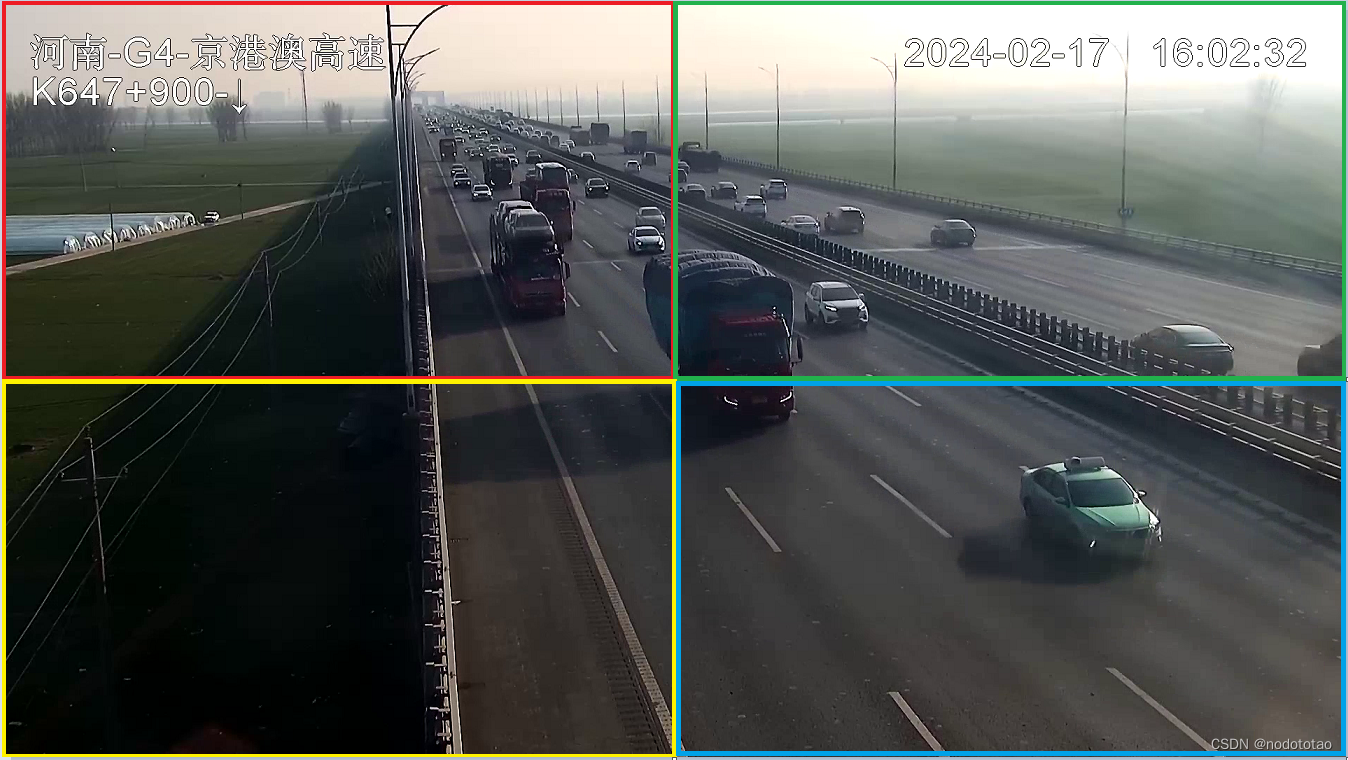
例如使用1920*1080分辨率的图片数据,把该分辨率的数据分为4份。
如果只是平均分车4份,当一个物体(比如车辆)正好处于图片中心时,则可能被拆分到4个区域,这样当后续这4个区域分别得到检测框后,无法对同一个拆分的物体进行完美覆盖。所以在拆分图片是,可用适当的大一些。

1.1 平均拆分

在这里插入图片描述

1.2 建议拆分

在这里插入图片描述
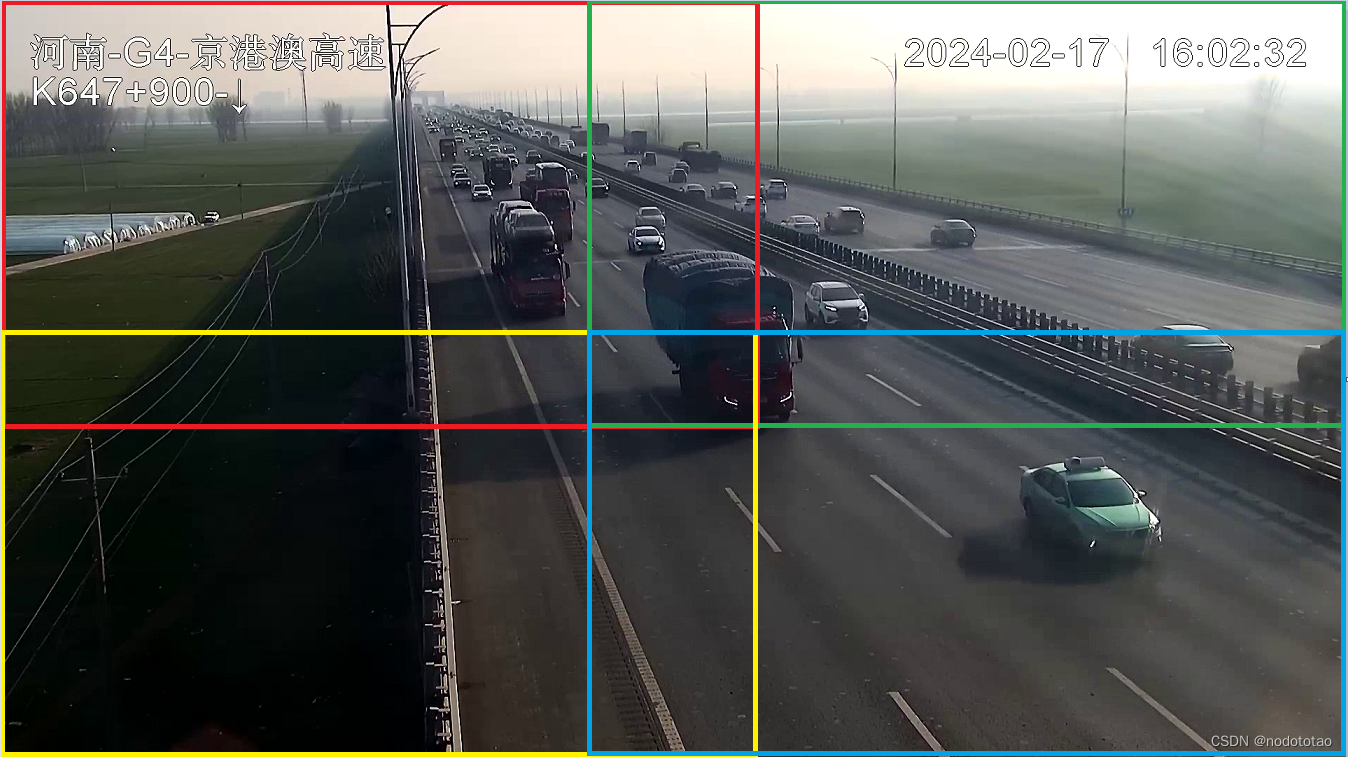
例如:1920*1080分辨率的图片,进行拆分

	h1 = int(1080 * 7 / 16) 
	h2 = int(1080 * 9 / 16) 
	w1 = int(1920 * 7 / 16)
	w2 = int(1920 * 9 / 16)
	
	img0 = frame[0:h_2, 0:w_2].copy()
    img1 = frame[0:h_2, w_1:w].copy()
    img2 = frame[h_1:h, 0:w_2].copy()
    img3 = frame[h_1:h, w_1:w].copy()

2. yolov8中多batch推理的方式

因为刚使用yolov8不久,推理过程中的数据加载逻辑重新梳理了一下,做个记录

1)推理调用入口
results = model(source=frame, save=False, conf=conf, iou=nms, save_txt=False,
 				show=False)
2)model定义
model = YOLO(MODEL)
3)YOLO类 (ultralytics/models/yolo/model.py)
from ultralytics import YOLO
class YOLO(Model):
4) Model基类
class Model(nn.Module):
(4.1)super().__init__()
  		self._load(model, task)
(4.2)def __call__(self, source=None, stream=False, **kwargs):
        """Calls the 'predict' function with given arguments to perform object detection."""
        return self.predict(source, stream, **kw
### YOLOv8 ONNX 推理代码示例 对于YOLOv8模型,在ONNX Runtime环境下进行推理可以按照如下Python代码实现: ```python import onnxruntime as ort import numpy as np from PIL import Image, ImageDraw import cv2 def preprocess(image_path): image = Image.open(image_path).convert('RGB') image_resized = image.resize((640, 640)) img_array = np.array(image_resized) # Normalize to [0, 1] and HWC to CHW format then add batch dimension. input_tensor = (img_array / 255.0)[np.newaxis, :, :, :].transpose(0, 3, 1, 2).astype(np.float32) return input_tensor def postprocess(outputs, conf_threshold=0.7, iou_threshold=0.5): boxes, scores, class_ids = [], [], [] output = outputs[0][0] for detection in output: score = float(detection[4]) if score >= conf_threshold: classes_scores = detection[5:] class_id = np.argmax(classes_scores) if classes_scores[class_id] > score: box = [ int(detection[0] - detection[2]/2), int(detection[1] - detection[3]/2), int(detection[0] + detection[2]/2), int(detection[1] + detection[3]/2)] boxes.append(box) scores.append(score) class_ids.append(class_id) indices = cv2.dnn.NMSBoxes( bboxes=boxes, scores=scores, score_threshold=conf_threshold, nms_threshold=iou_threshold ) filtered_boxes, filtered_scores, filtered_class_ids = [], [], [] for index in indices: filtered_boxes.append(boxes[index]) filtered_scores.append(scores[index]) filtered_class_ids.append(class_ids[index]) return filtered_boxes, filtered_scores, filtered_class_ids if __name__ == "__main__": session = ort.InferenceSession("yolov8.onnx", providers=['CUDAExecutionProvider']) input_name = session.get_inputs()[0].name test_image_path = "test.jpg" input_data = preprocess(test_image_path) raw_result = session.run(None, {input_name: input_data}) boxes, scores, class_ids = postprocess(raw_result) draw = ImageDraw.Draw(Image.open(test_image_path)) for idx, bbox in enumerate(boxes): label = f"{class_ids[idx]}:{scores[idx]:.2f}" draw.rectangle(bbox, outline="red", width=3) draw.text((bbox[0], bbox[1]), label, fill="white") result_img = Image.open(test_image_path) result_img.show() ``` 上述代码展示了如何加载一个预训练好的YOLOv8 ONNX模型,并通过给定的一张图像执行目标检测任务。此过程涉及到了输入数据的前处理以及输出结果后的后处理操作[^1]。
评论 14
添加红包

请填写红包祝福语或标题

红包个数最小为10个

红包金额最低5元

当前余额3.43前往充值 >
需支付:10.00
成就一亿技术人!
领取后你会自动成为博主和红包主的粉丝 规则
hope_wisdom
发出的红包
实付
使用余额支付
点击重新获取
扫码支付
钱包余额 0

抵扣说明:

1.余额是钱包充值的虚拟货币,按照1:1的比例进行支付金额的抵扣。
2.余额无法直接购买下载,可以购买VIP、付费专栏及课程。

余额充值