


一、RenderTarget
直接看E文的解释吧
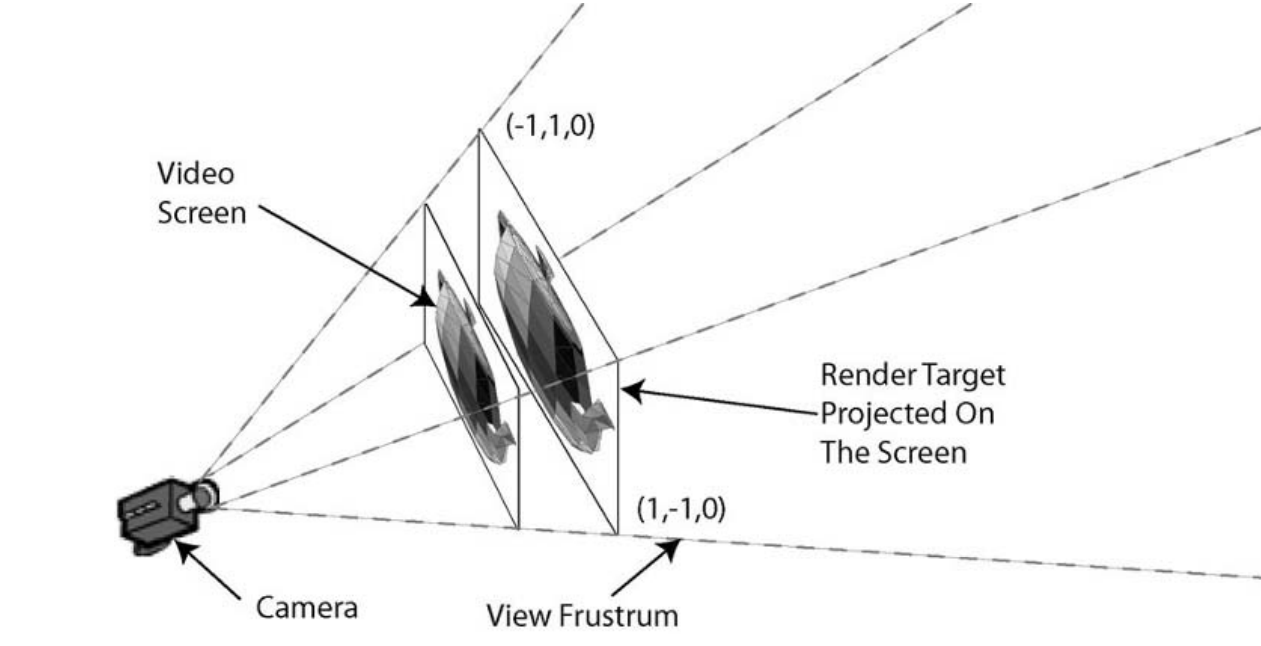
In RenderMonkey, rendering to a temporary texture can be carried out using something called a render target. Render targets are a technique exposed by the different rendering APIs to allow you to redirect the hardware’s rendering output to the texture of your choice. Such textures can then be used to accomplish other effects, such as shadowing or motion blur. Generally, this has few implications for the 3D hardware, because normal rendering usually happens to a hidden texture that has been allocated in the background and is presented to the user after the rendering is complete. Using render targets simply tells the 3D hardware to redirect the output to the texture you specify.
在ShaderMokey中要使用RT,解决方案是在屏幕上放一个Quad,将渲染结果的纹理贴到这个quad上面。
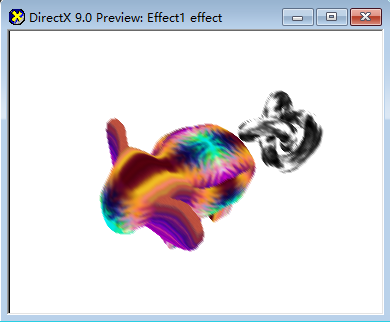
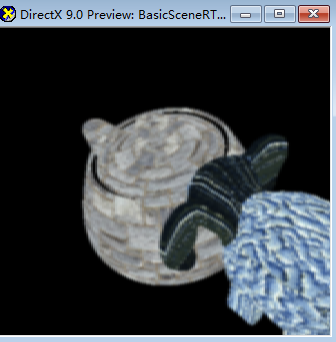
下面用绘制到RT的方法绘制两个模型,工程目录如下
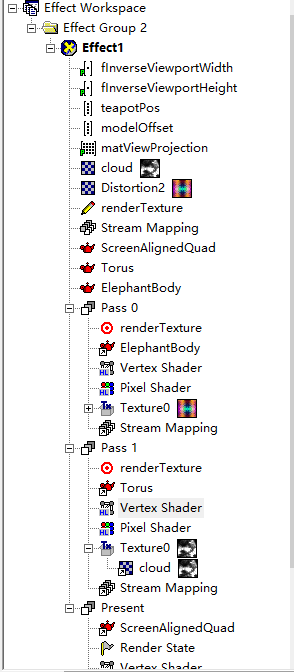
三个Pass
第一个pass把rt的颜色和深度清空,然后把大象绘制出来,第二个pass绘制Tirus,最后一个pass把rt画到quad上面。
最后一个pass里面要加一个RenderState,设置一个状态,把CULLMODE设置为NONE.

这样Quad就不会被cull掉了。

二、简单的后期
黑白效果
最后一个pass的时候
sampler Texture0;
float4 ps_main(float2 texCoord: TEXCOORD0) : COLOR
{
   // Read the source color
   float4 col = tex2D(Texture0, texCoord);
   float Intensity;
   // Make it B&W, intensity defines as being
   // I = 0.299*R + 0.587*G + 0.184*B
   Intensity = 0.299* col.r + 0.587*col.g + 0.184*col.r;
   // Note, can also be done as a dot product such as
   // Intensity = dot(col,float4(0.299,0.587,0.184,0));
   // Return the intensity as a uniform RGB color
   return float4(Intensity.xxx, col.a);
}
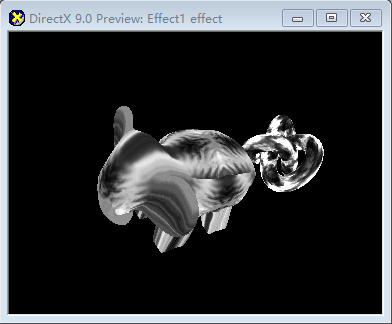
其中黑白强度由rt 的rgb三个分量定义
Intensity = 0.299*Red + 0.587*Green + 0.184*Blue渲染结果
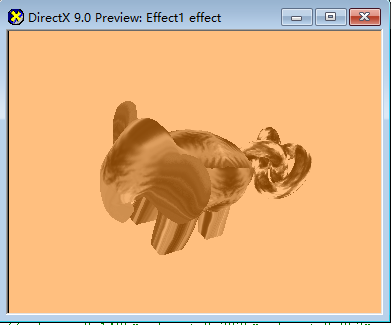
还可以用矩阵的方式来处理这样的问题,比如要实现土黄色的文艺感觉,可以这样写
outPut.x = 0.1495* col.x + 0.2935*col.y + 0.057*col.z + 0.5;
outPut.y = 0.1495* col.x + 0.2935*col.y + 0.057*col.z + 0.25;
outPut.z = 0.1495* col.x + 0.2935*col.y + 0.057*col.z;
outPut.w = 1;
效果是这样
看一下每个pass

下面用矩阵的方法来处理,首先添加一个矩阵参数

fs内容改成
float4x4 color_filter;
sampler Texture0;
float4 ps_main(float2 texCoord: TEXCOORD0) : COLOR
{
   // Read the source color
   float4 col = tex2D(Texture0, texCoord);

   // Apply the matrix to the incoming color
   col = mul(color_filter, col);
   return col;
}
这里用行主序,改一下shader 的property。
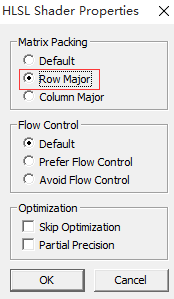
这样的矩阵称之为Filer,也可以叫滤波器。
三、模糊
下面将从易到难实现三种不同的模糊,它们分别是简单模糊,高斯模糊,动态模糊
简单模糊
这里要用到一个东西 - convolution filter(卷积滤波器)
下面这个东西叫box filter
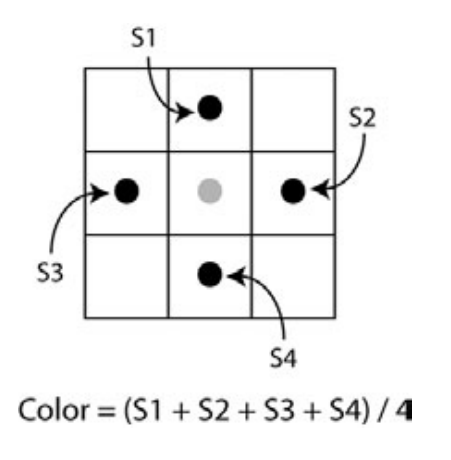
通过四次采样,将得到的值进行平均,得到当前像素点的值。
下面就是如何在fs中使用
float fInverseViewportWidth;
float fInverseViewportHeight;
sampler Texture0;

const float4 samples[4] =
{
   -1.0, 0.0, 0, 0.25,
   1.0, 0.0, 0, 0.25,
   0.0, 1.0, 0, 0.25,
   0.0, -1.0, 0, 0.25
};

float4 ps_main(float2 texCoord: TEXCOORD0) : COLOR
{
   float4 col = float4(0, 0, 0, 0);
   // Sample and output the box averaged colors
   for(int i = 0; i<4;i++)
      col += samples[i].w* tex2D(Texture0, texCoord+
      float2(samples[i].x* fInverseViewportWidth, samples[i].y* fInverseViewportHeight));

   return col;
}
得到的结果
高斯模糊
高斯模糊可以分为两个步骤,也就是要用到两个pass,第一个pass是Gass_H,ps的代码如下
float viewport_inv_width;
float viewport_inv_height;
float blur_offset;
sampler Texture0;
const float2 gaussFilterOffset[7] = {
         -3.0f,0.0f,
         -2.0f,0.0f,
         -1.0f,0.0f,
         0.0f,0.0f,
         1.0f,0.0f,
         2.0f,0.0f,
         3.0f,0.0f
};

const float gaussFilter[7] = {
         ( 1.0f/64.0f ),
         ( 6.0f/64.0f ),
         ( 15.0f/64.0f ),
         ( 20.0f/64.0f ),
         ( 15.0f/64.0f ),
         ( 6.0f/64.0f ),
         ( 1.0f/64.0f )
};

float4 ps_main(float2 texCoord: TEXCOORD0) : COLOR
{
   float4 col = float4(0,0,0,0);

   // Sample and output the box averaged colors
   for(int i=0;i<7;i++)
      col = col + gaussFilter[i]*tex2D(Texture0,texCoord+viewport_inv_width*gaussFilterOffset[i]);
   return col;
}
将结果渲染到一张rt上,基于这样rt,第二个Pass在进行Gauss_V
float viewport_inv_width;
float viewport_inv_height;
float blur_offset;
sampler Texture0;
float2 gaussFilterOffset[7] = {
         0.0f,-3.0f,
         0.0f,-2.0f,
         0.0f,-1.0f,
         0.0f,0.0f,
         0.0f,1.0f,
         0.0f,2.0f,
         0.0f,3.0f
};

const float gaussFilter[7] = {
         ( 1.0f/64.0f ),
         ( 6.0f/64.0f ),
         ( 15.0f/64.0f ),
         ( 20.0f/64.0f ),
         ( 15.0f/64.0f ),
         ( 6.0f/64.0f ),
         ( 1.0f/64.0f )
};

float4 ps_main(float2 texCoord: TEXCOORD0) : COLOR
{
   float4 col = float4(0,0,0,0);

   // Sample and output the box averaged colors
   for(int i=0;i<7;i++)
      col = col + gaussFilter[i]*tex2D(Texture0,texCoord+viewport_inv_width*gaussFilterOffset[i]);
   return col;
}
最后得到的结果
动态模糊
终于可以来点高端的了!
首先来说一下动态模糊形成的原因,主要是人眼或者摄像机是以一定的帧率来获取图像的,太快的东西只能捕捉到两帧之间的残影。
一种实现的方法是每两帧之间去检测每个像素的移动速度,然后用这个信息去对像素模糊,这个方法是可行的,但是有点小复杂。
简单的方法就是将当前帧和上一帧的图像进行blend,这种方法可能比较粗糙,应为没有考虑到实际的速度,但是很有游戏都在用这种方法。
用motion blur主要有两种目的,第一种目的很明显,就是制造出动态模糊的效果,另一种目的是减少锯齿,特别是在没有硬件抗锯齿的情况下。
看一下动态模糊的基本步骤
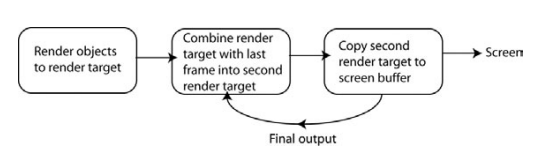
下面是具体的实现步骤
基于原来的工程,添加一个RenderTarget,用来存上一帧的渲染结果,添加一个color来存两帧之间blend的系数,值的设定如下

在present之前,添加一个pass,称为blur
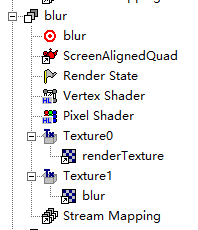
blur这份pass引用了两张rt
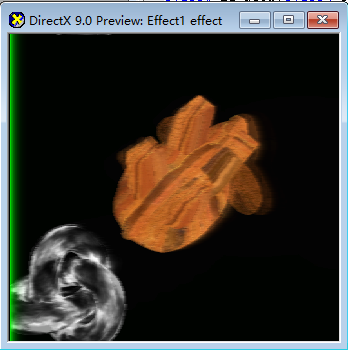
Vs和present pass一样, ps如下
float4 blur_factor;
sampler Texture0;
sampler Texture1;
float4 ps_main(float2 texCoord: TEXCOORD0) : COLOR
{
   float4 col1 = tex2D(Texture0, texCoord);
   float4 col2 = tex2D(Texture1, texCoord);

   return lerp(col1,col2,blur_factor);
}
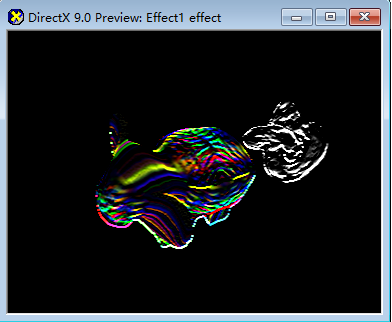
四、边缘检测和图像锐化
其实就是换了不同的滤波器对图像进行处理
两个滤波器如下
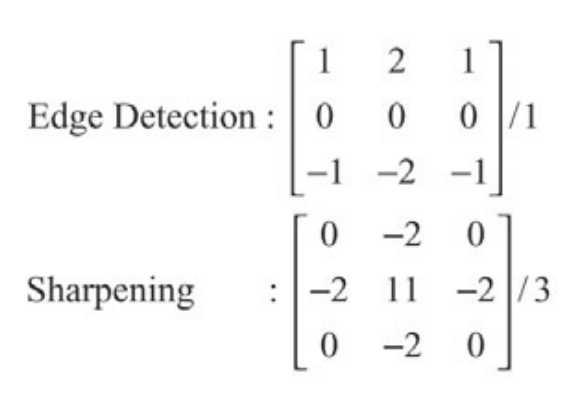
边缘检测fs如下
float viewport_inv_width;
float viewport_inv_height;
sampler Texture0;
const float4 samples[6] = {
    -1.0,    1.0,    0,    1.0,
    0.0,    1.0,    0,    2.0,
    1.0,    1.0,   0,    1.0,
    -1.0,    -1.0,   0,    -1.0,
    0.0,    -1.0,   0,    -2.0,
    1.0,    -1.0,   0,    -1.0
};


float4 ps_main(float2 texCoord: TEXCOORD0) : COLOR
{
   float4 col = float4(0,0,0,0);

   // Sample and output the averaged colors
   for(int i=0;i<6;i++)
      col += samples[i].w*tex2D(Texture0,texCoord+
       float2(samples[i].x*viewport_inv_width,
              samples[i].y*viewport_inv_height));
   return col;
}
最终效果
图像锐化fs如下
float fInverseViewportWidth;
float fInverseViewportHeight;

sampler Texture0;
const float4 samples[5] = {
    0.0,    0.0,    0,    11.0/3.0,
    0.0,    1.0,    0,    -2.0/3.0,
    0.0,    -1.0,   0,    -2.0/3.0,
    -1.0,    0.0,   0,    -2.0/3.0,
    1.0,    0.0,   0,    -2.0/3.0
};


float4 ps_main(float2 texCoord: TEXCOORD0) : COLOR
{
   float4 col = float4(0, 0, 0, 0);

   // Sample and output the averaged colors
   for(int i = 0; i<5;i++)
      col += samples[i].w* tex2D(Texture0, texCoord+
       float2(samples[i].x* fInverseViewportWidth,
              samples[i].y* fInverseViewportHeight));
   return col;
}
最终效果


 102
102


 被折叠的 条评论
为什么被折叠?
被折叠的 条评论
为什么被折叠?
 到【灌水乐园】发言


