


FastDDS Linux installation from sources

FastDDS是由位于西班牙马德里的eProsima公司推出的免费开源DDS中间件解决方案,并提供付费技术支持服务。它的源码基于C++,规范基于OMG DDS 1.4 and the OMG RTPS 2.2。本文的目的是根据官方的安装步骤进行整理,并记录自己在安装过程中遇到的实际问题和解决方法。
官方文档链接:https://fast-dds.docs.eprosima.com/en/latest/
在这个线上文档中除了由对FastDDS基本的介绍,安装的方法,还有丰富的入门指导和实例解释。
FastDDS的安装按系统分有三种:
- Windows (from Binaries 或Sources)
- Linux(from Binaries 或Sources)
- MAC Os (from Sources)
You can get either a binary distribution of eprosima Fast DDS or compile the library yourself from source.
这里我装的是Linux from Sources。
FastDDS的安装内容主要有三部分:
- Fast DDS library (必须安装)
- foonathan_memory_vendor : C++ memory allocator lib
- fasdcdr: CDR serialization mechanism
- fastrtps: Fast DDS core lib
其中安装方式又分为两种,colcon安装或CMake安装。我用的是colcon。
- Fast DDS Python bindings (可选)
Fast DDS Python bindings is an extension of Fast DDS which provides access to the Fast DDS API through Python.
- Fast DDS-Gen (必须安装)
- Java application generates source code from IDL file。由IDL文件中定义的data type生成代码的脚本工具。在旧版本中脚本工具的名字叫fastrtpsgen,大概在21年后改名叫fastddsgen。
1. 安装Fast DDS Library
- 链接:https://fast-dds.docs.eprosima.com/en/latest/installation/sources/sources_linux.html#fast-dds-library-installation
- 安装依赖项:
sudo apt install cmake g++ python3-pip wget git
sudo apt install libasio-dev libtinyxml2-dev
sudo apt install libssl-dev

libp11 and HSM libs:
//sudo apt install libp11-dev libengine-pkcs11-openssl (可选,只有DDS用到security和PKCS#11 URI时才需要,我没装)
//sudo apt install softhsm2 (可选,我没装,装了libp11-dev才需要)
//sudo usermod -a -G softhsm <user> (可选,我没装,同上)
//sudo apt install libengine-pkcs11-openssl (同上)
//p11-kit list-modules(同上)
//openssl engine pkcs11 -t(同上)

Gtest: 可选,C++单元测试库,我还没装
//git clone https://github.com/google/googletest src/googletest-distribution
- 使用Colcon 安装Fast DDS lib
3.1 安装colcon, vcstool:
pip3 install -U colcon-common-extensions vcstool
vcstool安装不成功造成命令 vcs不能使用的话,可以尝试reboot之后重新安装,也可以尝试将-U 替换成–user安装
3.2 把repos下载下来,为后面的vcs import做准备:
mkdir ~/Fast-DDS
cd ~/Fast-DDS
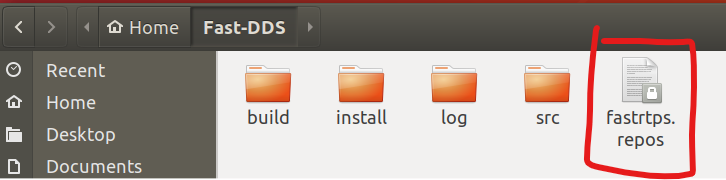
wget https://raw.githubusercontent.com/eProsima/Fast-DDS/master/fastrtps.repos
注意:以上命令运行之后只有fastrtps.repos一个文件,下图中的其余文件时后面build生成的
这里可能会碰到连接失败的错:
Connecting to raw.githubusercontent.com (raw.githubusercontent.com)|::|:443... failed: Connection refused.参考了:https://blog.csdn.net/laoxuan2011/article/details/106177126/?utm_term=https://raw.githubusercontent.com/&utm_medium=distribute.pc_aggpage_search_result.none-task-blog-2allsobaiduweb~default-0-106177126&spm=3001.4430
需要修改/etc/hosts,在末尾添加一行:
151.101.76.133(此IP是通过本机IP查询的值) raw.githubusercontent.com
3.3 下一步,把repos的内容导入到src文件夹:
mkdir src
vcs import src < fastrtps.repos

3.4 build packages:
colcon build
这里可能遇到CMake版本问题,因为colcon是依赖CMake build的。我用的ubuntu 18.04,用第一步依赖项安装的时候,cmake版本最高都没有达到colcon要求的版本。
CMake 3.8(具体3点几没记住) or higher is required.按照 https://www.cnblogs.com/jsdy/p/12689470.html 的方法卸载重新安装了3.16的CMake。
但是这里安装的路径到了/usr/local/bin/cmake,而不是colcon默认使用的/usr/bin/cmake路径。所以后面又碰到了这个错:
make: /usr/bin/cmake: Command not found通过以下命令把两个路径关联了:
sudo ln -s /usr/local/bin/cmake /usr/bin/cmake或者可以找方法,在安装的时候就指定路径到/usr/bin/cmake。
- 准备环境变量
4.1 每次新打开一个shell的时候可以运行source命令,设置局部环境变量:
source ~/Fast-DDS/install/setup.bash
4.2 或者设置永久环境变量:
echo 'source ~/Fast-DDS/install/setup.bash' >> ~/.bashrc
这样就可以使用fastdds命令了。
2. 安装Fast DDS-Gen
-
链接:https://fast-dds.docs.eprosima.com/en/latest/installation/sources/sources_linux.html#fast-dds-gen-installation
-
安装Java JDK:
sudo apt install openjdk-8-jdk -
安装Gradle:
这一步不用装。Gradle是一个开源自动化build工具。我从Gradle下了安装包安装完发现不能用,看起来是版本问题。官方最新版是7.4.2。Fast DDS-gen用6.4就可以。后面会说到免安装的方法。
-
从git clone dds-gen的包:
这一步按照官网说法,前面用colcon安装就不用git clone:
If already installed FastDDS with colcon, you may skip the git clone command; fastddsgen can be found under the src directory of FastDDS colcon workspace.
但是我的Fast-DDS/src/fastddsgen下面几乎是空的只有一个thirdparty文件夹,并不能成功build,所以我还是git clone了一下:

执行git clone:
cd ~ git clone --recursive https://github.com/eProsima/Fast-DDS-Gen.git -
执行gradle编译
cd Fast-DDS-Gen
//gradle assemble   这一步是安装了gradle的情况下执行的。我没用,用了报错。
./gradlew assemble  这里我用免安装的方法编译了。就是下面说的executable script
运行/gradlew assemble 之后才能生成如下图的share文件夹,否则调用fastddsgen工具时会报如下图的错误。


If errors occur during compilation or you do not wish to install gradle, an executable script is included which will download a gradle temporarily for the compilation step.
-
把fastddsgen的命令放到环境变量
cd /etc
sudo gedit profile
在profile末尾加入:
export PATH="$PATH:~/Fast-DDS-Gen/scripts"重新登录
可以看到fastddsgen的命令加进来了: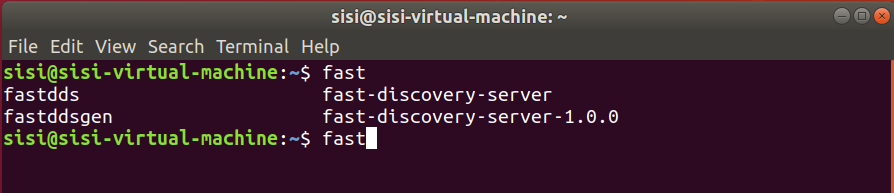


 572
572


 被折叠的 条评论
为什么被折叠?
被折叠的 条评论
为什么被折叠?
 到【灌水乐园】发言


