


视觉SLAM十四讲笔记-5-3
5.4 实践:3D视觉
5.4.1 双目视觉
前面已经介绍了双目视觉的成像原理,现在从双目视觉的左右图像出发,计算图像对应的视差图,然后计算个各像素在相机坐标系下的坐标,它们将构成点云.
mkdir stereoVision
cd stereoVision
code .
//launch.json
{
    // Use IntelliSense to learn about possible attributes.
    // Hover to view descriptions of existing attributes.
    // For more information, visit: https://go.microsoft.com/fwlink/?linkid=830387
    "version": "0.2.0",
    "configurations": [
        {
            "name": "g++ - 生成和调试活动文件",
            "type": "cppdbg",
            "request":"launch",
            "program":"${workspaceFolder}/build/stereoVision",
            "args": [],
            "stopAtEntry": false,
            "cwd": "${workspaceFolder}",
            "environment": [],
            "externalConsole": false,
            "MIMode": "gdb",
            "setupCommands": [
                {
                    "description": "为 gdb 启动整齐打印",
                    "text": "-enable-pretty-printing",
                    "ignoreFailures": true
                }
            ],
            "preLaunchTask": "Build",
            "miDebuggerPath": "/usr/bin/gdb"
        }
    ]
}
//tasks.json
{
	"version": "2.0.0",
	"options":{
		"cwd": "${workspaceFolder}/build"   //指明在哪个文件夹下做下面这些指令
	},
	"tasks": [
		{
			"type": "shell",
			"label": "cmake",   //label就是这个task的名字,这个task的名字叫cmake
			"command": "cmake", //command就是要执行什么命令,这个task要执行的任务是cmake
			"args":[
				".."
			]
		},
		{
			"label": "make",  //这个task的名字叫make
			"group": {
				"kind": "build",
				"isDefault": true
			},
			"command": "make",  //这个task要执行的任务是make
			"args": [

			]
		},
		{
			"label": "Build",
			"dependsOrder": "sequence", //按列出的顺序执行任务依赖项
			"dependsOn":[				//这个label依赖于上面两个label
				"cmake",
				"make"
			]
		}
	]
}
#CMakeLists.txt
cmake_minimum_required(VERSION 3.0)

project(STEREOVISION)

#在g++编译时,添加编译参数,比如-Wall可以输出一些警告信息
set(CMAKE_CXX_FLAGS "${CMAKE_CXX_FLAGS} -Wall -std=c++11")

#一定要加上这句话,加上这个生成的可执行文件才是可以Debug的,不然不加或者是Release的话生成的可执行文件是无法进行调试的
set(CMAKE_BUILD_TYPE Debug)

# Eigen
include_directories("/usr/include/eigen3")

#此工程要调用opencv库,因此需要添加opancv头文件和链接库
#寻找OpenCV库
find_package(OpenCV REQUIRED)

#添加头文件
include_directories(${OpenCV_INCLUDE_DIRS})

#添加Pangolin依赖
find_package(Pangolin REQUIRED)
include_directories(${Pangolin_INCLUDE_DIRS})

add_executable(stereoVision stereoVision.cpp)

#链接OpenCV库
target_link_libraries(stereoVision ${OpenCV_LIBS})
target_link_libraries(stereoVision ${Pangolin_LIBRARIES})
#include <pangolin/pangolin.h>
#include <opencv2/opencv.hpp>
#include <vector>
#include <string>
#include <Eigen/Core>
#include <unistd.h>

using namespace std;
using namespace Eigen;

//文件路径
string left_file = "./left.png";
string right_file = "./right.png";


// 在pangolin中画图,已写好,无需调整
void showPointCloud(
    const vector<Vector4d, Eigen::aligned_allocator<Vector4d>> &pointcloud);

int main(int argc, char **argv)
{
    //内参
    double fx = 718.856, fy = 718.856, cx = 607.1928, cy = 185.2157;
    //基线
    double b = 0.573;

    //读取图像
    cv::Mat left = cv::imread(left_file, 0); //0表示返回一张灰度图
    cv::Mat right = cv::imread(right_file, 0); //0表示返回一张灰度图
    cv::Ptr<cv::StereoSGBM> sgbm = cv::StereoSGBM::create(0, 96, 9, 8 * 9 * 9, 32 * 9 * 9, 1, 63, 10, 100, 32); //关于sgbm算法的经典参数配置
    cv::Mat disparity_sgbm, disparity;
    sgbm->compute(left, right, disparity_sgbm);
    disparity_sgbm.convertTo(disparity, CV_32F, 1.0 / 16.0f); //注意disparity才是最后的视差图

    //生成点云
    vector<Vector4d, Eigen::aligned_allocator<Vector4d>> pointcloud;

    // 如果你的机器慢,请把后面的v++和u++改成v+=2, u+=2
    for(int v = 0; v < left.rows; ++v)
    {
        for(int u = 0; u < left.cols; ++u)
        {
            if(disparity.at<float>(v,u) <= 10.0 || disparity.at<float>(v,u) >= 96.0)
            {
                continue;
            }

            Vector4d point(0, 0, 0, left.at<uchar>(v, u) / 255.0); //前3维为xyz,第四维为颜色

            //根据双目模型计算point的位置
            double x = (u - cx) / fx; //由像素坐标系转到图像坐标系,即归一化平面
            double y = (v - cy) / fy;
            double depth = fx * b / (disparity.at<float>(v,u)); //根据双目相机模型计算深度
            point[0] = x * depth;
            point[1] = y * depth;
            point[2] = depth;

            pointcloud.push_back(point);
        }
    }
    cv::imshow("disparity", disparity / 96.0);
    cv::waitKey(0);
    //画出点云
    showPointCloud(pointcloud);
    return 0;
}

void showPointCloud(const vector<Vector4d, Eigen::aligned_allocator<Vector4d>> &pointcloud) {

    if (pointcloud.empty()) {
        cerr << "Point cloud is empty!" << endl;
        return;
    }

    pangolin::CreateWindowAndBind("Point Cloud Viewer", 1024, 768);
    glEnable(GL_DEPTH_TEST);
    glEnable(GL_BLEND);
    glBlendFunc(GL_SRC_ALPHA, GL_ONE_MINUS_SRC_ALPHA);

    pangolin::OpenGlRenderState s_cam(
        pangolin::ProjectionMatrix(1024, 768, 500, 500, 512, 389, 0.1, 1000),
        pangolin::ModelViewLookAt(0, -0.1, -1.8, 0, 0, 0, 0.0, -1.0, 0.0)
    );

    pangolin::View &d_cam = pangolin::CreateDisplay()
        .SetBounds(0.0, 1.0, pangolin::Attach::Pix(175), 1.0, -1024.0f / 768.0f)
        .SetHandler(new pangolin::Handler3D(s_cam));

    while (pangolin::ShouldQuit() == false) {
        glClear(GL_COLOR_BUFFER_BIT | GL_DEPTH_BUFFER_BIT);

        d_cam.Activate(s_cam);
        glClearColor(1.0f, 1.0f, 1.0f, 1.0f);

        glPointSize(2);
        glBegin(GL_POINTS);
        for (auto &p: pointcloud) {
            glColor3f(p[3], p[3], p[3]);
            glVertex3d(p[0], p[1], p[2]);
        }
        glEnd();
        pangolin::FinishFrame();
        usleep(5000);   // sleep 5 ms
    }
    return;
}
left.png:
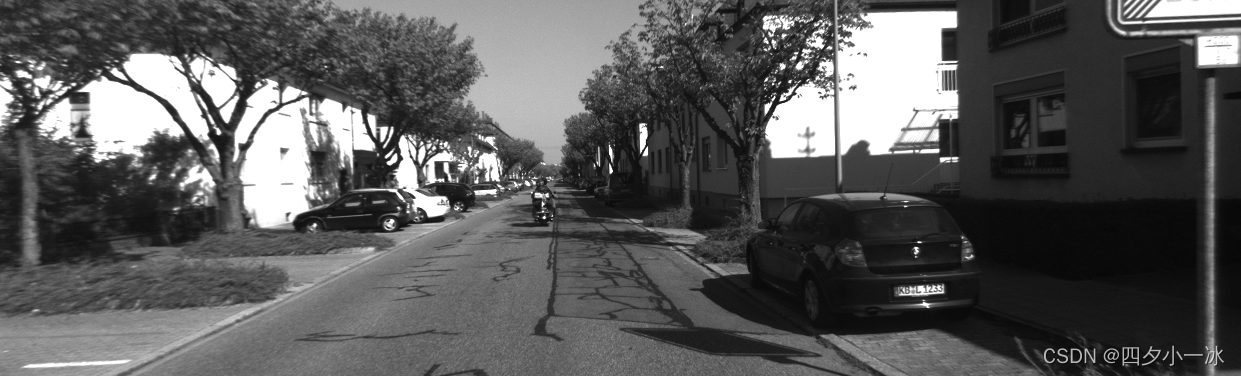
right.png:

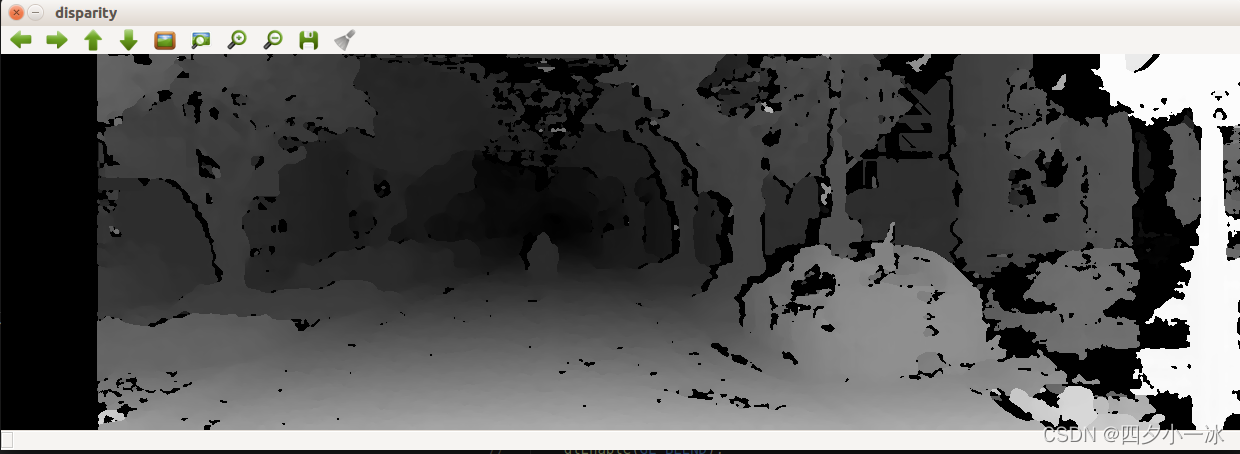
SGBM的视差图:
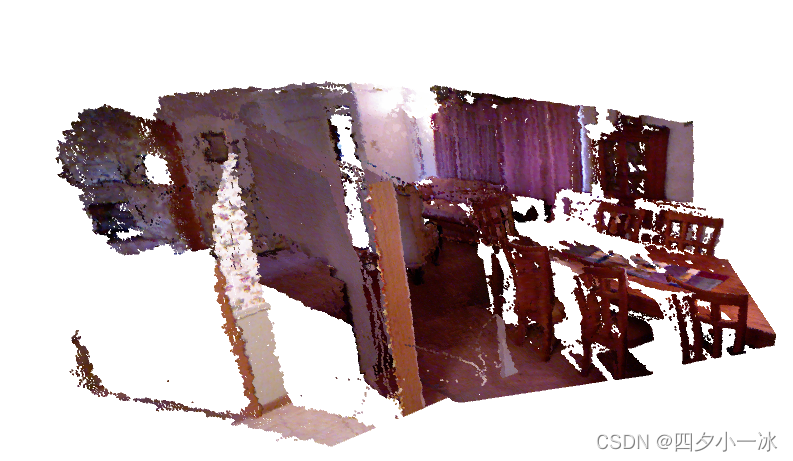
点云图:
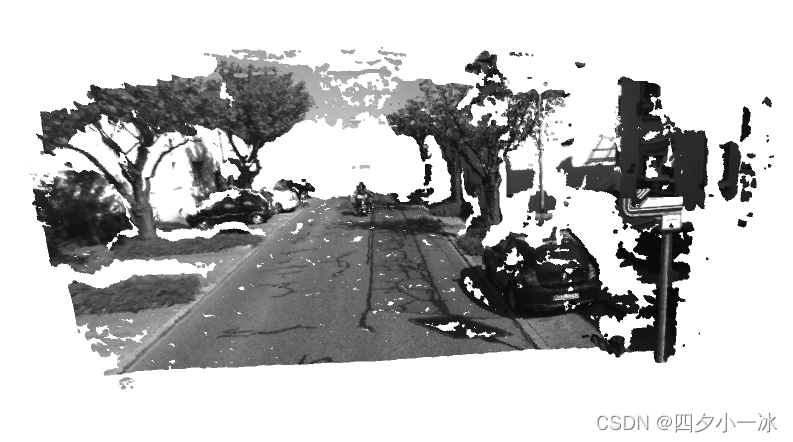
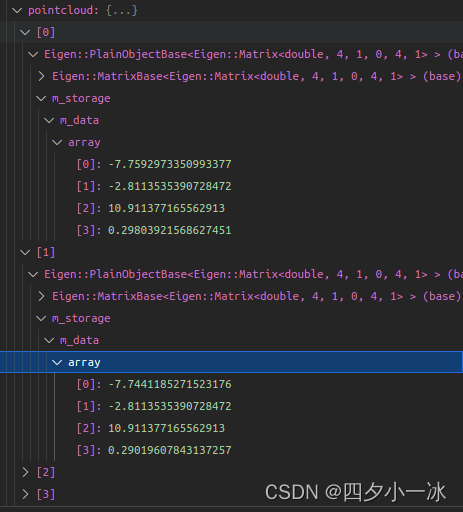
查看点云点坐标,这些坐标是在相机坐标系下的坐标(Z轴超前,X轴朝右,Y轴朝下)
这个例子中直接调用了OpenCV的SGBM(Semi-Global Batch Matching)算法计算左右图像的视差,然后通过双目相机的几何模型把它变换到相机的3D空间中.
SGBM是用来来自网络的经典配置,主要调整了最大和最小视差.视差数据结合相机的内参,基线,即能确定各点在三维空间中的位置.
5.4.2 RGB-D视觉
RGB-D相机的方便之处在于通过物理方法获得像素深度信息.如果已知一个相机的内外参,就可以计算一个像素在世界坐标系下的位置,从而建立一张点云地图.
给出5对图像,每一对有RGB图,和对应到深度图,同时有图像对应的相机外参数(以
T
w
c
T_{wc}
Twc 形式).位姿记录仍然和以前一样:
[
x
,
y
,
z
,
q
x
,
q
y
,
q
z
,
q
w
]
[x,y,z,q_x,q_y,q_z,q_w]
[x,y,z,qx,qy,qz,qw]
下面程序实现的功能是:
1.根据内参计算一对RGB-D图像对应的点云;
2.根据各张图像的相机位姿(也就是外参),把点云加起来,组成地图.
新建文件夹并在该文件夹下打开 VS Code
 mkdir jointMap
 cd jointMap/
 code .
//launch.json
{
    // Use IntelliSense to learn about possible attributes.
    // Hover to view descriptions of existing attributes.
    // For more information, visit: https://go.microsoft.com/fwlink/?linkid=830387
    "version": "0.2.0",
    "configurations": [
        {
            "name": "g++ - 生成和调试活动文件",
            "type": "cppdbg",
            "request":"launch",
            "program":"${workspaceFolder}/build/jointMap",
            "args": [],
            "stopAtEntry": false,
            "cwd": "${workspaceFolder}",
            "environment": [],
            "externalConsole": false,
            "MIMode": "gdb",
            "setupCommands": [
                {
                    "description": "为 gdb 启动整齐打印",
                    "text": "-enable-pretty-printing",
                    "ignoreFailures": true
                }
            ],
            "preLaunchTask": "Build",
            "miDebuggerPath": "/usr/bin/gdb"
        }
    ]
}
//tasks.json
{
	"version": "2.0.0",
	"options":{
		"cwd": "${workspaceFolder}/build"   //指明在哪个文件夹下做下面这些指令
	},
	"tasks": [
		{
			"type": "shell",
			"label": "cmake",   //label就是这个task的名字,这个task的名字叫cmake
			"command": "cmake", //command就是要执行什么命令,这个task要执行的任务是cmake
			"args":[
				".."
			]
		},
		{
			"label": "make",  //这个task的名字叫make
			"group": {
				"kind": "build",
				"isDefault": true
			},
			"command": "make",  //这个task要执行的任务是make
			"args": [

			]
		},
		{
			"label": "Build",
			"dependsOrder": "sequence", //按列出的顺序执行任务依赖项
			"dependsOn":[				//这个label依赖于上面两个label
				"cmake",
				"make"
			]
		}
	]
}
#CMakeLists.txt
cmake_minimum_required(VERSION 3.0)

project(JOINTMAP)

#在g++编译时,添加编译参数,比如-Wall可以输出一些警告信息
set(CMAKE_CXX_FLAGS "${CMAKE_CXX_FLAGS} -Wall -std=c++11")

#一定要加上这句话,加上这个生成的可执行文件才是可以Debug的,不然不加或者是Release的话生成的可执行文件是无法进行调试的
set(CMAKE_BUILD_TYPE Debug)

# Eigen
include_directories("/usr/include/eigen3")

#此工程要调用opencv库,因此需要添加opancv头文件和链接库
#寻找OpenCV库
find_package(OpenCV REQUIRED)

#添加头文件
include_directories(${OpenCV_INCLUDE_DIRS})

#添加Pangolin依赖
find_package(Pangolin REQUIRED)
include_directories(${Pangolin_INCLUDE_DIRS})

# 为使用 sophus,需要使用find_package命令找到它
find_package(Sophus REQUIRED)
include_directories( ${Sophus_INCLUDE_DIRS} )

add_executable(jointMap jointMap.cpp)

#链接OpenCV库
target_link_libraries(jointMap ${OpenCV_LIBS})
target_link_libraries(jointMap ${Pangolin_LIBRARIES})
target_link_libraries(jointMap Sophus::Sophus)
#include <iostream>
#include <fstream>
#include <opencv2/opencv.hpp>
#include <boost/format.hpp> //for formating strings
#include <sophus/se3.hpp>
#include <pangolin/pangolin.h>
using namespace std;
typedef vector<Sophus::SE3d, Eigen::aligned_allocator<Sophus::SE3d>> TrajectoryType;
typedef Eigen::Matrix<double, 6, 1> Vector6d;
void showPointCloud(const vector<Vector6d, Eigen::aligned_allocator<Vector6d>> &pointcloud);
int main(int argc, char **argv)
{
vector<cv::Mat> colorImgs, depthImgs; //彩色图和深度图
TrajectoryType poses; //相机位姿
ifstream fin("./pose.txt");
if(!fin)
{
cerr << "请在有poses.txt的目录下运行此程序" << endl;
return 1;
}
//读取并保存数据
for(int i=0; i<5; ++i)
{
boost::format fmt("./%s/%d.%s"); //图像文件格式
colorImgs.push_back(cv::imread((fmt % "color" % (i+1) % "png").str()));
depthImgs.push_back(cv::imread((fmt % "depth" % (i+1) % "pgm").str(), -1)); //使用-1读取原始图像
double data[7] = {0};
for(auto &d:data) fin >> d;
Sophus::SE3d pose(Eigen::Quaterniond(data[6], data[3], data[4], data[5]),
Eigen::Vector3d(data[0], data[1], data[2])
);
Eigen::Vector3d(data[0], data[1], data[2]);
poses.push_back(pose);
}
//计算点云并拼接
//相机内参
double cx = 325.5; //x方向上的原点平移量
double cy = 253.5; //y方向上的原点平移量
double fx = 518.0; //焦距
double fy = 519.0; //焦距
double depthScale = 1000.0; //现实世界中1米在深度图中存储为一个depthScale值
vector<Vector6d, Eigen::aligned_allocator<Vector6d>> pointcloud;
pointcloud.reserve(1000000);
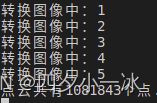
for(int i=0; i<5; ++i)
{
cout << "转换图像中:" << i+1 << endl;
cv::Mat color = colorImgs[i];
cv::Mat depth = depthImgs[i];
Sophus::SE3d T = poses[i]; //用SE3d表示的从当前相机坐标系到世界坐标系的变换
for(int v=0; v<color.rows; ++v)
{
for(int u=0; u<color.cols; ++u)
{
unsigned int d = depth.ptr<unsigned short>(v)[u]; //深度值
if(d == 0) continue;
//把每一个像素点转换到相机坐标系下
Eigen::Vector3d point;
point[2] = double(d) / depthScale;
point[0] = (u - cx) * point[2] / fx;
point[1] = (v - cy) * point[2] / fy;
//从相机坐标系到世界坐标系
Eigen::Vector3d pointWorld = T * point;
//颜色的话仍为原图原色
Vector6d p;
p.head<3>() = pointWorld; //head<n>()函数是对于Eigen库中的向量类型而言的,表示提取前n个元素
//opencv中图像的data数组表示把其颜色信息按行优先的方式展成的一维数组
p[5] = color.data[v * color.step + u * color.channels()]; //blue
p[4] = color.data[v * color.step + u * color.channels() + 1]; //green
p[3] = color.data[v * color.step + u * color.channels() + 2]; //red
pointcloud.push_back(p);
}
}
}
cout << "点云共有" << pointcloud.size() << "个点." << endl;
showPointCloud(pointcloud);
return 0;
}
void showPointCloud(const vector<Vector6d, Eigen::aligned_allocator<Vector6d>> &pointcloud) {
if (pointcloud.empty()) {
cerr << "Point cloud is empty!" << endl;
return;
}
pangolin::CreateWindowAndBind("Point Cloud Viewer", 1024, 768);
glEnable(GL_DEPTH_TEST);
glEnable(GL_BLEND);
glBlendFunc(GL_SRC_ALPHA, GL_ONE_MINUS_SRC_ALPHA);
pangolin::OpenGlRenderState s_cam(
pangolin::ProjectionMatrix(1024, 768, 500, 500, 512, 389, 0.1, 1000),
pangolin::ModelViewLookAt(0, -0.1, -1.8, 0, 0, 0, 0.0, -1.0, 0.0)
);
pangolin::View &d_cam = pangolin::CreateDisplay()
.SetBounds(0.0, 1.0, pangolin::Attach::Pix(175), 1.0, -1024.0f / 768.0f)
.SetHandler(new pangolin::Handler3D(s_cam));
while (pangolin::ShouldQuit() == false) {
glClear(GL_COLOR_BUFFER_BIT | GL_DEPTH_BUFFER_BIT);
d_cam.Activate(s_cam);
glClearColor(1.0f, 1.0f, 1.0f, 1.0f);
glPointSize(2);
glBegin(GL_POINTS);
for (auto &p: pointcloud) {
glColor3d(p[3] / 255.0, p[4] / 255.0, p[5] / 255.0);
glVertex3d(p[0], p[1], p[2]);
}
glEnd();
pangolin::FinishFrame();
usleep(5000); // sleep 5 ms
}
return;
}
运行结果:


 4187
4187


 被折叠的 条评论
为什么被折叠?
被折叠的 条评论
为什么被折叠?
 到【灌水乐园】发言


