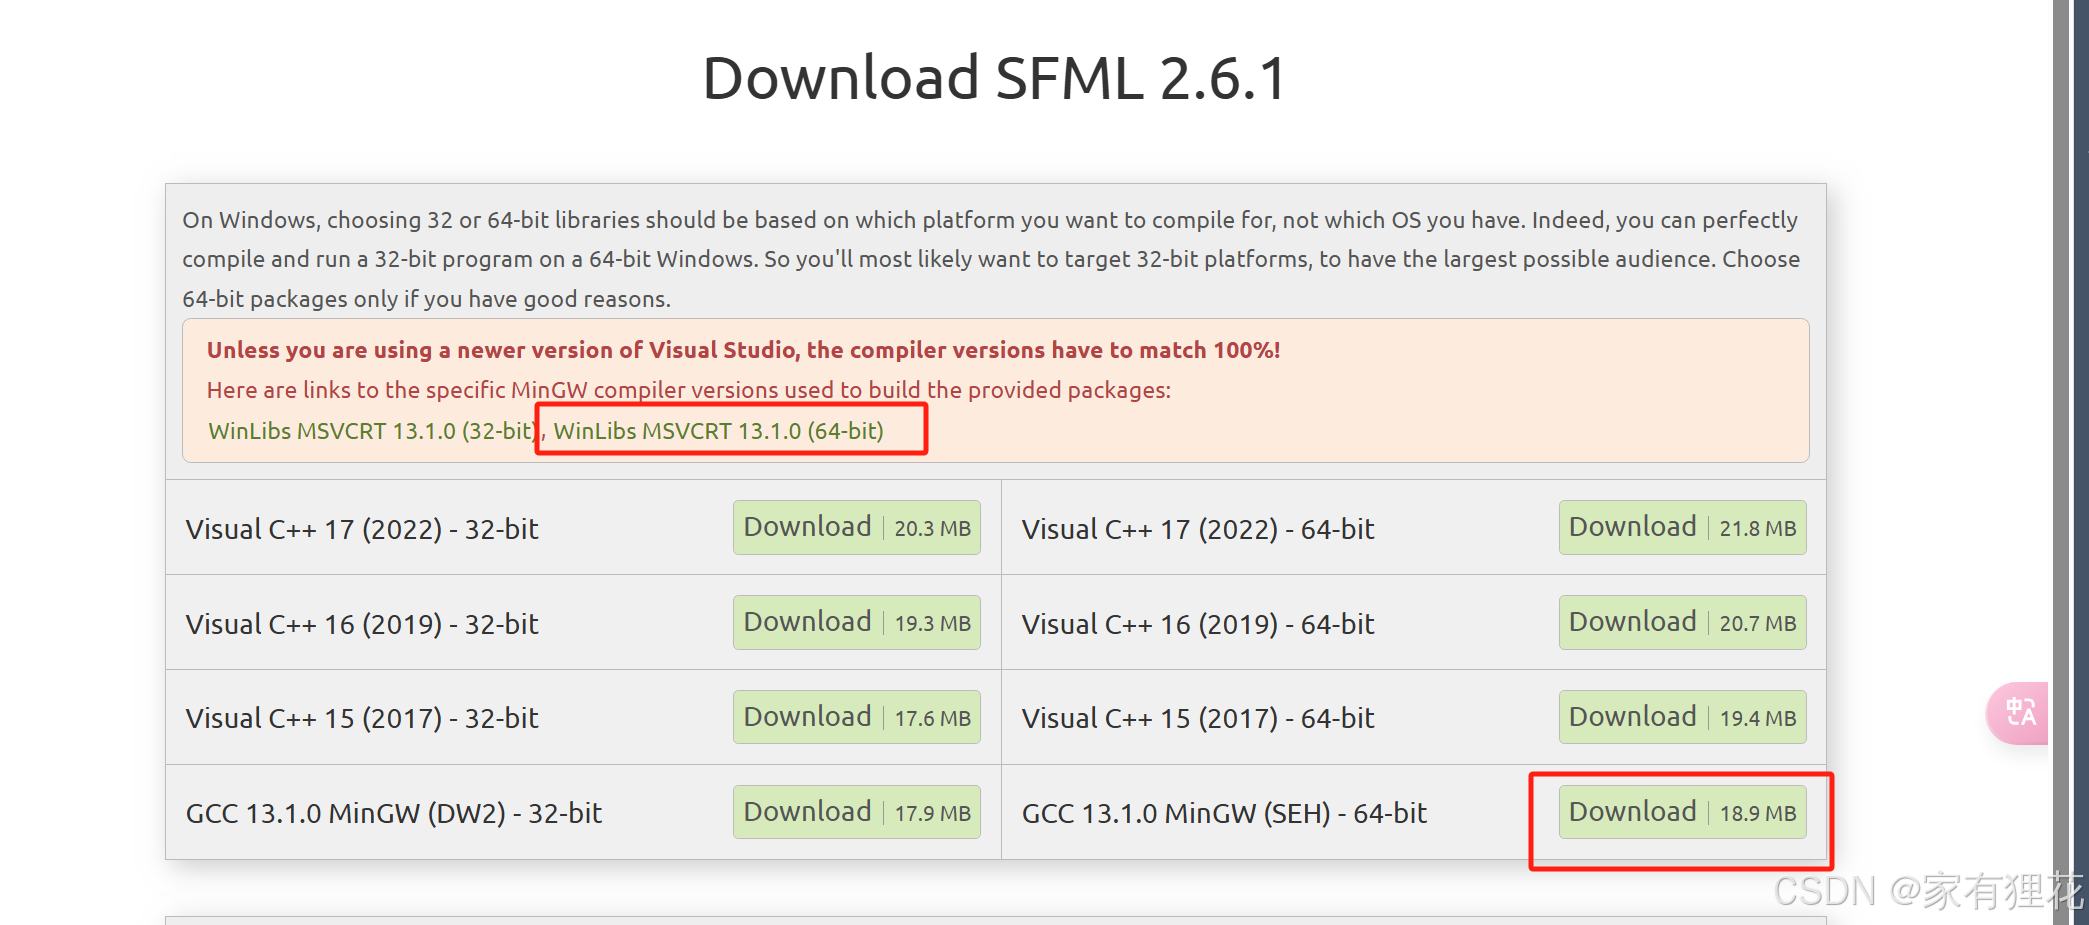
1.下载编译器和SFML环境包

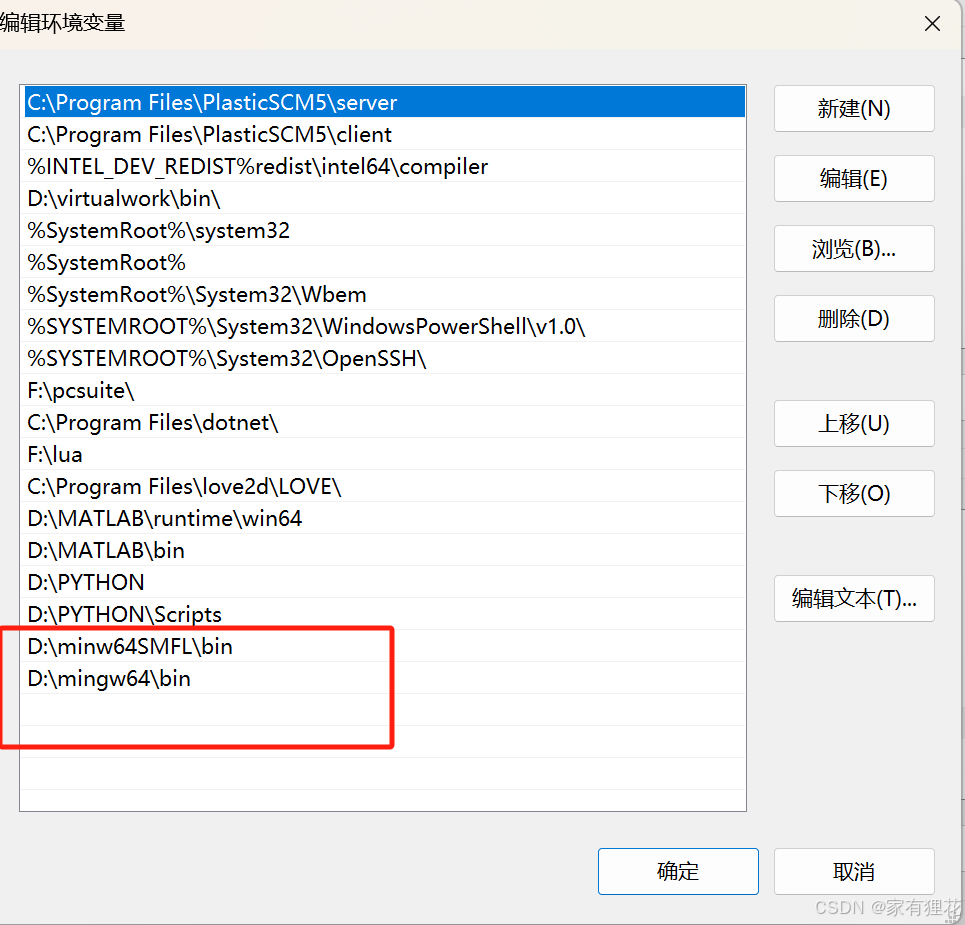
2. 解压编译器和SFML压缩包,并把路径添加到环境变量

3. 安装C++的插件,此处不谈
4. 配置task.json,launch.json
{
	//TASKS
    "version": "2.0.0",
    "tasks": [
        {
            "label": "build",// 不可更改
            "type": "shell",// 改成"cppbuild"也可以,略微影响
            "command": "g++",//若编译器路径已添加到环境变量就不用更改,如果没有则需要改成完整路径
            "args": [
                "-I/D:/minw64SMFL/include", //可以省略
                "-L/D:/minw64SMFL/lib",//根据自己电脑的文件路径进行修改
                "-o",// 不可更改
                "${fileDirname}/${fileBasenameNoExtension}.exe",// 不可更改
                "${file}",// 不可更改
                "-lsfml-graphics",//不可省略
                "-lsfml-window",//不可省略
                "-lsfml-system"//不可省略
            ],
            "group": "build"// 不可更改
        }
    ]
}
{
    "version": "0.2.0",
    "configurations": [
        {
            "name": "C++ hallo",//随意更改,这个会在左侧的调试bar中的下拉栏中出现
            "type": "cppdbg",//win不可更改
            "request": "launch",//无需更改
            "program": "${fileDirname}/${fileBasenameNoExtension}.exe", // 可执行文件路径
            "args": [], // 传递给程序的命令行参数
            "stopAtEntry": false, // 是否在入口处停止
            "cwd": "${fileDirname}", // 工作目录
            "environment": [],//可以删去
            "externalConsole": false, // 是否使用外部控制台
            "MIMode": "gdb", // 使用 GDB 调试
            "setupCommands": //可省略
            [
                {
                    "description": "Enable pretty-printing for gdb",
                    "text": "-enable-pretty-printing",
                    "ignoreFailures": true
                }
            ],
            "preLaunchTask": "build", // 预先构建任务
            "miDebuggerPath": "D:/mingw64/bin/gdb.exe" // 编译器的路径请根据自己的情况修改        }
    ]
}
5. 测试
1>粘贴测试代码
#include <SFML/Graphics.hpp>

int main()
{
    sf::RenderWindow window(sf::VideoMode(200, 200), "SFML works!");
    sf::CircleShape shape(100.f);
    shape.setFillColor(sf::Color::Green);

    while (window.isOpen())
    {
        sf::Event event;
        while (window.pollEvent(event))
        {
            if (event.type == sf::Event::Closed)
                window.close();
        }

        window.clear();
        window.draw(shape);
        window.display();
    }

    return 0;
}
2>用F5调试运行
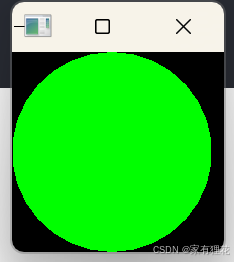
效果如图表示测试成功:

切记不能runcode,该操作只会让代码在终端输出,所以不会出现图形化的界面。需要用调试操作才能显现图形界面。


 1万+
1万+

 被折叠的 条评论
为什么被折叠?


