


之前写过一篇博客是关于无storyboar开发的,那么这里就接着写一下关于使用xib开发的吧。


现在就连接好了,我们给布局文件添加个label,输入拉布拉多


同样先新建single view application,配置成无storyboard开发的状态,不会的可以看看我之前的一篇博客,链接如下
http://blog.csdn.net/qq_37656219/article/details/79548990
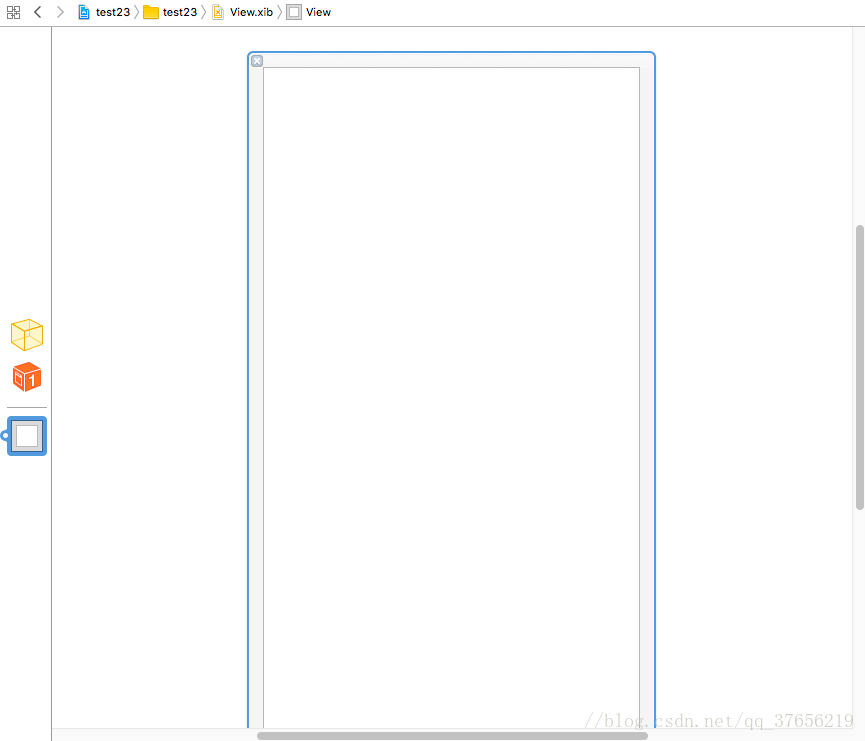
接着我们开始加入xib,点击File——New——File——View创建View.xib,我们这里把ViewController作为View.xib的控制器,那么先对ViewController.m进行修改如下(也就是添加了initWithNibName,记得在ViewController.h中加上声明)
#import "ViewController.h"

@interface ViewController ()

@end

@implementation ViewController
-(id)initWithNibName:(NSString *)nibNameOrNil bundle:(NSBundle *)nibBundleOrNil{
    self=[super initWithNibName:nibNameOrNil bundle:nibBundleOrNil];
    if(self){

    }
    return self;
}


- (void)viewDidLoad {
    [super viewDidLoad];
    // Do any additional setup after loading the view, typically from a nib.
}


- (void)didReceiveMemoryWarning {
    [super didReceiveMemoryWarning];
    // Dispose of any resources that can be recreated.
}


@end
在左边三个菜单中选择第一个File Owner
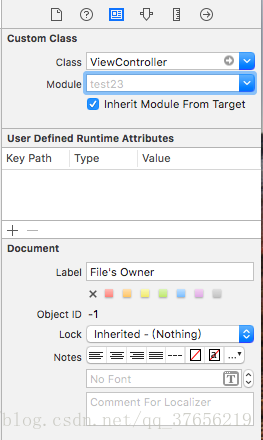
在右边的检查器将class设置为ViewController,如下
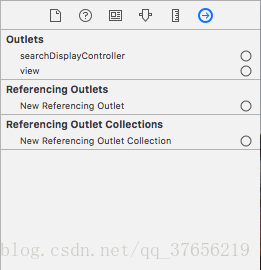
然后就要为试图控制器内部view属性绑定视图,再次选择File‘s Owner,在右侧可以看到view(必须在上一步设置完class后才会有view属性)
在view属性右侧空心小圆拖出线指向我们的布局文件。
现在就连接好了,我们给布局文件添加个label,输入拉布拉多
接下来开始修改AppDelegate.h和AppDelegate.m文件,修改如下
AppDelegate.h
AppDelegate.h
#import <UIKit/UIKit.h>
#import "ViewController.h"

@interface AppDelegate : UIResponder <UIApplicationDelegate>

@property (strong, nonatomic) UIWindow *window;
@property (strong,nonatomic) ViewController *viewController;

@end
#import "AppDelegate.h"
#import "ViewController.h"

@interface AppDelegate ()

@end

@implementation AppDelegate


- (BOOL)application:(UIApplication *)application didFinishLaunchingWithOptions:(NSDictionary *)launchOptions {
    self.window=[[UIWindow alloc]initWithFrame:[[UIScreen mainScreen] bounds]];
    self.viewController=[[ViewController alloc] initWithNibName:@"View" bundle:nil];
    self.window.rootViewController=self.viewController;
    self.window.backgroundColor=[UIColor whiteColor];
    [self.window makeKeyAndVisible];//这一句非常重要
    // Override point for customization after application launch.
    return YES;
}


- (void)applicationWillResignActive:(UIApplication *)application {
    // Sent when the application is about to move from active to inactive state. This can occur for certain types of temporary interruptions (such as an incoming phone call or SMS message) or when the user quits the application and it begins the transition to the background state.
    // Use this method to pause ongoing tasks, disable timers, and invalidate graphics rendering callbacks. Games should use this method to pause the game.
}


- (void)applicationDidEnterBackground:(UIApplication *)application {
    // Use this method to release shared resources, save user data, invalidate timers, and store enough application state information to restore your application to its current state in case it is terminated later.
    // If your application supports background execution, this method is called instead of applicationWillTerminate: when the user quits.
}


- (void)applicationWillEnterForeground:(UIApplication *)application {
    // Called as part of the transition from the background to the active state; here you can undo many of the changes made on entering the background.
}


- (void)applicationDidBecomeActive:(UIApplication *)application {
    // Restart any tasks that were paused (or not yet started) while the application was inactive. If the application was previously in the background, optionally refresh the user interface.
}


- (void)applicationWillTerminate:(UIApplication *)application {
    // Called when the application is about to terminate. Save data if appropriate. See also applicationDidEnterBackground:.
}


@end
好了,就到这里了,我是菜鸟多多指教DRW


 681
681

 被折叠的 条评论
为什么被折叠?
被折叠的 条评论
为什么被折叠?
 到【灌水乐园】发言


