


介绍
- Transformer是大语言模型(Large Language Model, LLM)的基础架构
- Transformers库是HuggingFace开源的
- 可以完成各种语言、音频、视频、多模态任务
- 情感分析
- 文本生成
- 命名实体识别
- 阅读理解:给的那个上下文,从上下文提取答案
- 掩码填充:完形填空
- 文本摘要
- 机器翻译
- 文本表征
- 对话机器人
相关库的介绍及其地址
- Transformers库:核心库
- Tokenizer:分词器,预处理
- Datasets:数据集库
- Accelerate:分布式训练
- Evaluate:评估函数
- 各种评价函数的计算函数
- PEFT:高效微调模型的库
- 几种高效微调的方法
- 小参数量微调大模型
- Optimum:优化加速库
- 支持多种后端
- Onnxruntime
- OpenVino(Intel)
- Gradio:可视化部署
- 实现基于Web交互的算法演示系统
安装
建议在anaconda新建环境安装
-
新建环境,这里选择python=3.9(与wsl安装的python版本一致)
conda create -n python=3.9 -
激活环境,配置清华源
conda activate llm # 激活-
pip换源
pip install pip -U pip config set global.index-url https://pypi.tuna.tsinghua.edu.cn/simple -
conda换源
conda config --add channels https://mirrors.tuna.tsinghua.edu.cn/anaconda/pkgs/free/
conda config --add channels https://mirrors.tuna.tsinghua.edu.cn/anaconda/pkgs/main/
conda config --add channels https://mirrors.tuna.tsinghua.edu.cn/anaconda/cloud/pytorch/
conda config --set show_channel_urls yes
-
-
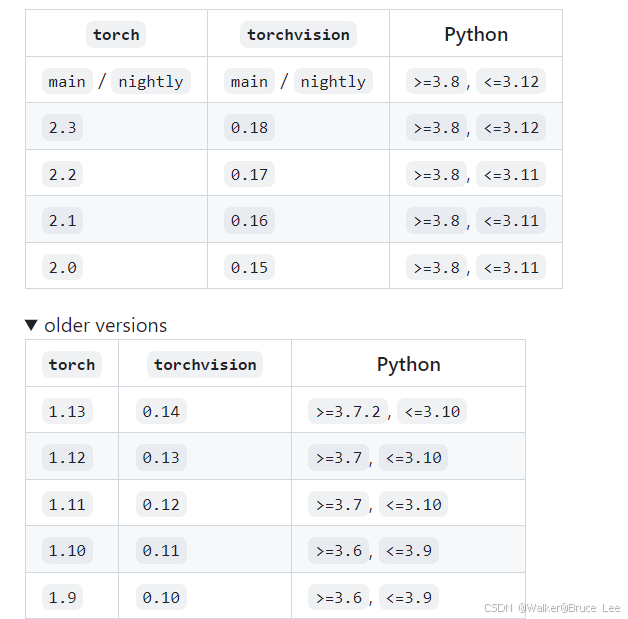
安装pytorch-->根据自己的cuda版本,选择小于等于cuda版本对应的pytorch(这里cuda选择11.6进行安装)
- 可以在pytorch官网进行安装,容易出现版本对应不上,安装出错
- 也可以通过whl文件进行安装
-
通过网络下载后torch、torchvision、torchaudio直接安装
-
只要版本与环境的python版本以及cuda版本对应得上,安装基本不会出错
-
pytorch whl文件下载地址:https://download.pytorch.org/whl/torch_stable.html
-
版本对应相应的网址
-
-
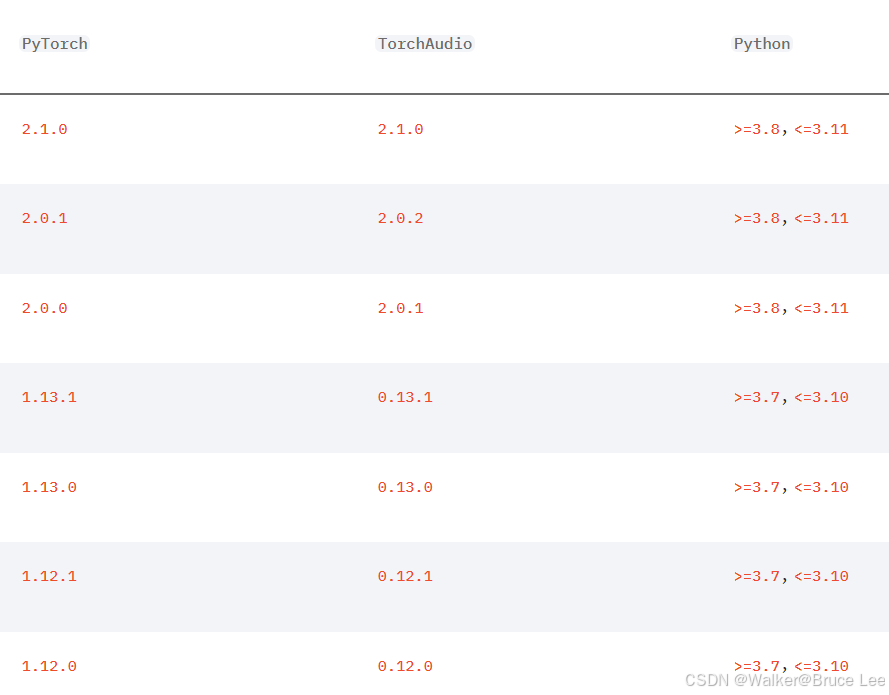
错误版本选择(以下版本安装后,再安装transformers相关的库会报错torchaudio 0.12.0+cu116 requires torch==1.12.0, but you have torch 2.3.1 which is incompatible.),为此选择1.13.1版本的进行安装,直接使用pytorch官网命令
错误的版本1.13.0以下的- torch-->1.12.0
- torchvision-->0.13.0
- torchaudio-->0.12.0
-
安装: pip install <对应whl文件的路径>
- 绝对路径
- 比如下载的torch whl文件在E:/Downloads/torch-1.12.0%2Bcu116-cp39-cp39-win_amd64.whl
- pip install E:/Downloads/torch-1.12.0%2Bcu116-cp39-cp39-win_amd64.whl
- 会当前目录下的相对路径
- 比如终端切换到E:/Downloads目录,该目录下有cu116/torch-1.12.0%2Bcu116-cp39-cp39-win_amd64.whl文件
- pip install torch-1.12.0%2Bcu116-cp39-cp39-win_amd64.whl
- 绝对路径
-
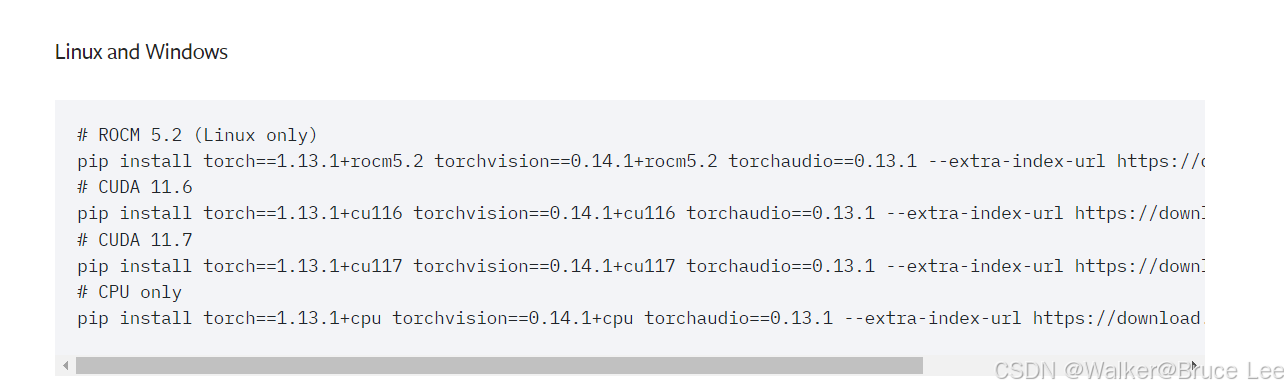
正确版本安装,选择1.13.0以上的,这里选择1.13.1,用官网下载命令(如果出现报错卸载重装)
官方安装地址:Previous PyTorch Versions | PyTorch
-
pip install torch==1.13.1+cu116 torchvision==0.14.1+cu116 torchaudio==0.13.1 --extra-index-url https://download.pytorch.org/whl/cu116 -
安装transformers相关库
- transformers、datasets、evaluate、peft、accelerate、gradio、optimum、sentencepiece
-
pip install transformers datasets evaluate peft accelerate gradio optimum sentencepiece - 没有出现的红色的警告信息即安装成功,通过安装实验证明transformers库的确需要torch 1.13.0版本以上的,建议1.13.1版本
-
安装其他库
- jupyterlab、scikit-learn、pandas、matplotlib、tensorboard、nltk、rouge、seaborn、tqdm、gtts、pygame
-
pip install jupyterlab scikit-learn pandas matplotlib tensorboard nltk rouge seaborn tqdm gtts pygame
-
将环境添加到Jupyter列表
-
安装ipykernel
pip install ipykernelpython -m ipykernel install --user --name llm --display-name llm
-
-
demo验证
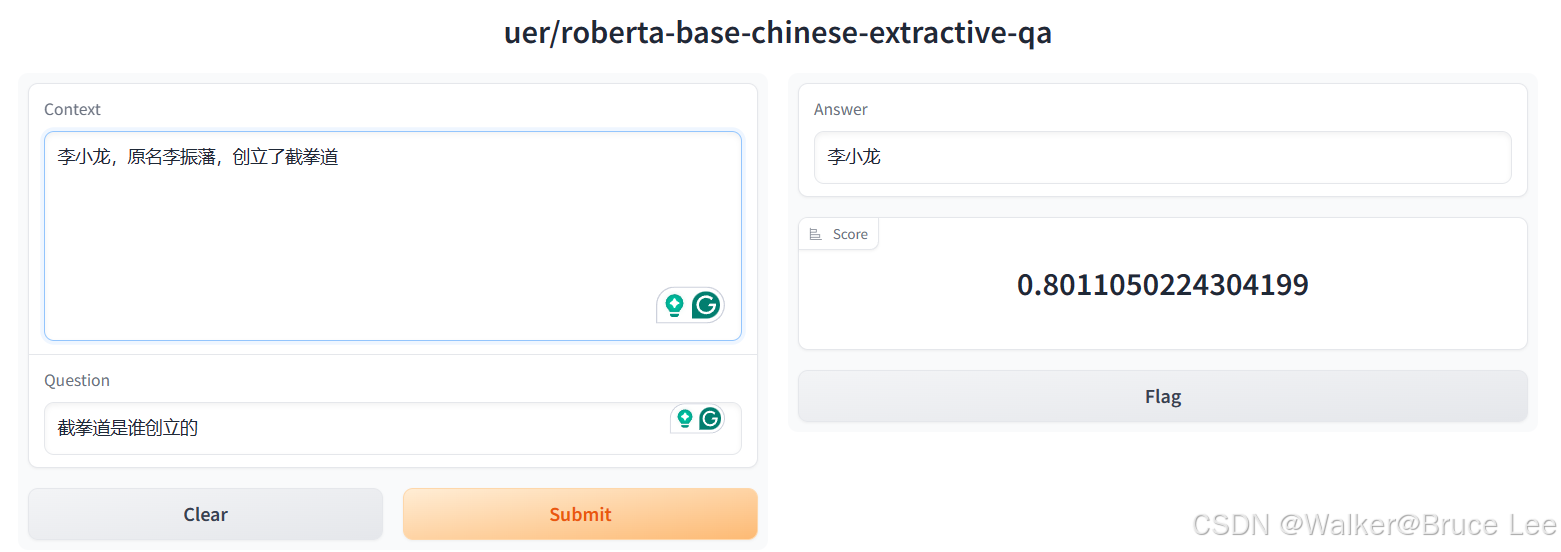
from transformers import *-
demo.py
# 导入gradio
import gradio as gr
# 导入transformers相关包
from transformers import pipeline
# 通过Interface加载pipeline并启动阅读理解服务
# 如果无法通过这种方式加载,可以采用离线加载的方式
gr.Interface.from_pipeline(pipeline("question-answering", model="uer/roberta-base-chinese-extractive-qa", device=0)).launch()
-
-
hosts修改-->解决访问github出问题
-
用everything搜索hosts
-
C:\Windows\System32\drivers\etc下的hosts用vscode打开
-
末尾添加以下内容并系统管理员保存
185.199.108.133 raw.githubusercontent.com
185.199.109.133 raw.githubusercontent.com
185.199.110.133 raw.githubusercontent.com
185.199.111.133 raw.githubusercontent.com
2606:50c0:8000::154 raw.githubusercontent.com
2606:50c0:8001::154 raw.githubusercontent.com
2606:50c0:8002::154 raw.githubusercontent.com
2606:50c0:8003::154 raw.githubusercontent.com
-
缓存路径修改
由于transformers的模型会下载到C盘用户下的.cache\huggingface\hub下,考虑到一般模型文件比较大占用系统内存,因此需要更改缓存路径到其他盘中
- 缓存路径
-
linux: ~/.cache/huggingface/hub
-
Windows:C:/Users/<用户名>/.cache/huggingface/hub
- 缓存的模型文件以哈希值形式储存
<CACHE_DIR> # 缓存路径
├─ <MODELS>    # 模型路径
├─ <DATASETS>  # 数据集路径
├─ <SPACES>    # 空间路径
-
<CACHE_DIR>通常由 HF_HOME 或 HF_HUB_CACHE指定
1. 更改模型下载的缓存路径
-
修改cache_dir参数
-
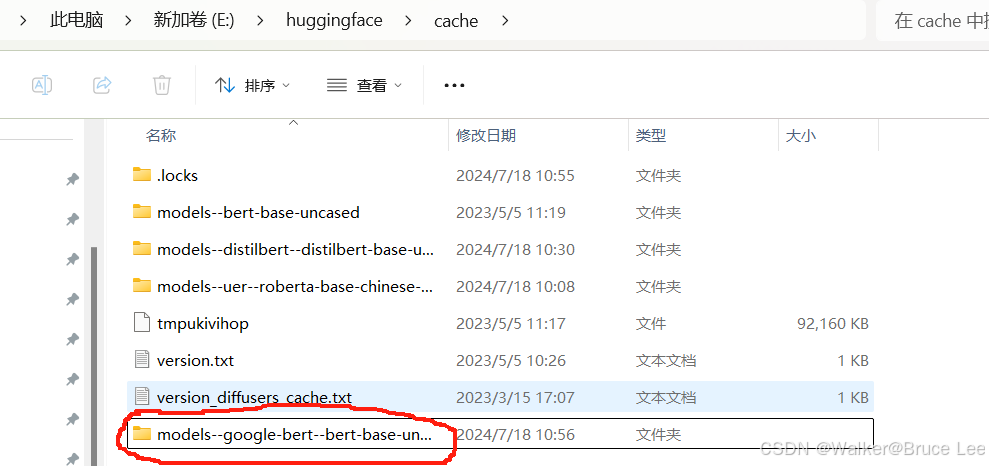
比如将模型下载到E:\huggingface\cache
from transformers import AutoModelForMaskedLM
model = AutoModelForMaskedLM.from_pretrained("google-bert/bert-base-uncased",cache_dir="E:/huggingface/cache")
- 设置环境变量
- HUGGINGFACE_HUB_CACHE
- TRANSFORMERS_CACHE
- HF_HOME
- XDG_CACHE_HOME + /huggingface
- 优先查找TRANSFORMERS_CACHE
- windows更改
- 新建系统环境变量TRANSFORMERS_CACHE,输入更改后的缓存目录路径
建议直接更改缓存目录参数就好


 4081
4081

 被折叠的 条评论
为什么被折叠?
被折叠的 条评论
为什么被折叠?
 到【灌水乐园】发言


