


用用户通过选择风的级别,让鲜花吹动 。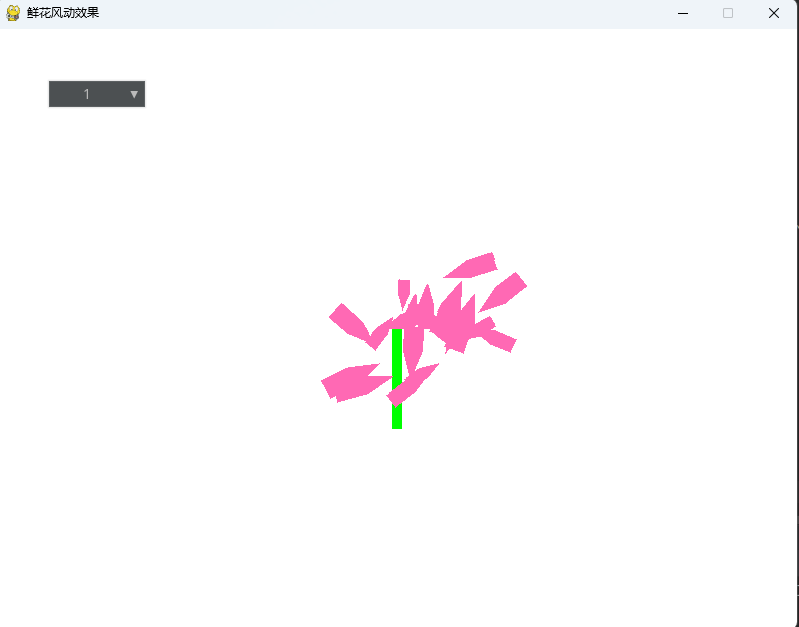
import pygame
import pygame_gui
import math

# 初始化 pygame
pygame.init()

# 窗口尺寸
WIDTH, HEIGHT = 800, 600
screen = pygame.display.set_mode((WIDTH, HEIGHT))
pygame.display.set_caption("鲜花风动效果")

# 创建 UI 管理器
manager = pygame_gui.UIManager((WIDTH, HEIGHT))

# 颜色定义
WHITE = (255, 255, 255)
GREEN = (0, 255, 0)
PINK = (255, 105, 180)

# 牡丹花参数
flower_center = (WIDTH // 2, HEIGHT // 2)
petal_num = 20  # 花瓣数量
petal_length_min = 30
petal_length_max = 60
petal_width_min = 10
petal_width_max = 20
stem_length = 100
stem_width = 10

# 风级相关参数
wind_level = 1
wind_force = 0.1  # 风的作用力大小
wind_direction = 0  # 风的方向(角度,0为水平向右)

# 每个花瓣的偏移、速度、旋转角度和旋转速度相关参数
petal_offsets = [0] * petal_num
petal_velocities = [0] * petal_num
petal_rotations = [0] * petal_num
petal_rotation_velocities = [0] * petal_num

# 计算风对物体的作用力
def wind_affect(x, y, mass, wind_force, wind_direction):
    force_x = wind_force * mass * math.cos(math.radians(wind_direction))
    force_y = wind_force * mass * math.sin(math.radians(wind_direction))
    return force_x, force_y

# 绘制牡丹花花瓣
def draw_petal(x, y, angle, length, width, rotation):
    rotated_points = []
    points = [
        (-width / 2, -length),
        (width / 2, -length),
        (width / 2, -length / 2),
        (0, 0),
        (-width / 2, -length / 2)
    ]
    for point in points:
        new_x = point[0] * math.cos(math.radians(angle + rotation)) - point[1] * math.sin(math.radians(angle + rotation))
        new_y = point[0] * math.sin(math.radians(angle + rotation)) + point[1] * math.cos(math.radians(angle + rotation))
        rotated_points.append((new_x + x, new_y + y))
    pygame.draw.polygon(screen, PINK, rotated_points)

# 绘制牡丹花
def draw_peony():
    global flower_center
    # 绘制花茎
    pygame.draw.rect(screen, GREEN, (flower_center[0] - stem_width // 2, flower_center[1], stem_width, stem_length))
    # 绘制花瓣
    for i in range(petal_num):
        angle = (i * (360 / petal_num)) + wind_direction
        length = petal_length_min + (petal_length_max - petal_length_min) * \
                 (math.sin(math.radians(angle * 2)) + 1) / 2
        width = petal_width_min + (petal_width_max - petal_width_min) * \
                (math.sin(math.radians(angle * 2)) + 1) / 2
        x = flower_center[0] + length * math.cos(math.radians(angle)) + petal_offsets[i] * math.cos(math.radians(wind_direction))
        y = flower_center[1] - length * math.sin(math.radians(angle)) + petal_offsets[i] * math.sin(math.radians(wind_direction))
        draw_petal(x, y, angle, length, width, petal_rotations[i])

# 创建风级选择下拉菜单
wind_level_options = [str(i) for i in range(1, 13)]
wind_level_dropdown = pygame_gui.elements.UIDropDownMenu(
    options_list=wind_level_options,
    starting_option=wind_level_options[0],
    relative_rect=pygame.Rect((50, 50), (100, 30)),
    manager=manager
)

# 主循环
running = True
clock = pygame.time.Clock()
while running:
    time_delta = clock.tick(60) / 1000.0
    for event in pygame.event.get():
        if event.type == pygame.QUIT:
            running = False
        elif event.type == pygame_gui.UI_DROP_DOWN_MENU_CHANGED:
            if event.ui_element == wind_level_dropdown:
                wind_level = int(event.text)
                wind_force = wind_level * 0.1
                # 重置速度和旋转速度,确保风级变化时能及时响应
                petal_velocities = [0] * petal_num
                petal_rotation_velocities = [0] * petal_num

        manager.process_events(event)

    # 根据风力更新花瓣的偏移和速度,强化反复摆动效果
    for i in range(petal_num):
        # 计算偏移速度,增加风的影响系数
        wind_influence = wind_force * (math.sin(math.radians(i * 10 + wind_direction)) + 1) / 3
        petal_velocities[i] += wind_influence
        petal_offsets[i] += petal_velocities[i]

        # 模拟更自然的反复摆动,增加阻尼效果
        damping = 0.98  # 阻尼系数,让摆动逐渐趋于稳定
        petal_velocities[i] *= damping

        # 边界反弹逻辑,实现反复摆动
        if petal_offsets[i] >= 30 or petal_offsets[i] <= -30:
            petal_velocities[i] *= -0.9  # 反弹并适当减速

        # 限制偏移量范围
        petal_offsets[i] = min(max(petal_offsets[i], -30), 30)

        # 添加更缓慢的旋转效果
        rotation_influence = wind_force * (math.cos(math.radians(i * 10 + wind_direction)) + 1) / 20  # 进一步减小旋转影响系数
        petal_rotation_velocities[i] += rotation_influence
        petal_rotations[i] += petal_rotation_velocities[i]
        petal_rotations[i] %= 360  # 确保旋转角度在 0-360 度之间

    screen.fill(WHITE)
    draw_peony()
    manager.update(time_delta)
    manager.draw_ui(screen)

    pygame.display.flip()

pygame.quit()
代码解释:
代码实现了一个带有风级选择下拉菜单的窗口,窗口中展示了一朵牡丹花,花瓣会根据选择的风级进行摆动和缓慢旋转。以下是对代码各部分的解释:
python
import pygame
import pygame_gui
import math
这部分代码导入了三个必要的库:pygame 是一个用于开发游戏和多媒体应用的 Python 库;pygame_gui 是基于 pygame 的一个用于创建用户界面的库,这里用于创建风级选择的下拉菜单;math 库则提供了各种数学函数,用于计算角度、三角函数等。
python
# 初始化 pygame
pygame.init()

# 窗口尺寸
WIDTH, HEIGHT = 800, 600
screen = pygame.display.set_mode((WIDTH, HEIGHT))
pygame.display.set_caption("鲜花风动效果")
初始化 pygame 库,设置游戏窗口的宽度为 800 像素,高度为 600 像素,并设置窗口的标题为 “鲜花风动效果”。
python
# 创建 UI 管理器
manager = pygame_gui.UIManager((WIDTH, HEIGHT))
创建一个 pygame_gui 的用户界面管理器,用于管理和更新界面元素。
python
# 颜色定义
WHITE = (255, 255, 255)
GREEN = (0, 255, 0)
PINK = (255, 105, 180)
定义了三种颜色常量,分别是白色、绿色和粉色,用于后续绘制图形。
python
# 牡丹花参数
flower_center = (WIDTH // 2, HEIGHT // 2)
petal_num = 20  # 花瓣数量
petal_length_min = 30
petal_length_max = 60
petal_width_min = 10
petal_width_max = 20
stem_length = 100
stem_width = 10
定义了牡丹花的相关参数,包括花朵中心的位置(位于窗口中心)、花瓣的数量、花瓣长度和宽度的最小值与最大值,以及花茎的长度和宽度。
python
# 风级相关参数
wind_level = 1
wind_force = 0.1  # 风的作用力大小
wind_direction = 0  # 风的方向(角度,0为水平向右)
定义了风的相关参数,初始风级为 1,风的作用力大小为 0.1,风的方向初始为水平向右(角度为 0 度)。
python
# 每个花瓣的偏移、速度、旋转角度和旋转速度相关参数
petal_offsets = [0] * petal_num
petal_velocities = [0] * petal_num
petal_rotations = [0] * petal_num
petal_rotation_velocities = [0] * petal_num
创建了四个列表,分别用于存储每个花瓣的偏移量、偏移速度、旋转角度和旋转速度,初始值都为 0。
python
# 计算风对物体的作用力
def wind_affect(x, y, mass, wind_force, wind_direction):
    force_x = wind_force * mass * math.cos(math.radians(wind_direction))
    force_y = wind_force * mass * math.sin(math.radians(wind_direction))
    return force_x, force_y
定义了一个函数 wind_affect,用于计算风对物体在 x 和 y 方向上的作用力,通过传入物体的位置 (x, y)、质量 mass、风的作用力大小 wind_force 和风的方向 wind_direction 来计算。
python
# 绘制牡丹花花瓣
def draw_petal(x, y, angle, length, width, rotation):
    rotated_points = []
    points = [
        (-width / 2, -length),
        (width / 2, -length),
        (width / 2, -length / 2),
        (0, 0),
        (-width / 2, -length / 2)
    ]
    for point in points:
        new_x = point[0] * math.cos(math.radians(angle + rotation)) - point[1] * math.sin(math.radians(angle + rotation))
        new_y = point[0] * math.sin(math.radians(angle + rotation)) + point[1] * math.cos(math.radians(angle + rotation))
        rotated_points.append((new_x + x, new_y + y))
    pygame.draw.polygon(screen, PINK, rotated_points)
定义了一个函数 draw_petal,用于绘制单个花瓣。它接受花瓣的位置 (x, y)、角度 angle、长度 length、宽度 width 和旋转角度 rotation 作为参数,通过计算旋转后的顶点坐标,然后使用 pygame.draw.polygon 绘制出花瓣。
python
# 绘制牡丹花
def draw_peony():
    global flower_center
    # 绘制花茎
    pygame.draw.rect(screen, GREEN, (flower_center[0] - stem_width // 2, flower_center[1], stem_width, stem_length))
    # 绘制花瓣
    for i in range(petal_num):
        angle = (i * (360 / petal_num)) + wind_direction
        length = petal_length_min + (petal_length_max - petal_length_min) * \
                 (math.sin(math.radians(angle * 2)) + 1) / 2
        width = petal_width_min + (petal_width_max - petal_width_min) * \
                (math.sin(math.radians(angle * 2)) + 1) / 2
        x = flower_center[0] + length * math.cos(math.radians(angle)) + petal_offsets[i] * math.cos(math.radians(wind_direction))
        y = flower_center[1] - length * math.sin(math.radians(angle)) + petal_offsets[i] * math.sin(math.radians(wind_direction))
        draw_petal(x, y, angle, length, width, petal_rotations[i])
定义了一个函数 draw_peony,用于绘制整朵牡丹花。首先绘制花茎,然后通过循环计算每个花瓣的角度、长度、宽度和位置,调用 draw_petal 函数绘制每个花瓣。
python
# 创建风级选择下拉菜单
wind_level_options = [str(i) for i in range(1, 13)]
wind_level_dropdown = pygame_gui.elements.UIDropDownMenu(
    options_list=wind_level_options,
    starting_option=wind_level_options[0],
    relative_rect=pygame.Rect((50, 50), (100, 30)),
    manager=manager
)
创建了一个风级选择的下拉菜单。首先生成一个包含风级选项的列表 wind_level_options,范围是从 1 到 12。然后使用 pygame_gui 的 UIDropDownMenu 类创建下拉菜单,设置初始选项为第一个选项,相对位置为 (50, 50),大小为 (100, 30),并将其关联到之前创建的 UI 管理器 manager 上。
python
# 主循环
running = True
clock = pygame.time.Clock()
while running:
    time_delta = clock.tick(60) / 1000.0
    for event in pygame.event.get():
        if event.type == pygame.QUIT:
            running = False
        elif event.type == pygame_gui.UI_DROP_DOWN_MENU_CHANGED:
            if event.ui_element == wind_level_dropdown:
                wind_level = int(event.text)
                wind_force = wind_level * 0.1
                # 重置速度和旋转速度,确保风级变化时能及时响应
                petal_velocities = [0] * petal_num
                petal_rotation_velocities = [0] * petal_num

        manager.process_events(event)
主循环部分,用于处理游戏的各种事件和更新游戏状态。设置一个布尔变量 running 来控制循环是否继续。使用 pygame.time.Clock 来控制帧率为 60 帧每秒。在事件循环中,检测窗口关闭事件和下拉菜单选项改变事件。当下拉菜单选项改变时,更新风级 wind_level 和风的作用力大小 wind_force,并重置花瓣的偏移速度和旋转速度。
python
    # 根据风力更新花瓣的偏移和速度,强化反复摆动效果
    for i in range(petal_num):
        # 计算偏移速度,增加风的影响系数
        wind_influence = wind_force * (math.sin(math.radians(i * 10 + wind_direction)) + 1) / 3
        petal_velocities[i] += wind_influence
        petal_offsets[i] += petal_velocities[i]

        # 模拟更自然的反复摆动,增加阻尼效果
        damping = 0.98  # 阻尼系数,让摆动逐渐趋于稳定
        petal_velocities[i] *= damping

        # 边界反弹逻辑,实现反复摆动
        if petal_offsets[i] >= 30 or petal_offsets[i] <= -30:
            petal_velocities[i] *= -0.9  # 反弹并适当减速

        # 限制偏移量范围
        petal_offsets[i] = min(max(petal_offsets[i], -30), 30)

        # 添加更缓慢的旋转效果
        rotation_influence = wind_force * (math.cos(math.radians(i * 10 + wind_direction)) + 1) / 20  # 进一步减小旋转影响系数
        petal_rotation_velocities[i] += rotation_influence
        petal_rotations[i] += petal_rotation_velocities[i]
        petal_rotations[i] %= 360  # 确保旋转角度在 0-360 度之间
在主循环中,根据风力更新每个花瓣的偏移量和速度,通过计算风的影响系数 wind_influence 来更新偏移速度 petal_velocities 和偏移量 petal_offsets。同时,添加了阻尼效果(通过乘以阻尼系数 damping),以及边界反弹逻辑,当花瓣偏移量达到边界时反向并减速。最后,计算旋转速度的影响系数 rotation_influence 来更新旋转速度 petal_rotation_velocities 和旋转角度 petal_rotations,并确保旋转角度在 0 到 360 度之间。
python
    screen.fill(WHITE)
    draw_peony()
    manager.update(time_delta)
    manager.draw_ui(screen)

    pygame.display.flip()
在每一帧中,先将屏幕填充为白色,然后调用 draw_peony 函数绘制牡丹花,接着更新 UI 管理器并绘制 UI 元素,最后使用 pygame.display.flip 更新屏幕显示,展示当前帧的内容。
python
pygame.quit()

当主循环结束(窗口关闭)时,调用 pygame.quit() 函数来退出 pygame。


 5692
5692

 被折叠的 条评论
为什么被折叠?
被折叠的 条评论
为什么被折叠?
 到【灌水乐园】发言


