


一、 概述
采用树莓派4B + 官方摄像头+阿里云服务器实现树莓派定时拍摄照片上传到服务器的功能。主要使用python 和C语言编程。树莓派和服务器之间采用TCP/IP 协议通信,树莓派通过串口发送指令给单片机,单片机在使用PWM控制舵机式摄像头可以拍摄不同角度的照片。
二、相关环境及使用材料说明
硬件:STM32F103RCT6
两个SG90舵机
树莓派4B
CSI摄像头500W像素
软件及环境:Keil5-MDK(5.30)
操作系统:Windows10 家庭版
树莓派镜像:2020-12-02-raspios-buster-armhf.img
服务器版本:ubuntu16.04 LTS(32位)
三、具体实现过程
1.服务器代码
import socket, time, struct, os, threading
host = '0.0.0.0'
port = 8000
s = socket.socket(socket.AF_INET, socket.SOCK_STREAM) # 定义socket类型
s.bind((host, port)) # 绑定需要监听的Ip和端口号,tuple格式
s.listen(5)
def conn_thread(connection, address):
i = 0
while True:
try:
connection.settimeout(600)
fileinfo_size = struct.calcsize('128sl')
buf = connection.recv(fileinfo_size)
if buf:
filename, filesize = struct.unpack('128sl', buf)
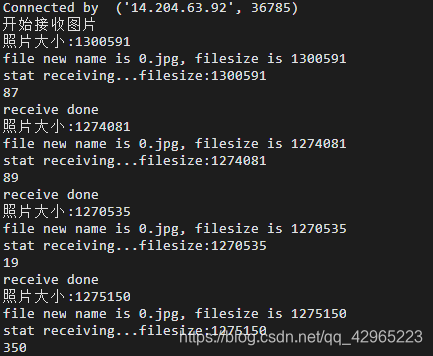
print("照片大小:"+str(filesize))
if filesize< 0 or filesize > 2432075:
continue
filename = filename.decode().strip('\00')
print('file new name is %s, filesize is %s' % (filename, filesize))
# 获取当前时间年月日时分秒
localtime =time.strftime("%Y%m%d%H%M%S",time.localtime(time.time()))
# 构造文件路径
filepath = '/root/PIC/'+ str(localtime) + '.jpg'
file = open(filepath,'wb')
print('stat receiving...filesize:' + str(filesize))
recvd_size = 0 # 定义接收了的文件大小
while recvd_size != filesize:
if filesize - recvd_size >= 1024:
rdata = connection.recv(1024)
recvd_size += len(rdata)
elif filesize - recvd_size <1024 and filesize - recvd_size > 0:
print(filesize - recvd_size)
rdata = connection.recv(filesize - recvd_size)
recvd_size += len(rdata)
file.write(rdata)
file.close()
print('receive done')
# connection.close()
i += 1
except socket.timeout:
connection.close()
con.close()
def main():
while True:
print("开始接收图片")
connection, address = s.accept()
print('Connected by ', address)
thread = threading.Thread(target=conn_thread, args=(connection, address))
thread.start()
s.close()
if __name__ == '__main__':
main()
未解之谜:当时用64位的服务器时,照片死活都传不上去,报错如下:
	服务端代码运行在服务器上时发生错误(此时服务器版本:ubuntu12 Python版本:3.5)
			File "/usr/lib/python3.5/threading.py", line 914, in _bootstrap_inner
			self.run()
			File "/usr/lib/python3.5/threading.py", line 862, in run
			self._target(*self._args, **self._kwargs)
			File "RecievePic.py", line 16, in conn_thread
			filename, filesize = struct.unpack('139sl', buf)
			struct.error: unpack requires a bytes object of length 152
后来更换成32位的服务器就好了,现在也不知道为啥。
2. 树莓派客户端代码
树莓派客户端采用了opencv对图像进行了处理,opencv具体的安装过程可以参考下面的几篇博客:
https://blog.csdn.net/cold_hl/article/details/106195325
https://www.cnblogs.com/gghy/p/11916830.html
我安装的是4.03版本的,安装过程中遇到的一些错误如下:
Archive:  opencv-3.4.8.zip
		End-of-central-directory signature not found.  Either this file is not
		a zipfile, or it constitutes one disk of a multi-part archive.  In the
		latter case the central directory and zipfile comment will be found on
		the last disk(s) of this archive.
		note:  opencv-3.4.8.zip may be a plain executable, not an archive
		unzip:  cannot find zipfile directory in one of opencv-3.4.8 or
				opencv-3.4.8.zip, and cannot find opencv-3.4.8.ZIP, period.

		①安装包不完全,选择重新下载
		② jar xvf opencv-3.4.8.zip 使用此命令解压


		编译Opencv报错:
			/home/pi/opencv-3.4.3/modules/stitching/include/opencv2/stitching/detail/matchers.hpp:52:10: fatal error: /home/pi/opencv_contrib-3.4.3/modules/xfeatures2d/cuda.hpp: No such file or directory
			#include "/home/pi/opencv_contrib-3.4.3/modules/xfeatures2d/cuda.hpp"
			在此路径中找不到头文件

			查询发现文件路径在这:/home/pi/opencv_contrib-3.4.3/modules/xfeatures2d/include/opencv2/xfeatures2d
			修改后便可

		最后无法找到 hdf.h 而失败告终


	更换树莓派系统,再次安装,成功
		系统版本:2020-12-02-raspios-buster-armhf.img
		opencv版本:opencv-3.4.3
		参考博客:https://blog.csdn.net/cold_hl/article/details/106195325

		注意事项:opencv.3.4.3.zip 可以在windows上下载然后拷贝下来
		          opencv_contrib-3.4.3.zip依赖还是使用wget方式,不然可能会缺失一些文件导致make失败
				  wget -O opencv_contrib-3.4.3.zip \
				  https://github.com/Itseez/opencv_contrib/archive/3.4.3.zip

				  使用CMAKE 命令时,需要注意修改路径对应自己依赖包下面的modules
				  cmake -D CMAKE_BUILD_TYPE=RELEASE \
					-D CMAKE_INSTALL_PREFIX=/usr/local \
					-D INSTALL_C_EXAMPLES=ON \
					-D INSTALL_PYTHON_EXAMPLES=ON \
					-D OPENCV_EXTRA_MODULES_PATH=/home/pi/Opencv/opencv_contrib-3.4.3/modules \#这一行
					-D BUILD_EXAMPLES=ON \
					-D WITH_LIBV4L=ON \
					-D PYTHON3_EXECUTABLE=/usr/bin/python3.7 \
					-D PYTHON_INCLUDE_DIR=/usr/include/python3.7 \
					-D PYTHON_LIBRARY=/usr/lib/arm-linux-gnueabihf/libpython3.7m.so \
					-D PYTHON3_NUMPY_INCLUDE_DIRS=/usr/lib/python3/dist-packages/numpy/core/include \
					..
客户端代码如下:
在这里插入代码片# -*- coding: UTF-8 -*-
import socket, os, struct
import time
import serial
import cv2
from picamera import PiCamera
"""设置 ip 地址"""
s = socket.socket(socket.AF_INET, socket.SOCK_STREAM)
s.connect(('xxx.xxx.xxx.xxx', 8000))#自己服务器的IP
"""设置 摄像头"""
camera = PiCamera()
camera.resolution = (1920,1080)
#camera.resolution = (160,120)
camera.framerate = 60
"""设置 串口 """
ser = serial.Serial("/dev/ttyAMA0", 9600)
PicNumber=0 #发送照片数量
#ser.write('S'.encode())
#ser.write('1'.encode())
#ser.write('E'.encode())
while True:
PicNumber = PicNumber+1
camera.capture('/home/pi/class/0.jpg')
filepath = '/home/pi/class/0.jpg'
if os.path.isfile(filepath):
fileinfo_size = struct.calcsize('128sl') # 定义打包规则
# 定义文件头信息,包含文件名和文件大小
fhead = struct.pack('128sl',bytes(os.path.basename(filepath),encoding='utf-8'), os.stat(filepath).st_size)
s.send(fhead)
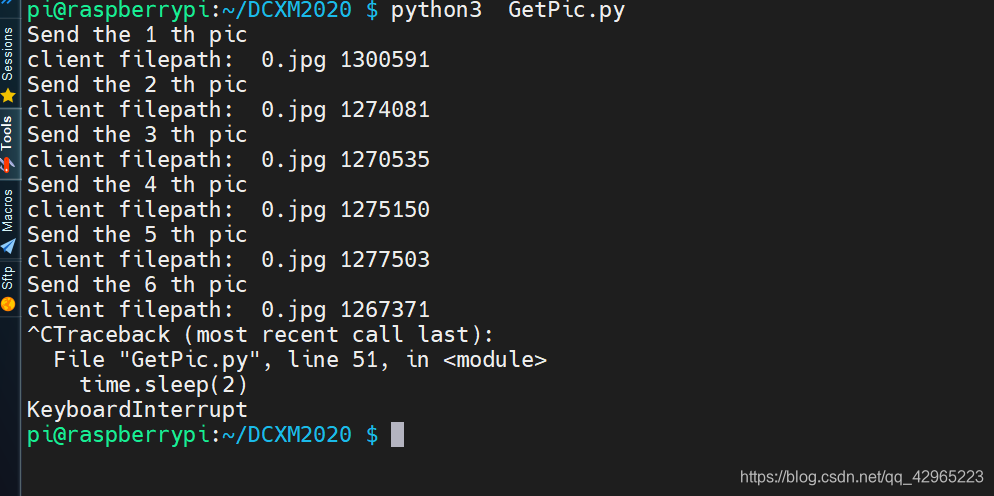
print('Send the',PicNumber,'th pic')
print('client filepath: ', os.path.basename(filepath), os.stat(filepath).st_size)
# with open(filepath,'rb') as fo: 这样发送文件有问题,发送完成后还会发一些东西过去
fo = open(filepath, 'rb')
while True:
filedata = fo.read(1024)
if not filedata:
break
s.send(filedata)
#time.sleep(0.5)
fo.close()
# print('Send the',PicNumber,'th pic')
time.sleep(2)
ser.write('S'.encode())
ser.write('1'.encode())
ser.write('E'.encode())
if PicNumber >= 10: #发送10张
print('All send',PicNumber,'sheet')
s.close()
3.STM32部分代码
STM32主要通过串口3接收树莓派发送过来的数据,然后完成驱动舵机转动的功能。
串口接收部分代码如下:
void USART3_IRQHandler()
{
    if(USART_GetITStatus(USART3,USART_IT_RXNE) != RESET) //中断产生
    {
        Usart3.pRxBuff[Usart3.RxReadPtr] = USART_ReceiveData(USART3) ; //接收一字节
        Usart3.RxOneFlag = 1 ;
        if(++Usart3.RxReadPtr > Usart3.RxBuffSize)
        {
            Usart3.RxReadPtr = 0 ;
            printf("Data Overflow\r\n") ; //提醒数据溢出
        }// ;

        USART_ClearITPendingBit(USART3, USART_IT_RXNE) ;
    }

    else if(USART_GetITStatus(USART3,USART_IT_IDLE) != RESET)  //空闲接收
    {
        USART3->SR;//先读SR    清除中断
		USART3->DR;//再读DR
        Usart3.RxFrameFlag = 1 ;
        Usart3.RxReadPtr = 0 ;

        if((Usart3.pRxBuff[0] == 'S') && (Usart3.pRxBuff[2] == 'E'))
        {
            //
             if(Usart3.pRxBuff[1] == '1')
             {
                  printf("AQA\r\n");    //just for test

                  RevCnt++ ;

                 if(RevCnt <= 5)   //正传
                 {
                     Servo1_Angle(RevCnt*36);
                 }
                 else if(RevCnt > 5 && RevCnt <= 10) //反转
                 {
                     Servo1_Angle((10-RevCnt)*36);
                     if(RevCnt == 10) RevCnt = 0 ;
                 }


             }
         memset(Usart3.pRxBuff, 0, USART3_RX_BUFF_SIZE);
        }
    }

}
舵机驱动代码:
void Servo_Init(void)
{
    Servo_PWM_Init(SERVO_TIM_ARR, SERVO_TIM_PSC);
	TIM_SetCompare2(TIM2,50);    //		CH2捕获比较寄存器赋值
	TIM_SetCompare1(TIM2, 50) ;  //     CH1捕获比较寄存器赋值
}


void Servo2_Angle(uint16_t Angle)
{
	uint16_t pulse ;

	if(Angle <= 0)
	{
	    Angle = 0;
	}

	if(Angle >= 300)
	{
	    Angle = 300 ;
	}

	 pulse = (uint16_t)(50 + Angle * 100/180.0);
	 TIM_SetCompare2(TIM2, pulse);
}


void Servo1_Angle(uint16_t Angle)
{
	uint16_t pulse ;

	if(Angle <= 0)
	{
	    Angle = 0;
	}

	if(Angle >= 300)
	{
	    Angle = 300 ;
	}

	 pulse = (uint16_t)(50 + Angle * 100/180.0);
	 TIM_SetCompare1(TIM2, pulse);
}
传输图片这部分参考了如下两篇博客,感谢博主!
https://www.cnblogs.com/lw77/p/11963174.html
https://blog.csdn.net/xqf1528399071/article/details/52850157
四、定时任务的实现
定时任务主要使用的是Linux系统下有一个定时运行的程序命令叫“crontab”,它是是任务调度的crond常驻命令,是Linux系统下的定时任务触发器 。采用这个需要用到实时的时间,若是时间不对的可以参考如下过程。
树莓派调整时间
		安装软件:sudo apt-get install ntpdate
				  sudo apt-get install ntp NTP(Network Time Protocol)服务
		修改时区:tzselect
		依次选择国家、城市、等,按提示进行操作

		sudo vim /root/.profile 在末尾添加:TZ="Asia/Shanghai";export TZ
		添加 ntp 服务器:sudo ntpdate cn.pool.ntp.org
		sudo ntpd -s –d 校准

		若是需要开机自启动对时,则执行以下命令:
		sudo nano /etc/rc.local  在最后添加一行:sudo ntpdate cn.pool.ntp.org

	采用 crontab命令定时执行任务详解:
		 sudo crontab -e 编辑事件

		分钟 小时 日期 月份 周 指令
        0-59 0-23 1-31 1-12 0-7 指令 #0和7都代表星期天

		每五分钟执行 */5 * * * *
		每小时执行 0 * * * *
		每天执行 0 0 * * *
		每周执行 0 0 * * 0
		每月执行 0 0 1 * *
		每年执行 0 0 1 1 *

		每五分钟执行 */5 * * * * :(具体实现)
			*/5 * * * * /usr/bin/python3.7 /home/pi/DCXM2020/GetPic.py

		*:表示所有的值,如果m字段是星号,这说明每分钟都运行。
        ,:表示一个列表,如果m字段是 “1,5,15,58”,这说明在第1分钟,第5分钟,第15分钟和第58分钟会运行
        -:表示一个范围,如果m字段是 1-5,这说明第1分钟、第2分钟、第3分钟、第4分钟和第5分钟都会运行
        /:表示时间间隔,如果m字段是 */10,这说明每隔10分钟运行


		编辑完成后记得重新启动:sudo /etc/init.d/cron restart
		主要若是采用上述语句无法看到效果后,可以采用如下命令:
			service cron restart  重新启动服务。
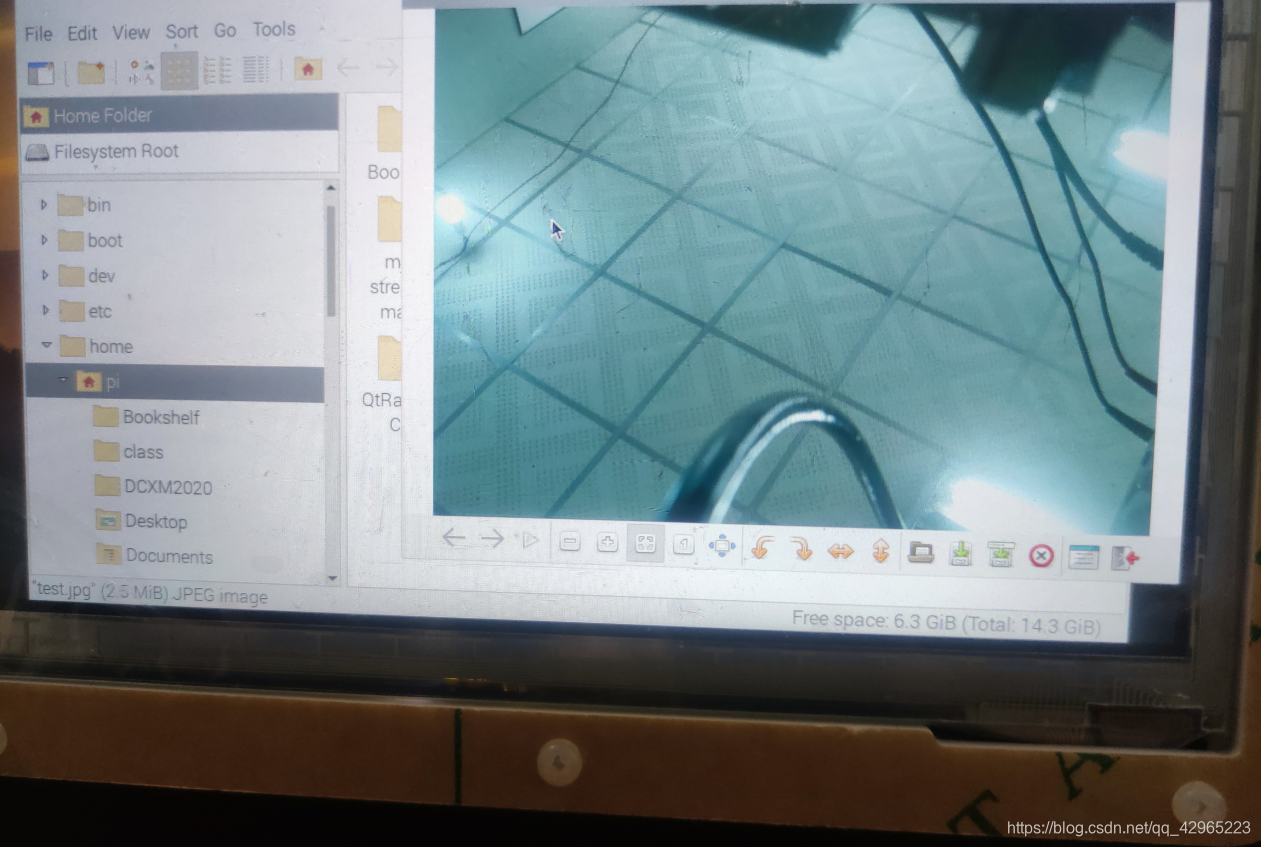
五、演示效果图


 755
755


 被折叠的 条评论
为什么被折叠?
被折叠的 条评论
为什么被折叠?
 到【灌水乐园】发言


