


win10系统下使用mingw编译protobuf,并且在vscode中使用cmake配置应用
1 安装mingw编译器
- 这里作者使用了QT6自带的mingw编译器进行编译,其他的版本并为测试,感觉应该也可以。
2 安装cmake编辑器
- 可以自己参考其他博客下载,这个不难
3 下载protobuf源码,地址
- (作者选择了21.6的版本,写博客的时候已经有22版本了,但是是一个大版本的更新,作者也报错了,就选了21.6版本)
4 开始编译
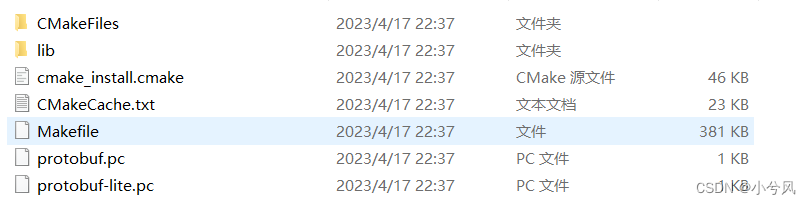
1 解压protobuf文件夹,在下面新建一个build文件夹

2 打卡cmake,设置源码路径以及编译路径
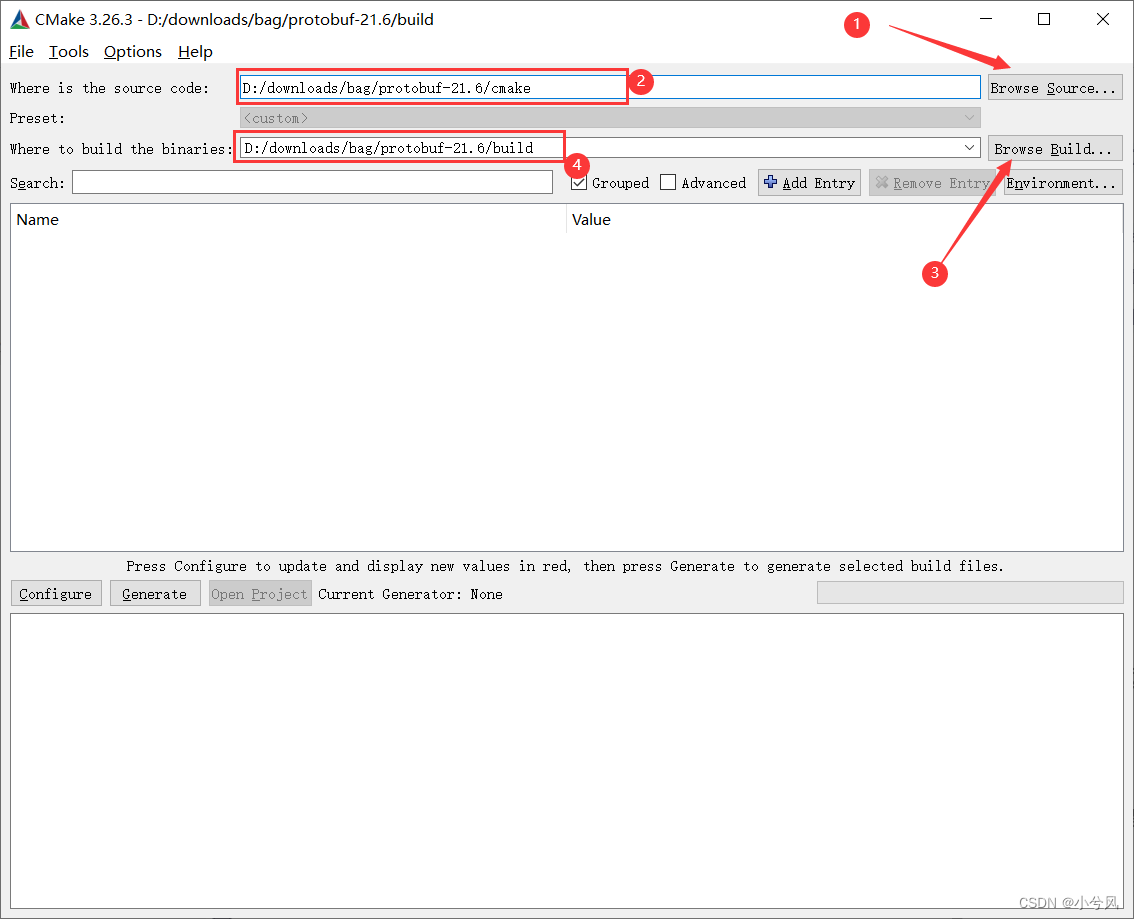
- 注意,源文件路径是protobuf下的cmake下,而不是直接是protobuf下就可以
3 设置编译选项
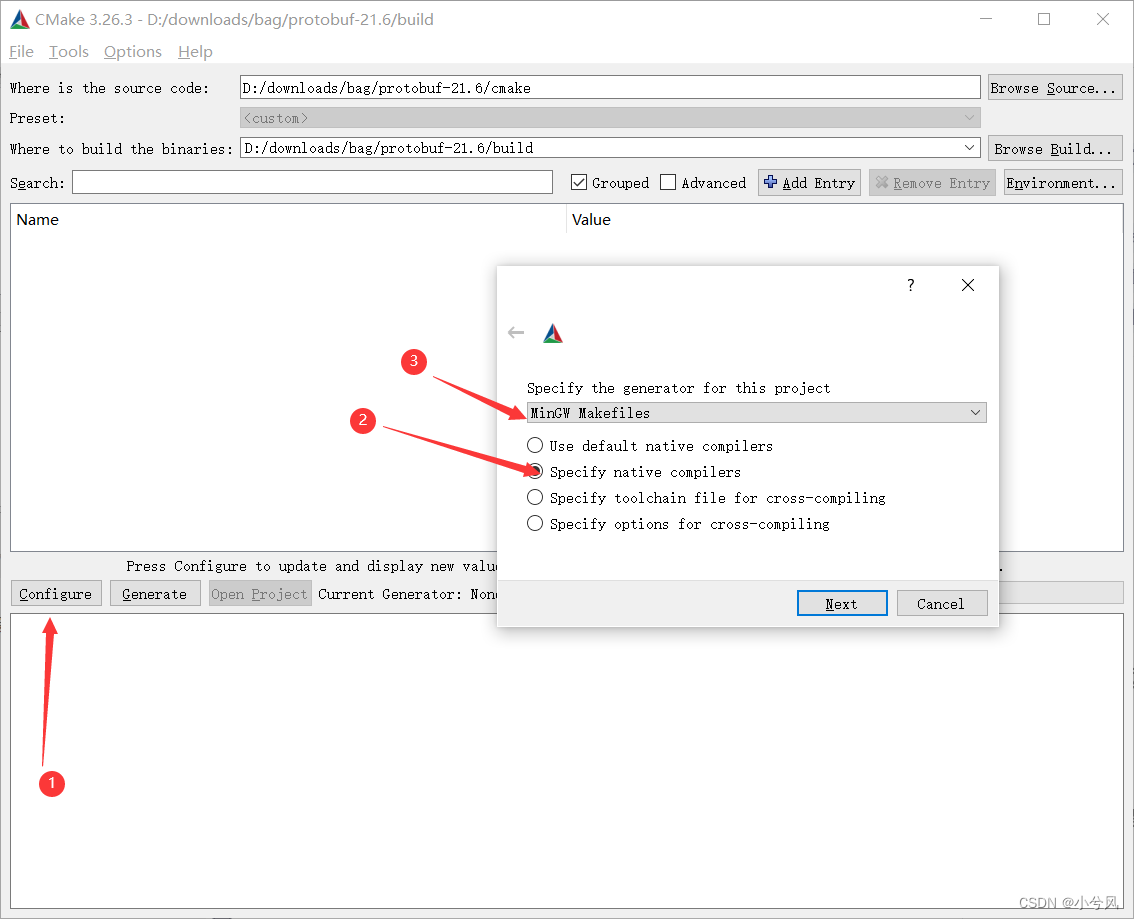
1、 点击configure按钮
2、设置Specify native compilers 自己的编译器
3、 选择mingw makefiles
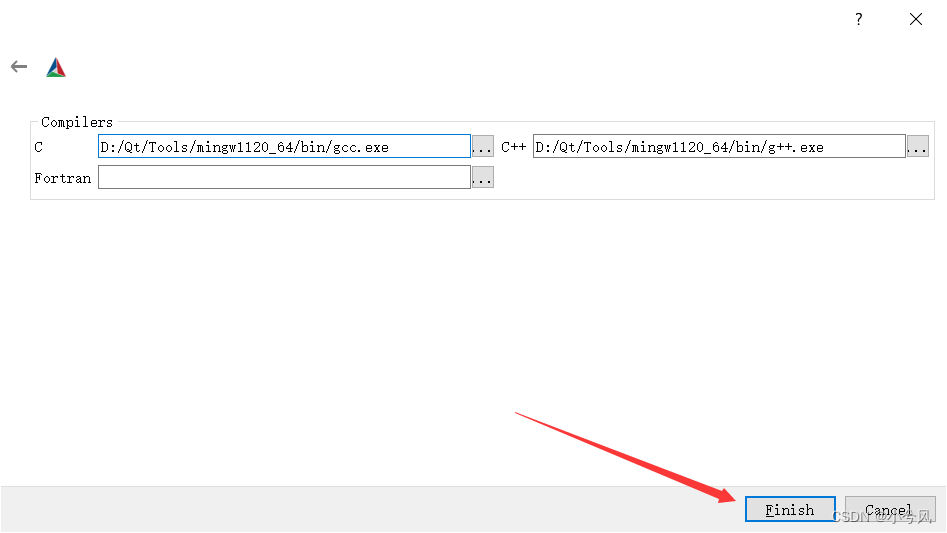
4 设置自己编译器路径
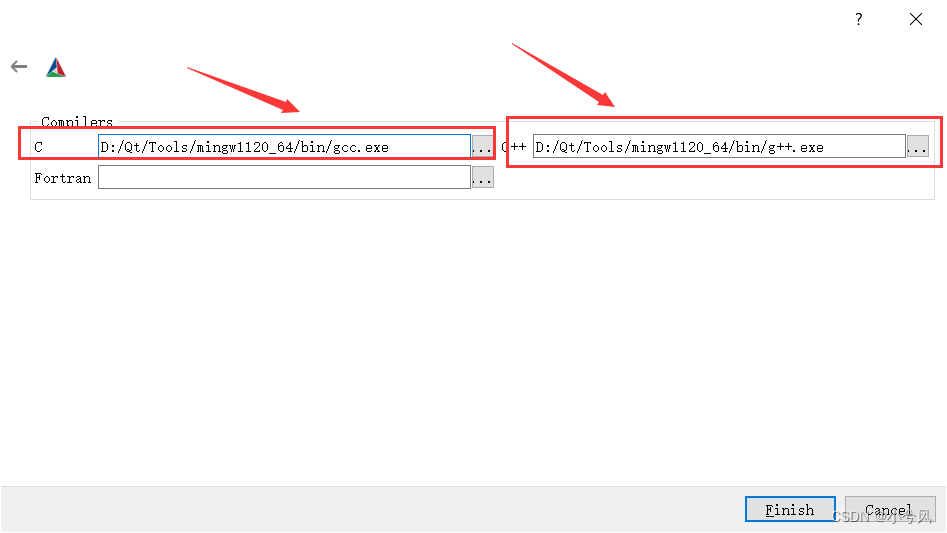
- 分别设置好C,C++的编译器路径
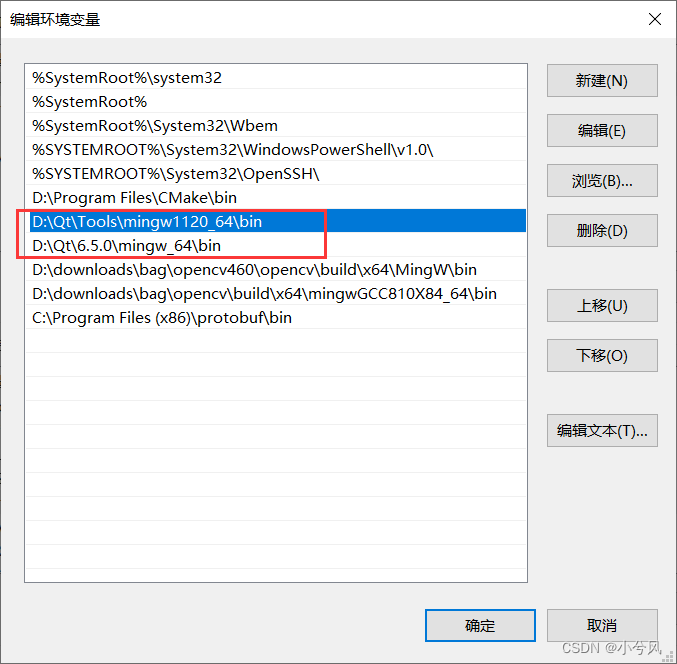
- 在环境变量中设置mingw的bin路径(这个应该是需要设置的)
5 完成设置,再次点击configure按钮
- 接着开始编译,然后会报错
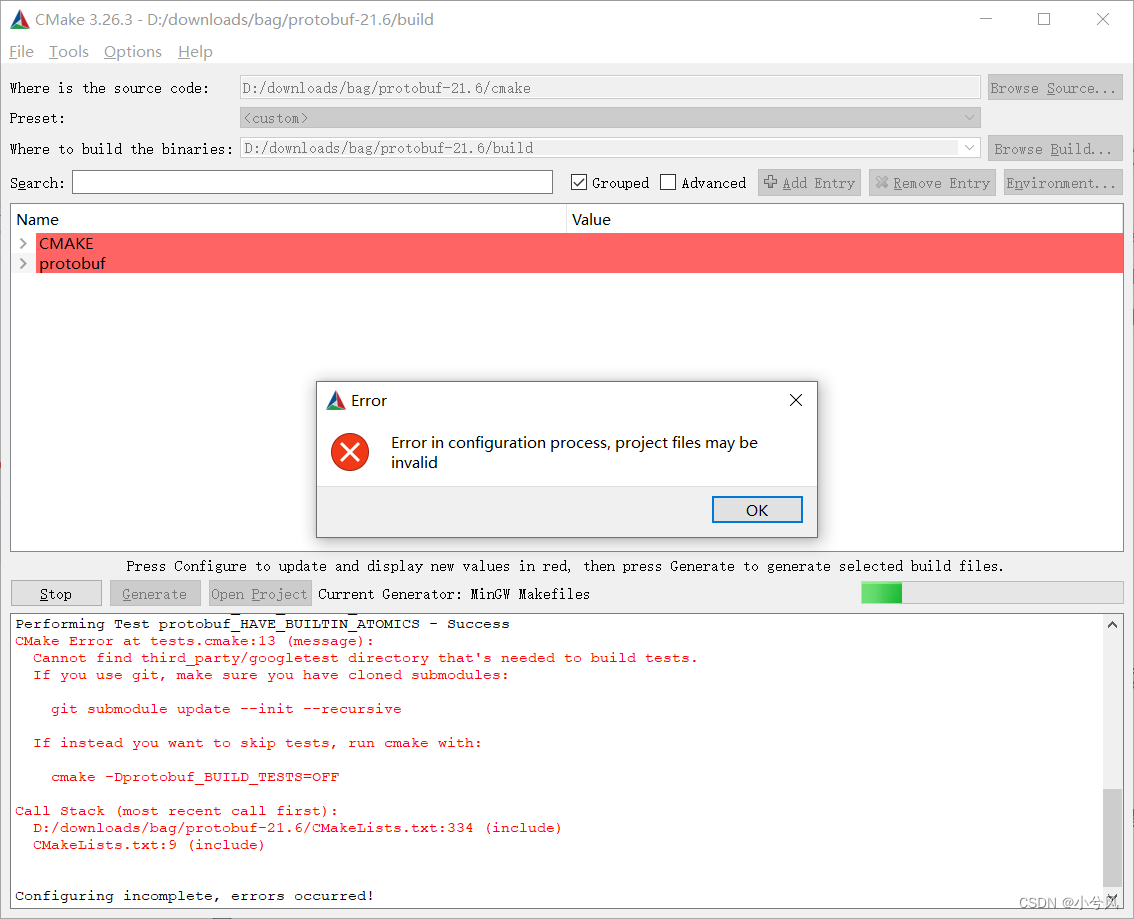
- 将报错叉掉,然后复制报错信息cmake -Dprotobuf_BUILD_TESTS=OFF
- 将其中的protobuf_BUILD_TESTS放到search上取消勾选
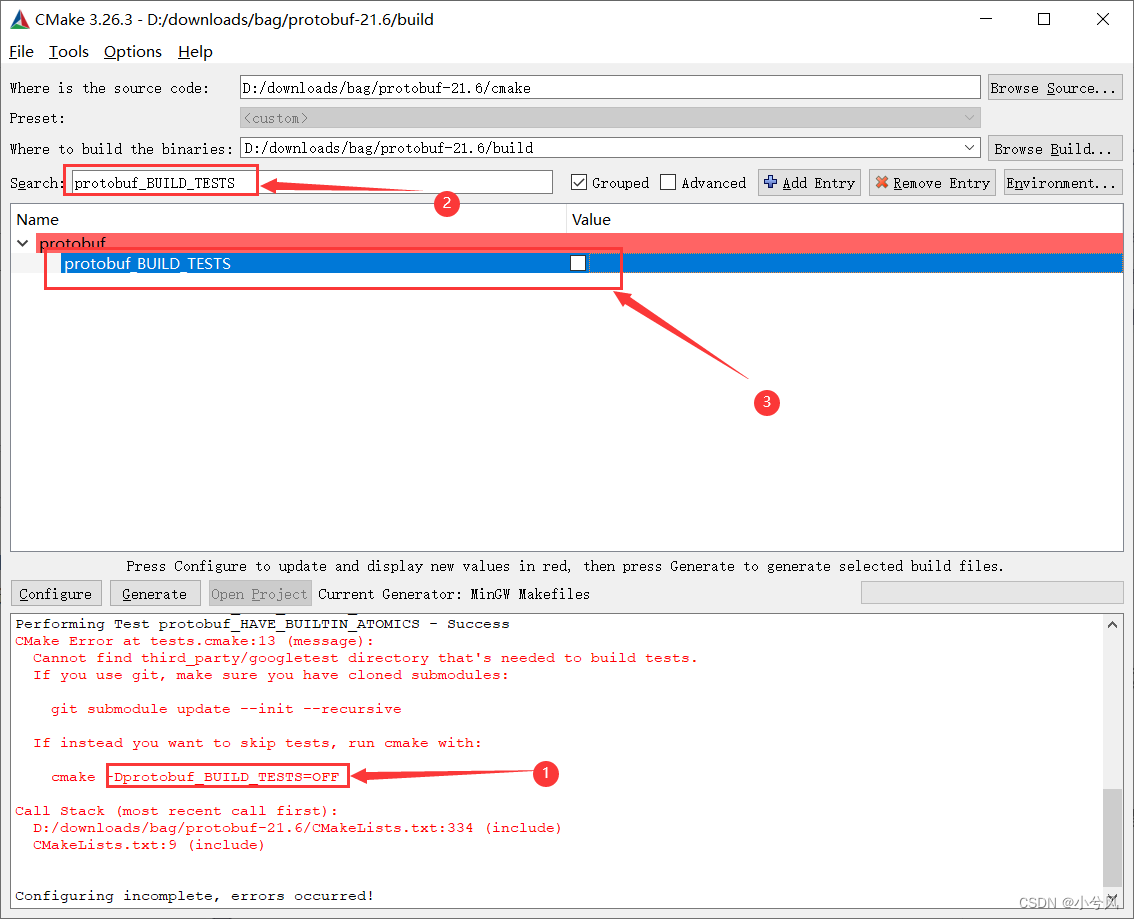
- 再次点击configure按钮
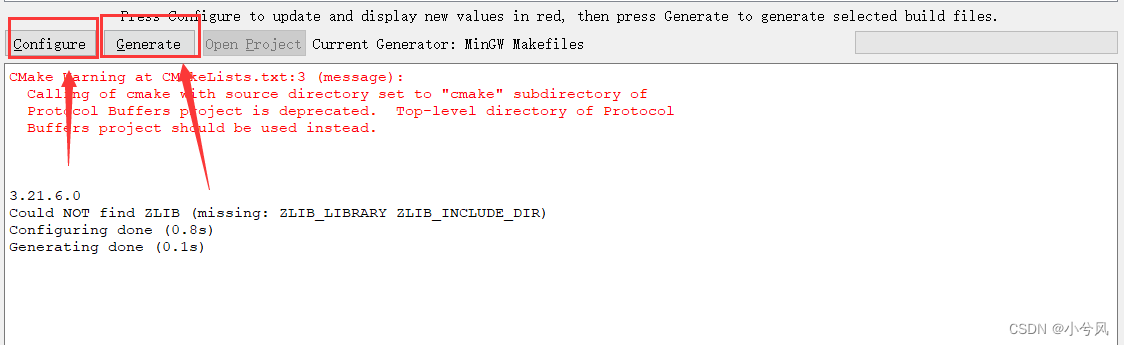
- 在点击generate
- 整个过程完成了
6 使用mingw32-make编译文件
- 在刚刚新建了的build路径下生成了许多文件
在这个路径下使用mingw32-make对文件进行编译
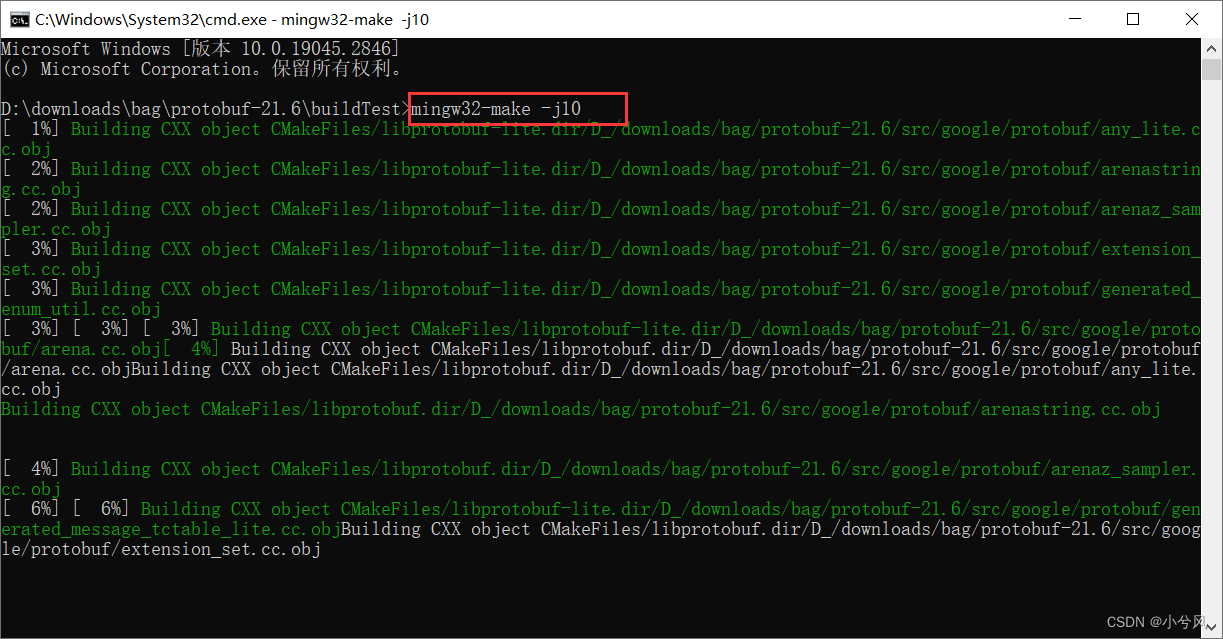
- mingw32-make -j10 其中j10 是编译线程,根据自己机器设,不影响
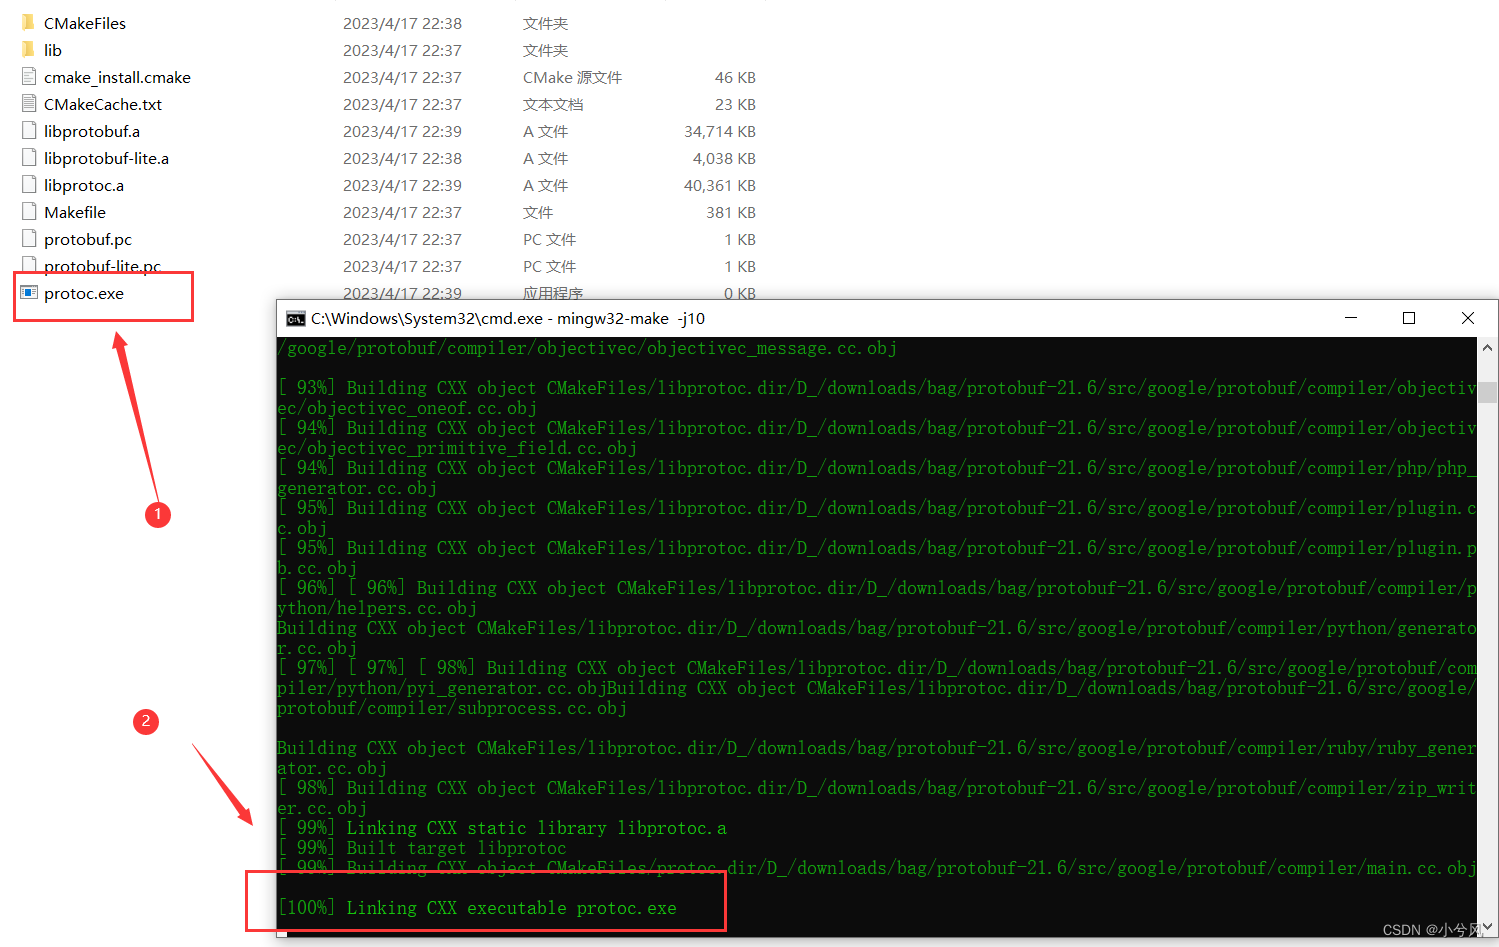
- 编译完成会有一个protoc.exe文件,则编译成功了(正常情况下,可以使用了)
7 使用mingw32-make install 安装
- 接着执行mingw32-make install (可能是需要管理员权限)
- 完成后 就可以看到在C盘下多了这几个文件

5 vscode中使用protobuf
1 需要在上一步中进行protobuf的mingw32-make install 安装,不然在cmake中查找不到
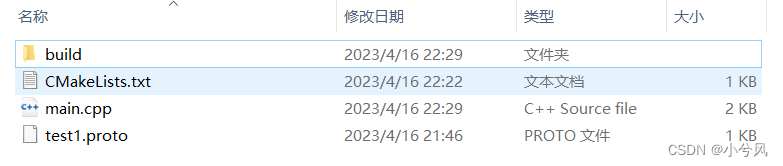
2 新建立一个项目,目录为
----demo_protobuf
	---build
	---main.cpp
	---CMakeLists.txt
	---test1.proto
3 各个文件的内容
CMakeLists.txt
cmake_minimum_required(VERSION 3.0.0)
project(testProtobuf VERSION 0.1.0)

include(CTest)
enable_testing()

find_package(Protobuf REQUIRED)

include_directories(${CMAKE_CURRENT_BINARY_DIR})
protobuf_generate_cpp(PROTO_SRCS PROTO_HDRS test1.proto)

aux_source_directory(. SRC_DIR)


add_executable(${PROJECT_NAME} ${SRC_DIR} ${PROTO_SRCS} ${PROTO_HDRS})
target_include_directories(${PROJECT_NAME} PUBLIC ${Protobuf_INCLUDE_DIR})
target_link_libraries(${PROJECT_NAME} ${Protobuf_LIBRARIES})

set(CPACK_PROJECT_NAME ${PROJECT_NAME})
set(CPACK_PROJECT_VERSION ${PROJECT_VERSION})
include(CPack)
main.cpp
#include "test1.pb.h"
#include <fstream>
#include <cstdio>

void SaveToFile(){
    hello::UsersInfo user_info;
    user_info.set_id(5);
    user_info.set_name("Zhang");
    user_info.set_state("working");
    user_info.set_role("worker");
    std::fstream f_out("saving.bin",std::ios::out|std::ios::binary);
    user_info.SerializeToOstream(&f_out);
    f_out.close();
}

void ReadFromFile(hello::UsersInfo &user_info, std::string filename){
    std::fstream f_in(filename.c_str(),std::ios::in|std::ios::binary);
    if (!user_info.ParseFromIstream(&f_in)) {
        std::cerr << "Failed to parse user_info.pb." << std::endl;
    }
    f_in.close();
}

/*定义一个写protobuf的函数*/

void WriteToProtobuf(hello::UsersInfo &user_info, std::string filename){
    std::fstream f_out(filename.c_str(),std::ios::out|std::ios::binary);
    user_info.SerializeToOstream(&f_out);
    f_out.close();
}

int main(int argc, char* argv[]){

    SaveToFile();

    hello::UsersInfo user_info;
    ReadFromFile(user_info, "saving.bin");
    printf("id: %d \t", user_info.id());
    printf("name: %s \t", user_info.name().c_str());
    printf("state: %s \t", user_info.state().c_str());
    printf("role: %s \t", user_info.role().c_str());
    printf("\n");

    user_info.set_id(6);
    user_info.set_name("Li");
    user_info.set_state("learning");
    user_info.set_role("student");
    WriteToProtobuf(user_info, "saving.bin");

    ReadFromFile(user_info, "saving.bin");
    printf("id: %d \t", user_info.id());
    printf("name: %s \t", user_info.name().c_str());
    printf("state: %s \t", user_info.state().c_str());
    printf("role: %s \t", user_info.role().c_str());
    return 0;
}
test1.proto
syntax = "proto3";	//默认proto2,这里用proto3

package hello; //C++ 类似 namespace

message UsersInfo{
  int32 id = 1;
  string name = 2;
  string state = 3;
  string role = 4;
}
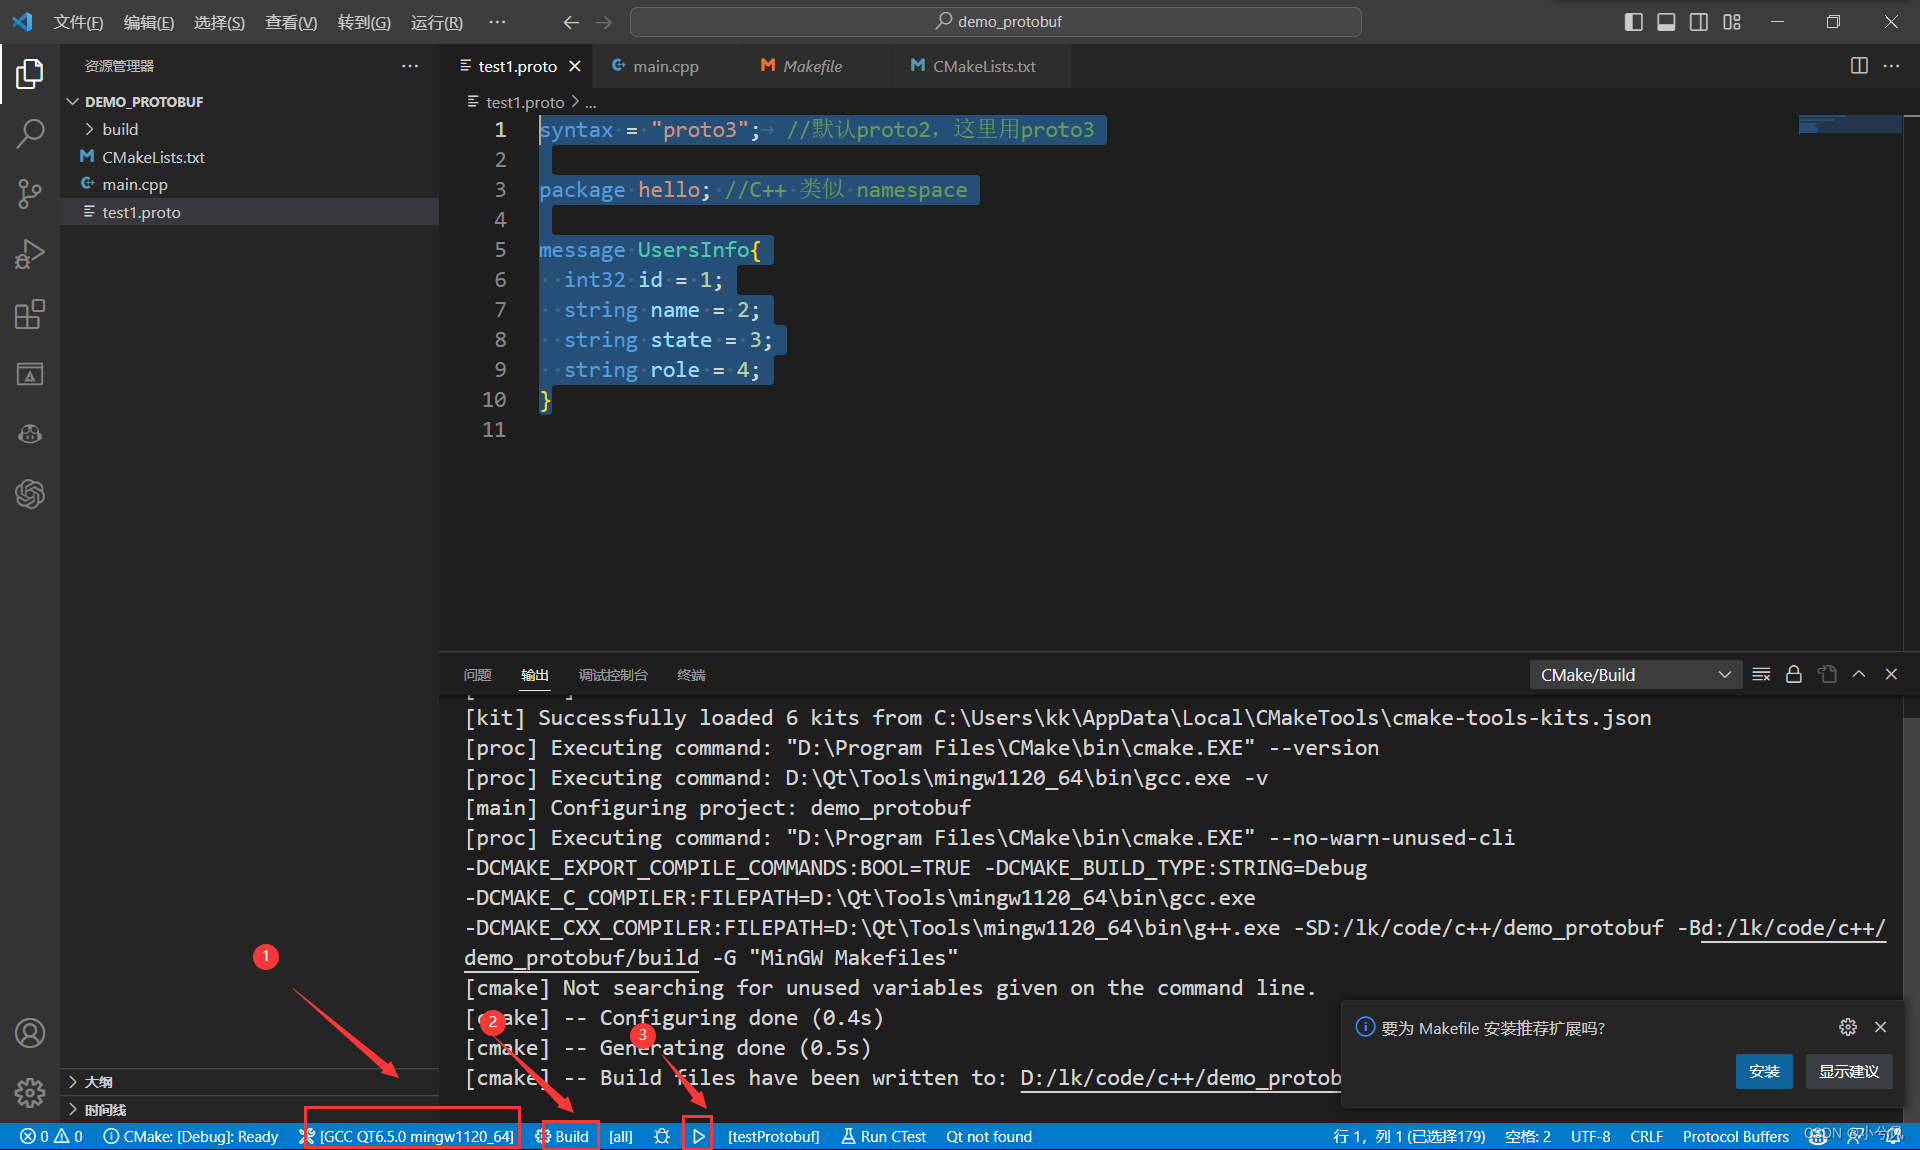
4 在vscode 中使用cmake、cmake tools等的插件对项目进行编译,如果是不知道如何使用vscode编译项目cmake项目,可以参考别的博客
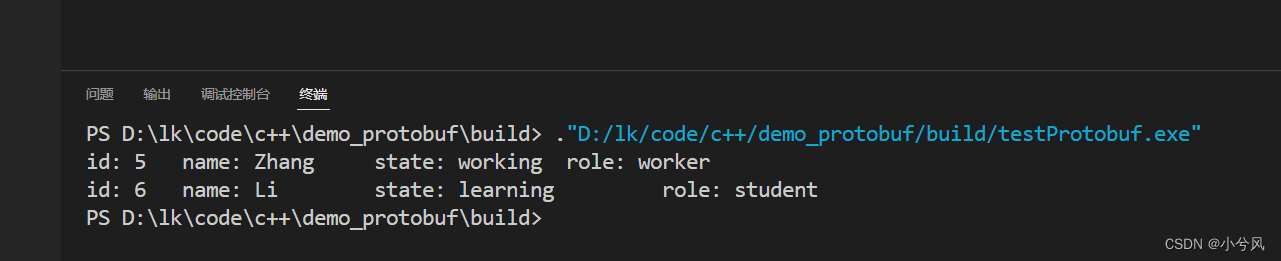
5 运行结果
6 报错处理
- 在4.6中执行mingw32-make 编译的时候出现 redefine报错的时候,很有可能是在系统环境变量中,设置了多个mingw的编译器的bin路径,取消 掉就好
- 在cmake中find_package(Protobuf REQUIRED)中找不到包,可能是你没有安装,执行4.7的安装,然后重启一下vscode
写于:2023/4/17
原文链接:https://blog.csdn.net/qq_43190806/article/details/130210412
嘻嘻嘻


 9786
9786


 被折叠的 条评论
为什么被折叠?
被折叠的 条评论
为什么被折叠?
 到【灌水乐园】发言


