


一. 概述
UVM学习流程仍然按照SV时候的核心流程,即:
- 如何搭建验证框架
- 验证组件之间的连接和通信
- 如何编写测试用例,继而完成复用和覆盖率的收敛
我们UVM入门和进阶实验0还是同之前SV验证实验0思想一样,让大家通过简单的实验要求,从而掌握下面的基本概念和仿真操作:
- 懂得如何编译UVM代码。
- 理解SV和UVM之间的关系。
- 了解UVM验证顶层盒子与SV验证顶层盒子之间的联系。
- 掌握启动UVM验证的必要步骤。
二. 编译UVM代码
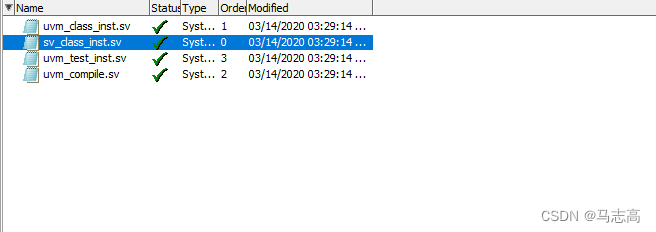
(1)导入uvm_dass_inst.sv,sv_class_inst.sv,uvm_test_inst.sv,uvm_compile.sv并且compile select
(2)编译文件uvm_compile.sv,选项为:simulate without optimization,待正常编译结束。
module uvm_compile;
  // NOTE:: it is necessary to import uvm package and macros
  import uvm_pkg::*; //预编译的uvm的库
  `include "uvm_macros.svh"//预编译的uvm的库

  initial begin
    `uvm_info("UVM", "Hello, welcome to RKV UVM training!", UVM_LOW)
    #1us;
    `uvm_info("UVM", "Bye, and more gifts waiting for you!", UVM_LOW)
  end
endmodule

uvm_pkg可以在mtiUvm中找到。

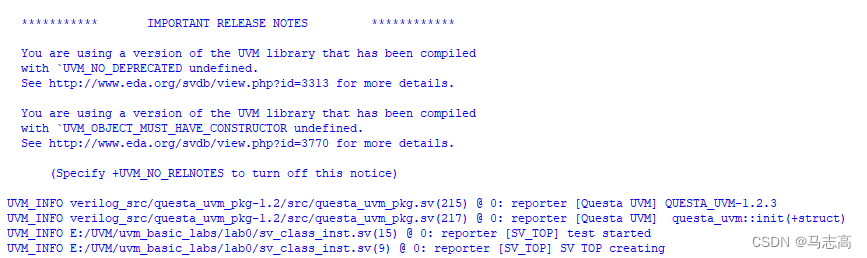
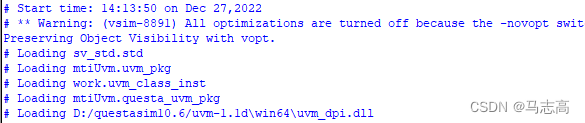
(3)在命令窗口中敲入"run-all",可以观察到仿真输出语句:

三. SV和UVM之间的关系
(1)编译sv_class_inst
module sv_class_inst;
  import uvm_pkg::*;
  `include "uvm_macros.svh"

  class top;
    function new();
      `uvm_info("SV_TOP", "SV TOP creating", UVM_LOW)
    endfunction
  endclass

  initial begin
    top t;
    `uvm_info("SV_TOP", "test started", UVM_LOW)
    t = new();
    `uvm_info("SV_TOP", "test finished", UVM_LOW)
  end
endmodule
编译结果:

反映在sim中的结构图:
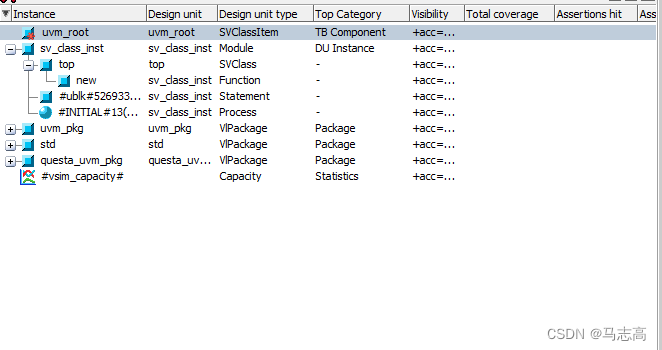
其实在0时刻的时候创建了t,并且结束了仿真,但是在instance中没有显示。获得显示的过程为:
首先transcipt中输入restart
然后点击sv_class_inst,将断点设置在17行,
再者transcipt中输入run -all,
点击view-local,
选中initial过程块,local中会显示t变量。

run -all的仿真结果:
(2)编译uvm_class_inst
module uvm_compile;
  // NOTE:: it is necessary to import uvm package and macros
  import uvm_pkg::*;
  `include "uvm_macros.svh"

  class top extends uvm_component;
    `uvm_component_utils(top)
    function new(string name = "top", uvm_component parent = null);
      super.new(name, parent);
      `uvm_info("UVM_TOP", "SV TOP creating", UVM_LOW)
    endfunction
  endclass

  initial begin
    `uvm_info("UVM", "Hello, welcome to RKV UVM training!", UVM_LOW)
    #1us;
    `uvm_info("UVM", "Bye, and more gifts waiting for you!", UVM_LOW)
  end
endmodule
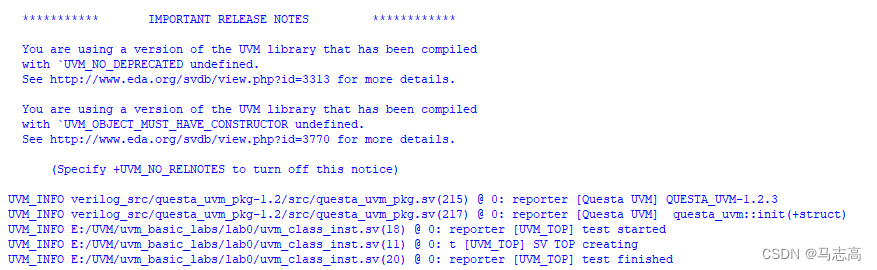
编译结果:
run -all仿真结果:
四. UVM验证顶层盒子与SV验证顶层盒子之间的联系。
编译并仿真uvm_test_inst.sv
package test_pkg;
  import uvm_pkg::*;
  `include "uvm_macros.svh"

  class top extends uvm_test;
    `uvm_component_utils(top)
    function new(string name = "top", uvm_component parent = null);
      super.new(name, parent);
      `uvm_info("UVM_TOP", "SV TOP creating", UVM_LOW)
    endfunction
    task run_phase(uvm_phase phase);
      phase.raise_objection(this);
      `uvm_info("UVM_TOP", "test is running", UVM_LOW)
      phase.drop_objection(this);
    endtask
  endclass
endpackage

module uvm_test_inst;
  import uvm_pkg::*;
  `include "uvm_macros.svh"
  import test_pkg::*;

  initial begin
    `uvm_info("UVM_TOP", "test started", UVM_LOW)
    run_test("top");
    `uvm_info("UVM_TOP", "test finished", UVM_LOW)
  end

endmodule
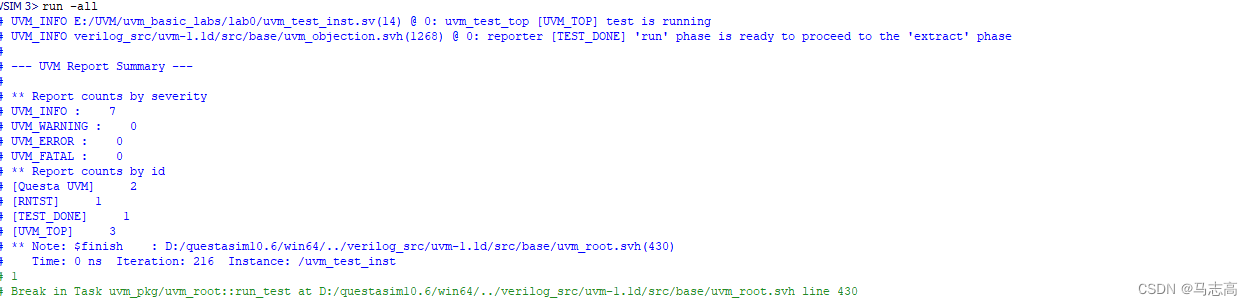
仿真结果:


 408
408


 被折叠的 条评论
为什么被折叠?
被折叠的 条评论
为什么被折叠?
 到【灌水乐园】发言


