


RSSC-LLAVA:基于XTuner用遥感数据微调LLAVA模型
项目介绍:
基于UCM场景分类数据集构建简单的对话文本,随后利用Xtuner微调LLAVA模型,实现遥感图文问答,主要是场景分类。
代码分享:https://github.com/biscuit279/RSSC-LLAVA
实现步骤
1.数据准备
下载UCM场景分类数据集,包含21个类别,每个类别有100张图片
LAVVA模型的微调分为两步,第一步是做文本和图像的特征对齐,第二步是图文问答
第一步的时候需要准备两个json文件:
1.图像的文本描述,原作者用GPT生成的数据集,场景分类的话可以用脚本模拟一套
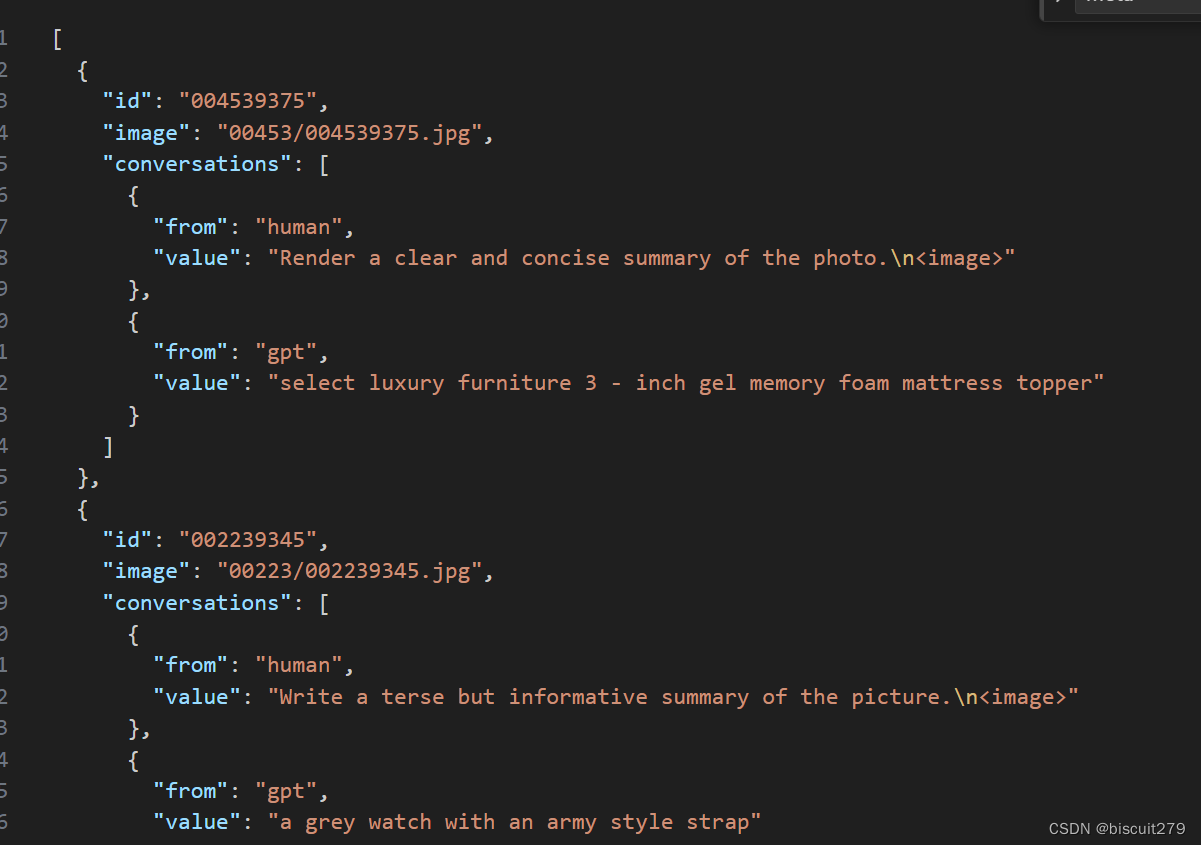
使用GPT3.5生成代码,prompt如下:
User
帮我写一段python代码:输入是一个Images文件夹,Images包含多个子文件夹,子文件夹的名称是类别名,子文件夹中装有多张图片。输出是一个json文件,格式如下:
[
  {
    "id": "004539375",
    "image": "00453/004539375.jpg",
    "conversations": [
      {
        "from": "human",
        "value": "Render a clear and concise summary of the photo.\n<image>"
      },
      {
        "from": "gpt",
        "value": "select luxury furniture 3 - inch gel memory foam mattress topper"
      }
    ]
  },
  {
    "id": "002239345",
    "image": "00223/002239345.jpg",
    "conversations": [
      {
        "from": "human",
        "value": "Write a terse but informative summary of the picture.\n<image>"
      },
      {
        "from": "gpt",
        "value": "a grey watch with an army style strap"
      }
    ]
  }
id字段是图片的名称,image字段是文件夹名称/图片名称,conversion字段的from不变,第一个value改成"What is it",第二个value改成"This is a photo of {class}"
生成的代码为
import os
import json

def process_images(input_folder):
    output_data = []
    for root, dirs, files in os.walk(input_folder):
        for file in files:
            if file.endswith('.jpg'):
                image_id = os.path.splitext(file)[0]
                image_path = os.path.join(root, file)
                class_name = os.path.basename(root)

                conversation_human = {
                    "from": "human",
                    "value": "Write a terse but informative summary of the picture.\n<image>"
                }

                conversation_gpt = {
                    "from": "gpt",
                    "value": f"This is a photo of {class_name}"
                }

                output_data.append({
                    "id": image_id,
                    "image": f"{class_name[:5]}/{image_id}.jpg",
                    "conversations": [conversation_human, conversation_gpt]
                })
    return output_data

def save_to_json(data, output_file):
    with open(output_file, 'w') as f:
        json.dump(data, f, indent=2)

if __name__ == "__main__":
    input_folder = "Images"
    output_file = "output.json"

    images_data = process_images(input_folder)
    save_to_json(images_data, output_file)
相关脚本已上传至github
2.meta数据集,记录图片的基本信息,主要是名称,URL,以及blip生成的caption
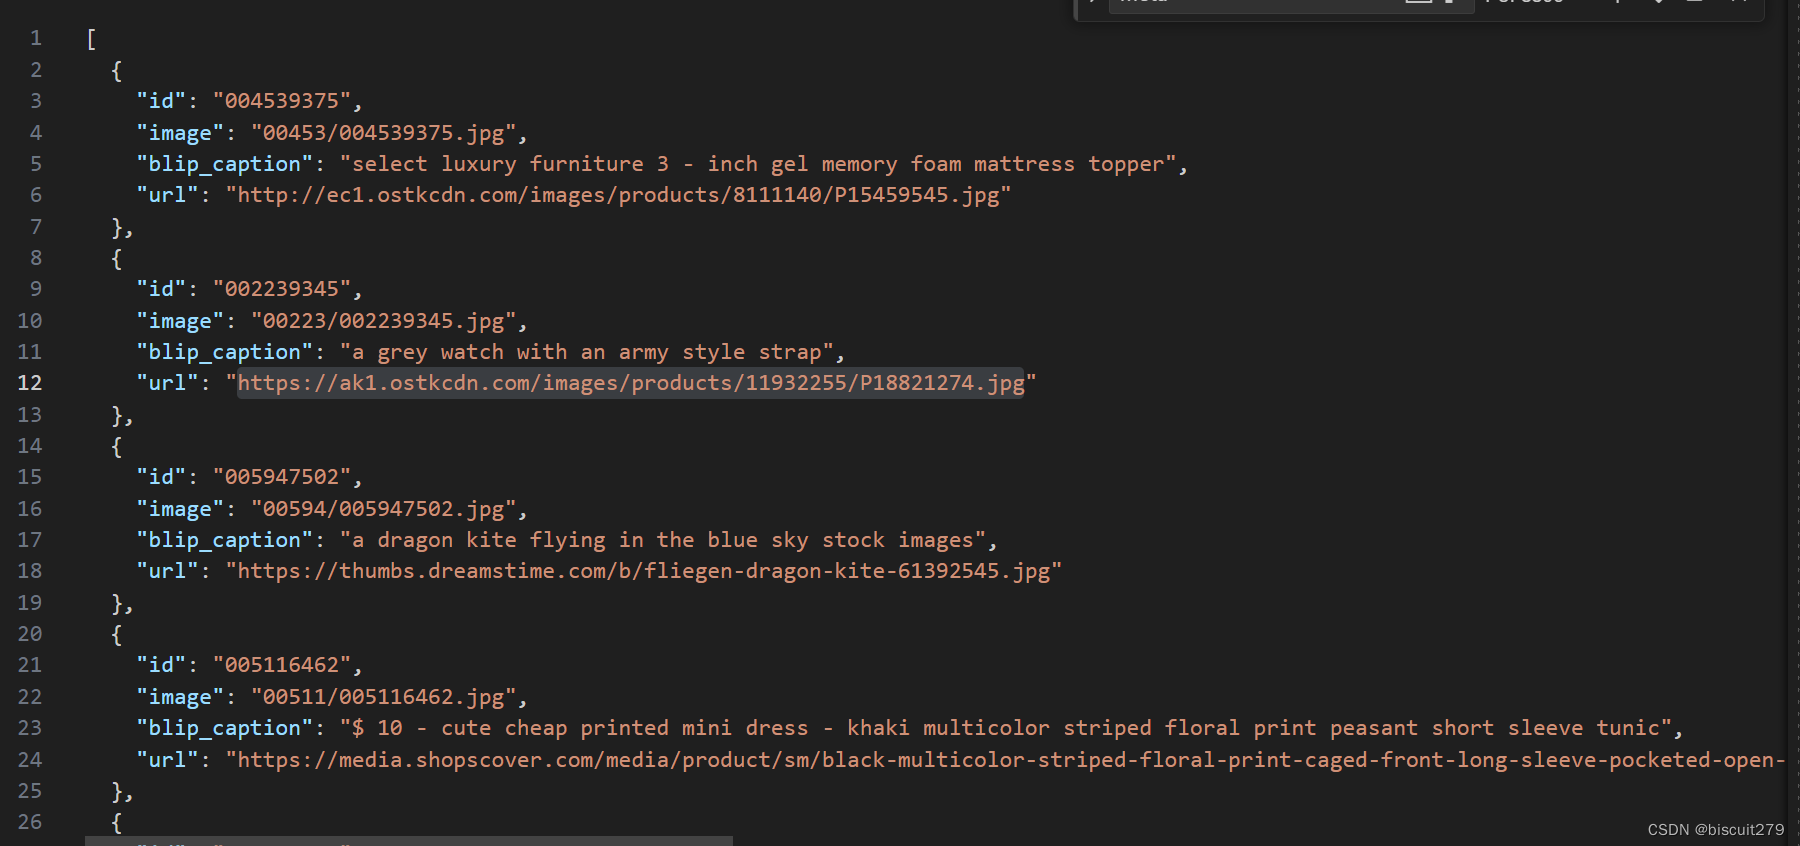
这个可能用不到,暂时不管
2.修改代码
主要修改config文件中的数据路径以及evaluation案例
随便选了一个数据集中的图片作为evaluation案例,未修改evaluattion_inputs


3.环境安装
从github下载xtuner项目并安装
git clone https://github.com/InternLM/xtuner.git
pip install -e '.[all]'
4.pretrain
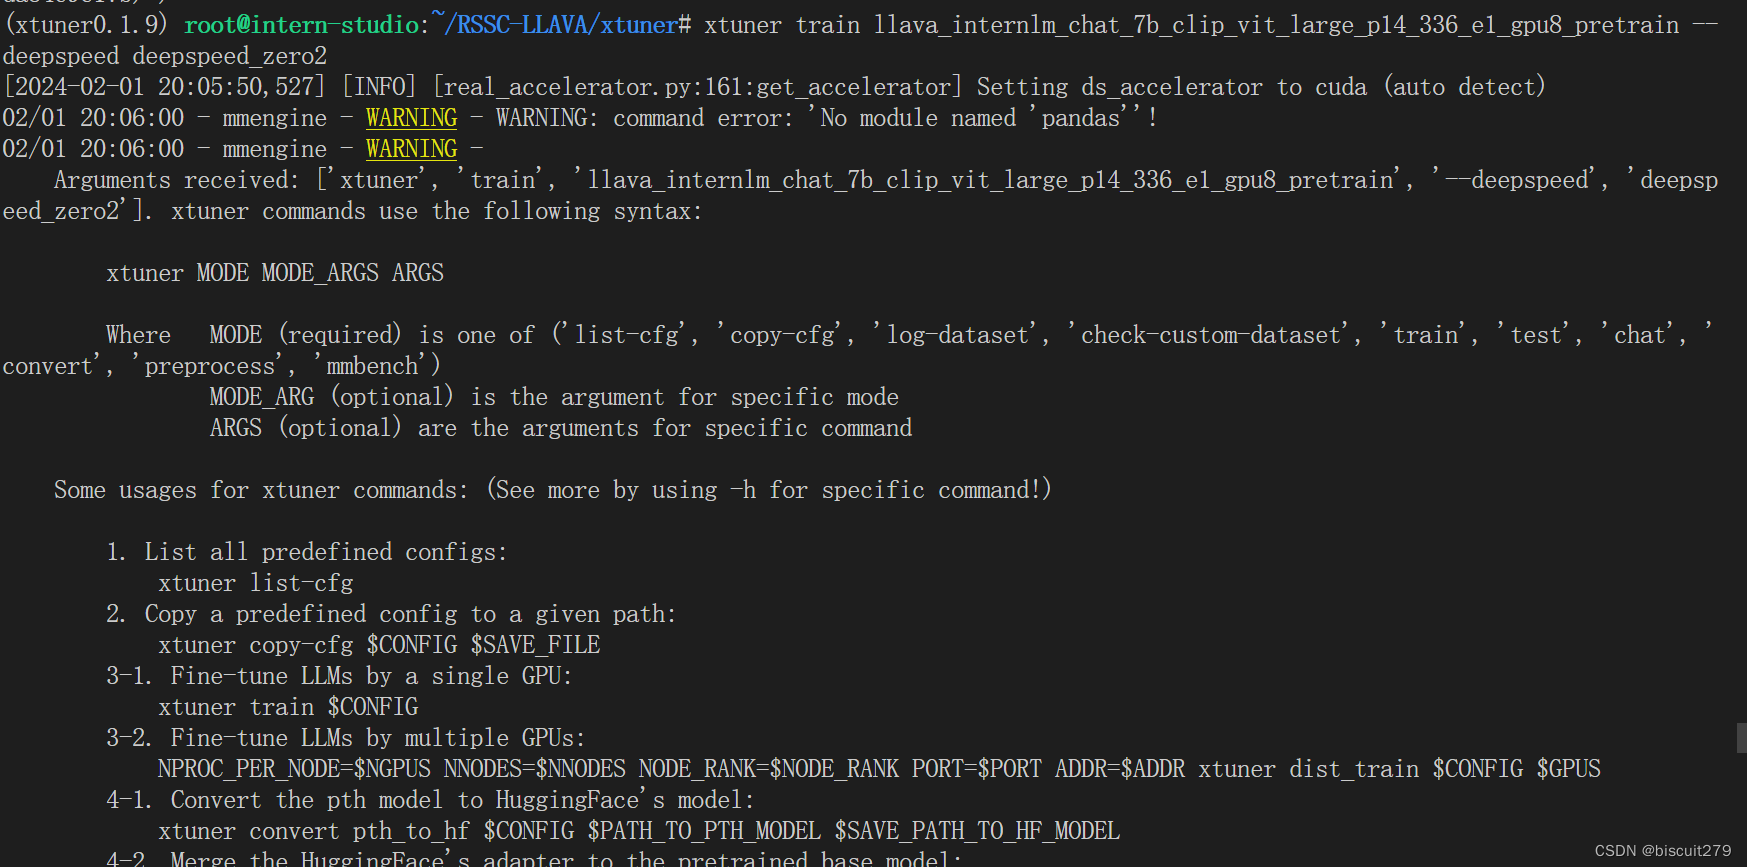
修改好了以后,运行xtuner train llava_internlm_chat_7b_clip_vit_large_p14_336_e1_gpu8_pretrain --deepspeed deepspeed_zero2
会自动下载internlm7b模型
但是遇到了一个报错,似乎是网络问题
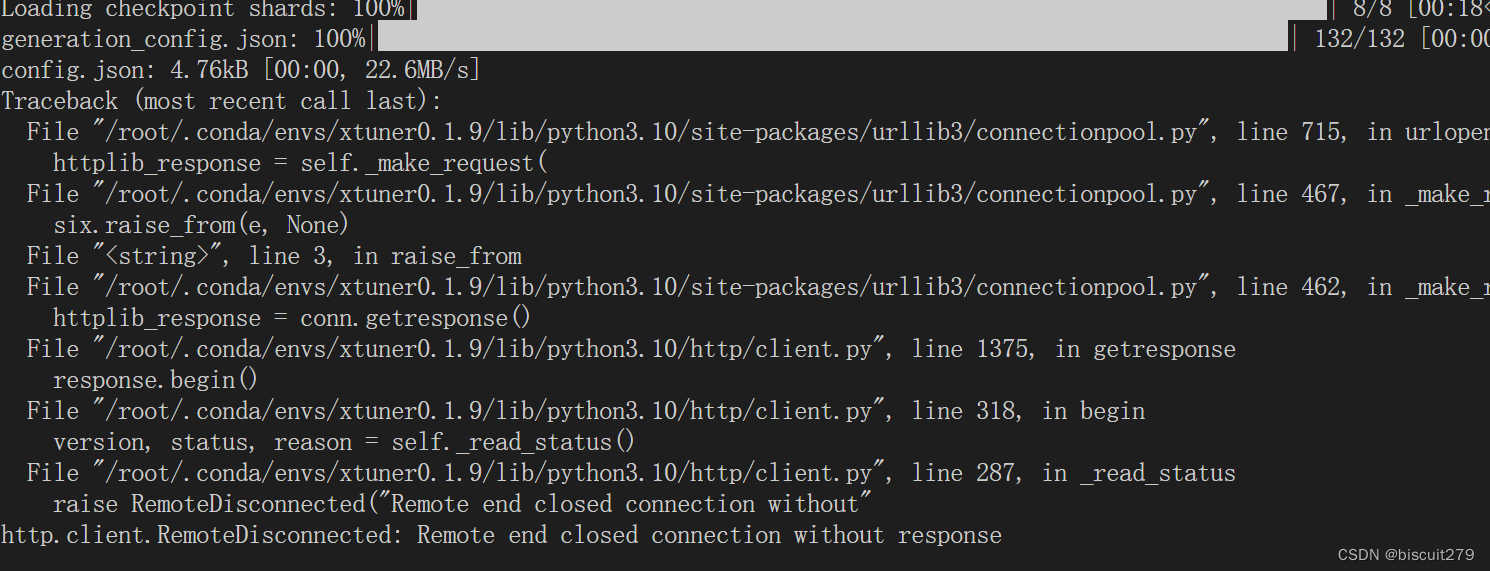
再次运行相同的指令,竟然无法复现这个错误,变成了一堆莫名其妙的提示
未完待续。。
2.4更新:
上次的报错其实就是因为那个warning,pandas包没装好,卸载重装即可解决
pip uninstall pandas
pip install pandas
注意在训练时一定要加` --deepspeed deepspeed_zero2``否则会报数据类型不匹配的错误
成功运行:

2100个图片文本对,一个epoch只需要5分钟左右,占31980m显存
换成56k,70个类别的数据集,用同样的脚本生成json,再次运行
5.finetune
finetune阶段每张图片需要有五组对应的问答,将生成pretrain数据的代码稍作修改,添加其他几种template即可。
总共选择11种问题的模板,9种回答的模板,每组对话的QA都是从模板中随机挑选的。
注意第一组QA中应该有"\n“
import os
import json
import random

Q_templates = ["Describe the image concisely.",
"Provide a brief description of the given image.",
"Offer a succinct explanation of the picture presented.",
"Summarize the visual content of the image.",
"Give a short and clear explanation of the subsequent image.",
"Share a concise interpretation of the image provided.",
"Present a compact description of the photo's key features.",
"Relay a brief, clear account of the picture shown.",
"Render a clear and concise summary of the photo.",
"Write a terse but informative summary of the picture.",
"Create a compact narrative representing the image presented."]

A_templates = ["This is a photo of a {}.",
"This is a satellite image of a {}. ",
"This is a land use image of a {}. ",
"This is a remote sensing image of a {}.",
"Here is an aerial picture depicting {}.",
"Displayed is an aerial photo illustrating {}.",
"This image captures the aerial perspective of {}.",
"Presented is an aerial view of {}.",
"This picture shows {} from an aerial vantage point."]


def process_images(input_folder):
    output_data = []
    for root, dirs, files in os.walk(input_folder):
        for file in files:
            if file.endswith('.jpg'):
                image_id = os.path.splitext(file)[0]
                image_path = os.path.join(root, file)
                class_name = os.path.basename(root)

                conversation_human = {
                    "from": "human",
                    "value": "Write a terse but informative summary of the picture./n<image>"
                }

                conversation_gpt = {
                    "from": "gpt",
                    "value": f"This is an aerial image of {class_name}."
                }

                conversations = [conversation_human, conversation_gpt]
                Q_samples = random.sample(Q_templates, 4)
                A_samples = random.sample(A_templates, 4)

                for i in range(4):
                    conversation_human = {
                    "from": "human",
                    "value": f"{Q_samples[i]}"
                    }
                    conversation_gpt = {
                    "from": "gpt",
                    "value": f"{A_samples[i]}".format(class_name)

                    }
                    # conversation_gpt['value'].replace('{class_name}', class_name)
                    # import ipdb;ipdb.set_trace()
                    conversations.append(conversation_human)
                    conversations.append(conversation_gpt)

                output_data.append({
                    "id": image_id,
                    "image": f"{image_id}.jpg",
                    "conversations": conversations
                })

    return output_data

def save_to_json(data, output_file):
    with open(output_file, 'w') as f:
        json.dump(data, f, indent=2)
得到的数据例如:
[
  {
    "id": "airplane1",
    "image": "airplane1.jpg",
    "conversations": [
      {
        "from": "human",
        "value": "Write a terse but informative summary of the picture./n<image>"
      },
      {
        "from": "gpt",
        "value": "This is an aerial image of airplane."
      },
      {
        "from": "human",
        "value": "Describe the image concisely."
      },
      {
        "from": "gpt",
        "value": "Presented is an aerial view of airplane."
      },
      {
        "from": "human",
        "value": "Provide a brief description of the given image."
      },
      {
        "from": "gpt",
        "value": "Displayed is an aerial photo illustrating airplane."
      },
      {
        "from": "human",
        "value": "Offer a succinct explanation of the picture presented."
      },
      {
        "from": "gpt",
        "value": "This is a land use image of a airplane. "
      },
      {
        "from": "human",
        "value": "Summarize the visual content of the image."
      },
      {
        "from": "gpt",
        "value": "This is a photo of a airplane."
      }
    ]
  }
  ]
将生成好的数据按以下格式组织:
随后修改finetune阶段的配置文件llava_internlm_chat_7b_qlora_clip_vit_large_p14_336_lora_e1_gpu8_finetune.py
仍然是需要修改数据、模型的路径和测试图片的位置
随后运行NPROC_PER_NODE=8 xtuner train llava_internlm_chat_7b_qlora_clip_vit_large_p14_336_lora_e1_gpu8_finetune --deepspeed deepspeed_zero2
将8改成实际的显卡数量
这一步使用qlora方法同时微调llm和vit,将会得到两个adapter
发现同一个工作空间,运行finetune的时候还需要重新下载一遍internlm7b模型,猜测应该是下载完之后直接加载,加载结束后就删除了本地文件。更正:默认会下载到/root/.cache/huggingface/hub/下
可以使用以下代码手动下载文件,这样下次运行就不需要重复下载了。
cd ~/RSSC
apt install git git-lfs -y
git lfs install
git lfs clone https://modelscope.cn/Shanghai_AI_Laboratory/internlm-chat-7b.git -b v1.0.3
如果是手动下载的,需要修改模型位置参数llm_name_or_path为模型存放的路径

但手动下载可能会报一个KeyError,可能是internlm模型的版本问题,暂时未找到合适的解决方案
仍然采用自动下载的方式。8卡A800跑56k张图片数据要一个小时

6.模型合并与部署
转换成huggingface格式:
xtuner convert pth_to_hf llava_internlm_chat_7b_qlora_clip_vit_large_p14_336_lora_e1_gpu8_finetune ./work_dirs/llava_internlm_chat_7b_qlora_clip_vit_large_p14_336_lora_e1_gpu8_finetune/iter_875.pth/ ./work_dirs/iter_875_hf
可以把config文件的指定成本地py文件,然后修改py文件中的模型路径,从而避免重复缓存模型
格式转换完成后,将会得到llm_adapter,projector,visual_encoder_adapter,可以分别与llm和vit合并

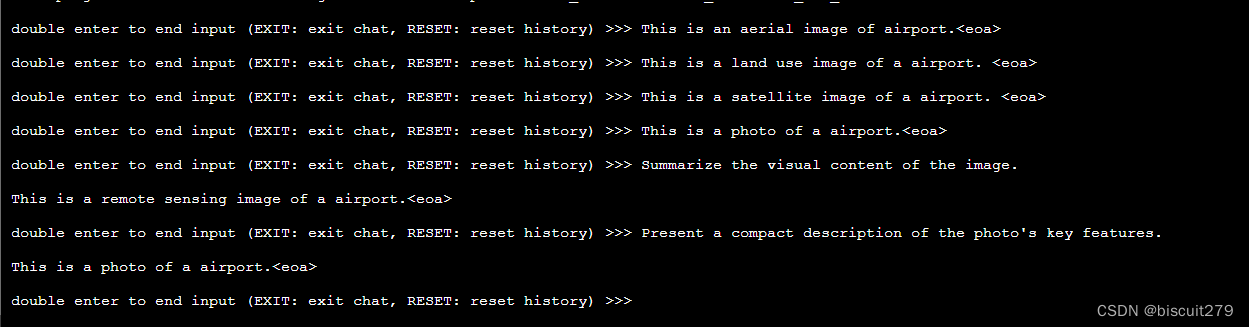
转换完成后,就可以进行对话了,分别输入llm模型,视觉模型,hf格式的llava模型,以及图片的路径,即可开始对话
xtuner chat internlm/internlm-chat-7b
–visual-encoder openai/clip-vit-large-patch14-336
–llava xtuner/llava-internlm-7b
–prompt-template internlm_chat
–image $IMAGE_PATH
发现用不同的问题,都可以输出正确的场景分类结果。


 9479
9479


 被折叠的 条评论
为什么被折叠?
被折叠的 条评论
为什么被折叠?
 到【灌水乐园】发言


