


效果预览

准备所需资源
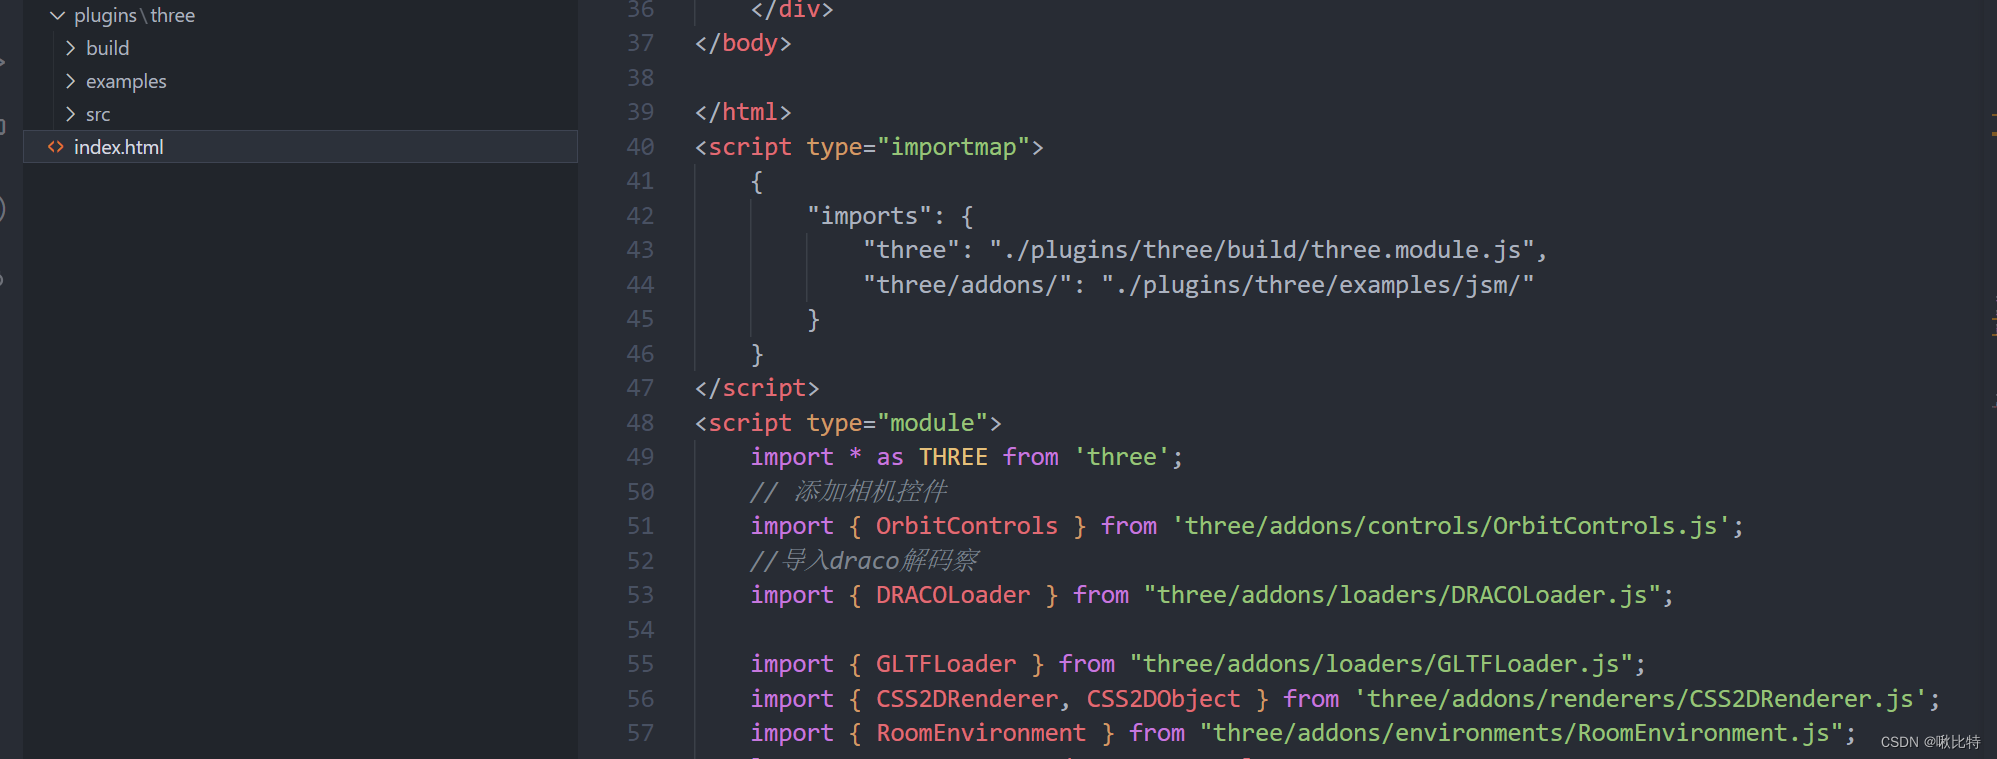
搭建场景环境
 const container = document.querySelector("#box_bim");
 // 创建摄像机
 camera = new THREE.PerspectiveCamera(
   50,
   window.innerWidth / window.innerHeight,
   0.1,
   1000
 );
 //
 camera.position.set(500, 500, 500);
 // 调整近裁减值
 camera.near = 0.1; // 根据需要调整这个值
 // 调整远裁减值
 camera.far = 100000; // 根据需要调整这个值

 // 更新相机投影矩阵(如果使用了透视投影)
 camera.updateProjectionMatrix();
 // 创建场景
 scene = new THREE.Scene();
 renderer = new THREE.WebGLRenderer({ antialias: true });
 renderer.setPixelRatio(window.devicePixelRatio);
 renderer.setSize(window.innerWidth, window.innerHeight);
 renderer.shadowMap.enabled = true
 container.appendChild(renderer.domElement);
 //辅助观察的坐标系
 const axesHelper = new THREE.AxesHelper(100);
 scene.add(axesHelper);
 const environment = new RoomEnvironment();
const pmremGenerator = new THREE.PMREMGenerator(renderer);

 scene.background = new THREE.Color(0x000000); //背景色
 scene.environment = pmremGenerator.fromScene(environment).texture;

 // 如果你使用的是 THREE.SpotLight(光束光源),可以通过以下方式设置光束的范围:
 const spotLight = new THREE.SpotLight(0xFFFFFF, 1, 100);
 spotLight.position.set(50, 50, 50);
 spotLight.angle = Math.PI / 4; // 光束的角度
 spotLight.penumbra = 0.05; // 光束边缘的模糊度
 spotLight.decay = 2; // 光强随距离的减少速度
 scene.add(spotLight);

 labelRenderer = new CSS2DRenderer();
 labelRenderer.setSize(window.innerWidth, window.innerHeight);
 labelRenderer.domElement.style.position = "absolute";
 labelRenderer.domElement.style.top = "0px";
 container.appendChild(labelRenderer.domElement);

 controls = new OrbitControls(camera, labelRenderer.domElement); //控制图层,添加相机控件
 controls.enableDamping = true;
 // controls.minDistance = 1;
 // controls.maxDistance = 10;
 controls.target.set(0, 0.5, 0);
 controls.autoRotate = false
 controls.autoRotateSpeed =0.5
 controls.update();
添加模型
使用的是gltf类型的模型
        // 实例化加载器g1tf
        const gltfLoader = new GLTFLoader();
        // 实例化加较器draco -- 为了解决大型模型经过压缩无法直接加载的问题
        const dracoloader = new DRACOLoader();
        dracoloader.setDecoderPath("./draco/");

        // 加载第一个模型 - 人
        gltfLoader.setDRACOLoader(dracoloader);
        gltfLoader.load(
            "./model/people.gltf",
            (gltf) =>{
                // 设置模型大小
                gltf.scene.scale.set(0.2, 0.2, 0.2);
                gltf.scene.position.set(200,0,0)//调整人位置,使得车模型在小区模型的地面上
                people = gltf.scene
                scene.add(gltf.scene);
            }
        )
        // 加载第二个模型 - 车辆
        gltfLoader.load(
            "./model/car.gltf",
            (gltf) =>{
                gltf.scene.scale.set(0.2,0.2,0.2);
                gltf.scene.position.set(100,0,0)//调整车辆位置,使得车模型在小区模型的地面上
                car =  gltf.scene
                scene.add(gltf.scene);
            }
        )
        // 加载第三个模型 - 小区
        gltfLoader.load(
            "./model/district.gltf",
            (gltf) =>{
                gltf.scene.scale.set(0.08, 0.08, 0.08); // 小区模型太大,需要缩小
                gltf.scene.position.set(100,238,500)//调整车辆位置,使得车模型在小区模型的地面上
                gltf.scene.rotation.y  = -Math.PI / 13;//旋转模型,使得坐标轴与小区的房屋平行便于计算轨迹向量
                scene.add(gltf.scene);
            }
        )
增加运动轨迹
 // 创建轨迹 - 车辆的移动轨迹
        spline = new THREE.CatmullRomCurve3([

            new THREE.Vector3(100,0,0),
            new THREE.Vector3(100,0,30),
            new THREE.Vector3(100,0,60),
            new THREE.Vector3(100,0,90),
            new THREE.Vector3(100,0,120),
            new THREE.Vector3(100,0,150),
            new THREE.Vector3(100,0,180),
            new THREE.Vector3(100,0,210),
            new THREE.Vector3(100,0,240),
            new THREE.Vector3(100,0,270),
            new THREE.Vector3(100,0,300),
            new THREE.Vector3(110,0,300),
            new THREE.Vector3(130,0,300),
            new THREE.Vector3(150,0,300),
            new THREE.Vector3(170,0,300),
            new THREE.Vector3(190,0,300),
            new THREE.Vector3(210,0,300),
            new THREE.Vector3(290,0,300),
            new THREE.Vector3(500,0,300),
            new THREE.Vector3(800,0,300),
            new THREE.Vector3(900,0,300),
            new THREE.Vector3(900,0,290),
            new THREE.Vector3(900,0,280),
            new THREE.Vector3(900,0,270),
            new THREE.Vector3(900,0,260),
            new THREE.Vector3(900,0,250),
            new THREE.Vector3(900,0,170),
            new THREE.Vector3(900,0,120),
            new THREE.Vector3(900,0,90),
            new THREE.Vector3(900,0,60),
            new THREE.Vector3(900,0,30),
            new THREE.Vector3(900,0,-30),
            new THREE.Vector3(900,0,-60),
            new THREE.Vector3(900,0,-90),
            new THREE.Vector3(800,0,-90),
            new THREE.Vector3(100,0,-90),
                        ]);
        spline.curveType = 'catmullrom'
        spline.closed = true //设置是否闭环
        spline.tension = 0.5 //设置线的张力,0为无弧度折线
        // 为曲线添加材质在场景中显示出来,方便看到轨迹线
        const points = spline.getPoints(50) // 50等分获取曲线点
        const geometry = new THREE.BufferGeometry().setFromPoints(points);
        const material = new THREE.LineBasicMaterial({ color: 0x000000 });

        // Create the final object to add to the scene
        const curveObject = new THREE.Line(geometry, material);
        scene.add(curveObject) // 添加到场景中
使物体沿着轨迹移动
  // 创建渲染函数
    let progress = 0; // 物体运动时在运动路径的初始位置,范围0~1
    const velocity = 0.0008; // 影响运动速率的一个值,范围0~1,需要和渲染频率结合计算才能得到真正的速率
    // 物体沿线移动方法
    function moveOnCurve() {
        if (spline == null || car == null) {
            console.log("Loading")
        } else {
            if (progress <= 1 - velocity) {
                const point = spline.getPointAt(progress); //获取样条曲线指定点坐标
                const pointBox = spline.getPointAt(progress + velocity); //获取样条曲线指定点坐标

                if (point && pointBox) {
                    car.position.set(point.x, point.y, point.z);
                    var targetPos = pointBox   //目标位置点
                    var offsetAngle = 0 //目标移动时的朝向偏移

                    // //以下代码在多段路径时可重复执行
                    var mtx = new THREE.Matrix4()  //创建一个4维矩阵
                    // .lookAt ( eye : Vector3, target : Vector3, up : Vector3 ) : this,构造一个旋转矩阵,从eye 指向 target,由向量 up 定向。
                    mtx.lookAt(car.position, targetPos, car.up) //设置朝向
                    mtx.multiply(new THREE.Matrix4().makeRotationFromEuler(new THREE.Euler(0, offsetAngle, 0)))
                    var toRot = new THREE.Quaternion().setFromRotationMatrix(mtx)  //计算出需要进行旋转的四元数值
                    car.quaternion.slerp(toRot, 0.2)
                }

                progress += velocity;
            } else {
                progress = 0;
            }
        }

    };


 871
871


 被折叠的 条评论
为什么被折叠?
被折叠的 条评论
为什么被折叠?
 到【灌水乐园】发言


