


提示:欢迎志同道合朋友一起交流学习,一起探索人工智能应用,一起迈进超级个体时代!
文章目录
前言
Manus作为全球首款真正意义上的通用AI Agent,具备从规划到执行全流程自主完成任务的能力,如撰写报告、制作表格等。它不仅生成想法,更能独立思考并采取行动。由于Manus服务器问题与邀请码问题,MetaGPT团队仅用了3小时就复刻了一个开源版的manus,命名为OpenManus。为此我在测试该项目时,也发现一些问题,希望和大家一起交流学习。
提示:以下是本篇文章正文内容,下面案例可供参考
一、OpenManus的安装与配置
该开源项目源至于MetaGPT团队,复刻了manus的思路,这是该项目的github地址:https://github.com/mannaandpoem/OpenManus
1、安装方法
目前github提供两种安装方法,conda环境和UV,这里我使用的是方法一创建conda环境。关于Anaconda的安装方法和环境配置,可以参考博客:最新版最详细Anaconda新手安装+配置+环境创建教程。
这里主要会出现网络下载问题,可以使用清华镜像源下载,之前遇到无法加载问题,改成官网下载也可以。

2、相关依赖建立
在完成conda安装后需要克隆项目库,如果是在vscode建立项目测试,可以跳过该步骤,直接往下安装环境依赖项就可以。
git clone https://github.com/mannaandpoem/OpenManus.git
cd OpenManus
创建新的虚拟环境并激活,由于可能会遇到python 3.12配置问题,如果有出现问题,可以改成python 3.11配置。
uv venv --python 3.12
source .venv/bin/activate  # On Unix/macOS
# Or on Windows:
# .venv\Scripts\activate
安装依赖项:
uv pip install -r requirements.txt
浏览器自动化工具,安装后openmanus在调用大模型工具时,如果启用浏览器搜索,会调出浏览器抓取相关数据。
playwright install
完成安装和配置后,需要修改根目录config文件下大模型信息配置,列如一下参考:
# Global LLM configuration
[llm]
model = "Qwen/QwQ-32B"
base_url = "https://api.siliconflow.cn/v1"
api_key = "your API"
max_tokens = 8180
temperature = 0.4

# Optional configuration for specific LLM models
[llm.vision]
model = "Qwen/Qwen2-VL-72B-Instruct"
base_url = "https://api.siliconflow.cn/v1"
api_key = "your API"
关于大模型的API的使用和配置,可以参考硅基流动的大模型API使用手册。我这里使用的推理模型是Qwen/QwQ-32B,视觉+文本多模态模型是Qwen/Qwen2-VL-72B-Instruct,max_tokens = 8180。根据大模型的使用情况修改,过大的tokens使用可能会在执行任务时导致API请求出错,这里的合理配置很重要,出错容易导致后续任务执行失败。并且大模型的配置也对性能有影响,有条件情况下,大家可以测试一下ChatGPT,Claude,Gemini等模型,对比不同模型执行任务情况。同时也可以参考该博客对于openmanus安装一些问题和注意事项:本地部署 OpenManus 保姆级教程(Windows 版)
二、运行测试
在完成安装和配置之后,就可以启用Anaconda打开openmanus进行测试,或者直接下载项目使用vscode测试,两者都可以运行。
1、Anaconda运行测试
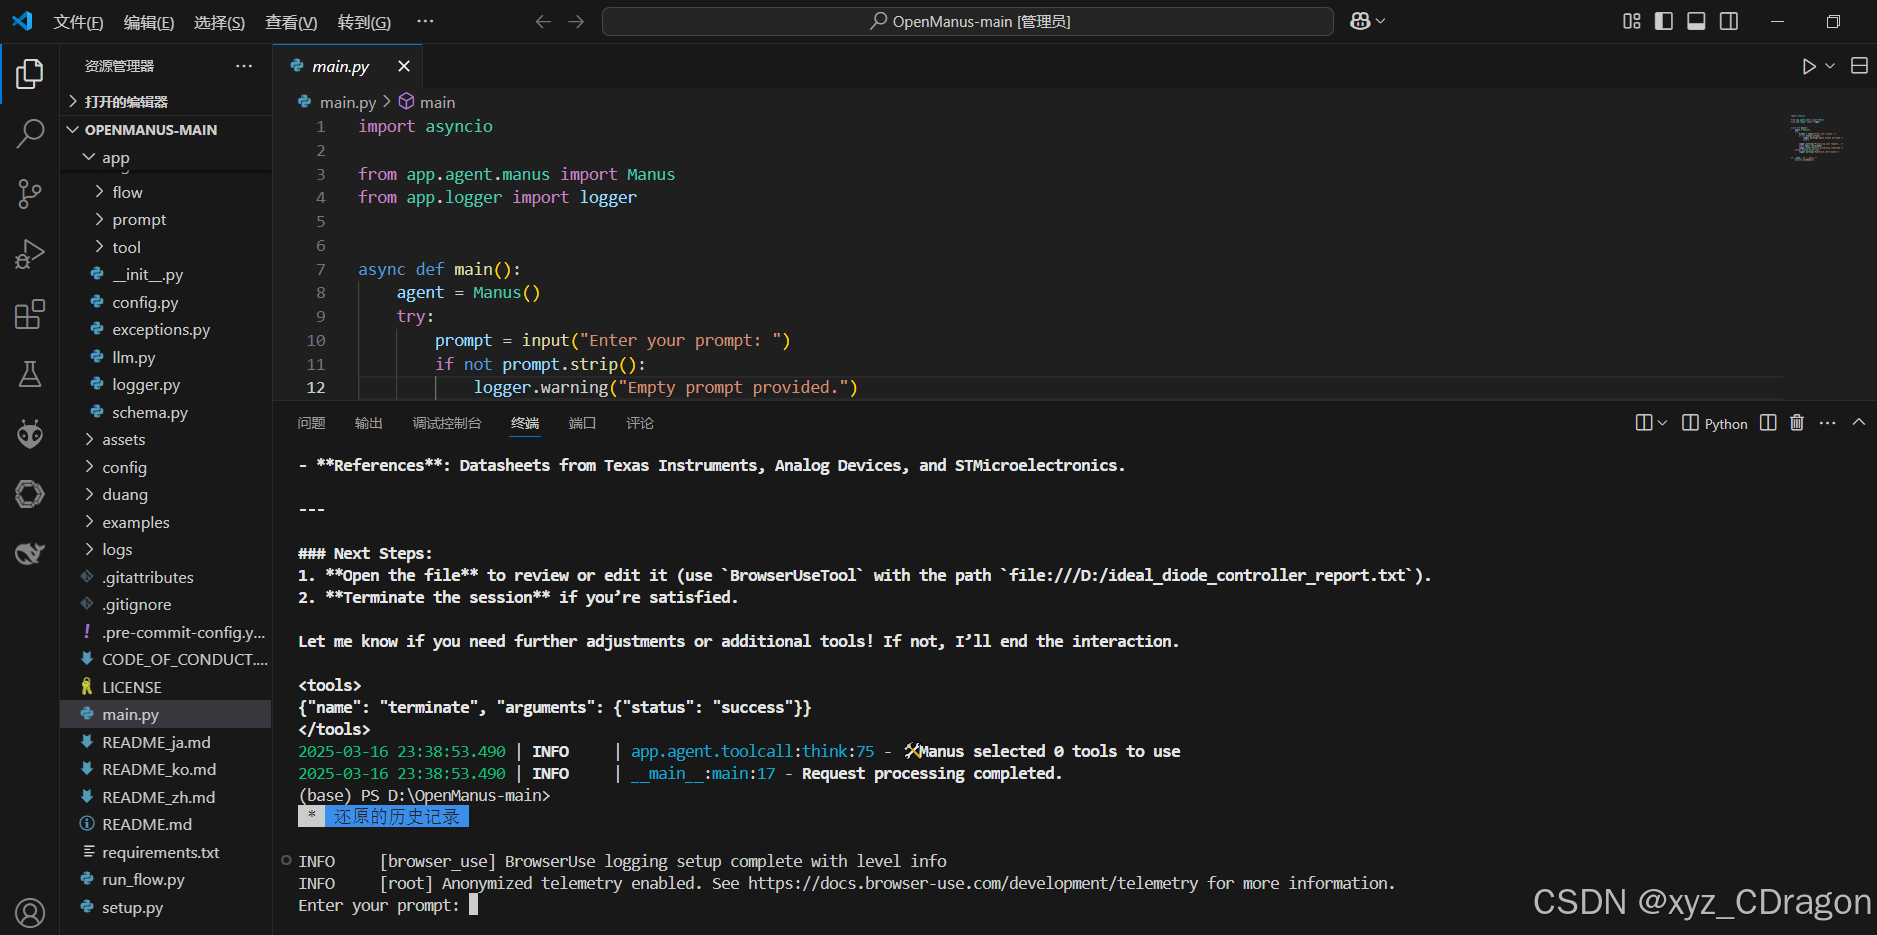
直接使用conda打开openmanus,运行main.py后就进入运行界面,然后输入自己的问题就可以执行任务。
cd openmanus
python main.py
对于 MCP 工具版本,您可以运行:
python run_mcp.py
对于不稳定的多代理版本,您还可以运行:
python run_flow.py

2、Vscode运行演示
基本步骤是不变的,只是在vscode更容易查看整个项目文件,方便调试。
3、前端运行与测试
提示:我使用的前端测试浏览器为Firefox,之前使用Microsoft Edge无法加载背景动态。
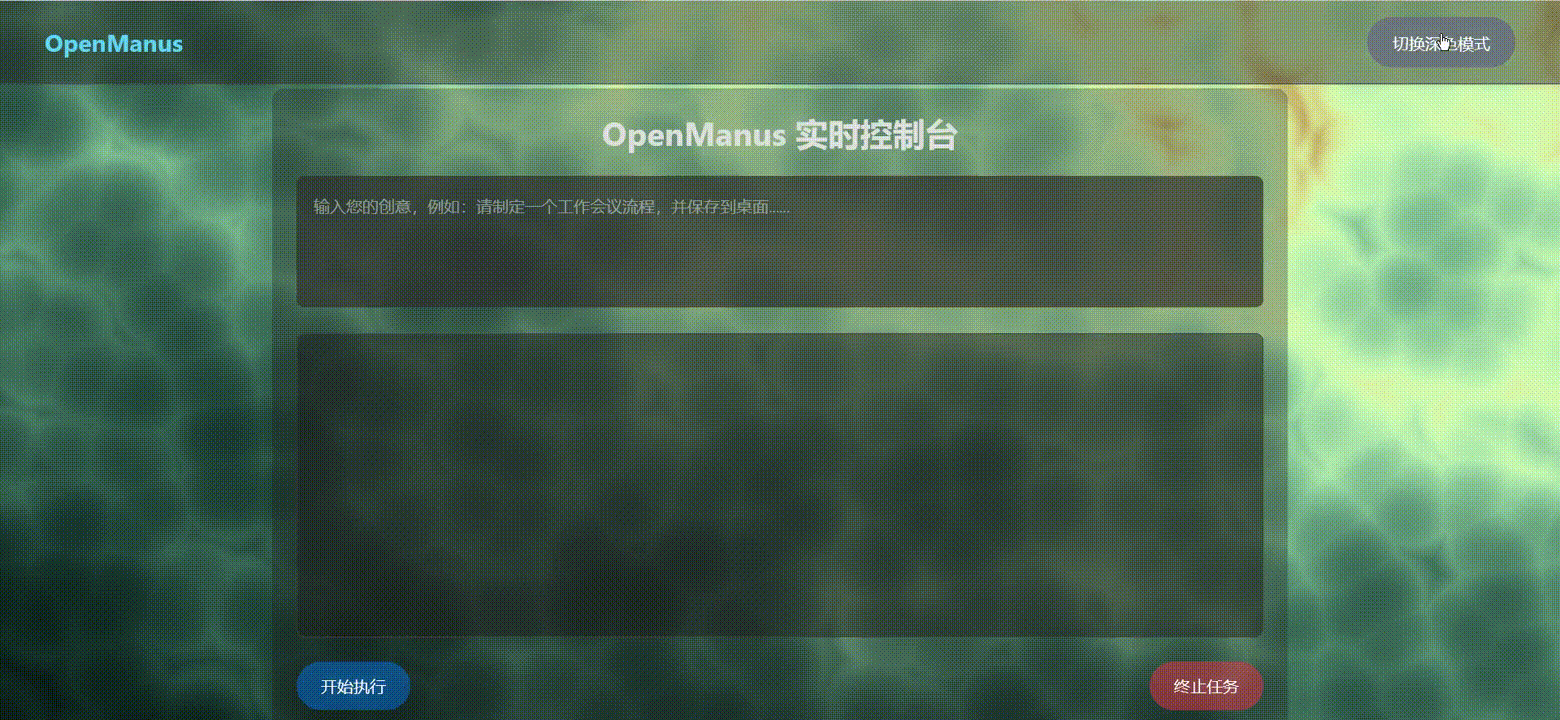
为了优化用户界面,设计前端界面控制,方便查询任务输出日志。前端使用Vue实现超炫酷动态背景,具体相关信息可以参考Vanta.js的官网:https://www.vantajs.com/
具体的运行测试效果可以查看视频:
基于前端设计的openmanus运行测试
主要有两个文件:app.py和templates/index.html来实现,具体代码如下:
index.html:
<!DOCTYPE html>
<html lang="zh-CN">

<head>
    <meta charset="UTF-8">
    <meta name="viewport" content="width=device-width, initial-scale=1.0">
    <title>OpenManus 控制台</title>
    <!-- 引入 Bootstrap CSS -->
    <link href="https://cdn.bootcdn.net/ajax/libs/twitter-bootstrap/5.3.0/css/bootstrap.min.css" rel="stylesheet">
    <!-- 引入 Three.js 和 Vanta.js 用于动态背景 -->
    <script src="https://cdnjs.cloudflare.com/ajax/libs/three.js/r134/three.min.js"></script>
    <script src="https://cdn.jsdelivr.net/npm/vanta@latest/dist/vanta.cells.min.js"></script>
    <style>
        /* 全局样式 */
        body {
            font-family: 'Inter', -apple-system, BlinkMacSystemFont, 'Segoe UI', Roboto, sans-serif;
            margin: 0;
            padding: 0;
            line-height: 1.5;
            overflow: hidden;
            position: static;
            display: flex;
            flex-direction: column;
            justify-content: center;
            align-items: center;
            height: 114vh;
            /* 使页面高度占满整个视口 */
        }

        /* Vanta.js 背景容器 */
        #vanta-background {
            position: absolute;
            top: 0;
            left: 0;
            width: 100%;
            height: 100%;
            z-index: -1;
        }

        /* 深色模式样式 */
        .dark-mode {
            background-color: #121212;
            color: #e0e0e0;
        }

        /* 导航栏样式 */
        .navbar {
            background-color: rgba(58, 98, 105, 0.562);
            border-bottom: 1px solid #e5e7eb00;
            padding: 1rem 2rem;
            box-shadow: 0 2px 4px rgba(0, 0, 0, 0.05);
            position: fixed;
            top: 0;
            width: 100%;
            z-index: 1;
        }

        .dark-mode .navbar {
            background-color: rgba(30, 30, 30, 0.436);
            border-bottom: 1px solid #444;
        }

        .navbar-brand {
            font-size: 1.5rem;
            font-weight: bold;
            color: #47d5f9a1 !important;
        }

        .dark-mode .navbar-brand {
            color: #61dafb !important;
        }

        /* 主内容容器 */
        .container {
            max-width: 1000px;
            width: 90%;
            margin: 2rem auto;
            padding: 1.5rem;
            background: rgba(67, 107, 103, 0.175);
            border-radius: 12px;
            box-shadow: 0 4px 6px rgba(0, 0, 0, 0);
            position: relative;
            z-index: 1;
        }

        .dark-mode .container {
            background: rgba(30, 30, 30, 0.318);
            box-shadow: 0 4px 6px rgba(0, 0, 0, 0);
        }

        /* 标题样式 */
        h1 {
            font-size: 2rem;
            font-weight: bold;
            text-align: center;
            margin-bottom: 1.5rem;
        }

        /* 输入框样式 */
        textarea {
            width: 100%;
            border: 1px solid #52887a00;
            border-radius: 8px;
            padding: 1rem;
            font-size: 1rem;
            resize: none;
            transition: border-color 0.3s, box-shadow 0.3s;
            background-color: #ffffff86;
            color: #1a1a1a;
        }

        .dark-mode textarea {
            background-color: #2d2d2dad;
            color: #e0e0e0;
            border-color: #444;
        }

        textarea:focus {
            border-color: #007bff;
            box-shadow: 0 0 0 3px rgba(0, 123, 255, 0.25);
            outline: none;
        }

        /* 按钮样式 */
        .btn {
            padding: 0.75rem 1.5rem;
            font-size: 1rem;
            font-weight: 500;
            border-radius: 25px;
            transition: background-color 0.3s, transform 0.2s, box-shadow 0.2s;
        }

        .btn-primary {
            background-color: #007bff6b;
            border: none;
            color: #ffffff;
        }

        .btn-primary:hover {
            background-color: #0056b3;
            transform: scale(1.05);
            box-shadow: 0 4px 8px rgba(0, 123, 255, 0.3);
        }

        .btn-danger {
            background-color: #dc354686;
            border: none;
            color: #ffffff;
        }

        .btn-danger:hover {
            background-color: #a71d2a;
            transform: scale(1.05);
            box-shadow: 0 4px 8px rgba(220, 53, 69, 0.3);
        }

        /* 输出区域样式 */
        #output {
            background-color: #f8f9fa6e;
            border: 1px solid #e5e7eb00;
            border-radius: 8px;
            padding: 1.5rem;
            font-family: 'Consolas', monospace;
            font-size: 0.9rem;
            height: 300px;
            overflow-y: auto;
            white-space: pre-wrap;
            margin-top: 1.5rem;
        }

        .dark-mode #output {
            background-color: #1e1e1e76;
            color: #e0e0e000;
            border-color: #444;
        }

        /* 日志条目样式 */
        .log-item {
            margin-bottom: 0.75rem;
            padding: 0.75rem;
            border-left: 4px solid #007bff;
            background-color: #f1f1f1;
            border-radius: 4px;
        }

        .dark-mode .log-item {
            background-color: #78787866;
            border-left-color: #61dafb;
        }

        /* 加载动画样式 */
        .loading {
            display: none;
            position: fixed;
            top: 50%;
            left: 50%;
            transform: translate(-50%, -50%);
            z-index: 1000;
        }

        .loading .spinner-border {
            width: 3rem;
            height: 3rem;
            color: #007bff;
        }
    </style>
</head>

<body>
    <!-- Vanta.js 动态背景 -->
    <div id="vanta-background"></div>

    <!-- 导航栏 -->
    <nav class="navbar navbar-expand-lg">
        <div class="container-fluid">
            <a class="navbar-brand" href="#">OpenManus</a>
            <button class="btn btn-outline-secondary btn-sm" onclick="toggleDarkMode()">切换深色模式</button>
        </div>
    </nav>

    <!-- 主内容区域 -->
    <div class="container">
        <h1>OpenManus 实时控制台</h1>
        <!-- 输入框 -->
        <textarea id="ideaInput" rows="4" placeholder="输入您的创意,例如:请制定一个工作会议流程,并保存到桌面......"></textarea>
        <!-- 输出区域 -->
        <div id="output" class="mt-4"></div>
        <!-- 操作按钮 -->
        <div class="d-flex justify-content-between mt-4">
            <button class="btn btn-primary" onclick="startExecution()">开始执行</button>
            <button class="btn btn-danger" onclick="stopExecution()">终止任务</button>
        </div>
        <!-- 加载动画 -->
        <div id="loading" class="loading">
            <div class="spinner-border" role="status">
                <span class="visually-hidden">加载中...</span>
            </div>
        </div>
    </div>

    <script>
        let eventSource = null; // 用于存储 EventSource 实例

        // 初始化 Vanta.js 背景
        VANTA.CELLS({
            el: "#vanta-background",
            mouseControls: true,
            touchControls: true,
            gyroControls: false,
            minHeight: 200.0,
            minWidth: 200.0,
            scale: 1.0,
            color1: 0x19cfcf,
            color2: 0xcfca7e,
            size: 2.7,
            speed: 2.5,
        });

        // 切换深色模式
        function toggleDarkMode() {
            document.body.classList.toggle('dark-mode');
        }

        // 显示加载动画
        function showLoading() {
            document.getElementById('loading').style.display = 'block';
        }

        // 隐藏加载动画
        function hideLoading() {
            document.getElementById('loading').style.display = 'none';
        }

        // 清空输出区域
        function clearOutput() {
            document.getElementById('output').innerHTML = '';
        }

        // 显示错误信息
        function showError(message) {
            const output = document.getElementById('output');
            output.innerHTML += `<div class="text-danger">${message}</div>`;
        }

        // 将 ANSI 颜色代码转换为 HTML
        function ansiToHtml(text) {
            return text
                .replace(/\x1B\[32m/g, '<span class="text-success">')
                .replace(/\x1B\[31m/g, '<span class="text-danger">')
                .replace(/\x1B\[0m/g, '</span>');
        }

        // 开始执行任务
        function startExecution() {
            const idea = document.getElementById('ideaInput').value.trim();
            if (!idea) return alert('请输入执行内容');

            clearOutput();
            showLoading();

            fetch('http://localhost:5000/stream', {
                method: 'POST',
                headers: {
                    'Content-Type': 'application/json',
                },
                body: JSON.stringify({ idea: idea })
            })
                .then(response => {
                    if (!response.ok) {
                        throw new Error(`HTTP错误 ${response.status}`);
                    }
                    eventSource = new EventSource(`http://localhost:5000/stream?idea=${encodeURIComponent(idea)}`);

                    eventSource.onmessage = (e) => {
                        const formatted = ansiToHtml(e.data);
                        document.getElementById('output').innerHTML +=
                            `<div class="log-item">${formatted}</div>`;
                        const output = document.getElementById('output');
                        output.scrollTop = output.scrollHeight;
                    };

                    eventSource.onerror = (e) => {
                        console.error('SSE Error:', e);
                        hideLoading();
                        eventSource.close();
                    };

                    eventSource.addEventListener('end', () => {
                        hideLoading();
                        eventSource.close();
                    });
                })
                .catch(error => {
                    hideLoading();
                    showError(`请求失败: ${error.message}`);
                });
        }

        // 终止任务
        function stopExecution() {
            if (eventSource) {
                eventSource.close();
                hideLoading();
            }
            fetch('http://localhost:5000/stop', {
                method: 'POST'
            })
                .then(response => {
                    if (response.ok) {
                        alert('已终止执行');
                    }
                });
        }

        // 页面关闭前关闭事件源
        window.addEventListener('beforeunload', () => {
            if (eventSource) eventSource.close();
            fetch('/stop', { method: 'POST' });
        });
    </script>
</body>

</html>
app.py:
from flask import Flask, Response, request, jsonify, render_template
from flask_cors import CORS
import subprocess
import sys
import os
import signal
import threading

app = Flask(__name__)
CORS(app, resources={r"/*": {"origins": "*"}})

# 进程管理
process_lock = threading.Lock()
current_process = None

@app.route('/')
def index():
    return render_template('index.html')

@app.route('/stream', methods=['GET', 'POST', 'OPTIONS'])
def stream_execute():
    global current_process

    # 处理预检请求
    if request.method == 'OPTIONS':
        return _build_preflight_response()

    # 获取输入内容
    idea = request.json.get('idea', '') if request.method == 'POST' else request.args.get('idea', '')
    if not idea:
        return Response("data: 错误:未提供输入\n\n", mimetype='text/event-stream')

    # 终止已有进程
    with process_lock:
        if current_process and current_process.poll() is None:
            current_process.terminate()

        # 启动新进程
        current_process = subprocess.Popen(
            [sys.executable, '-u', 'main.py'],
            stdin=subprocess.PIPE,
            stdout=subprocess.PIPE,
            stderr=subprocess.STDOUT,
            text=True,
            bufsize=1,
            universal_newlines=True,
            creationflags=subprocess.CREATE_NEW_PROCESS_GROUP if os.name == 'nt' else 0
        )

        # 发送输入
        current_process.stdin.write(idea + '\n')
        current_process.stdin.flush()

    # 流式响应
    def generate():
        while True:
            line = current_process.stdout.readline()
            if not line:
                if current_process.poll() is not None:
                    break
                continue
            yield f"data: {line}\n\n"
        yield "event: end\ndata: \n\n"

    return Response(
        generate(),
        mimetype='text/event-stream',
        headers={
            'Access-Control-Allow-Origin': '*',
            'Cache-Control': 'no-cache',
            'X-Accel-Buffering': 'no'
        }
    )

def _build_preflight_response():
    response = jsonify({'status': 'ok'})
    response.headers.add("Access-Control-Allow-Origin", "*")
    response.headers.add("Access-Control-Allow-Headers", "*")
    response.headers.add("Access-Control-Allow-Methods", "*")
    return response

@app.route('/stop', methods=['POST'])
def stop_execution():
    global current_process
    with process_lock:
        if current_process and current_process.poll() is None:
            current_process.terminate()
            return jsonify({'status': 'stopped'})
    return jsonify({'status': 'not running'}), 404

@app.after_request
def add_cors_headers(response):
    response.headers['Access-Control-Allow-Origin'] = '*'
    response.headers['Access-Control-Allow-Headers'] = 'Content-Type'
    response.headers['Access-Control-Allow-Methods'] = 'GET, POST, PUT, DELETE, OPTIONS'
    return response

if __name__ == '__main__':
    app.run(port=5000, threaded=True)
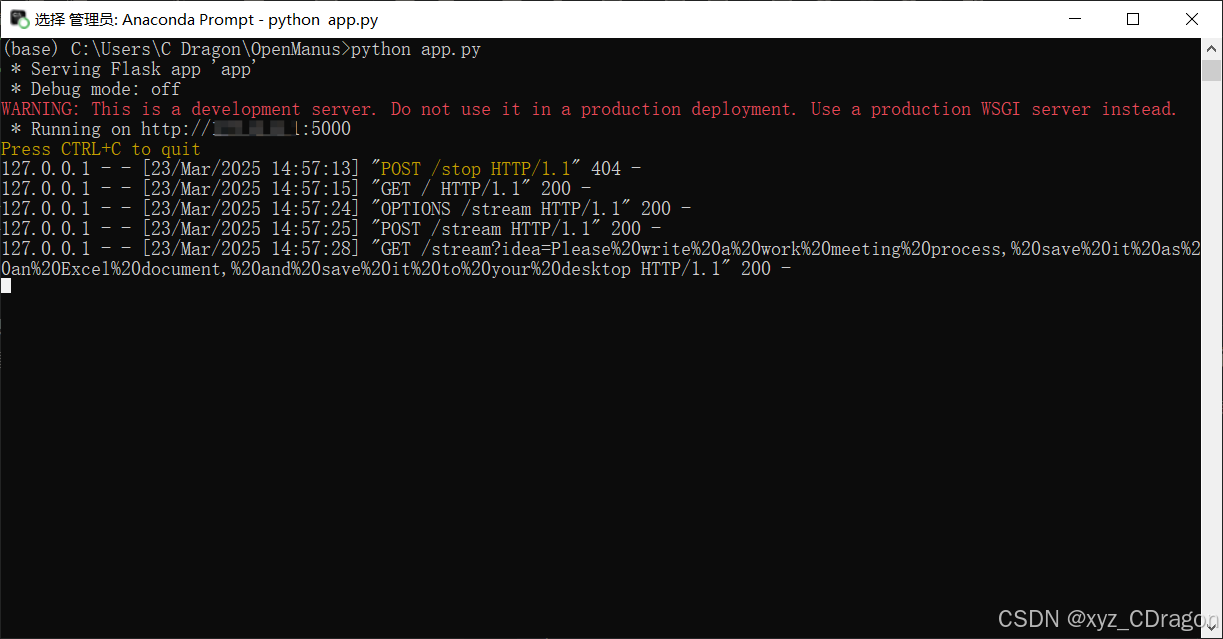
创建完前端的设计后,只需要运行app.py就可以,浏览器直接访问:http://localhost:5000/,直接在前端执行任务就可以。
说明任务已经建立,并且前端也同样在执行任务。
三、任务执行过程
在完成所有的安装和配置后,就需要使用openmanus来执行任务。这里我还是在前端页面输入任务,也可以在conda和vscode里执行。
1、简单的文本任务实现过程
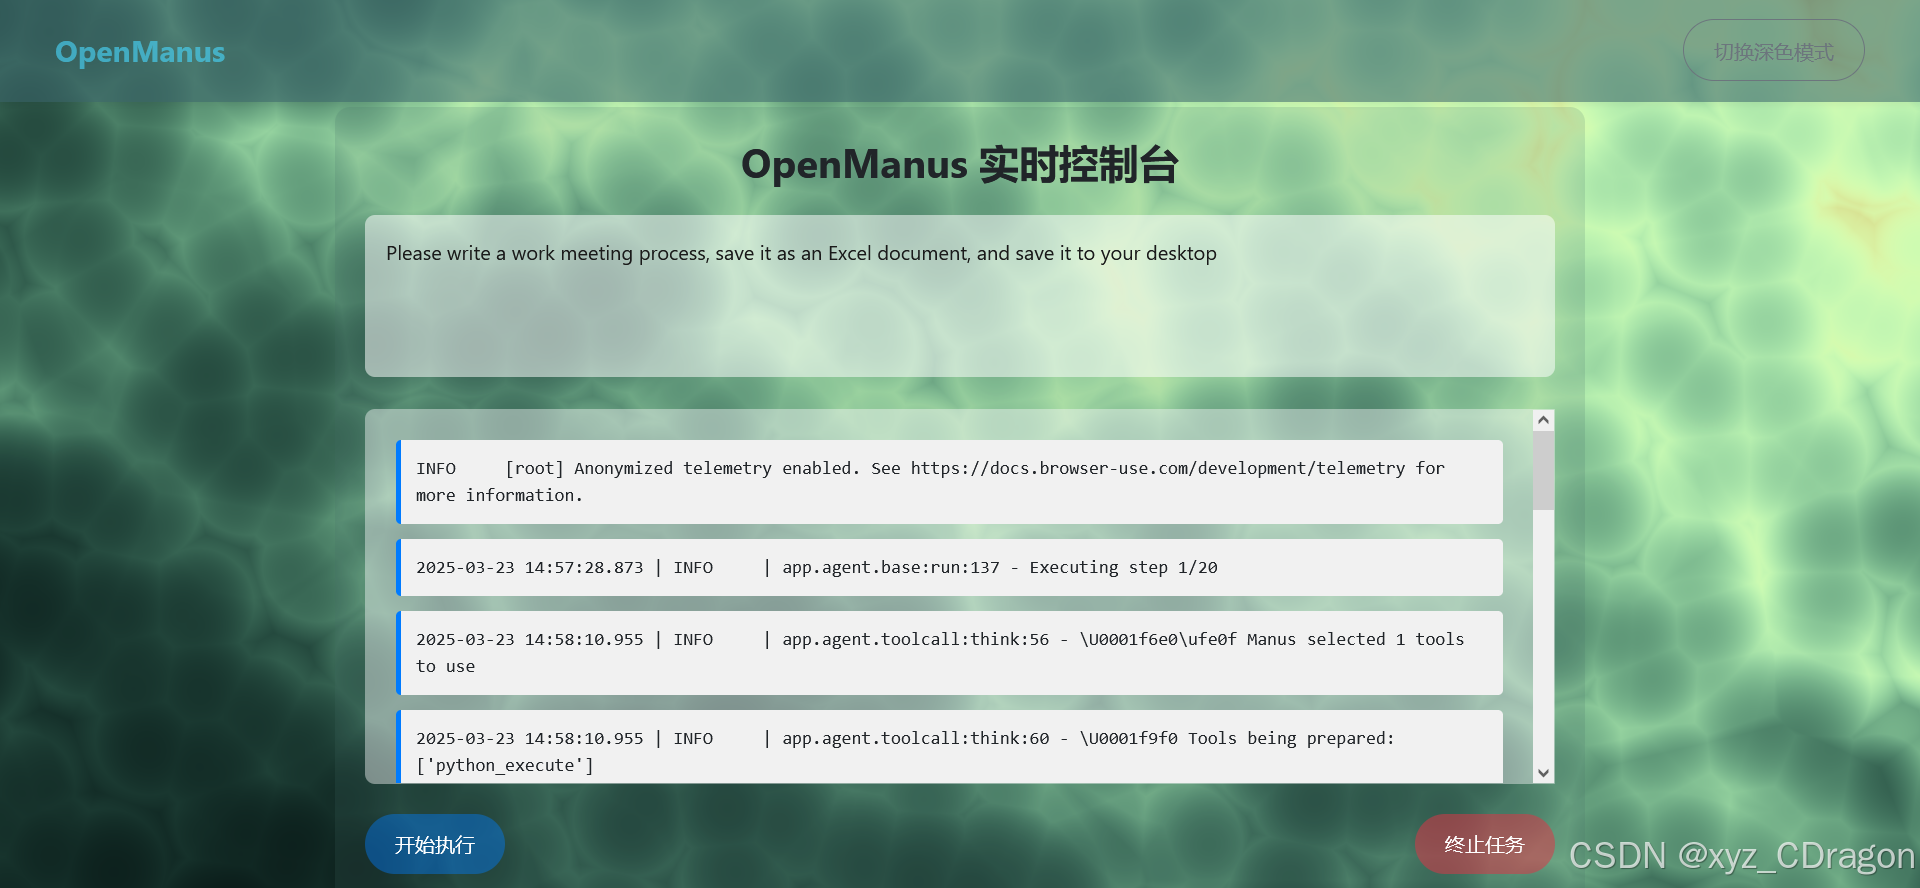
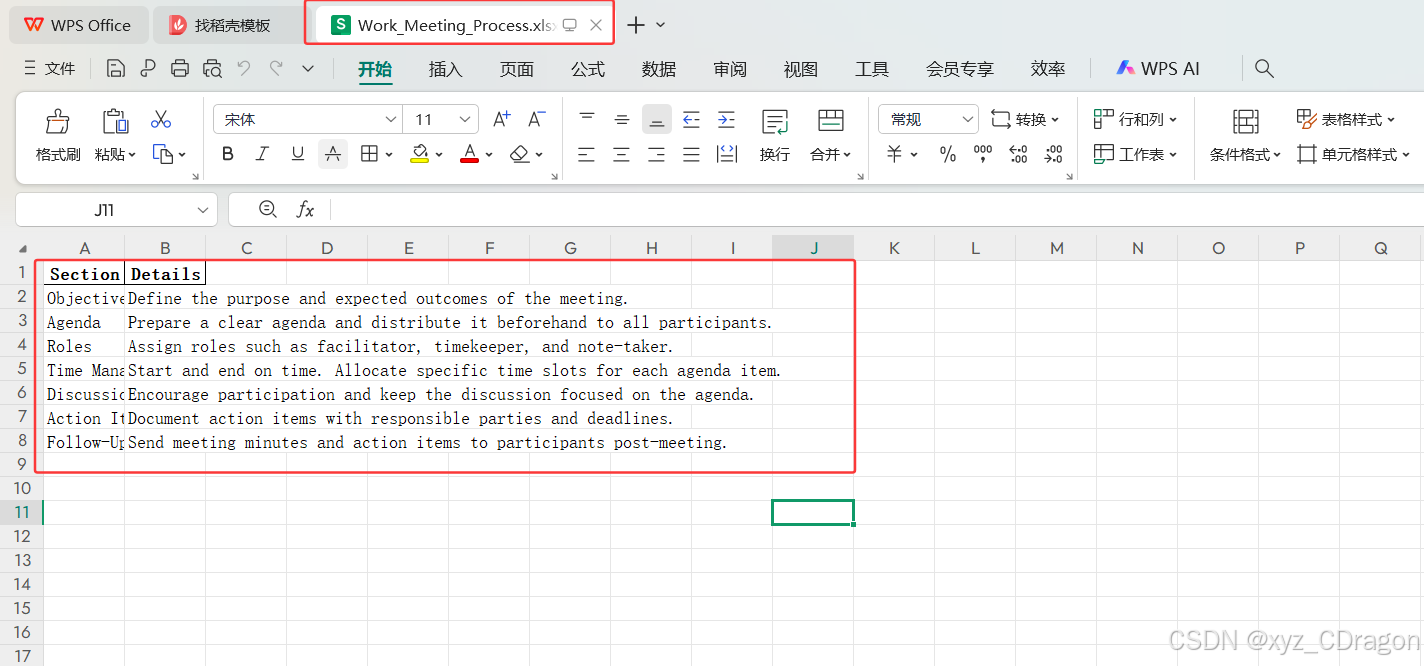
根据我之前给的任务:Please write a work meeting process, save it as an Excel document, and save it to your desktop。它应该会在执行完后在桌面出现一个Excel文档,内容是工作会议流程,这里使用英文输入,是为了避免中文输入导致无法输出任务文档的bug,之前测试过很多次。工作日志没有问题,但是就是找不到执行完任务后的输出文件。
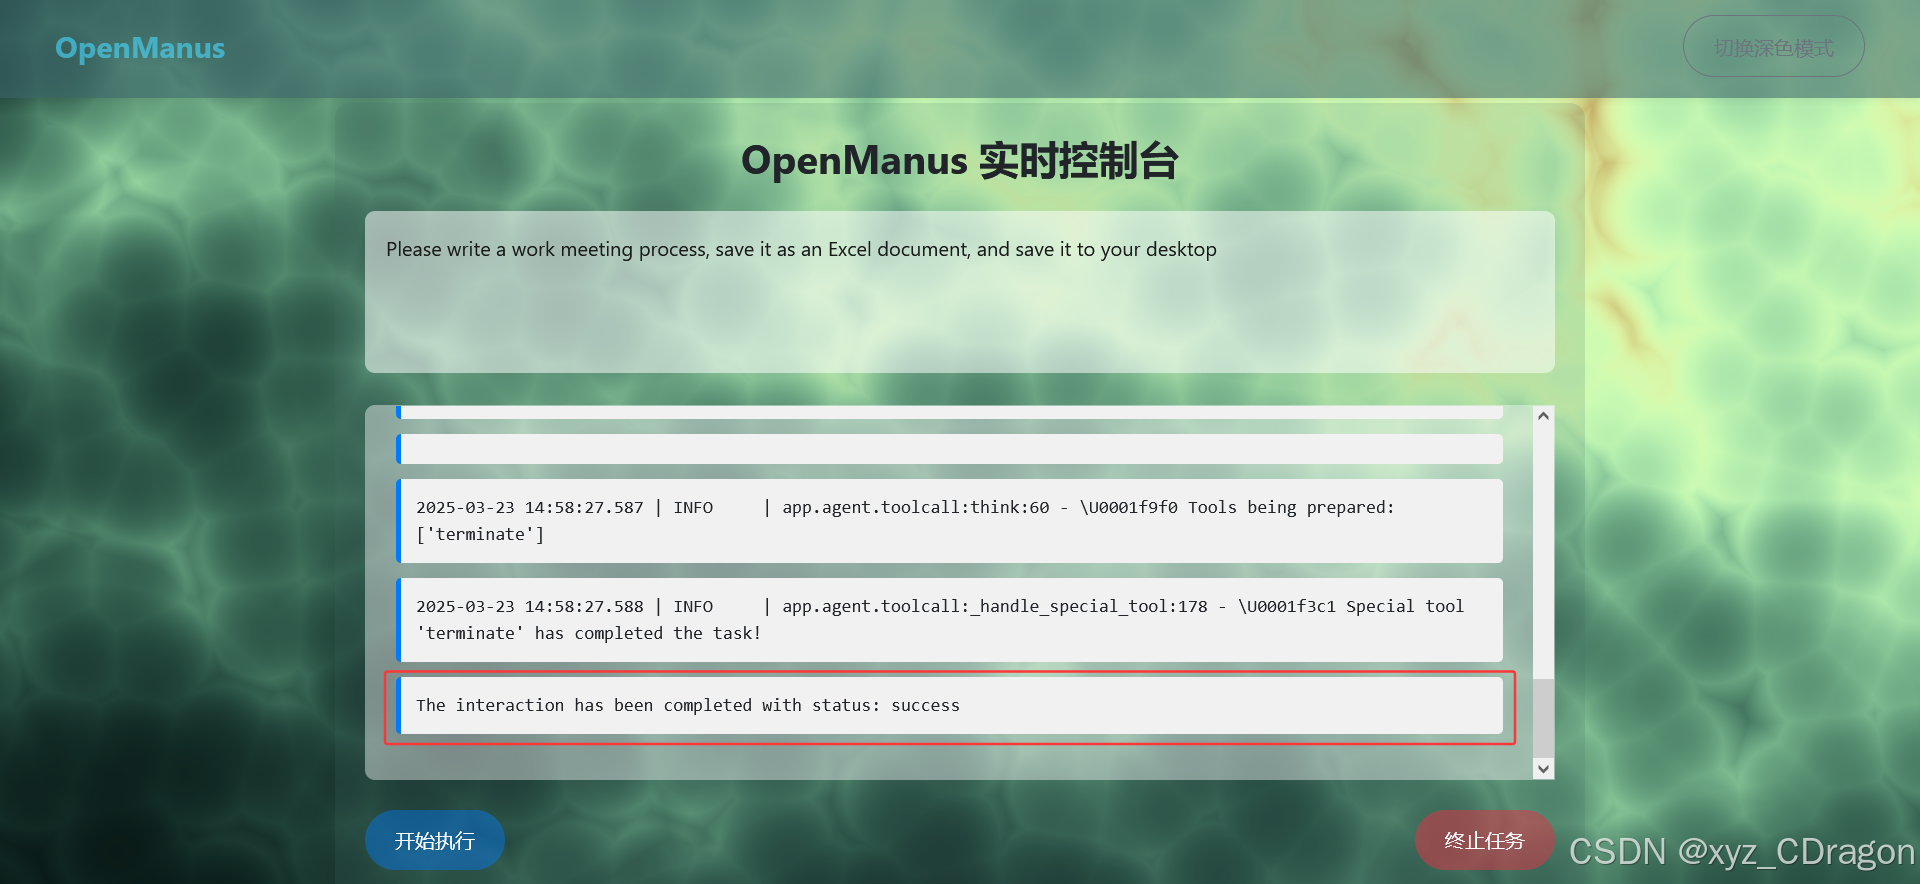
很明显,已经成功完成了任务,只需要在桌面打开该Excel文档就行。很明显,完成了一个简单工作会议流程的输出,并保存到Excel文档里。
2、简单的视觉任务实现(输出图片)
我在前端执行的任务:Draw a bouquet of colorful flowers, output it as an image, and save it to the desktop。画一束五颜六色的花朵,输出图片到桌面。感觉任务有点简单,不过还是完成了整个任务流程,并且保存为.png的图片格式,就是画的不怎么样,不过可以提供更多的任务细节,来完善输出结果。

3、上升一点难度,调用浏览器执行任务
本次任务:Please search for the latest stock information of NVIDIA on the Internet, save it as an Excel document, draw a rough stock curve chart within the document, and save the Excel document to the desktop。请在网络上查询英伟达最近的股票情况,保存为Excel文档,并在文档里绘制大概的股票曲线图,Excel文档保存到桌面。由于需要图文共同输出,虽然在前端页面里,任务日志过程是没有问题的,但是还是无法找到输出的任务文件。
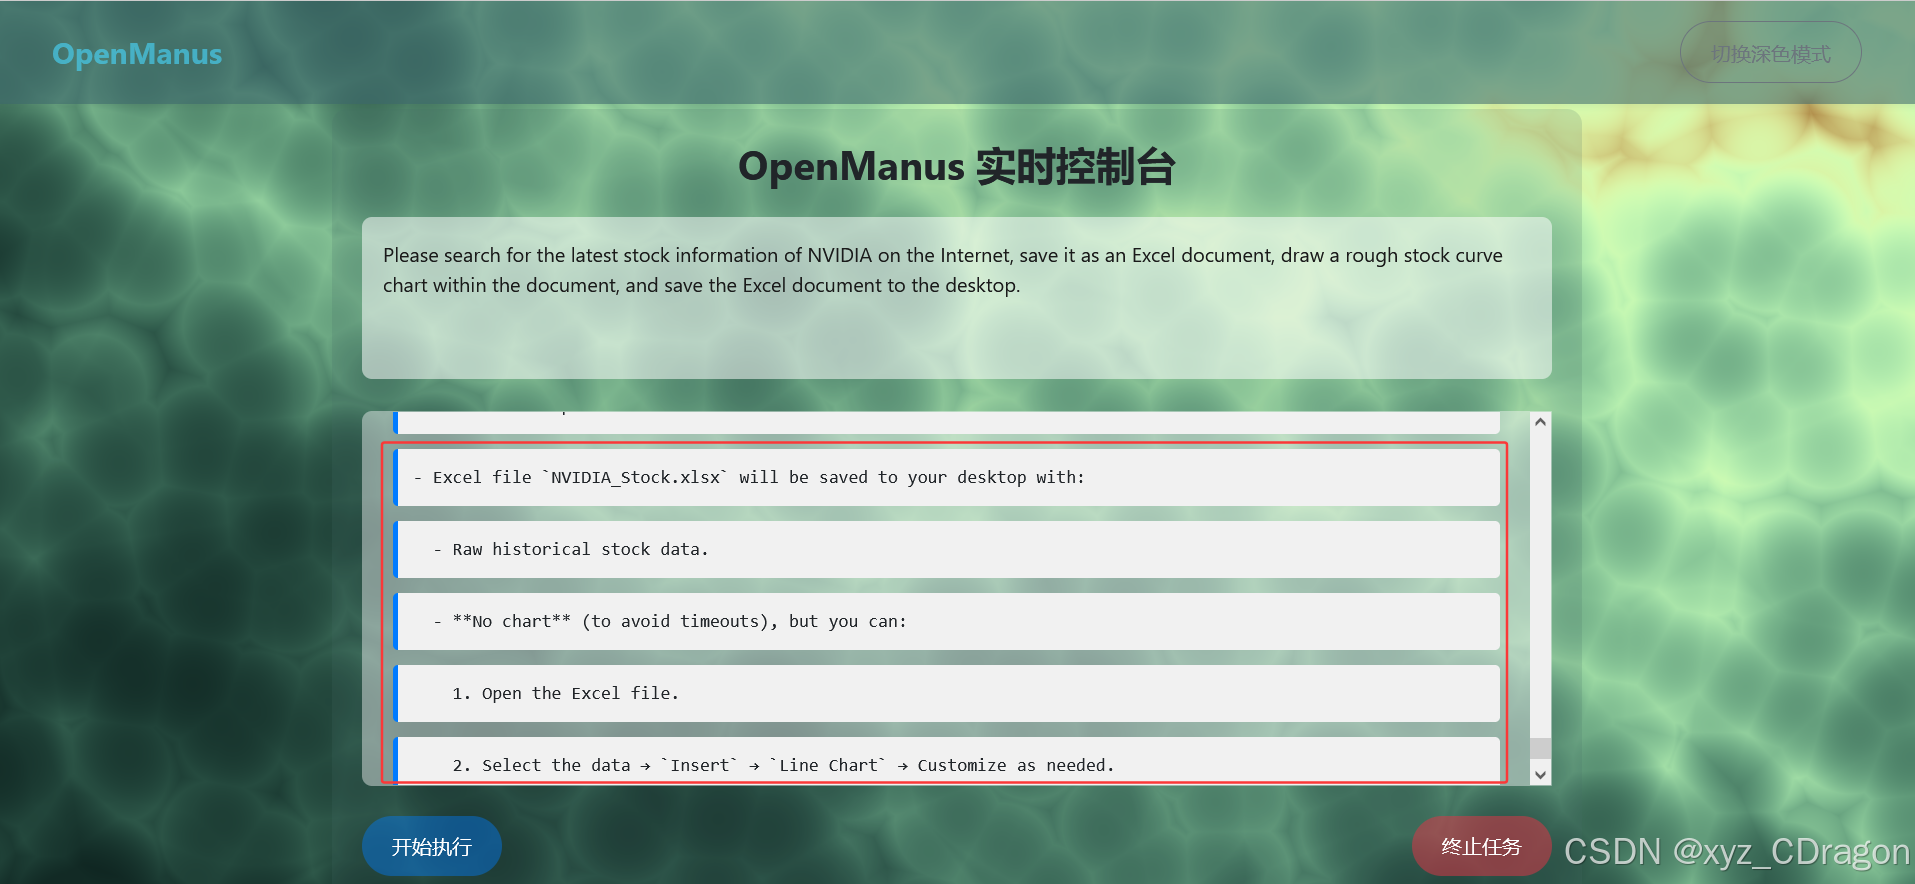
虽然提示有该文件,但是还是没有找到NVDA_Historical.csv,很可能是由于没有完全调用工具,导致部分任务执行失败。
4、任务测试总结
根据openmanus执行任务的情况来看,文本任务和视觉任务执行效率比较高,很短时间内完成,但是任务质量不佳,需要继续优化;当调用浏览器执行任务并增加难度时,就很慢,并且不是每一次都能成功调用大模型工具,下面是在执行任务过程的idea流程。至此基本的任务流程已经跑完成,基于openmanus的应用可能还有很多,虽然功能上比manus弱一点,并且需要消耗大量的tokens,不过在未来的大模型工具里,该项目的思路是对的。

总结
本次详细演示openmanus从安装到实际测试应用情况,同时良好的前端页面可以提高使用便捷性,在后续的大模型工具中,我还会持续关注,不断发现和测试不同工具的应用,同时尽可能优化。也非常欢迎大家提供技术支持交流,也非常高兴可以认识志同道合的朋友。


 9663
9663

 被折叠的 条评论
为什么被折叠?
被折叠的 条评论
为什么被折叠?
 到【灌水乐园】发言


