


一、STM32F103C8T6介绍
①STM32F103C8T6 Blue Pill
②stm32f103c8t6最小核心板的主要引脚接口:
STM32F103C8T6是一款基于ARM Cortex-M3内核的低功耗、高性能32位微控制器。其最小核心板的主要引脚接口包括:GPIO(通用输入输出)引脚、USART(通用同步异步收发器)引脚、ADC(模数转换器)引脚、SWDIO和SWCLK引脚、USB D+和D-引脚、I2C(Inter-Integrated Circuit)引脚等其他引脚。
二、在Proteus中实现LED周期性亮灭
1.搭建Proteus仿真电路图
2.Keil编译代码
#define GPIOB_BASE 0x40010C00
#define GPIOC_BASE 0x40011000
#define GPIOA_BASE 0x40010800
#define RCC_APB2ENR (*(unsigned int *)0x40021018)
#define GPIOB_CRH (*(unsigned int *)0x40010C04)
#define GPIOC_CRH (*(unsigned int *)0x40011004)
#define GPIOA_CRL (*(unsigned int *)0x40010800)
#define GPIOB_ODR (*(unsigned int *)0x40010C0C)
#define GPIOC_ODR (*(unsigned int *)0x4001100C)
#define GPIOA_ODR (*(unsigned int *)0x4001080C)
void SystemInit(void);
void Delay_ms(volatile  unsigned  int);
void A_LED_LIGHT(void);
void B_LED_LIGHT(void);
void C_LED_LIGHT(void);
void Delay_ms( volatile  unsigned  int  t)
{
     unsigned  int  i;
     while(t--)
         for (i=0;i<800;i++);
}

void A_LED_LIGHT(){
	GPIOA_ODR=0x0<<4;		//PA4低电平
	GPIOB_ODR=0x1<<9;		//PB9高电平
	GPIOC_ODR=0x1<<15;		//PC15高电平
}
void B_LED_LIGHT(){
	GPIOA_ODR=0x1<<4;		//PA4高电平
	GPIOB_ODR=0x0<<9;		//PB9低电平
	GPIOC_ODR=0x1<<15;		//PC15高电平
}
void C_LED_LIGHT(){
	GPIOA_ODR=0x1<<4;		//PA4高电平
	GPIOB_ODR=0x1<<9;		//PB9高电平
	GPIOC_ODR=0x0<<15;		//PC15低电平
}

int main(){
	int j=100;
	// 开启时钟
	RCC_APB2ENR |= (1<<3); // 开启 GPIOB 时钟
	RCC_APB2ENR |= (1<<4); // 开启 GPIOC 时钟
	RCC_APB2ENR |= (1<<2); // 开启 GPIOA 时钟


	// 设置 GPIO 为推挽输出
	GPIOB_CRH&= 0xffffff0f;	//设置位 清零
	GPIOB_CRH|=0x00000020;  //PB9推挽输出

	GPIOC_CRH &= 0x0fffffff; //设置位 清零
	GPIOC_CRH|=0x30000000;  //PC15推挽输出


	GPIOA_CRL &= 0xfff0ffff; //设置位 清零
	GPIOA_CRL|=0x00010000; //PA4推挽输出

	// 3个LED初始化为不亮(即高点位)
	GPIOB_ODR |= (1<<9);
	GPIOC_ODR |= (1<<15);
	GPIOA_ODR |= (1<<4);

	while(j){

		B_LED_LIGHT();
		Delay_ms(1000000);

		C_LED_LIGHT();
		Delay_ms(1000000);

		A_LED_LIGHT();
		Delay_ms(1000000);
	}

}


void SystemInit(){

}
3.Proteus仿真运行
三、在面包板中实现LED周期性亮灭
①面包板模拟搭建电路图
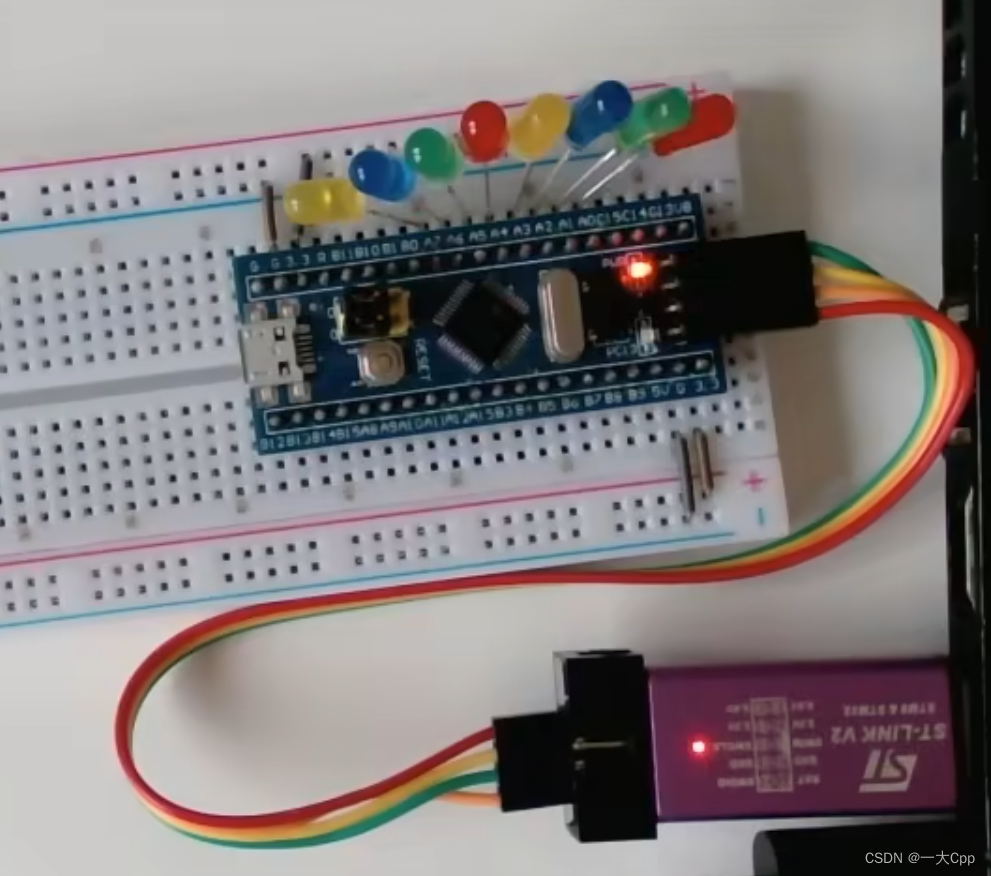
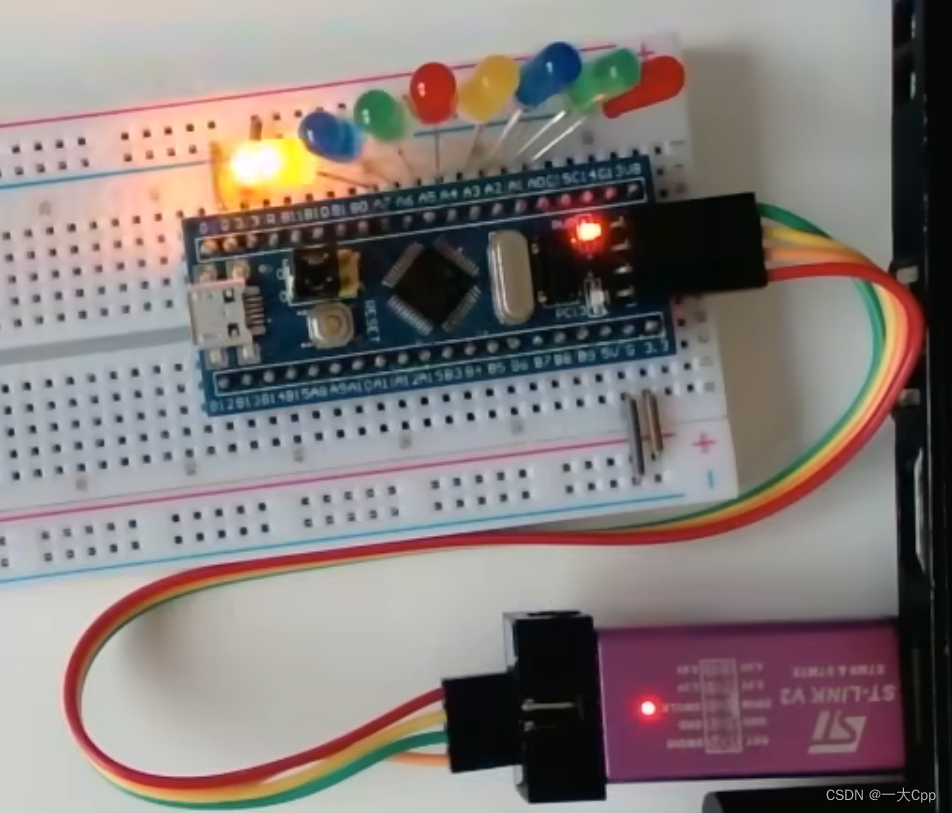
②面包板实际搭建图
③Keil部分编译代码
main.c
#include "stm32f10x.h"                  // Device header
#include "Delay.h"

int main(void)
{
	RCC_APB2PeriphClockCmd(RCC_APB2Periph_GPIOA, ENABLE);

	GPIO_InitTypeDef GPIO_InitStructure;
	GPIO_InitStructure.GPIO_Mode = GPIO_Mode_Out_PP;
	GPIO_InitStructure.GPIO_Pin = GPIO_Pin_All;
	GPIO_InitStructure.GPIO_Speed = GPIO_Speed_50MHz;
	GPIO_Init(GPIOA, &GPIO_InitStructure);

	while (1)
	{
		GPIO_Write(GPIOA, ~0x0002);	//0000 0000 0000 0010
		Delay_ms(1000);
		GPIO_Write(GPIOA, ~0x0004);	//0000 0000 0000 0100
		Delay_ms(1000);
		GPIO_Write(GPIOA, ~0x0008);	//0000 0000 0000 1000
		Delay_ms(1000);
	}
}
Delay.c
#include "stm32f10x.h"

/**
  * @brief  微秒级延时
  * @param  xus 延时时长,范围:0~233015
  * @retval 无
  */
void Delay_us(uint32_t xus)
{
	SysTick->LOAD = 72 * xus;				//设置定时器重装值
	SysTick->VAL = 0x00;					//清空当前计数值
	SysTick->CTRL = 0x00000005;				//设置时钟源为HCLK,启动定时器
	while(!(SysTick->CTRL & 0x00010000));	//等待计数到0
	SysTick->CTRL = 0x00000004;				//关闭定时器
}

/**
  * @brief  毫秒级延时
  * @param  xms 延时时长,范围:0~4294967295
  * @retval 无
  */
void Delay_ms(uint32_t xms)
{
	while(xms--)
	{
		Delay_us(1000);
	}
}

/**
  * @brief  秒级延时
  * @param  xs 延时时长,范围:0~4294967295
  * @retval 无
  */
void Delay_s(uint32_t xs)
{
	while(xs--)
	{
		Delay_ms(1000);
	}
}
④实验结果展示
四、总结
因为STM32F103C8在Proteus8.15版本才有,所以需要将Proteus版本升级到8.15及以上版本;
STM32F103C8的开发难度较大,需要有较深厚的开发语言功底;
逐步清楚STM32F103C8的工作方法和应用范围;


 1万+
1万+

 被折叠的 条评论
为什么被折叠?
被折叠的 条评论
为什么被折叠?
 到【灌水乐园】发言


