


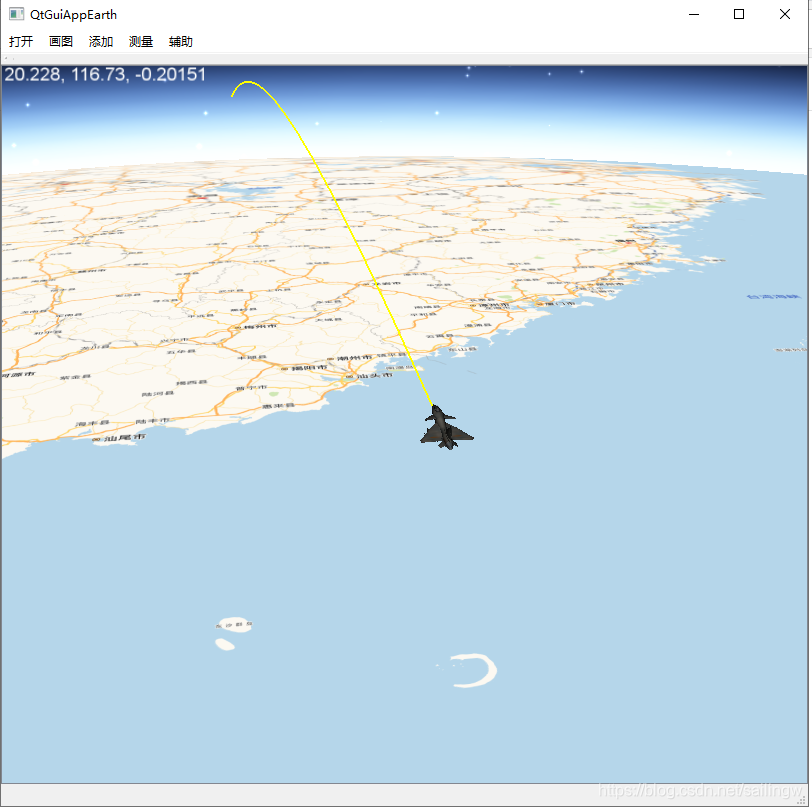
 本文介绍如何在三维环境中加载并显示模型文件,通过调整模型的位置、大小来适配场景,并实现模型移动轨迹的绘制。文章详细展示了使用osgEarth进行三维地图开发的过程,包括模型的加载、设置状态属性以确保正确光照、以及绘制模型移动轨迹的方法。
/*******************模型操作********************/
void GraphicsView::addModel()
{
	//设置位置
	planeGroup = new osg::Group;
	osg::ref_ptr<GeoTransform> gt = new GeoTransform();//应该是模型移动平台的意思
	osg::ref_ptr<osg::MatrixTransform> mt = new osg::MatrixTransform;//放置模型的矩阵
	osg::ref_ptr<osg::Node> model;
	model = osgDB::readNodeFile("model_flight\\J10.ive");
	model->getOrCreateStateSet()->setMode(GL_RESCALE_NORMAL, osg::StateAttribute::ON);//osg中光照只会对有法线的模型起作用,而模型经过缩放后法线是不会变得,//所以需要手动设置属性,让法线随着模型大小变化而变化。GL_NORMALIZE 或 GL_RESCALE_NORMAL
	gt->addChild(mt);
	mt->addChild(model);//mt 可以控制模型的方向
	planeGroup->addChild(gt);
	m_pRoot->addChild(planeGroup);
	mt->setMatrix(osg::Matrix::scale(osg::Vec3(1000, 1000, 1000)));//放大一些,方便看到
	//PlaneMove(116.7176, 20.6994, 100000.0);
	gt->setPosition(GeoPoint(m_pMapSRS, osg::Vec3(116.7176, 20.6994, 100000.0), ALTMODE_ABSOLUTE));// (osg::Vec3(lon_degrees, lat_degrees, height));
	/*********绘制轨迹**********/
	std::vector<osg::Vec3d> m_vecPoint;
	m_vecPoint.push_back(osg::Vec3d(116.7176, 20.6994, 100000.0));
	m_vecPoint.push_back(osg::Vec3d(116.3, 39.9, 100000.0));
	createLine(m_vecPoint, planeGroup);

}
绘制轨迹
void GraphicsView::createLine(std::vector<osg::Vec3d> m_vecPoint, osg::ref_ptr<osg::Group> modelGroup)
{
	osgEarth::Symbology::Style m_lineStyle;
	osgEarth::Features::Feature* m_pFeature;
	osgEarth::Annotation::FeatureNode* m_pFeatureNode;

	// init style
	m_lineStyle.getOrCreate<osgEarth::Symbology::LineSymbol>()->stroke()->color() = osgEarth::Symbology::Color::Yellow;
	m_lineStyle.getOrCreate<osgEarth::Symbology::LineSymbol>()->stroke()->width() = 2.0f;
	m_lineStyle.getOrCreate<osgEarth::Symbology::LineSymbol>()->tessellation() = 20.0;
	//m_lineStyle.getOrCreate<osgEarth::Symbology::AltitudeSymbol>()->clamping() = osgEarth::Symbology::AltitudeSymbol:: CLAMP_TO_TERRAIN;//贴地
	m_lineStyle.getOrCreate<osgEarth::Symbology::AltitudeSymbol>()->technique() = osgEarth::Symbology::AltitudeSymbol::TECHNIQUE_DRAPE;
	m_lineStyle.getOrCreate<osgEarth::Symbology::AltitudeSymbol>()->verticalOffset() = 0.1;

	m_pFeature = new osgEarth::Features::Feature(new osgEarth::Annotation::LineString, m_pMapNode->getMapSRS());
	m_pFeatureNode = new osgEarth::Annotation::FeatureNode(m_pMapNode, m_pFeature, m_lineStyle);
	modelGroup->addChild(m_pFeatureNode);//如果是多个模型,这里就需要改了

	m_pFeature->getGeometry()->clear();
	m_pFeatureNode->setStyle(m_lineStyle);
	for (auto& n : m_vecPoint)
	{
		m_pFeature->getGeometry()->push_back(n);
	}

	m_pFeatureNode->init();

}


 4083
4083

 被折叠的 条评论
为什么被折叠?
被折叠的 条评论
为什么被折叠?
 到【灌水乐园】发言


