


 本文详细介绍了如何将FreeRTOS的命令行接口(CLI)组件移植到GD32F107单片机上,通过串口和DMA实现命令交互。作者分享了从下载FreeRTOS源码、移植CLI组件、实现串口初始化及中断,到注册并执行自定义命令(如hello、led控制和sum计算)的全过程。CLI的使用大大方便了单片机的调试和维护。
1、前言
接触过Linux的都知道,最好用的一个工具就是终端,终端可以输入命令运行代码,查看信息,非常便捷。而搞单片机开发的好像基本没怎么接触过类似的工具,开发单片机用的最多的就是使用串口打印工具进行调试printf,但这个缺陷是,只能做显示,不能进行交互,如果需要显示新的信息,需要改代码然后编译,烧写,运行。这样操作难度比较大,比如在客户现场售后维护同时要进行调试,这个操作基本不可行,一般售后人员没有编写代码的能力或者权限。
为了方便代码调试以及bug排除。最好是能有一个类似linux上的串口中断,我可以输入命令,终端给我反馈数据。之前有用过原子哥写的usmart工具,很简洁,可以实现中断运行函数。这段时间在研究freertos,发现其中就包含了这样的组件,在freerots中叫做cli。
经过了初步研究,移植后。运行效果如下。
Command not recognised.  Enter 'help' to view a list of available commands.


[Press ENTER to execute the previous command again]
>helo
Command not recognised.  Enter 'help' to view a list of available commands.


[Press ENTER to execute the previous command again]
>help

help:
 Lists all the registered commands


task-stats:
 Displays a table showing the state of each FreeRTOS task

echo-3-parameters <param1> <param2> <param3>:
 Expects three parameters, echos each in turn

echo-parameters <...>:
 Take variable number of parameters, echos each in turn

hello:
 Displays a strings hello world on the terminal

led:
 control led on and off

[Press ENTER to execute the previous command again]
>hello
 hello world

[Press ENTER to execute the previous command again]
>led on
led on
1: on

[Press ENTER to execute the previous command again]
>led off
led off
1: off

[Press ENTER to execute the previous command again]
>task-stats
Task              State   Priority  Stack    #
************************************************
CLI             X       1       446     1
IDLE            R       0       118     3
Tmr Svc         B       31      228     4
tx_task         B       1       100     5

[Press ENTER to execute the previous command again]
>
输入hello+回车,会打印hello world。led on+回车会点亮一个led,led off+回车会关闭一个led。task-stats可以打印所有任务的状态。输入help+回车可以显示所有可运行的命令。这个效果还是不错的,后续如果用到了文件系统,还可以实现 ls mkdir touch这些Linux常用命令。可拓展性还是比较强的,下面就讲下如何移植到st或gd32,我用的是gd32f107,。具体代码仓库连接:
https://gitee.com/yvany/gd_freertos.git
2、cli移植
2.1cli组件
首先要下载一个freertos源码。下载方式见freertos.org可以参考之前的文章。
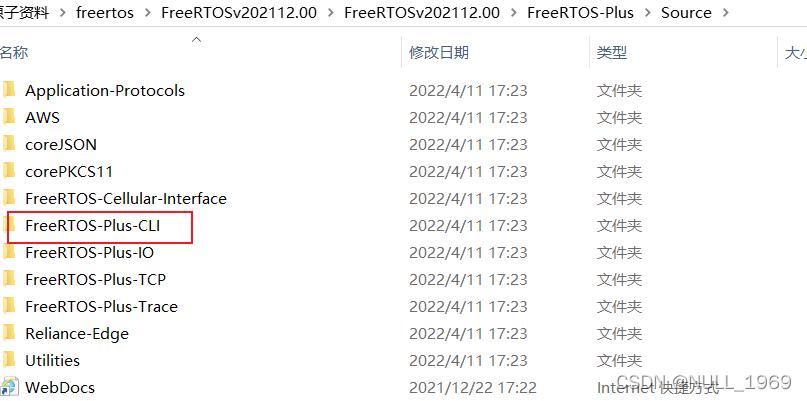
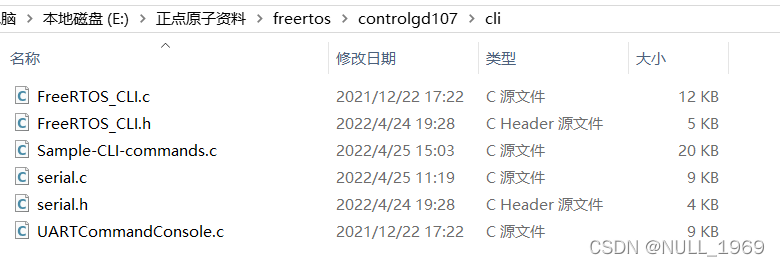
在freertos-plus文件夹下的source文件下,可以找到cli组件,如上图。
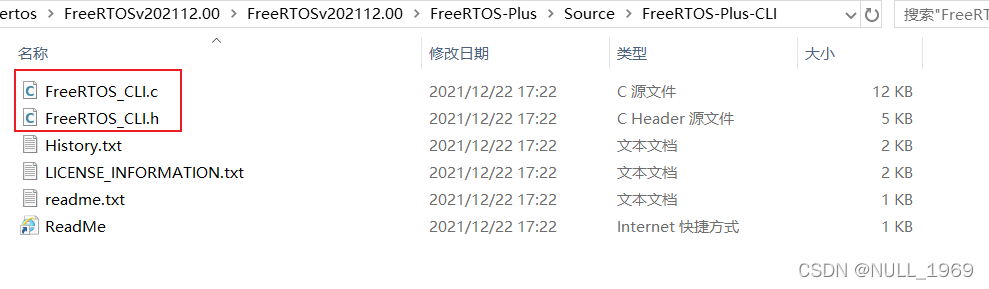
打开文件夹,cli组件很简单,就一个.c一个.h文件。理论上来说,只要移植这两文件就好了。但是为了方便,可以移植一个官方已经准备好的demo。
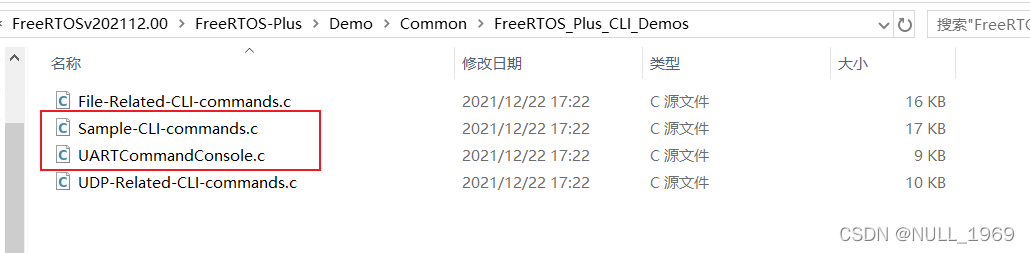
在freertos-plus->demo->coomon->cli_demos文件下下可以看到上述4个文件。初次使用,我们需要的只是上图中红框中的两个文件,这两个一个示例,一个是在串口下实现的中断。
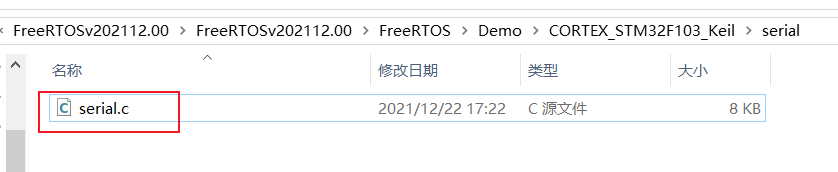
为了进一步简化代码工作量,可以直接使用官方的底层串口驱动文件。
至此,移植cli需要的文件就准备完毕了。下面只需要将这些放到工程cli文件夹目录下即可。
最终组件需要的文件如上图所示。剩下就是将这些文件添加到mdk keil工程中。
2.2 实现串口初始化及中断
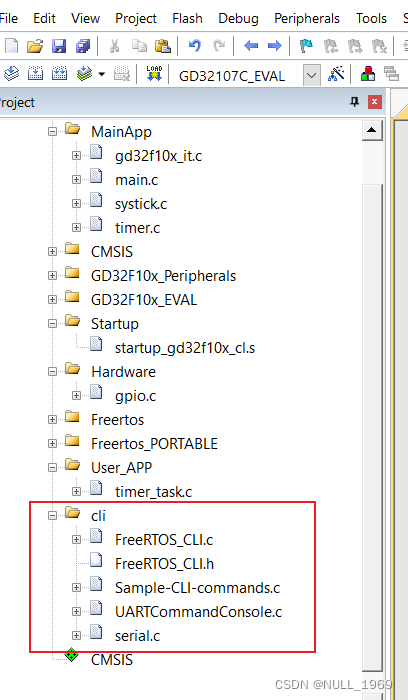
打开mdk,添加cli 组,并添加文件。
在serial.c中实现串口初始化,以及中断函数。
xComPortHandle xSerialPortInitMinimal( unsigned long ulWantedBaud, unsigned portBASE_TYPE uxQueueLength )
{
xComPortHandle xReturn;


	/* Create the queues used to hold Rx/Tx characters. */
	xRxedChars = xQueueCreate( uxQueueLength, ( unsigned portBASE_TYPE ) sizeof( signed char ) );
	xCharsForTx = xQueueCreate( uxQueueLength + 1, ( unsigned portBASE_TYPE ) sizeof( signed char ) );

	/* If the queue/semaphore was created correctly then setup the serial port
	hardware. */
	if( ( xRxedChars != serINVALID_QUEUE ) && ( xCharsForTx != serINVALID_QUEUE ) )
	{
		/* Enable USART1 clock */
	dma_parameter_struct dma_init_struct;  // DMA配置参数结构体

	rcu_periph_clock_enable(RCU_GPIOD);  // 使能 GPIOD 时钟
	rcu_periph_clock_enable(RCU_AF);
	rcu_periph_clock_enable(RCU_USART2);  // 使能 USART2 时钟
	rcu_periph_clock_enable(RCU_DMA0);   // 使能 DMA0 时钟
	gpio_pin_remap_config(GPIO_USART2_FULL_REMAP, ENABLE);

	gpio_init(GPIOD, GPIO_MODE_AF_PP, GPIO_OSPEED_50MHZ, GPIO_PIN_8);
	gpio_init(GPIOD, GPIO_MODE_IPU, GPIO_OSPEED_50MHZ, GPIO_PIN_9);

	usart_deinit(USART2);
	usart_baudrate_set(USART2, 115200U);
	usart_word_length_set(USART2, USART_WL_8BIT);
	usart_stop_bit_set(USART2, USART_STB_1BIT);
	usart_parity_config(USART2, USART_PM_NONE);
	usart_hardware_flow_rts_config(USART2, USART_RTS_DISABLE);
	usart_hardware_flow_cts_config(USART2, USART_CTS_DISABLE);

	usart_receive_config(USART2, USART_RECEIVE_ENABLE);
	usart_transmit_config(USART2, USART_TRANSMIT_ENABLE);

	usart_interrupt_enable(USART2,USART_INT_IDLE);

	usart_enable(USART2);


    /* deinitialize DMA channel3(USART0 tx) */
    dma_deinit(DMA0, DMA_CH2);
    dma_init_struct.direction = DMA_PERIPHERAL_TO_MEMORY;
    dma_init_struct.memory_addr = (uint32_t)g_usart2_rx_buff;
    dma_init_struct.memory_inc = DMA_MEMORY_INCREASE_ENABLE;
    dma_init_struct.memory_width = DMA_MEMORY_WIDTH_8BIT;
    dma_init_struct.number = sizeof(g_usart2_rx_buff);
    dma_init_struct.periph_addr = USATR2_DATA_ADDRESS;
    dma_init_struct.periph_inc = DMA_PERIPH_INCREASE_DISABLE;
    dma_init_struct.periph_width = DMA_PERIPHERAL_WIDTH_8BIT;
    dma_init_struct.priority = DMA_PRIORITY_MEDIUM;
    dma_init(DMA0, DMA_CH2, &dma_init_struct);

	dma_circulation_disable(DMA0, DMA_CH2);                   // 关闭DMA循环模式
	dma_memory_to_memory_disable(DMA0, DMA_CH2);              //  DMA内存到内存模式不开启
	dma_channel_enable(DMA0, DMA_CH2);                        // 使能DMA传输

	usart_dma_receive_config(USART2, USART_DENR_ENABLE); // USART0 DMA接收模式开启
	nvic_irq_enable(USART2_IRQn, 5, 0);                  // USART中断设置,抢占优先级0,子优先级0
	}
	else
	{
		xReturn = ( xComPortHandle ) 0;
	}

	/* This demo file only supports a single port but we have to return
	something to comply with the standard demo header file. */
	return xReturn;
}
这里我使用的串口接收dma配合串口空闲中断。移植时,将串口初始化代码填入上面的函数。
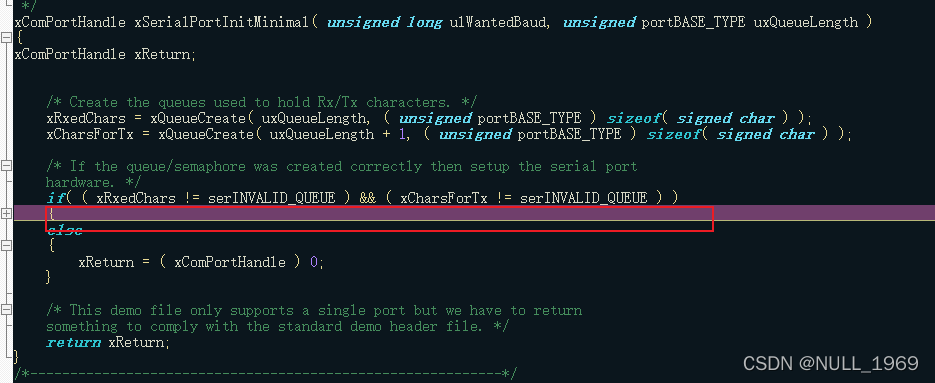
需要添加的在这个if里面,其他的不用动,保持原样。
void USART2_IRQHandler( void )
{
portBASE_TYPE xHigherPriorityTaskWoken = pdFALSE;
	uint16_t usart2_rx_len = 0;
	uint8_t data = 0;
	if (RESET != usart_interrupt_flag_get(USART2, USART_INT_FLAG_IDLE)) //空闲中断
    {
		usart_interrupt_flag_clear(USART2, USART_INT_FLAG_IDLE);  // 清除空闲中断标志位
		data = (uint8_t)usart_data_receive(USART2);
				dma_channel_disable(DMA0, DMA_CH2);                     // 关闭DMA传输

		usart2_rx_len = sizeof(g_usart2_rx_buff) - dma_transfer_number_get(DMA0, DMA_CH2);
		for(int i = 0; i<usart2_rx_len;i++)
		{
		  xQueueSendFromISR(xRxedChars, &g_usart2_rx_buff[i], &xHigherPriorityTaskWoken);
		  portEND_SWITCHING_ISR( xHigherPriorityTaskWoken );

		}


		dma_memory_address_config(DMA0, DMA_CH2, (uint32_t)g_usart2_rx_buff);
		dma_transfer_number_config(DMA0, DMA_CH2, sizeof(g_usart2_rx_buff));
		dma_channel_enable(DMA0, DMA_CH2); // 开启DMA传输

	}


}
添加串口中断函数,为了方便,我这里直接将其默认的名字改成串口中断函数名称。由于我使用的是串口dma空闲中断。所以需要将读到的值用队列一个字节一个字节的发送出去。
如果直接采用的串口接收中断。可以将上图的for循环去掉。直接将受到的一个字节发送出去。
2.3配置

在FreeRTOS_CLI.h文件下添加宏定义,定义中端最大输出的字符长度。
#define configCOMMAND_INT_MAX_OUTPUT_SIZE 1000
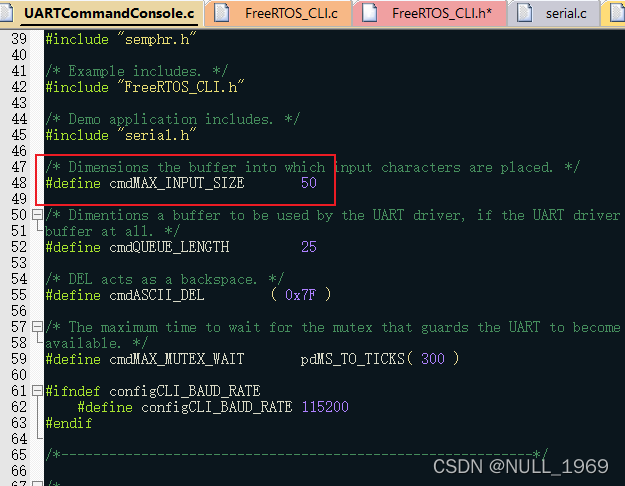
在串口控制台c文件中,注意上面的宏定义,这个定义了终端最大输入的字节数量。如果超了可能会存在硬件错误的问题。初步使用一定要注意。
最后就是在main函数中初始化cli组件
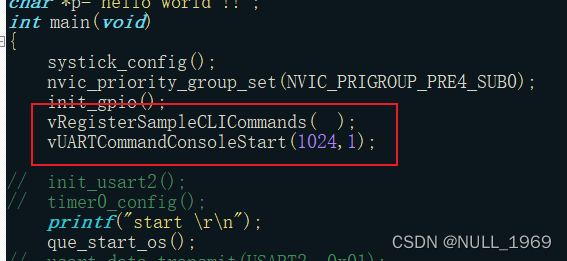
main函数中,添加如下初始化函数命令。定义cli任务堆栈大小为4k字节,优先级为1,这里堆栈是设置的比较大,实际项目中,要根据实际设置的小一点。
vRegisterSampleCLICommands( );
vUARTCommandConsoleStart(1024,1);
最后编译运行,下载烧录。
串口终端建议使用MobaXterm,完全免费,支持多种协议。
打开MobaXterm。新建串口终端。
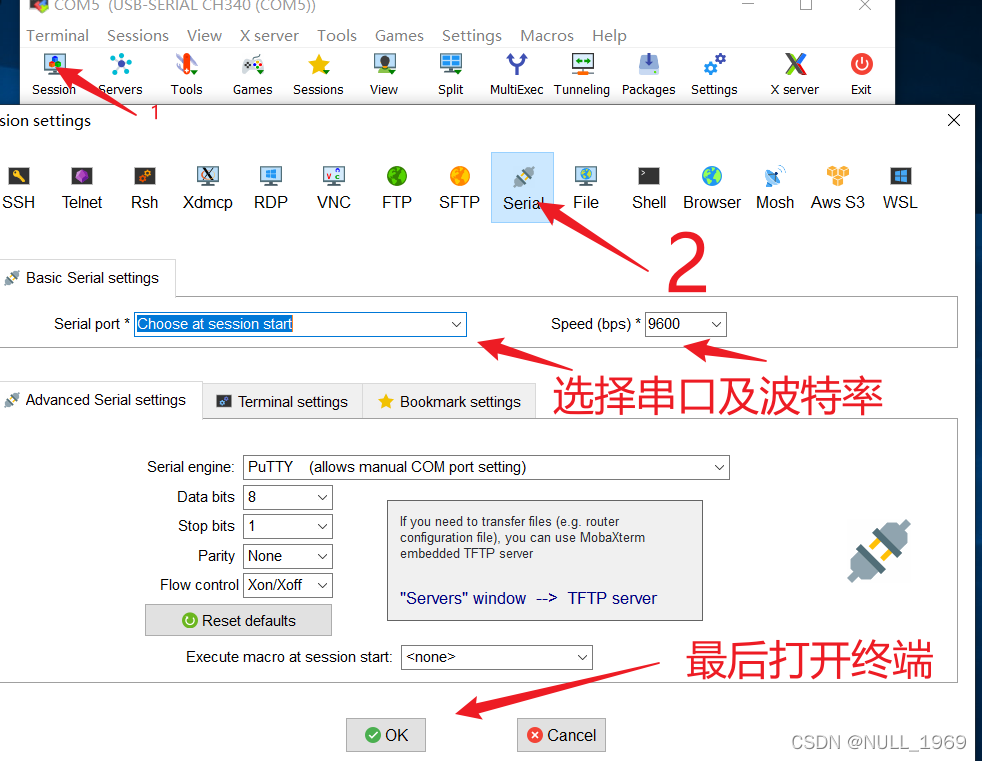
最后输入回车

如果有输出内容如上图,则说明成功,这个时候,可以输入官方已经实现了的命令
task-stats
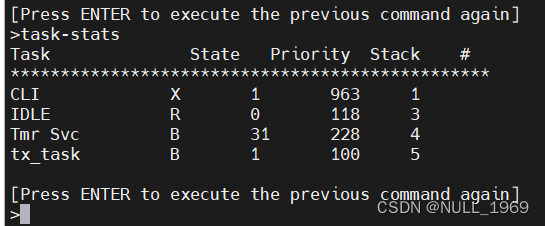
打印了当前系统的开销,可见cli的剩余堆栈用量还是很大的,可以设置的小一些。
至此初步的移植就完成了。
3、自定义cli命令
3.1实现hello命令
要求:终端输入hello;终端输出 hello world
先上代码,再解释原理。在Sample_CLI-commands.c中添加如下代码
//声明prvhelloCommand函数,注意函数参数要完全保持一致
static BaseType_t prvhelloCommand( char *pcWriteBuffer, size_t xWriteBufferLen, const char *pcCommandString );
1、声明hello命令函数,这个函数返回值及参数要与官方代码里的保持一致,不能修改。
//定义xhello对象。第一行终端识别的命令。第二行注释信息,第三行,执行函数,第四行,参数个数,这是没有参数所以是0
static const CLI_Command_Definition_t xhello =
{
	"hello", /* The command string to type. */
	"\r\nhello:\r\n Displays a strings hello world on the terminal \r\n",
	prvhelloCommand, /* The function to run. */
	0 /* No parameters are expected. */
};
2、定义hello对象,第一行终端识别的命令。第二行注释信息,第三行,执行函数,第四行,参数个数,这是没有参数所以是0
static BaseType_t prvhelloCommand( char *pcWriteBuffer, size_t xWriteBufferLen, const char *pcCommandString )
{
const char *const pcHeader = " hello world\r\n";
BaseType_t xSpacePadding;

	/* Remove compile time warnings about unused parameters, and check the
	write buffer is not NULL.  NOTE - for simplicity, this example assumes the
	write buffer length is adequate, so does not check for buffer overflows. */
	( void ) pcCommandString;
	( void ) xWriteBufferLen;
	configASSERT( pcWriteBuffer );


	strcpy( pcWriteBuffer, pcHeader );


	/* There is no more data to return after this single string, so return
	pdFALSE. */
	return pdFALSE;
}
3、实现hello的执行函数prvhelloCommand。最后一句return pdFALSE;一定要,这个返回值是告诉cli组件函数执行完毕。
cli会一直循环调用这个函数,直到函数返回值为pdFALSE。这个非常关键。特别是命令行命令的参数有多个的情况下。
/*注册xhello命令*/
void vRegisterSampleCLICommands( void )
{
	/* Register all the command line commands defined immediately above. */
	FreeRTOS_CLIRegisterCommand( &xTaskStats );
	FreeRTOS_CLIRegisterCommand( &xThreeParameterEcho );
	FreeRTOS_CLIRegisterCommand( &xParameterEcho );
	FreeRTOS_CLIRegisterCommand( &xhello );
	FreeRTOS_CLIRegisterCommand( &xled );
	#if( configGENERATE_RUN_TIME_STATS == 1 )
	{
		FreeRTOS_CLIRegisterCommand( &xRunTimeStats );
	}
	#endif

	#if( configINCLUDE_QUERY_HEAP_COMMAND == 1 )
	{
		FreeRTOS_CLIRegisterCommand( &xQueryHeap );
	}
	#endif

	#if( configINCLUDE_TRACE_RELATED_CLI_COMMANDS == 1 )
	{
		FreeRTOS_CLIRegisterCommand( &xStartStopTrace );
	}
	#endif
}
最后一步相对简单,将xhello 结构体注册到cli组件。
编译运行,输入hello,便可打印出hello world。
3.2 实现开关led
要求:终端输入 led on 点亮一个led;输入led off 关闭一个led。
这里 on 和off便是led这个命令的参数。这个跟linux下终端基本上是一致的。这里的参数数量是1.
具体代码如下:
定义xled结构体,这里要注意,参数要设置为1。命令带有一个参数。
static BaseType_t ledCommand( char *pcWriteBuffer, size_t xWriteBufferLen, const char *pcCommandString );
static const CLI_Command_Definition_t xled =
{
	"led", /* The command string to type. */
	"\r\nled:\r\n control led on and off  \r\n",
	ledCommand, /* The function to run. */
	1 /* No parameters are expected. */
};
led命令的实现函数调用了pcParameter = FreeRTOS_CLIGetParameter函数来获取当前的命令行参数。参数结果为pcParameter
static BaseType_t ledCommand( char *pcWriteBuffer, size_t xWriteBufferLen, const char *pcCommandString )
{
const char *pcParameter;
BaseType_t xParameterStringLength, xReturn;
static UBaseType_t uxParameterNumber = 1;

	/* Remove compile time warnings about unused parameters, and check the
	write buffer is not NULL.  NOTE - for simplicity, this example assumes the
	write buffer length is adequate, so does not check for buffer overflows. */
	( void ) pcCommandString;
	( void ) xWriteBufferLen;
	configASSERT( pcWriteBuffer );


		/* Obtain the parameter string. */
	pcParameter = FreeRTOS_CLIGetParameter
					(
						pcCommandString,		/* The command string itself. */
						uxParameterNumber,		/* Return the next parameter. */
						&xParameterStringLength	/* Store the parameter string length. */
					);

	/* Sanity check something was returned. */
	configASSERT( pcParameter );

	/* Return the parameter string. */
	memset( pcWriteBuffer, 0x00, xWriteBufferLen );
	sprintf( pcWriteBuffer, "%d: ", ( int ) uxParameterNumber );
	strncat( pcWriteBuffer, pcParameter, ( size_t ) xParameterStringLength );
	strncat( pcWriteBuffer, "\r\n", strlen( "\r\n" ) );

	if(strcmp(pcParameter,"on")==0)
		led_on();

	if(strcmp(pcParameter,"off")==0)
		led_off();
	xReturn = pdFALSE;

	return xReturn;
}
获取到了参数后,将参数与 on 与off 对比,再分别调用led的底层控制函数。
最后返回pdFALSE。
void vRegisterSampleCLICommands( void )
{
	/* Register all the command line commands defined immediately above. */
	FreeRTOS_CLIRegisterCommand( &xTaskStats );
	FreeRTOS_CLIRegisterCommand( &xThreeParameterEcho );
	FreeRTOS_CLIRegisterCommand( &xParameterEcho );
	FreeRTOS_CLIRegisterCommand( &xhello );
	FreeRTOS_CLIRegisterCommand( &xled );
	#if( configGENERATE_RUN_TIME_STATS == 1 )
	{
		FreeRTOS_CLIRegisterCommand( &xRunTimeStats );
	}
	#endif

	#if( configINCLUDE_QUERY_HEAP_COMMAND == 1 )
	{
		FreeRTOS_CLIRegisterCommand( &xQueryHeap );
	}
	#endif

	#if( configINCLUDE_TRACE_RELATED_CLI_COMMANDS == 1 )
	{
		FreeRTOS_CLIRegisterCommand( &xStartStopTrace );
	}
	#endif
}
3.3实现sum函数
要求,终端输入 sum 1 2 3 ,终端输出 1+2+3的结果。sum命令的参数数量不定。
这里有个要求是参数数量不定,3.2中实现的参数是1个。那么参数不定长该怎么设置呢,先看实现代码。
注意这里要设置第xsum结构体的第4个参数为-1,表示命令的参数不定长。
static BaseType_t prvsumCommand( char *pcWriteBuffer, size_t xWriteBufferLen, const char *pcCommandString );
static const CLI_Command_Definition_t xsum =
{
	"sum", /* The command string to type. */
	"\r\nsum:\r\n sum of numbers  \r\n",
	prvsumCommand, /* The function to run. */
	-1 /* No limit of parameters num. */
};
实现函数如下:
static BaseType_t prvsumCommand( char *pcWriteBuffer, size_t xWriteBufferLen, const char *pcCommandString )
{
const char *pcParameter;
BaseType_t xParameterStringLength, xReturn;
static UBaseType_t uxParameterNumber = 1;
static uint32_t sum_num = 0;
	/* Remove compile time warnings about unused parameters, and check the
	write buffer is not NULL.  NOTE - for simplicity, this example assumes the
	write buffer length is adequate, so does not check for buffer overflows. */
	( void ) pcCommandString;
	( void ) xWriteBufferLen;
	configASSERT( pcWriteBuffer );

		/* Obtain the parameter string. */
	pcParameter = FreeRTOS_CLIGetParameter
					(
						pcCommandString,		/* The command string itself. */
						uxParameterNumber,		/* Return the next parameter. */
						&xParameterStringLength	/* Store the parameter string length. */
					);

	if( pcParameter != NULL )
	{
		pcWriteBuffer[ 0 ] = 0x00;   //每次运行如果不需要输出,就要将pcWriteBuffer清0,至少第一个字节清0
		sum_num += atoi(pcParameter);
		/* There might be more parameters to return after this one. */
		xReturn = pdTRUE;
		uxParameterNumber++;
	}
	else
	{
		if(uxParameterNumber == 1)
		{
			memset( pcWriteBuffer, 0x00, xWriteBufferLen );
			strcpy( pcWriteBuffer, "no parameters!\r\n" );
		}
		else
		{
			memset( pcWriteBuffer, 0x00, xWriteBufferLen );
			sprintf( pcWriteBuffer, "sum = %d  \r\n", sum_num );
			sum_num = 0;
		}
		/* No more parameters were found.  Make sure the write buffer does
		not contain a valid string. */
		// pcWriteBuffer[ 0 ] = 0x00;


		/* Start over the next time this command is executed. */
		uxParameterNumber = 1;
					/* No more data to return. */
		xReturn = pdFALSE;
	}


	return xReturn;
}
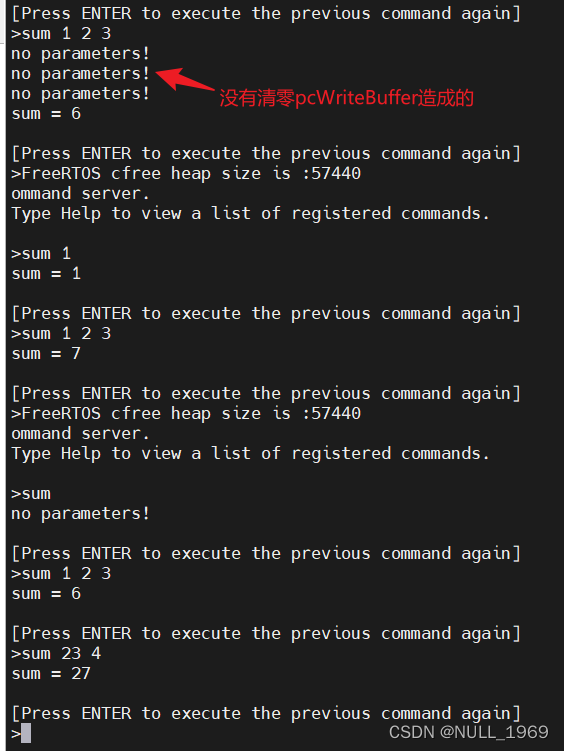
依次读取命令行参数,将参数通过atoi函数转换成为int型。sum_num变量累加输入的参数值。如果读取到得一个参数为空,则终端输出 无参数的提示信息。读取到了最后一个参数后,输出最终结果。
注意,每次运行如果不需要输出,就要将pcWriteBuffer清零,如果里面非空,则每次运行都会输出
注意,每次运行运行完成后要将sum_num清0,因为该值设置的是static类型
到最终输出时返回pdFALSE表示函数要结束执行。注册函数就不贴出来了,看上文。
最终执行效果如图:
其中计算结果7就是因为第一次运行没有清零sum_num。导致累加了第一次的1


 7782
7782

 被折叠的 条评论
为什么被折叠?
被折叠的 条评论
为什么被折叠?
 到【灌水乐园】发言


