


本文介绍 Liuli 在树莓派上的配置部署教程
Liuli[1]的目标是帮助你一站式构建多源、干净、个性化的阅读环境,目前还在缓慢开发迭代中,欢迎更多的朋友参与进来,其当前可应用的场景有:
建议使用前看一下上面的文章,有个大概印象,接下来将根据以下方式来介绍如何在树莓派上面安装Liuli:
Docker 部署
源码部署
PS:本项目已开源,地址见github.com/liuli-io/liuli,欢迎给个Star🤟🏻
安装 MongoDB [重要]
因为Liuli依赖MongoDB作为数据库,而在树莓派下Docker启用MongoDB有点混乱,所以这块咱就直接在系统上安装,再者因为有的朋友可能配置不是很高,都带不动Docker,到时直接源码部署的话更是要在系统上安装。
安装MongoDB:
# 升级更新
sudo apt update
sudo apt upgrade

# 在`/etc/apt/sources.list`添加软件源
wget -qO - https://www.mongodb.org/static/pgp/server-4.4.asc | sudo apt-key add -
echo "deb [ arch=amd64,arm64 ] https://repo.mongodb.org/apt/ubuntu focal/mongodb-org/4.4 multiverse" | sudo tee /etc/apt/sources.list.d/mongodb-org-4.4.list

# 安装MongoDB
sudo apt-get update
sudo apt-get install -y mongodb-org

# 启动
sudo systemctl daemon-reload
sudo systemctl enable mongod
sudo systemctl start mongod
# 查看状态
sudo systemctl status mongod

# 进入MongoDB
mongo
创建用户:
use admin
db.createUser(
    {
        "user": "liuli",
        "pwd": "liuli",
        "roles": [
            "userAdminAnyDatabase",
            "dbAdminAnyDatabase",
            "readWriteAnyDatabase"
        ]
    }
)
exit配置操作sudo vim /etc/mongod.conf,改动如下:
# 修改 bindIp 为 0.0.0.0,外部可访问
net:
  port: 27017
  bindIp: 0.0.0.0
# 增加登录验证
security:
   authorization: enabled
重启生效:
sudo systemctl restart mongod此时登录:
# 注意自己的 ip
sudo mongo --host "192.168.0.2" -u "liuli" -p "liuli"

# 查看数据库
> db.adminCommand({listDatabases: 1})
Docker 部署
总的来说,Docker部署还是比较方便的,特别针对不熟悉Python的朋友,所以把这个方式放在第一位。
安装 Docker
首先我们来安装Docker:
sudo apt-get install apt-transport-https ca-certificates software-properties-common -y

curl -fsSL https://get.docker.com -o get-docker.sh
# 如果网速慢,可以尝试:sudo sh get-docker.sh --mirror Aliyun
sudo sh get-docker.sh

# 添加密钥
curl -fsSL https://mirrors.aliyun.com/docker-ce/linux/raspbian/gpg | sudo apt-key add -

# 在`/etc/apt/sources.list`添加软件源
sudo add-apt-repository \
    "deb [arch=armhf] https://mirrors.aliyun.com/docker-ce/linux/raspbian \
    $(lsb_release -cs) \
    stable"

sudo groupadd docker
sudo usermod -aG docker $USER

# 更新
sudo apt-get update
sudo apt-get upgrade

# 刷新
newgrp docker

# 启动
sudo systemctl enable docker
sudo systemctl start docker

# 测试
sudo docker run hello-world可以考虑引入portainer来管理:
sudo mkdir -p /data/docker_data/portainer_data
sudo docker run -d -p 8001:8000 -p 9001:9000 --name=portainer --restart=always -v /var/run/docker.sock:/var/run/docker.sock -v /data/docker_data/portainer_data:/data portainer/portainer-ce
Docker 部署
接下来就是正式部署了:
# 下载 api 和 schedule 镜像
sudo docker pull liuliio/api:v0.1.3
sudo docker pull liuliio/schedule:v0.2.4

# 建立配置目录
sudo mkdir -p liuli/liuli_config
sudo touch liuli/pro.env
sudo touch liuli/liuli_config/wechat.json先来看看pro.env配置:
PYTHONPATH=${PYTHONPATH}:${PWD}
LL_M_USER="liuli"
LL_M_PASS="liuli"
# 你的外部可访问ip
LL_M_HOST="192.168.0.2"
LL_M_PORT="27017"
LL_M_DB="admin"
LL_M_OP_DB="liuli"
LL_FLASK_DEBUG=0
LL_HOST="0.0.0.0"
LL_HTTP_PORT=8765
LL_DOMAIN=""
LL_WORKERS=1
# 上面这么多配置不用改,下面的才需要各自配置
# 是否发送通知给钉钉
LL_D_TOKEN=""
# 是否发送通知给微信
LL_WECOM_ID=""
LL_WECOM_AGENT_ID="-1"
LL_WECOM_SECRET=""
# 在你的github建立仓库 liuli_backup 即可
# 也可以不填,完全填空,也就是内容不备份到github
LL_GITHUB_TOKEN=""
LL_GITHUB_REPO="{your_github_name}/liuli_backup"
LL_GITHUB_DOMAIN="https://{your_github_name}.github.io/liuli_backup/"
请详细查看以下文档进行具体参数配置,按照流程操作,很简单:
分发器配置[2]:钉钉微信配置获取教程
备份器配置[3]:Github 备份器配置获取教程
参数说明[4]:各个参数详细介绍
配置好后,请将以上内容写到sudo vim liuli/pro.env文件。
接下来直接配置公众号相关,直接使用Liuli官方的配置sudo vim liuli/liuli_config/wechat.json:
{
    "name": "wechat",
    "author": "liuli_team",
    "doc_source": "liuli_wechat",
    "collector": {
        "wechat": {
            "wechat_list": [
                "小众消息"
            ],
            "delta_time": 5,
            "spider_type": "sg_ruia",
            "spider_type_des": "当镜像是schedule:playwright_*时,spider_type可填写sg_playwright"
        }
    },
    "processor": {
        "before_collect": [],
        "after_collect": [{
            "func": "ad_marker",
            "cos_value": 0.6
        }, {
            "func": "to_rss",
            "doc_source_list": ["liuli_wechat"],
            "link_source": "github"

        }]
    },
    "sender": {
        "sender_list": ["wecom"],
        "query_days": 7,
        "delta_time": 3
    },
    "backup": {
        "backup_list": ["mongodb"],
        "query_days": 7,
        "delta_time": 3,
        "init_config": {},
        "after_get_content": [{
            "func": "str_replace",
            "before_str": "data-src=\"",
            "after_str": "src=\"https://images.weserv.nl/?url="
        }]
    },
    "schedule": {
        "period_list": [
            "00:10",
            "12:10",
            "21:10"
        ]
    }
}
此时文件夹目录如下:
(base) ➜  cd liuli
(base) ➜  liuli tree -L 2
.
├── liuli_config
│   └── wechat.json
└── pro.env
配置完毕,接下来就可以启动了:
# 启动 API
sudo docker run -d -it --restart=always -p 8765:8765 -v $PWD/pro.env:/data/code/pro.env --name liuli_api liuliio/api:v0.1.3
# 启动 schedule
sudo docker run -d -it --restart=always -v $PWD/pro.env:/data/code/pro.env -v $PWD/liuli_config:/data/code/liuli_config --name liuli_schedule liuliio/schedule:v0.2.4
成功日志如下:
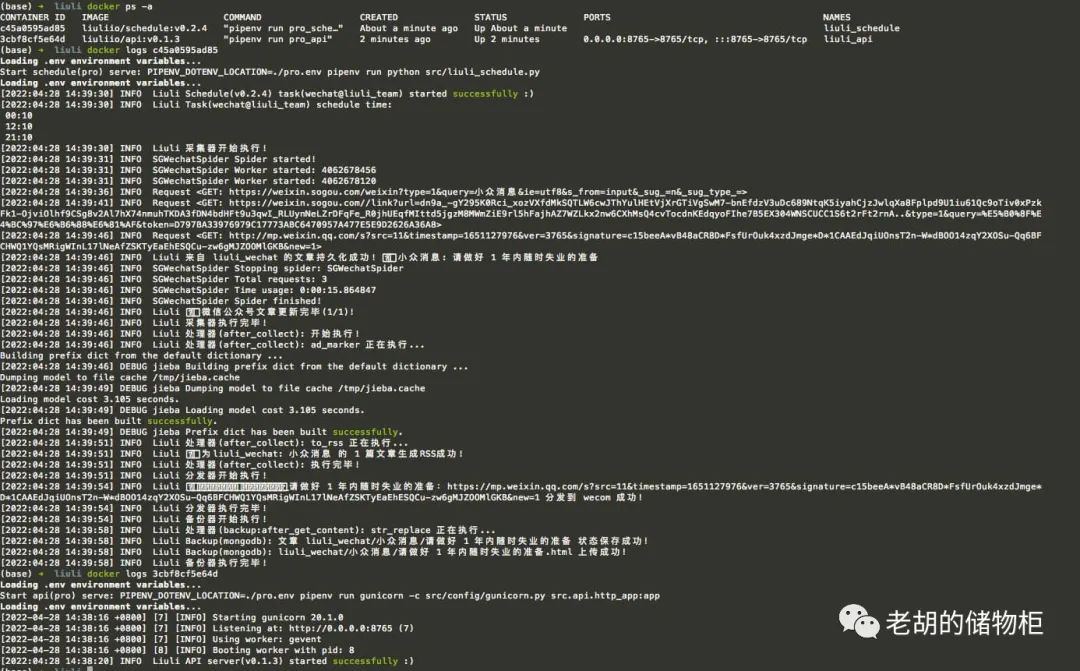
此时访问以下接口可进行验证:
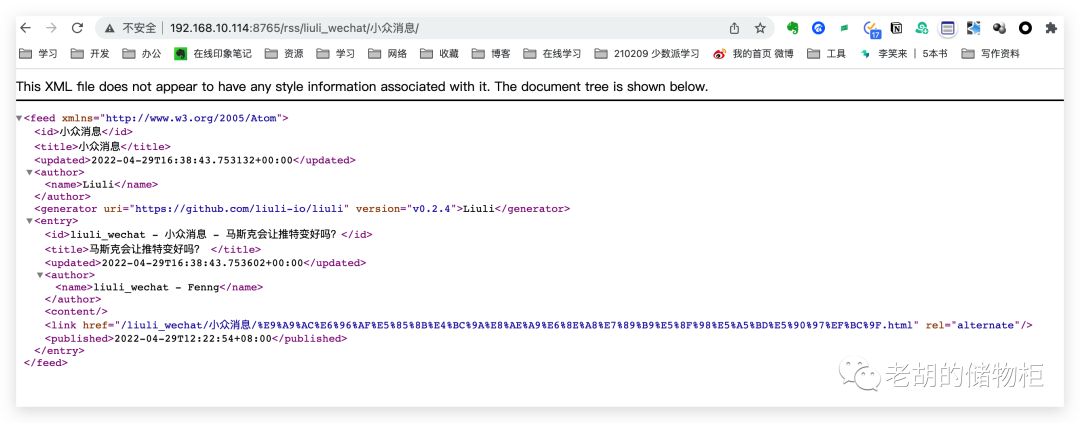
获取公众号 rss 地址: http://0.0.0.0:8765/rss/liuli_wechat/小众消息/
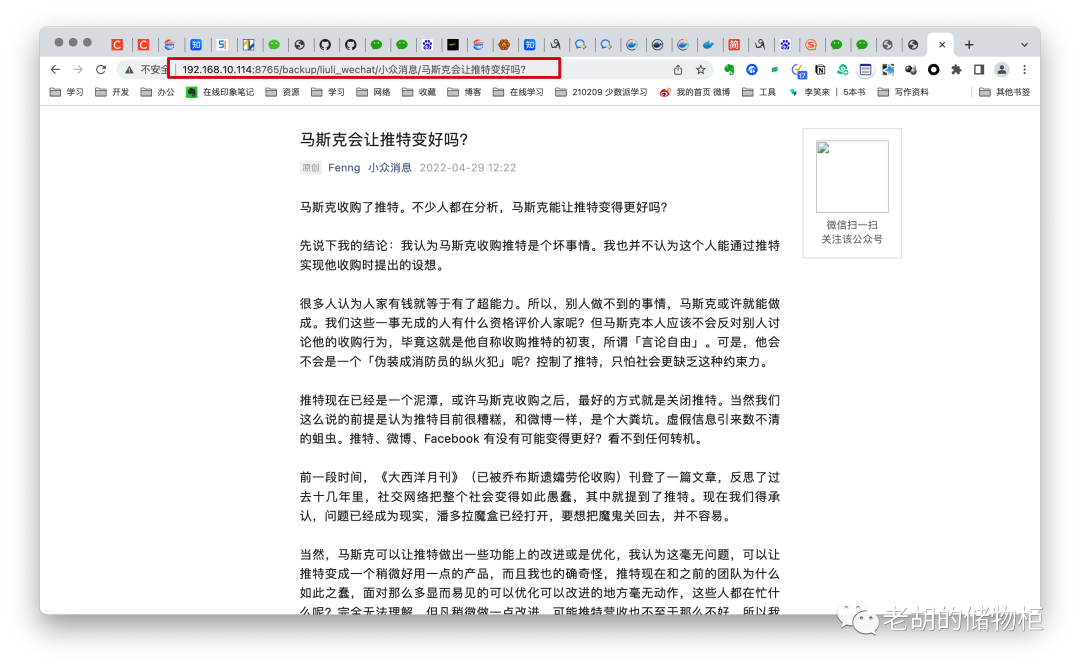
查看目标公众号备份的文章:http://0.0.0.0:8765/backup/liuli_wechat/公众号名称/文章名称
至此,你可以订阅和查看目标公众号的文章了。
注意 ⚠️:IP 根据自身部署服务的 IP 填写
公众号 rss 地址效果:
目标公众号备份文章:
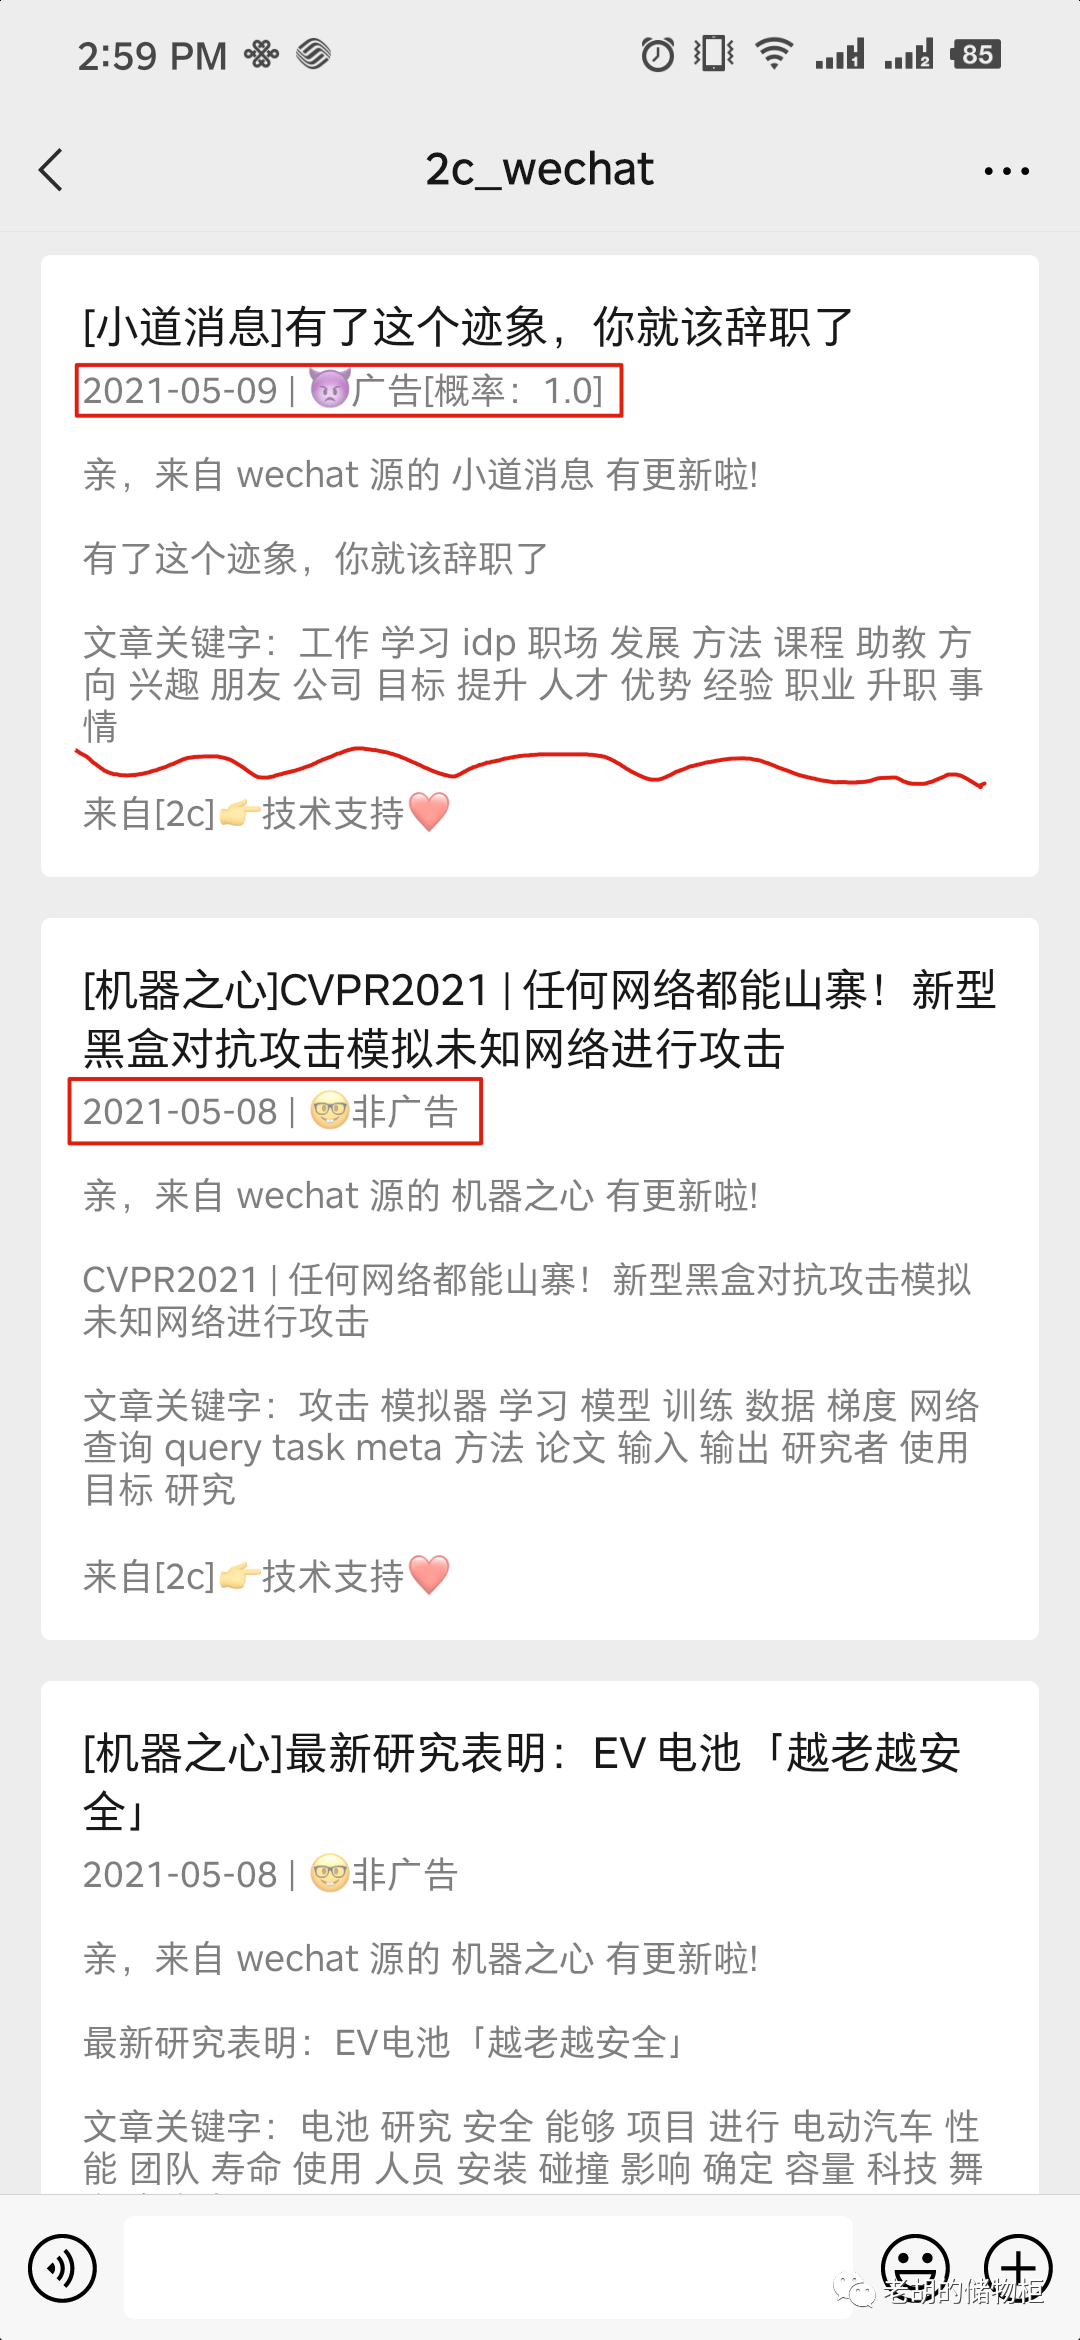
如果需要微信消息提示,请移步:分发器配置|钉钉微信配置教程[5]
源码部署
如果你是直接看的源码部署,请先阅读Docker部署部分,拷贝好以下文件:
wechat.json
pro.env
首先,下载源码:
git clone https://github.com/liuli-io/liuli.git

# 删除掉 Pipfile 里面以下行
# black = "*"
# isort = "*"
# pylint = "*"
# pytest = "*"
# pandas = "*"
# numpy = "*"
# pypinyin = "*"
# playwright = "*"

# 保证有 python3.7+ 环境
pip install pipenv
pipenv install --python {your_python3.7_path} --skip-lock --dev

# 配置
# 将上面的 pro.env 内容拷贝
vim pro.env
# 删除 liuli_config 文件夹所有内容
# 将 wechat.json 复制到 liuli_config/wechat.json

# 启动 API
bash ./start.sh api pro
# 启动 schedule
bash ./start.sh schedule pro
查看日志:
((liuli) ) (base) ➜  liuli git:(main) ✗ bash ./start.sh api pro
Start api(pro) serve: PIPENV_DOTENV_LOCATION=./pro.env pipenv run gunicorn -c src/config/gunicorn.py src.api.http_app:app
Loading .env environment variables...
[2022-04-28 15:00:50 +0800] [29074] [INFO] Starting gunicorn 20.1.0
[2022-04-28 15:00:50 +0800] [29074] [INFO] Listening at: http://0.0.0.0:8765 (29074)
[2022-04-28 15:00:50 +0800] [29074] [INFO] Using worker: gevent
[2022-04-28 15:00:50 +0800] [29079] [INFO] Booting worker with pid: 29079
[2022:04:28 15:00:54] INFO  Liuli API server(v0.1.3) started successfully :)
...
说明
上述过程参考资料如下:
Install & Configure MongoDB on the Raspberry Pi[6]
How to install Conda and Docker on your Raspberry Pi[7]
Docker 入门到实践-raspberry-pi[8]
Docker 官方文档 Install Docker Engine[9]
看到这里的朋友你好,这篇推送我试了下微信的新功能快捷私信,不知道是啥东西,大家可以帮我试试看。
使用中有任何问题,欢迎加群交流:

参考资料
[1]
Liuli: https://github.com/liuli-io/liuli
[2]分发器配置: https://github.com/liuli-io/liuli/blob/main/docs/03.%E5%88%86%E5%8F%91%E5%99%A8%E9%85%8D%E7%BD%AE.md
[3]备份器配置: https://github.com/liuli-io/liuli/blob/main/docs/04.%E5%A4%87%E4%BB%BD%E5%99%A8%E9%85%8D%E7%BD%AE.md
[4]参数说明: https://github.com/liuli-io/liuli/blob/main/docs/02.%E7%8E%AF%E5%A2%83%E5%8F%98%E9%87%8F.md
[5]分发器配置|钉钉微信配置教程: https://github.com/liuli-io/liuli/blob/main/docs/03.%E5%88%86%E5%8F%91%E5%99%A8%E9%85%8D%E7%BD%AE.md
[6]Install & Configure MongoDB on the Raspberry Pi: https://www.mongodb.com/developer/how-to/mongodb-on-raspberry-pi/
[7]How to install Conda and Docker on your Raspberry Pi: https://www.anegron.site/2020/06/18/how-to-install-conda-and-docker-on-your-raspberry-pi/
[8]Docker 入门到实践-raspberry-pi: https://yeasy.gitbook.io/docker_practice/install/raspberry-pi
[9]Docker官方文档 Install Docker Engine: https://docs.docker.com/engine/install/


 1205
1205


 被折叠的 条评论
为什么被折叠?
被折叠的 条评论
为什么被折叠?
 到【灌水乐园】发言


