Quartz 2D初探
Quartz 2D支持iOS和Mac OS X的2D图形绘制引擎.我们将学习用它来绘制 线条/矩形/圆形/圆弧/文字/图像
1. 自定义UIView
自定义UIView的步骤:
- 自定义一个类继承UIView
- 重写init
- 如果要自定义绘制的话, 实现drawRect方法
import UIKit

class MyView: UIView {

    override init(frame: CGRect) {
        super.init(frame: frame)
    }

    required init?(coder aDecoder: NSCoder) {
        fatalError("init(coder:) has not been implemented")
    }

    override func drawRect(rect: CGRect) {
        // Drawing code

    }
}
2. 绘制线条
绘制的代码要放到drawRect方法中, 而绘制是通过context绘制的, context可以通过UIGraphicsGetCurrentContext()方法获得.
一般绘制的步骤如下:
- 获取上下文
- 创建路径并设置路径,如果有必要的话封闭路径
- 路径添加到上下文中
- 设置上下文属性
- 绘制路径
下面我们绘制一个线条:
// MARK: - 绘图方法
    // MARK: 画直线
    func drawLine() {
        // 获取上下文
        let context = UIGraphicsGetCurrentContext()

        // 创建并设置路径
        let path = CGPathCreateMutable()
        CGPathMoveToPoint(path, nil, 50, 50)
        CGPathAddLineToPoint(path, nil, 200, 200)

        CGPathAddLineToPoint(path, nil, 200, 200)
        CGPathAddLineToPoint(path, nil, 50, 200)

        // 封闭路径
        CGPathCloseSubpath(path)

        // 路径添加到上下文
        CGContextAddPath(context, path)

        // 设置上下文属性
        // 设置边框颜色
        CGContextSetRGBStrokeColor(context, 1.0, 0.0, 0.0, 1.0)
        // 设置填充颜色
        CGContextSetRGBFillColor(context, 0.0, 1.0, 0.0, 1.0)
        CGContextSetLineWidth(context, 5.0)
        // 设置线条的顶点样式
        CGContextSetLineCap(context, .Round)
        // 设置线条的的连接点样式
        CGContextSetLineJoin(context, .Round)
        // 设置线条的虚线样式
        CGContextSetLineDash(context, 0, [20, 10], 2)


        // 绘制路径
        /**
        模式:
            Fill: 划线(实心)
            EOFill
            Stroke: 划线(空心)
            FillStroke: 即划线, 又填充
            EOFillStroke
        */
        CGContextDrawPath(context, .FillStroke)

    }
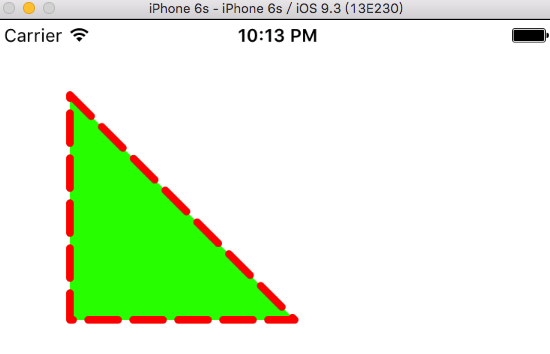
然后到drawRect()方法中调用drawLine()方法.运行程序:
上面的代码中我们使用的是创建的路径, 事实上上下文有默认的路径,我们可以直接使用它绘制.设置颜色也可以通过UIColor设置
    func drawLine2() {
        let context = UIGraphicsGetCurrentContext()
        CGContextMoveToPoint(context, 50, 50)
        CGContextAddLineToPoint(context, 200, 200)
        CGContextAddLineToPoint(context, 50, 200)
        CGContextClosePath(context)

        // 设置属性
        // 设置边线
//        UIColor.redColor().setStroke()
//        // 设置填充
//        UIColor.blueColor().setFill()
        UIColor.blueColor().set() // 同时设置边线和填充

        // 绘制路径
        CGContextDrawPath(context, .FillStroke)
    }
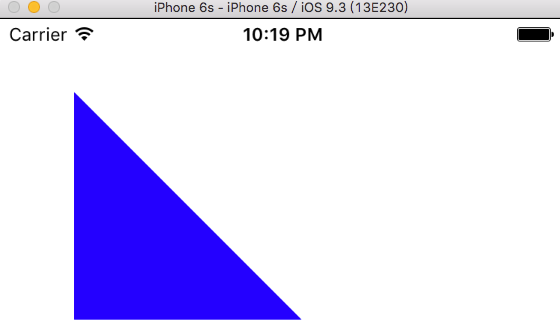
我们在drawRect()中调用drawLine2(), 运行程序:
3. 绘制矩形
// 绘制矩形
func drawRectangle() {
    let rect = CGRect(x: 50, y: 50, width: 200, height: 200)
    UIColor.redColor().set()

    // 绘制实心矩形
    UIRectFill(rect)
    // 绘制空心矩形
    UIRectFrame(CGRect(x: 50, y: 300, width: 200, height: 200))
}
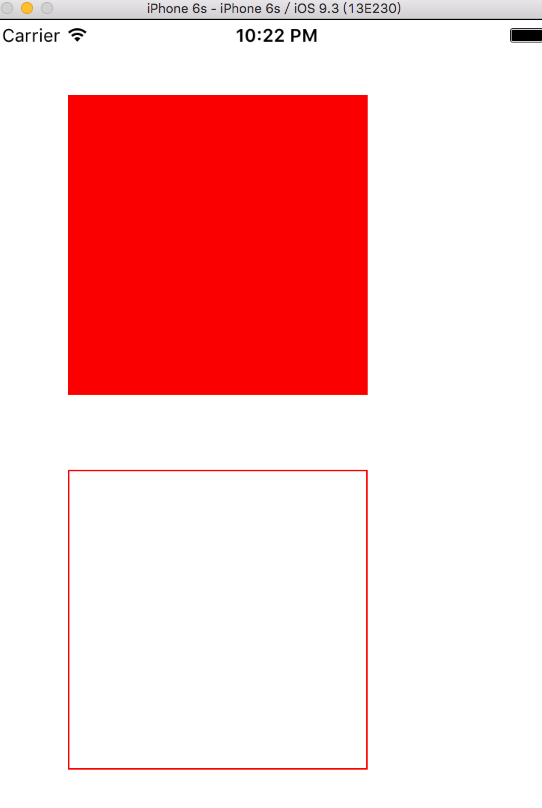
我们在drawRect()中调用它, 运行程序:
4. 绘制圆形
// 画圆
func drawShapeCircle() {
    let context = UIGraphicsGetCurrentContext()

    UIColor.greenColor().set()

    // 设置路径
    CGContextAddEllipseInRect(context, CGRect(x: 50, y: 50, width: 200, height: 200))

    CGContextDrawPath(context, .FillStroke)
}
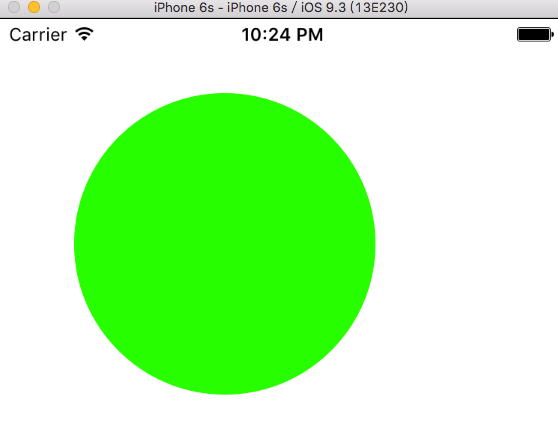
运行程序:
CGContextAddEllipseInRect可以在指定的矩形中绘制椭圆, 当这个矩形是正方形时, 绘制的就是圆形了
5. 绘制圆弧
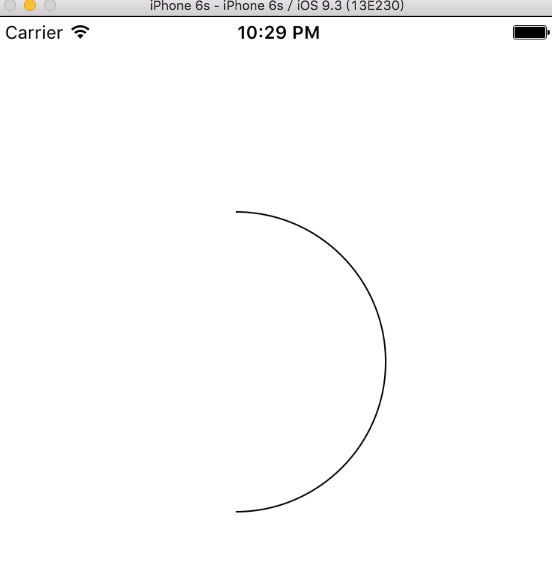
 // 画圆弧
 func drawArc(context: CGContextRef?) {

     CGContextAddArc(context, 160, 230, 100, CGFloat(-M_PI_2), CGFloat(M_PI_2), 0)

     CGContextDrawPath(context, .Stroke)
 }
我们在drawRect中调用它,并运行程序
绘制圆弧的方法定义如下:
@available(iOS 2.0, *)
public func CGContextAddArc(c: CGContext?, _ x: CGFloat, _ y: CGFloat, _ radius: CGFloat, _ startAngle: CGFloat, _ endAngle: CGFloat, _ clockwise: Int32)

参数:
   c: 上下文
   x,y : 圆弧所在圆的中心点坐标
   radius: 半径, 所在圆的半径
   startAngle endAngle 起始角度和结束角度, 单位是弧度
   closewise 顺时针->0, 逆时针->1
6. 绘制文字
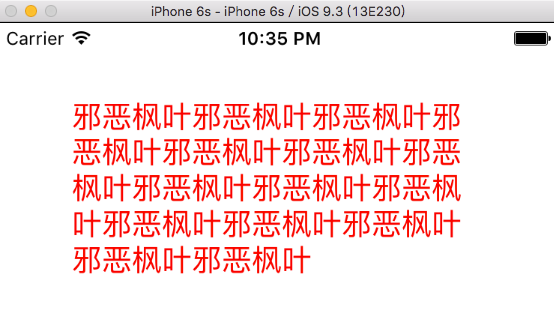
// 绘制文字
func drawText(context: CGContextRef?) {
    let str: NSString = "邪恶枫叶邪恶枫叶邪恶枫叶邪恶枫叶邪恶枫叶邪恶枫叶邪恶枫叶邪恶枫叶邪恶枫叶邪恶枫叶邪恶枫叶邪恶枫叶邪恶枫叶邪恶枫叶邪恶枫叶"
    let textFontAttributes = [
        NSFontAttributeName: UIFont.systemFontOfSize(20),
        NSForegroundColorAttributeName: UIColor.redColor()
    ]
//        str.drawAtPoint(CGPoint(x: 50, y: 50), withAttributes:textFontAttributes)

    str.drawInRect(CGRect(x: 50, y: 50, width: 270, height: 410), withAttributes: textFontAttributes)
}
drawAtPoint在指定坐标绘制文字, drawInRect在指定矩形绘制文字
我们在drawRect中调用它,并运行程序:
7. 绘制图形
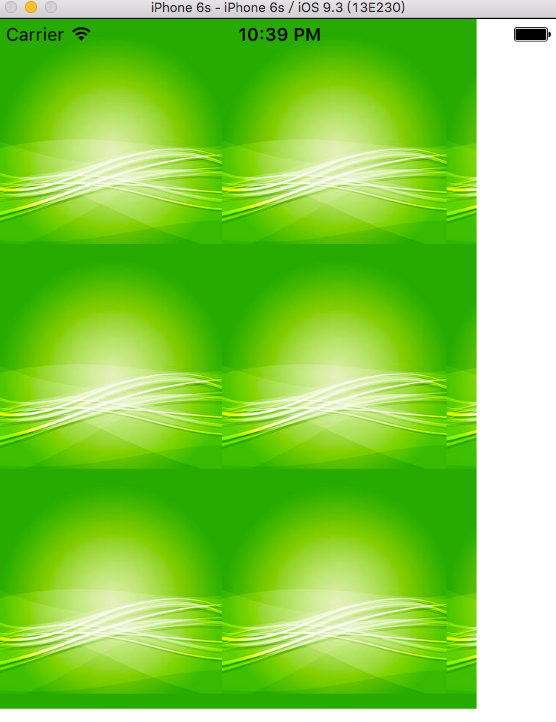
func drawImage(context: CGContextRef?) {
    let image = UIImage(named: "pic")
//        image?.drawAtPoint(CGPoint(x: 50, y: 50))
    // 会在指定的矩形中拉伸绘制
//        image?.drawInRect(CGRect(x: 0, y: 0, width: 320, height: 460))

    // 在指定矩形区域中平铺图片
    image?.drawAsPatternInRect(CGRect(x: 0, y: 0, width: 320, height: 460))
}
我们在drawRect中调用它,并运行程序:
后面我们将学习渐变和裁剪的使用.
8. 完整代码:
MyView.swift:
import UIKit

class MyView: UIView {

    override init(frame: CGRect) {
        super.init(frame: frame)
    }

    required init?(coder aDecoder: NSCoder) {
        fatalError("init(coder:) has not been implemented")
    }

    // Only override drawRect: if you perform custom drawing.
    // An empty implementation adversely affects performance during animation.
    override func drawRect(rect: CGRect) {
        // Drawing code

        let context = UIGraphicsGetCurrentContext()
//        drawLine()
//        drawLine2()
//        drawRectangle()
//        drawCircle()
//        drawArc(context)
//        drawText(context)
        drawImage(context)

    }

    // MARK: - 绘图方法
    // MARK: 画直线
    func drawLine() {
        // 获取上下文
        let context = UIGraphicsGetCurrentContext()

        // 创建并设置路径
        let path = CGPathCreateMutable()
        CGPathMoveToPoint(path, nil, 50, 50)
        CGPathAddLineToPoint(path, nil, 200, 200)

        CGPathAddLineToPoint(path, nil, 200, 200)
        CGPathAddLineToPoint(path, nil, 50, 200)

        // 封闭路径
        CGPathCloseSubpath(path)

        // 路径添加到上下文
        CGContextAddPath(context, path)

        // 设置上下文属性
        CGContextSetRGBStrokeColor(context, 1.0, 0.0, 0.0, 1.0)
        CGContextSetRGBFillColor(context, 0.0, 1.0, 0.0, 1.0)
        CGContextSetLineWidth(context, 5.0)
        // 设置线条的顶点样式
        CGContextSetLineCap(context, .Round)
        // 设置线条的的连接点样式
        CGContextSetLineJoin(context, .Round)
        // 设置线条的虚线样式
        CGContextSetLineDash(context, 0, [20, 10], 2)


        // 绘制路径
        /**
        模式:
            Fill: 划线(实心)
            EOFill
            Stroke: 划线(空心)
            FillStroke: 即划线, 又填充
            EOFillStroke
        */
        CGContextDrawPath(context, .FillStroke)

    }

    func drawLine2() {
        let context = UIGraphicsGetCurrentContext()
        CGContextMoveToPoint(context, 50, 50)
        CGContextAddLineToPoint(context, 200, 200)
        CGContextAddLineToPoint(context, 50, 200)
        CGContextClosePath(context)

        // 设置属性
        // 设置边线
//        UIColor.redColor().setStroke()
//        // 设置填充
//        UIColor.blueColor().setFill()
        UIColor.blueColor().set() // 同时设置边线和填充

        // 绘制路径
        CGContextDrawPath(context, .FillStroke)
    }

    // 绘制矩形
    func drawRectangle() {
        let rect = CGRect(x: 50, y: 50, width: 200, height: 200)
        UIColor.redColor().set()

        // 绘制实心矩形
        UIRectFill(rect)
        // 绘制空心矩形
        UIRectFrame(CGRect(x: 50, y: 300, width: 200, height: 200))
    }

    // 画圆
    func drawCircle() {
        let context = UIGraphicsGetCurrentContext()

        UIColor.greenColor().set()

        // 设置路径
        CGContextAddEllipseInRect(context, CGRect(x: 50, y: 50, width: 200, height: 200))

        CGContextDrawPath(context, .FillStroke)
    }

    // 画圆弧
    func drawArc(context: CGContextRef?) {
        /**
            1. context: 上下文
            2. x,y : 是圆弧所在圆的中心点坐标
            3. radius: 半径, 所在圆的半径
            4. startAngle endAngle 起始角度和结束角度, 单位是弧度
            5. closewise 顺时针->0, 逆时针->1
        */
        CGContextAddArc(context, 160, 230, 100, CGFloat(-M_PI_2), CGFloat(M_PI_2), 0)

        CGContextDrawPath(context, .Stroke)
    }

    // 绘制文字
    func drawText(context: CGContextRef?) {
        let str: NSString = "邪恶枫叶邪恶枫叶邪恶枫叶邪恶枫叶邪恶枫叶邪恶枫叶邪恶枫叶邪恶枫叶邪恶枫叶邪恶枫叶邪恶枫叶邪恶枫叶邪恶枫叶邪恶枫叶邪恶枫叶"
        let textFontAttributes = [
            NSFontAttributeName: UIFont.systemFontOfSize(20),
            NSForegroundColorAttributeName: UIColor.redColor()
        ]
//        str.drawAtPoint(CGPoint(x: 50, y: 50), withAttributes:textFontAttributes)

        str.drawInRect(CGRect(x: 50, y: 50, width: 270, height: 410), withAttributes: textFontAttributes)
    }

    func drawImage(context: CGContextRef?) {
        let image = UIImage(named: "pic")
//        image?.drawAtPoint(CGPoint(x: 50, y: 50))
        // 会在指定的矩形中拉伸绘制
//        image?.drawInRect(CGRect(x: 0, y: 0, width: 320, height: 460))

        // 在指定矩形区域中平铺图片
        image?.drawAsPatternInRect(CGRect(x: 0, y: 0, width: 320, height: 460))
    }


}
ViewController.swift:
import UIKit

class ViewController: UIViewController {

    override func viewDidLoad() {
        super.viewDidLoad()
        // Do any additional setup after loading the view, typically from a nib.
        let view = MyView(frame: self.view.bounds)
        view.backgroundColor = UIColor.whiteColor()
        self.view.addSubview(view)

    }

    override func didReceiveMemoryWarning() {
        super.didReceiveMemoryWarning()
        // Dispose of any resources that can be recreated.
    }
}




 491
491

 被折叠的 条评论
为什么被折叠?


