在前面的三篇博客中,我们已经成功向系统注册了我们自己的服务,并通过服务访问hal层,hal层会真正和linux kernel交互。所以这一节,自然就是写一个app来测试我们前面所有的工作是否正确了。
app的编写还是在集成开发环境下比较方便。在android studio写好代码,然后删除不必要的文件和目录,最后把代码放到android源码目录下编译。我们的应用需要用到一些公用api没有的类和方法,所以我们必须在系统下编译。
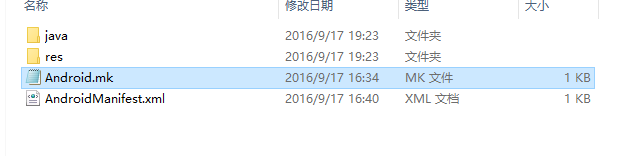
最后写好的代码只需要保留java目录、res目录和AndroidManifest.xml即可。
一.MainActivity.java
我们的代码很简单,只有一个java文件,在该文件中,只有两个Button,一个TextView和一个EditView,两个Button分别用于读取Linux驱动中的字符串和写入字符串,读取的字符串在TextView中显示,写入的字符串由EditView指定:
package com.konka.testhelloteserserviceapp;
import android.os.RemoteException;
import android.app.Activity;
import android.os.Bundle;
import android.util.Log;
import android.view.View;
import android.widget.Button;
import android.widget.EditText;
import android.widget.TextView;
import android.os.IHelloTestService;
import android.os.ServiceManager;
public class MainActivity extends Activity {
final String TAG = "jinwei";
Button write = null;
Button read = null;
TextView readText = null;
EditText writeEdit = null;
private IHelloTestService helloTestService = null;
@Override
protected void onCreate(Bundle savedInstanceState) {
super.onCreate(savedInstanceState);
setContentView(R.layout.activity_main);
write = (Button) findViewById(R.id.write_button);
read = (Button) findViewById(R.id.read_button);
readText = (TextView) findViewById(R.id.text);
writeEdit = (EditText) findViewById(R.id.edit);
helloTestService = IHelloTestService.Stub.asInterface(
ServiceManager.getService("hellotest"));
write.setOnClickListener(new View.OnClickListener() {
@Override
public void onClick(View v) {
try{
helloTestService.wirteString(writeEdit.getText().toString());
} catch (RemoteException e) {
Log.e(TAG, "Remote Exception while writing value to device.");
}
}
});
read.setOnClickListener(new View.OnClickListener() {
@Override
public void onClick(View v) {
try{
readText.setText(helloTestService.readString());
} catch (RemoteException e) {
Log.e(TAG, "Remote Exception while writing value to device.");
}
}
});
}
}
二.activity_main.xml
布局文件:
<?xml version="1.0" encoding="utf-8"?>
<RelativeLayout xmlns:android="http://schemas.android.com/apk/res/android"
xmlns:tools="http://schemas.android.com/tools"
android:layout_width="match_parent"
android:layout_height="match_parent"
android:paddingBottom="@dimen/activity_vertical_margin"
android:paddingLeft="@dimen/activity_horizontal_margin"
android:paddingRight="@dimen/activity_horizontal_margin"
android:paddingTop="@dimen/activity_vertical_margin"
tools:context="com.konka.testhelloteserserviceapp.MainActivity">
<LinearLayout
android:id="@+id/read"
android:orientation="horizontal"
android:layout_width="match_parent"
android:layout_height="wrap_content">
<TextView
android:id="@+id/text"
android:layout_width="200dp"
android:layout_height="wrap_content" />
<Button
android:layout_gravity="right"
android:text="@string/button_read"
android:id="@+id/read_button"
android:layout_width="wrap_content"
android:layout_height="wrap_content" />
</LinearLayout>
<LinearLayout
android:layout_below="@+id/read"
android:orientation="horizontal"
android:layout_width="match_parent"
android:layout_height="wrap_content">
<EditText
android:id="@+id/edit"
android:layout_width="200dp"
android:layout_height="wrap_content" />
<Button
android:text="@string/button_write"
android:id="@+id/write_button"
android:layout_width="wrap_content"
android:layout_height="wrap_content" />
</LinearLayout>
</RelativeLayout>
三.string.xml
用到的字符串资源:
<resources>
<string name="app_name">TestHelloTeserServiceApp</string>
<string name="button_read">read</string>
<string name="button_write">write</string>
</resources>
四.Android.mk
用于编译的Android.mk
LOCAL_PATH:= $(call my-dir)
include $(CLEAR_VARS)
LOCAL_MODULE_TAGS := optional
LOCAL_SRC_FILES := $(call all-subdir-java-files)
LOCAL_PACKAGE_NAME := HelloTest
LOCAL_DEX_PREOPT := false
LOCAL_JACK_ENABLED := disabled
include $(BUILD_PACKAGE)
在Android.mk中我们禁止了JACK编译器,并且禁止了DEX优化。
五.编译
在android源码目录package/apps/新建目录:TestHelloTeserServiceApp
把Android.mk等文件放入其中(参考图1),然后在该目录下执行mm命令。但是这个时候还是提示helloTestService.wirteString不存在。这在编译service的时候也会有提示:
*****************************
You have tried to change the API from what has been previously approved.
To make these errors go away, you have two choices:
1) You can add "@hide" javadoc comments to the methods, etc. listed in the
errors above.
2) You can update current.txt by executing the following command:
make update-api
To submit the revised current.txt to the main Android repository,
you will need approval.
所以,我们按照提示在android源码目录下执行make update-api即可。
之后,就可以在应用程序目录下执行mm命令,编译出测试用的apk了。
六.结果展示
用一张图说明就可以了:
至此android应用程序访问Linux 驱动的整个过程就成功实现了。如果有需要的话,这个过程中用到的代码我已上传,可以在http://download.csdn.net/detail/u011913612/9632268 下载。