


instagram在国外很火,它的登陆界面做的很简洁,很有设计感。如果你用过ins的话一定会觉得它登陆界面上方的颜色变换独具特色。现在研究一下它的实现方法。

这是登陆界面,它下方的文本框实现不难,我们要实现的是这个部分:

首先我们下载到了instagram的安装包,把文件格式改为zip压缩格式,然后解压,我们再找到其存放资源的文件夹,就可以IDE到这样一张原始图:
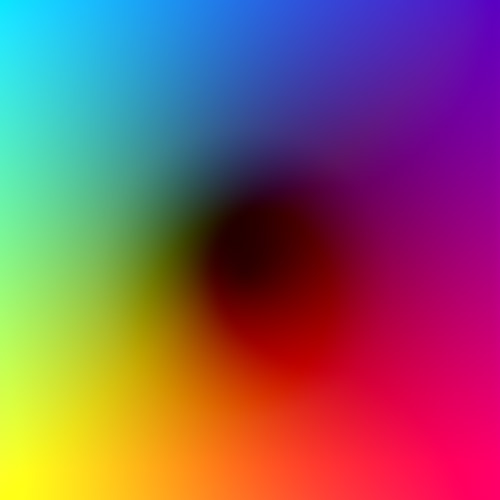
我们能利用安卓提供的animation让这张图片作为背景围绕一个点进行旋转,我们的目的就达到了。
animation属性代码:
 <set xmlns:android="http://schemas.android.com/apk/res/android"
    android:interpolator="@android:anim/linear_interpolator" >

    <!-- 透明度控制动画效果 alpha 浮点型值: fromAlpha 属性为动画起始时透明度 toAlpha 属性为动画结束时透明度 说明: 0.0表示完全透明 1.0表示完全不透明 以上值取0.0-1.0之间的float数据类型的数字 长整型值: duration 属性为动画持续时间 说明: 时间以毫秒为单位 -->

    <rotate
        android:duration="1000000"
        android:fromDegrees="300"
        android:pivotX="50%"
        android:pivotY="50%"
        android:toDegrees="-15000" />

</set>
有了这个属性代码,我们在写一个布局文件:
<?xml version="1.0" encoding="utf-8"?>
<LinearLayout xmlns:android="http://schemas.android.com/apk/res/android"
    android:layout_width="match_parent"
    android:layout_height="match_parent"
    android:background="#FFFFF0"
    android:orientation="vertical" >

    <LinearLayout
        android:layout_width="match_parent"
        android:layout_height="46dip"
        android:background="#FFFFFF" >

        <Button
            android:id="@+id/Button_Setting"
            android:layout_width="26.5dip"
            android:layout_height="26.5dip"
            android:layout_marginLeft="320dip"
            android:layout_marginTop="10dip"
            android:alpha="0.5"
            android:background="@drawable/setting" />
    </LinearLayout>

    <View
        android:layout_width="match_parent"
        android:layout_height="0.7dip"
        android:alpha="0.3"
        android:background="#000000" >
    </View>

    <LinearLayout
        android:layout_width="match_parent"
        android:layout_height="match_parent"
        android:orientation="vertical" >

        <LinearLayout
            android:layout_width="match_parent"
            android:layout_height="wrap_content"
            android:orientation="horizontal" >

            <FrameLayout
                android:layout_width="match_parent"
                android:layout_height="150dip" >

                <ImageView
                    android:id="@+id/id_back"
                    android:layout_width="600dip"
                    android:layout_height="590dip"
                    android:layout_gravity="center_horizontal"
                    android:layout_marginTop="-60dip"
                    android:src="@drawable/id_rainbow" />

                <Button
                    android:id="@+id/identify"
                    android:layout_width="88dip"
                    android:layout_height="88dip"
                    android:layout_gravity="center_horizontal"
                    android:layout_marginTop="20dip"
                    android:background="@drawable/register" />

                <TextView
                    android:id="@+id/logintext"
                    android:layout_width="80dip"
                    android:layout_height="20dip"
                    android:layout_marginLeft="151dip"
                    android:layout_marginTop="110dip"
                    android:text="注册/登陆"
                    android:textColor="#FFFFFF" />
            </FrameLayout>
        </LinearLayout>

        <LinearLayout
            android:layout_width="match_parent"
            android:layout_height="1dip"
            android:background="#EE0000" >
        </LinearLayout>

        <ScrollView
            android:layout_width="match_parent"
            android:layout_height="wrap_content"
            android:scrollbars="none" >

            <GridLayout
                android:layout_width="match_parent"
                android:layout_height="wrap_content"
                android:background="@drawable/qmemo3"
                android:columnCount="5"
                android:orientation="horizontal"
                android:rowCount="4" >
            </GridLayout>
        </ScrollView>
    </LinearLayout>

</LinearLayout>
然后将这个布局文件绑定到代码:
package com.example.weixin;

import java.util.ArrayList;
import java.util.List;

import android.R.dimen;
import android.R.integer;
import android.content.Intent;
import android.graphics.Color;
import android.os.Bundle;
import android.os.Parcelable;
import android.support.v4.app.Fragment;
import android.support.v4.view.PagerAdapter;
import android.support.v4.view.ViewPager;
import android.view.Gravity;
import android.view.LayoutInflater;
import android.view.View;
import android.view.View.OnClickListener;
import android.view.ViewGroup;
import android.view.animation.Animation;
import android.view.animation.AnimationUtils;
import android.widget.ArrayAdapter;
import android.widget.Button;
import android.widget.ImageView;
import android.widget.TextView;

public class TabFra3 extends Fragment {
    public static String PAGE_NUMBER = "pagenumber";
    private Button identifyButton = null;
    private ViewPager viewPager;
    private List<ImageView> list = new ArrayList<ImageView>();;
    private int[] imagesid;
    private int num = 300;
    private Button buttonsetting = null;
    private ImageView imageView1, imageView2, imageView3;
    private ImageView idBackImageView = null;
    private TextView logintTextView = null;

    @Override
    public View onCreateView(LayoutInflater inflater, ViewGroup container,
            Bundle savedInstanceState) {

        View rootvView3 = inflater.inflate(R.layout.tab3, container, false);
        buttonsetting = (Button) rootvView3.findViewById(R.id.Button_Setting);
        idBackImageView = (ImageView) rootvView3.findViewById(R.id.id_back);
        Animation animation = AnimationUtils.loadAnimation(getActivity(),
                R.drawable.idback_anim);
        animation.setFillAfter(true);
        idBackImageView.startAnimation(animation);
        identifyButton = (Button) rootvView3.findViewById(R.id.identify);
        logintTextView = (TextView) rootvView3.findViewById(R.id.logintext);
        logintTextView.setOnClickListener(new OnClickListener() {

            @Override
            public void onClick(View v) {
                // TODO Auto-generated method stub
                Intent intent = new Intent();
                intent.setClass(getActivity(), LogIn.class);
                startActivity(intent);
            }
        });
        identifyButton.setOnClickListener(new OnClickListener() {

            @Override
            public void onClick(View v) {
                // TODO Auto-generated method stub
                Intent intent = new Intent();
                intent.setClass(getActivity(), LogIn.class);
                startActivity(intent);
            }
        });

        buttonsetting.setOnClickListener(new OnClickListener() {

            @Override
            public void onClick(View v) {
                // TODO Auto-generated method stub
                Intent intent = new Intent();
                intent.setClass(getActivity(), Activity_setting.class);
                startActivity(intent);
            }
        });

        return rootvView3;

    }
}
其中最关键的是这几句代码:
Animation animation = AnimationUtils.loadAnimation(getActivity(),
                R.drawable.idback_anim);
        animation.setFillAfter(true);
        idBackImageView.startAnimation(animation);
这样便可以实现这个简单的动画了!

本文原创,转载请注明出处,谢谢!


 9715
9715

 被折叠的 条评论
为什么被折叠?
被折叠的 条评论
为什么被折叠?
 到【灌水乐园】发言


