


注:本文为 “WSAPPX” 相关文章合辑。
机翻,未校。
未整理去重。
What is WSAPPX? WSAPPX High Disk Usage Issue [Fixed]
什么是 WSAPPX?WSAPPX 高磁盘使用率问题 [已修复]
WSAPPX is a process that runs in the background on your Windows 11/10/8 computer as a part of the Windows Store and the Universal app platform of Microsoft. It is used for installations, updates, and uninstallation of Store apps, so once you are done installing all updates, you don’t need it. But at times, you may face situations where you find that this process is using high disk, CPU, or memory.
WSAPPX 是一个在 Windows 11/10/8 计算机上后台运行的进程,它是 Windows 应用商店和 Microsoft 通用应用程序平台的一部分。它用于安装、更新和卸载 Microsoft Store 应用程序,因此安装完所有更新后,就不需要它。 但有时,您可能会遇到发现此进程使用高磁盘、CPU 或内存的情况。
What is WSAPPX? 什么是 WSAPPX?
WSAPPX is a Microsoft Store process that includes AppX Deployment Service (AppXSVC) and Client License Service (ClipSVC).
WSAPPX 是一个 Microsoft Store 进程,包括 AppX 部署服务 (AppXSVC) 和客户端许可证服务 (ClipSVC)。
What is AppXSVC? 什么是 AppXSVC?
AppXSVC AppX is AppX Deployment Service that deploys the UWP Store apps that are distributed as .appx packages.
AppXSVC AppX 是 AppX 部署服务,用于部署作为 .appx 包分发的 UWP 应用商店应用程序。
What is ClipSVC? 什么是 ClipSVC?
ClipSVC is the Client License Service that handles infrastructure support for the Microsoft Store.
ClipSVC 是处理 Microsoft Store 基础设施支持的客户端许可证服务。
WSAPPX High Disk Usage in Windows 11/10 Windows 11/10 中的 WSAPPX 高磁盘使用率
If you face this issue, here are a few things you can try to troubleshoot and fix the problem.
如果您遇到此问题,您可以尝试以下一些方法来排除故障并解决问题。
- Increase Virtual Memory
增加虚拟内存 - Disable Windows Store
禁用 Windows 应用商店 - Change the value of AppXSvc in Registry
更改 Registry 中 AppXSvc 的值 - Troubleshoot in Clean Boot State
在干净启动状态下进行故障排除
You will need admin permission to fix this issue.
您需要管理员权限才能解决此问题。
1] Increase Virtual Memory
1] 增加虚拟内存

The virtual memory size may need to be expanded. You can do it as follows:
可能需要扩展虚拟内存大小。您可以按如下方式进行操作:
- Type the word “performance” in the search bar and select the option “Adjust Appearance vs. Performance in Windows.”
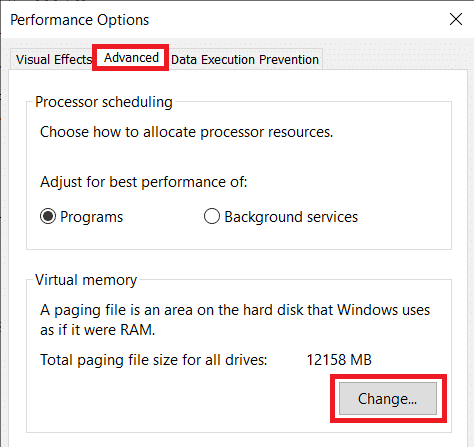
在搜索栏中输入“performance”一词,然后选择“在 Windows 中调整外观与性能”选项。 - Select the ‘Advanced’ tab among the tabs on the top.
在顶部的选项卡中选择 ‘Advanced’ 选项卡。 - Go to ‘Virtual Memory’ and click on ‘Change’.
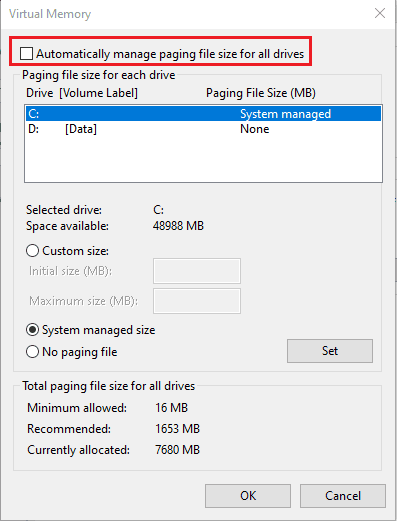
转到“虚拟内存”,然后单击“更改”。 - Uncheck the ‘Automatically manage paging file size for all drives checkbox.
取消选中“自动管理所有驱动器的分页文件大小”复选框。 - Select the drive where the OS is installed and click on ‘Custom size’.
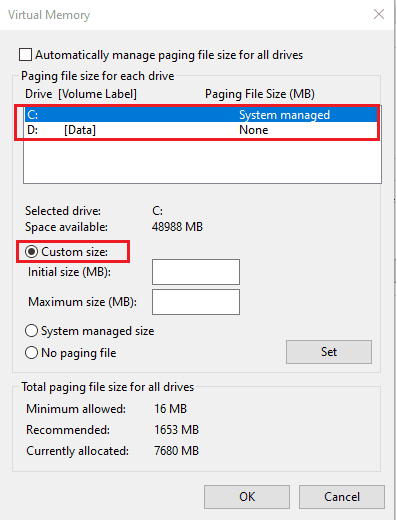
选择安装了操作系统的驱动器,然后单击“自定义大小”。 - Set the ‘Initial size’ equivalent to the size of your RAM but in MB and the ‘Maximum size’ to double of the Initial size.
将 ‘Initial size’ 设置为等于 RAM 大小但以 MB 为单位,并将 ‘Maximum size’ 设置为初始大小的两倍。 - Click ‘Set’ and then ‘OK’ and then restart your device.
单击“设置”,然后单击“确定”,然后重新启动设备。
See if this helps. 看看这是否有帮助。
2] Disable Windows Store
2] 禁用 Windows 应用商店
You can do this by two methods, first, with the Group Policy Editor. Second, with the Registry Editor. Here are the steps for both ways.
您可以通过两种方法执行此操作,第一种是使用组策略编辑器。其次,使用注册表编辑器。以下是两种方法的步骤。
Using Group Policy Editor 使用组策略编辑器
- Type’ gpedit.msc’ in Start Search and press Enter. It opens the Local Group Policy Editor.
在 Start Search 中键入 ’ gpedit.msc’ 并按 Enter。它将打开本地组策略编辑器。 - Go to ‘Computer Configuration’ and select ‘Administrative Templates’.
转到“计算机配置”并选择“管理模板”。 - Then go to ‘Windows Components’ and select ‘Store’.
然后转到“Windows 组件”并选择“商店”。 - Find the ‘Turn Off Store application’ setting in the right pane.
在右侧窗格中找到“关闭应用商店应用程序”设置。 - Select ‘Enable’ and ‘Apply’.
选择 ‘Enable’ 和 ‘Apply’。
Using Registry Editor
使用注册表编辑器
Some versions of Windows do not have the Group Policy Editor option. So, here is the other way to do it. But before you begin, create a backup of your data first.
某些版本的 Windows 没有 Group Policy Editor 选项。所以,这是另一种方法。但在开始之前,请先创建数据的备份。
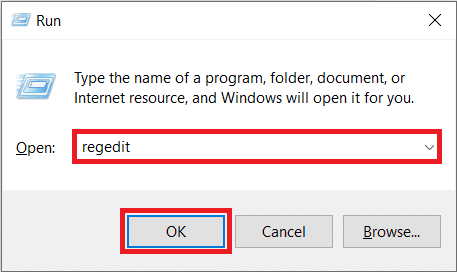
Type ‘regedit’ in Start Search and hit ‘Enter’. It opens the Registry Editor.
在 Start Search 中键入 ‘regedit’ 并点击 ‘Enter’。它将打开 Registry Editor。
Navigate to: 导航到:
HKEY_LOCAL_MACHINE\SOFTWARE\Policies\Microsoft\WindowsStore key
Here you need to create new DWORD value within the Windows Store key and name it RemoveWindowsStore and give it the value of ‘1‘. If the WindowsStore key does not exist itself, you will have to create it..
在这里,您需要在 Windows 应用商店密钥中创建新的 DWORD 值,并将其命名为 RemoveWindowsStore 并为其指定值“1”。如果 WindowsStore 密钥本身不存在,则必须创建它。
Now restart your Windows device.
现在重新启动您的 Windows 设备。
When you disable Windows Store, third-party Windows Store apps cannot be installed or updated. If anybody tries to open the Windows Store app now, the screen will display the message:
禁用 Windows 应用商店后,无法安装或更新第三方 Windows 应用商店应用程序。如果有人现在尝试打开 Windows 应用商店应用程序,屏幕将显示以下消息:
Windows Store isn’t available on this PC. Contact your system administrator for more information.
Apps like Mail, Movies & TV, Photos, Calculator, and OneNote need this app for automatic updates so if you need those frequent updates, disabling this feature is not recommended.
像邮件、电影和电视、照片、计算器和OneNote这样的应用程序需要这个应用程序进行自动更新,所以如果你需要那些频繁的更新,不建议禁用这个功能。
3] Change the value of AppXSvc in Registry
3] 更改注册表中 AppXSvc 的值
Jerry Shelton adds below in the comments:
Jerry Shelton 在评论中补充道:
Open Registry Editor and navigate to:
打开注册表编辑器并导航到:
HKEY_LOCAL_MACHINE\SYSTEM\ControlSet001\Services\AppXSvc
In the right panel, change the value of Start to 4.
在右侧面板中,将 Start (开始) 的值更改为 4。
Restart the computer.
重新启动计算机。
4] Troubleshoot in Clean Boot State
4] 在干净启动状态下进行故障排除
If nothing helps, you may need to perform a Clean Boot. in order to make Windows run only on a few essential driver sets and startup programs. This will help you manually isolate the issue in case it is because of startup programs.
如果没有任何帮助,您可能需要执行干净启动,以使 Windows 仅在少数基本驱动程序集和启动程序上运行。这将帮助您手动隔离问题,以防它是由于启动程序引起的。
5] Update Device Driver
5] 更新设备驱动程序
While Windows updates the driver automatically, In case you have a doubt, you can check with the OEM if there is an update available. Windows Device Manager does allow you to search for it, but it doesn’t work all the time, and the best would be to download the OEM software and update it. As an example, Samsung offers Magician software that can update all its supported drives.
虽然 Windows 会自动更新驱动程序,但如果您有疑问,可以向 OEM 查询是否有可用的更新。 Windows 设备管理器确实允许您搜索它,但它并非一直有效,最好的方法是下载 OEM 软件并更新它。例如,三星提供的 Magician 软件可以更新其所有支持的驱动器。
6] Check for Virus
6] 检查病毒
You can use any antivirus, including Microsoft Security, to check if malware or virus has replaced this program with itself. Usually, these files are hard to replace, but let’s take no chance here.
您可以使用任何防病毒软件(包括 Microsoft Security)来检查恶意软件或病毒是否已将此程序替换为自身。通常,这些文件很难替换,但让我们在这里不要冒险。
7] Perform a Disk Check
7] 执行磁盘检查
Most of the storage devices are now SSD. So the best way to figure if the SSD storage has an issue is to use OEMs software to resolve it. If you are still using HDD, use the CHKDSK program in Windows. to fix any bad area of the drive.
大多数存储设备现在都是 SSD。因此,确定 SSD 存储是否有问题的最佳方法是使用 OEM 软件来解决它。如果您仍在使用 HDD,请使用 Windows 中的 CHKDSK 程序修复驱动器的任何坏区域。
Why does Wsappx take high disk usage?
为什么 Wsappx 的磁盘使用率很高?
When any of the services get stuck, i.e., AppX Deployment Service (AppXSVC) or Client License Service (ClipSVC), it waits for what is complete. However, it is possible that it gets into a loop and hence the problem when this happens. The problem should occur when you are installing an app from Microsoft Store.
当任何服务卡住时,即 AppX 部署服务 (AppXSVC) 或客户端许可证服务 (ClipSVC),它会等待完成。但是,它可能会进入循环,因此当这种情况发生时会出现问题。当您从 Microsoft Store 安装应用程序时,应该会出现此问题。
Is Wsappx a virus?
Wsappx 是病毒吗?
No, it is not a virus but a genuine program that Microsoft Store uses to deploy and license apps. However, if you are in doubt, check with security software.
不,它不是病毒,而是 Microsoft Store 用来部署和许可应用程序的正版程序。但是,如果您有疑问,请使用安全软件进行检查。
Can you end Wsappx?
你能结束 Wsappx 吗?
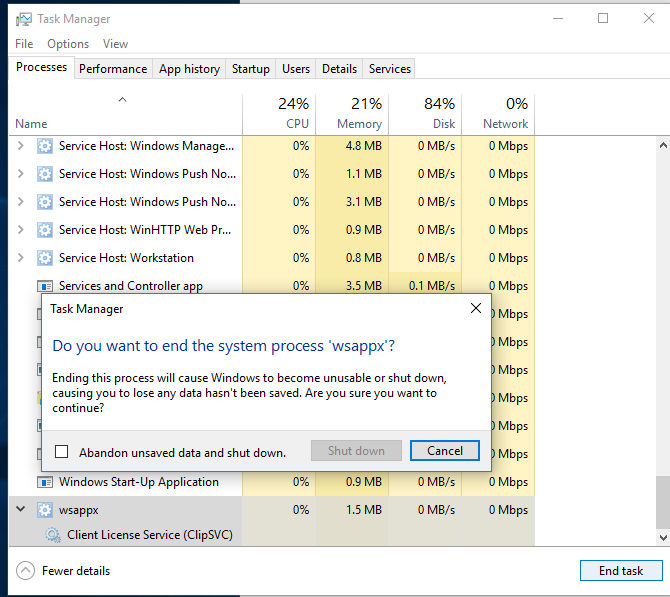
Yes, you can kill the program using the Task Manager if it keeps consuming resources. It’s not a system-critical program, and the only problem you would face is crashing Microsoft Store. If there were an installation in progress, that would also stop.
是的,如果程序不断消耗资源,您可以使用任务管理器终止该程序。它不是系统关键型程序,您面临的唯一问题是 Microsoft Store 崩溃。如果安装正在进行中,那也会停止。
Can you disable Wsappx in Windows 11/10?
您可以在 Windows 11/10 中禁用 Wsappx 吗?
While you can disable WSAPPX using the services snap-in, it is not recommended. Some apps are dependent on this service, and disabling it will result in problems.
虽然您可以使用服务管理单元禁用 WSAPPX,但不建议这样做。某些应用程序依赖于此服务,禁用它会导致问题。
I hope something here helps you.
我希望这里的东西对你有所帮助。
Updated on October 4, 2021
Tags: Microsoft Store, Troubleshoot
What is WSAPPX? Why Does It Cause High Disk and CPU Usage in Windows 10?
什么是 WSAPPX?为什么会导致 Windows 10 中的磁盘和 CPU 使用率过高?
By Ben Stegner
Updated Feb 15, 2021
Sign in to your MUO account
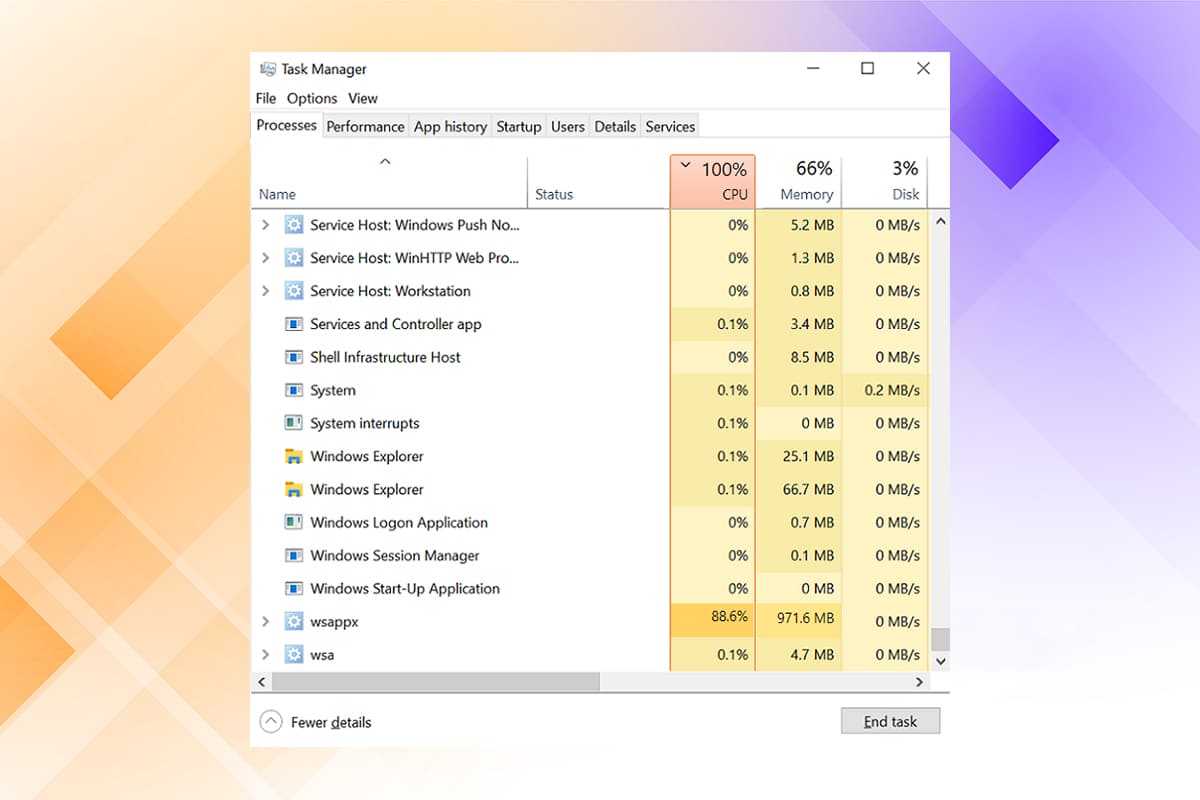
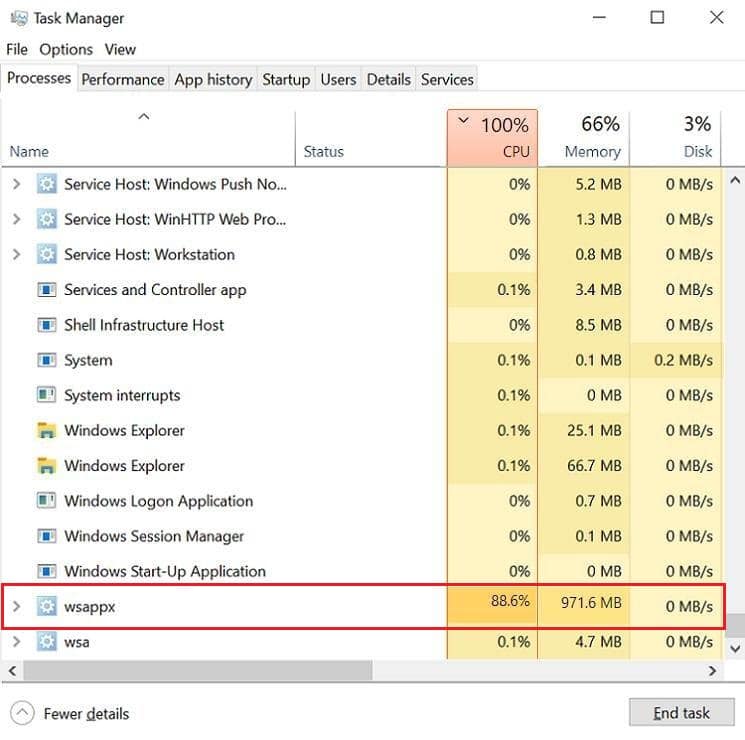
If you’ve checked the Task Manager to see what’s using up a lot of your PC’s resources, you might have come across an entry named WSAPPX. This is notable for two reasons: its strange name can raise suspicion, and it often uses a lot of CPU and disk resources.
如果您检查了任务管理器以查看什么占用了大量 PC 资源,则可能会遇到一个名为 WSAPPX 的条目。这值得注意有两个原因:它奇怪的名字可能会引起怀疑,并且它经常使用大量的 CPU 和磁盘资源。
We’ll explain what the WSAPPX process is, what it’s for, and how you can deal with its high disk and CPU usage.
我们将解释什么是 WSAPPX 进程,它的用途,以及如何处理其高磁盘和 CPU 使用率。
What Is WSAPPX?
什么是 WSAPPX?
WSAPPX is a process that handles installing, removing, and managing Universal apps through the Microsoft Store in Windows 8 and 10. Since these Universal/Modern apps didn’t exist on Windows 7 and earlier, you won’t see this process on those Windows versions.
WSAPPX 是通过 Windows 8 和 10 中的 Microsoft Store 处理通用应用程序安装、删除和管理通用应用程序的过程。由于这些通用/现代应用程序在 Windows 7 及更早版本上不存在,因此您不会在这些 Windows 版本上看到此过程。
You can find it by opening the Task Manager (press Ctrl + Shift + Esc). Click More details if needed to expand to its full view, then select the Processes tab and scroll all the way to the bottom to find it.
您可以通过打开任务管理器(按 Ctrl + Shift + Esc)找到它。单击 更多详细信息(如果需要) 以展开到其完整视图,然后选择 流程 选项卡并一直滚动到底部以找到它。
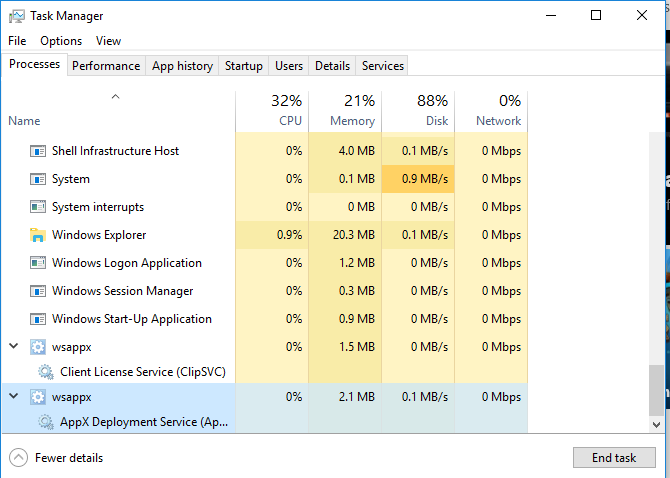
The process includes two sub-processes, which you can see by expanding it in the Task Manager. On Windows 8, there’s a sub-process named WSService, or Windows Store Service. You’ll find an essentially identical process on Windows 10 as ClipSVC, short for Client License Service.
该流程包括两个子流程,您可以通过在 Task Manager 中展开它来查看这两个子流程。在 Windows 8 上,有一个名为 WSService 或 Windows Store Service 的子进程。您会在 Windows 10 上找到与 ClipSVC 基本相同的过程,ClipSVC 是 Client License Service 的缩写。
Both Windows 10 and Windows 8 also include AppXSVC, the AppX Deployment Service.
Windows 10 和 Windows 8 还包括 AppXSVC,即 AppX 部署服务。
What Do WSAPPX and Related Processes Do?
WSAPPX 和相关进程有什么作用?
The technical names might make this sound complicated, but it’s really not. According to their entries in the Services panel, ClipSVC and WSService both “provide infrastructure support for the Microsoft Store.” If you disable them, Store apps won’t work, because these processes handle licensing. They’re designed to protect against piracy for Microsoft Store apps—if that even exists.
技术名称可能使这听起来很复杂,但实际上并非如此。根据它们在 Services 面板中的条目,ClipSVC 和 WSService 都“为 Microsoft Store 提供基础设施支持”。如果禁用它们,Microsoft Store 应用程序将不起作用,因为这些进程会处理许可。它们旨在防止 Microsoft Store 应用的盗版(如果存在)。
The other process, AppXSVC, works to deploy apps. This means that it runs whenever you install, remove, or update a Store app. Its name comes from the file extension for Store apps: AppX. Conversely, traditional desktop software usually runs from an executable file ending in EXE.
另一个进程 AppXSVC 用于部署应用程序。这意味着,只要您安装、删除或更新 Microsoft Store 应用程序,它就会运行。它的名称来自应用商店应用程序的文件扩展名:AppX。相反,传统的桌面软件通常从以 EXE 结尾的可执行文件运行。
Like Android apps (with the APK file extension), you can grab AppX files from anywhere to sideload apps onto your PC.. However, doing this could open you up to malware if you’re not careful._
与 Android 应用程序(具有 APK 文件扩展名)一样,您可以从任何地方获取 AppX 文件以将应用程序旁加载到您的 PC 上。但是,如果您不小心,这样做可能会让您受到恶意软件的威胁。
Because these sub-processes all run under the main WSAPPX process, you’ll see its usage increase when any one of them is active.
因为这些子进程都在主 WSAPPX 进程下运行,所以当其中任何一个子进程处于活动状态时,您会看到它的使用量增加。
Why Is WSAPPX Using System Resources?
为什么 WSAPPX 使用系统资源?
In most cases, you’ll only see WSAPPX active when you’re using the Microsoft Store. Simply opening it and browsing around will cause the process to start. When downloading an app or installing an update, it will naturally use more resources, since it needs them for the install process.
在大多数情况下,只有在使用 Microsoft Store 时,您才会看到 WSAPPX 处于活动状态。只需打开它并四处浏览即可启动该过程。下载应用程序或安装更新时,它自然会使用更多资源,因为它需要它们来执行安装过程。
This isn’t unique to Store apps. When you install traditional desktop software, its installation process takes up resources, too. However, instead of running under the WSAPPX process, you’ll see the new program’s entry using your CPU and disk.
这并不是 Microsoft Store 应用程序独有的。当您安装传统的桌面软件时,其安装过程也会占用资源。但是,您将看到使用 CPU 和磁盘的新程序条目,而不是在 WSAPPX 进程下运行。
If you never use the Microsoft Store or its apps, yet still see WSAPPX active, it’s almost certainly due to apps updating in the background automatically. Thankfully, you can prevent this.
如果您从未使用 Microsoft Store 或其应用程序,但仍看到 WSAPPX 处于活动状态,则几乎可以肯定是由于应用程序在后台自动更新。值得庆幸的是,你可以防止这种情况。
How to Stop Store Apps From Automatically Updating
如何阻止 Microsoft Store 应用程序自动更新
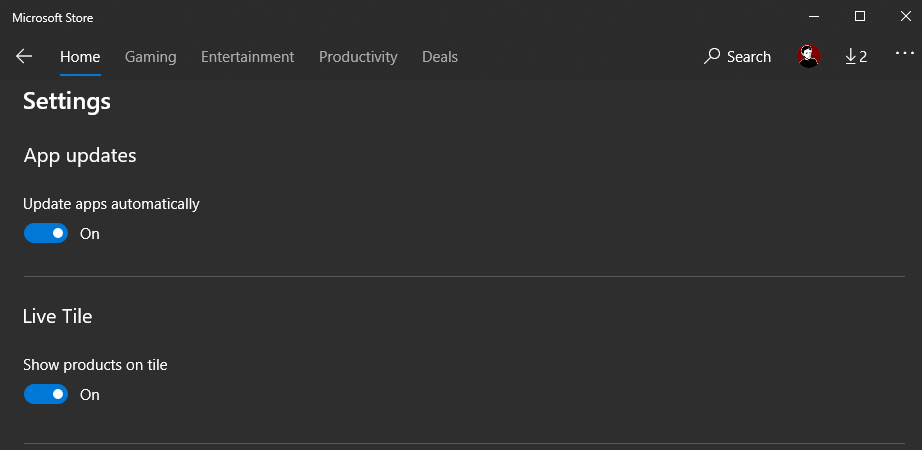
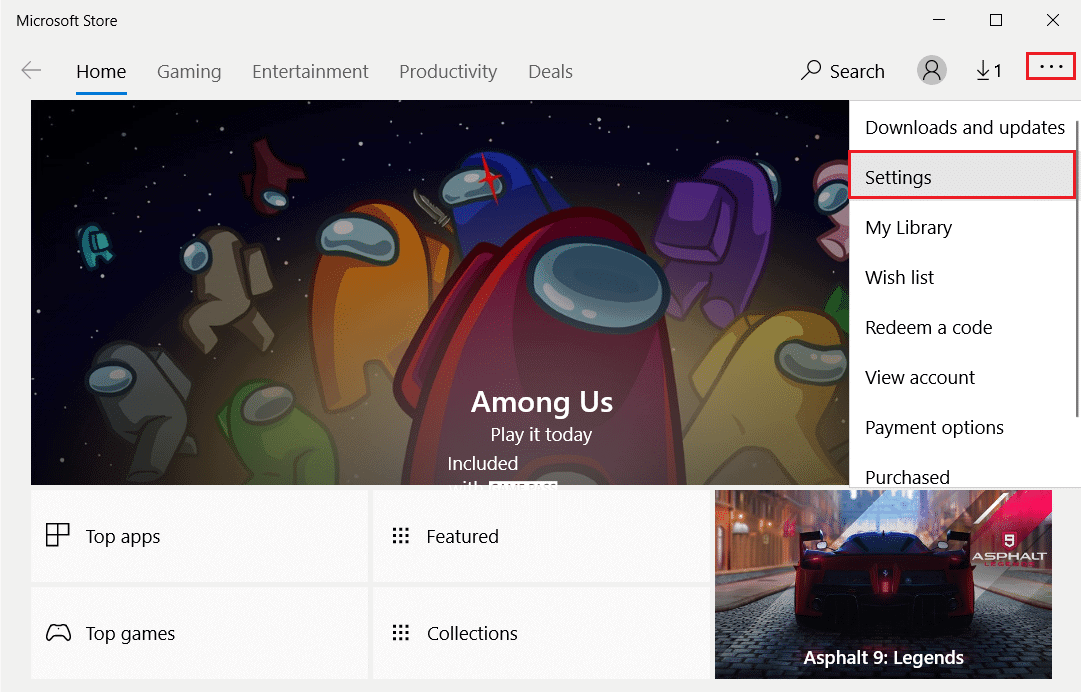
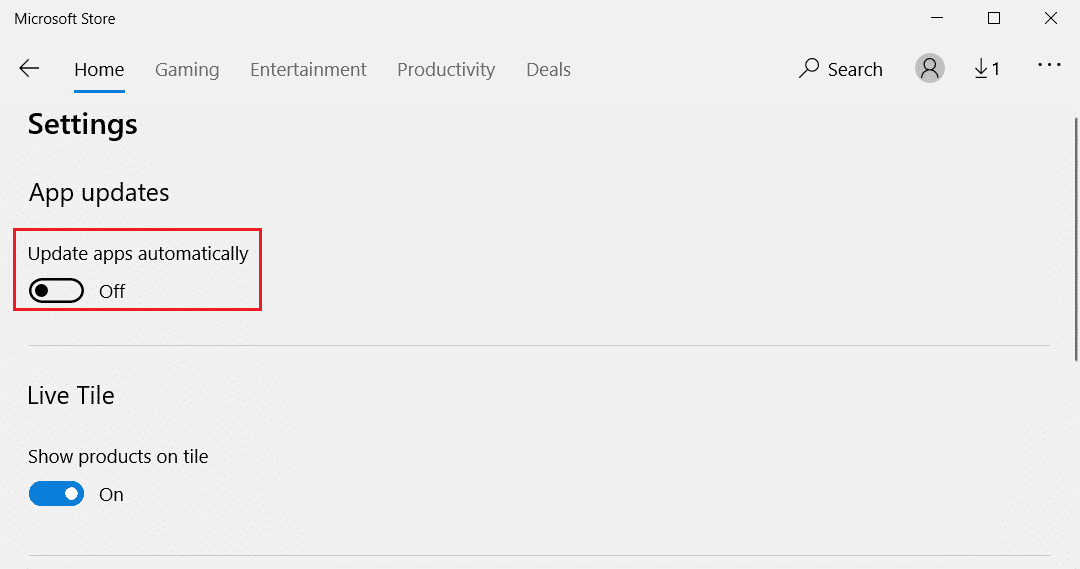
Disabling automatic updates for Store apps is easy. Type “store” into the Start Menu and open the Microsoft Store entry. Here, click the three-dot icon in the top-right, then select Settings. In the Settings menu, toggle the Update apps automatically slider to Off.
禁用 Microsoft Store 应用的自动更新非常简单。在开始菜单中键入“store”并打开 Microsoft Store 条目。在这里,单击右上角的三点图标,然后选择 Settings(设置)。在 Settings (设置) 菜单中,将 Update apps automatically (自动更新应用程序) 滑块切换为 Off(关)。
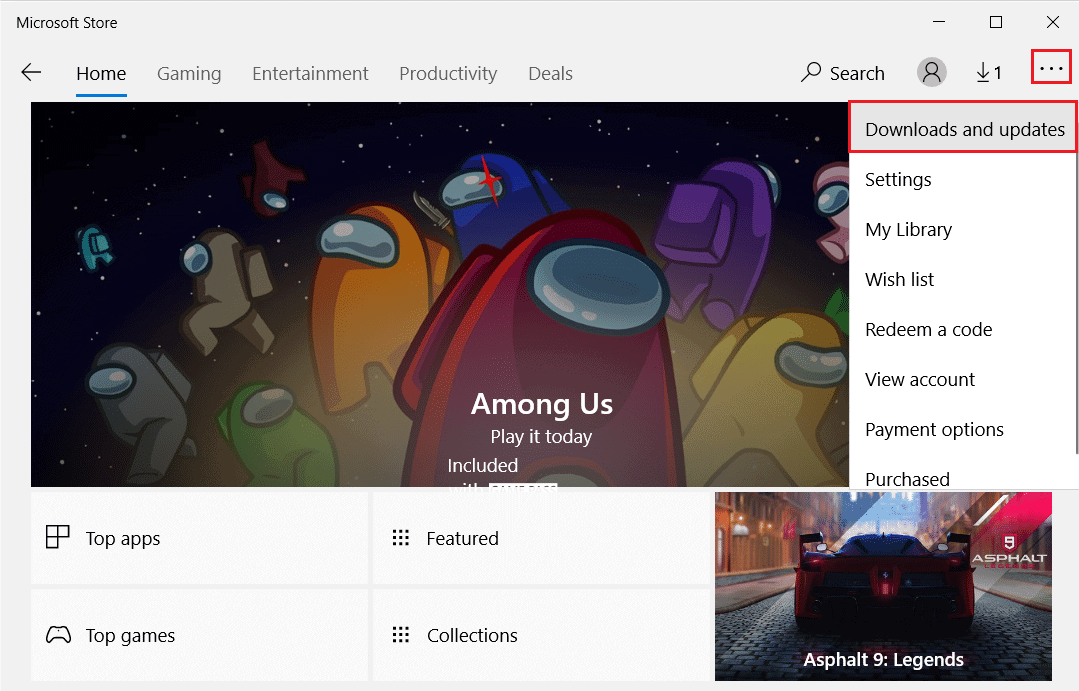
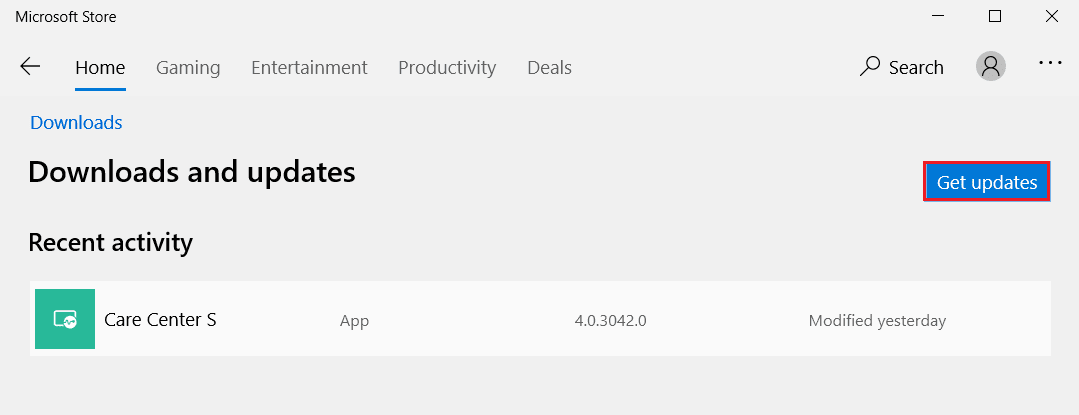
This will prevent app updates from happening in the future unless you manually trigger them. To check for updates, click the Menu button again and choose Downloads and updates. Hit the Get updates button to check for any, and install them as you see fit.
这将阻止将来发生应用程序更新,除非您手动触发它们。要检查更新,请再次单击 Menu 按钮,然后选择 Downloads and updates。点击 获取更新 按钮以检查任何更新,然后根据需要安装它们。
Do I Need Any Store Apps?
我需要任何 Store 应用程序吗?
You can get by just fine in Windows 10 without ever using the Microsoft Store. But even if you don’t download anything from the Store, there are several built-in Windows 10 apps that update through it.
您可以在 Windows 10 中过得很好,而无需使用 Microsoft Store。但是,即使您没有从商店下载任何内容,也有几个内置的 Windows 10 应用程序可以通过它进行更新。
The Xbox app has tons of features for gamers, the Calculator is now a Store app, and the Photos and Mail apps are decent defaults if you haven’t swapped them out for something else. Apps like Your Phone, which let you access your phone’s data right from your computer, also come from the Store.
Xbox 应用程序为游戏玩家提供了大量功能,计算器现在是一个 Store 应用程序,如果您还没有将它们换成其他应用程序,那么照片和邮件应用程序是不错的默认值。像 Your Phone 这样的应用程序也来自 Store,它们允许您直接从计算机访问手机的数据。

Thus, if you use any of these, you’ll see some extra usage from WSAPPX. Since installing updates is an important way to protect yourself on any platform, we don’t recommend disabling automatic updates unless they’re grinding your system to a halt.
因此,如果您使用其中任何一个,您将看到 WSAPPX 的一些额外用法。由于安装更新是在任何平台上保护自己的重要方式,因此我们不建议禁用自动更新,除非它们使您的系统陷入停顿。
For most people, remembering to check for updates manually is tough. Store apps have fewer permissions than desktop apps, so they don’t pose as much of a security risk. But for the small amount of resources these updates take every once in a while, it’s worth being up-to-date.
对于大多数人来说,记住手动检查更新是很困难的。应用商店应用程序的权限比桌面应用程序少,因此它们不会带来那么大的安全风险。但是,对于这些更新每隔一段时间占用的少量资源,值得保持最新状态。
Remove Bloatware and Stop Background Apps
删除英国媒体报道软件并停止后台应用程序
While we advise against disabling automatic updates, you can still take a few steps to prevent Store apps from running when you don’t want them to.
虽然我们建议不要禁用自动更新,但你仍然可以采取一些步骤来阻止 Microsoft Store 应用在你不希望运行时运行。
The first is removing bloatware apps from your PC.. As you’ve likely seen, Windows 10 comes with some pre-installed junk like Candy Crush Saga. If you never use these apps, having them update in the background is just a waste of resources._
首先是从 PC 中删除膨胀软件应用程序。正如您可能已经看到的,Windows 10 预装了一些垃圾,例如 Candy Crush Saga。如果您从不使用这些应用程序,那么让它们在后台更新只是浪费资源。
Visit Settings > Apps > Apps & features to browse everything installed on your PC. Click an app and choose Uninstall to remove it.
访问设置>应用程序>应用程序和功能,浏览您电脑上安装的所有内容。单击应用程序并选择 卸载 将其删除。
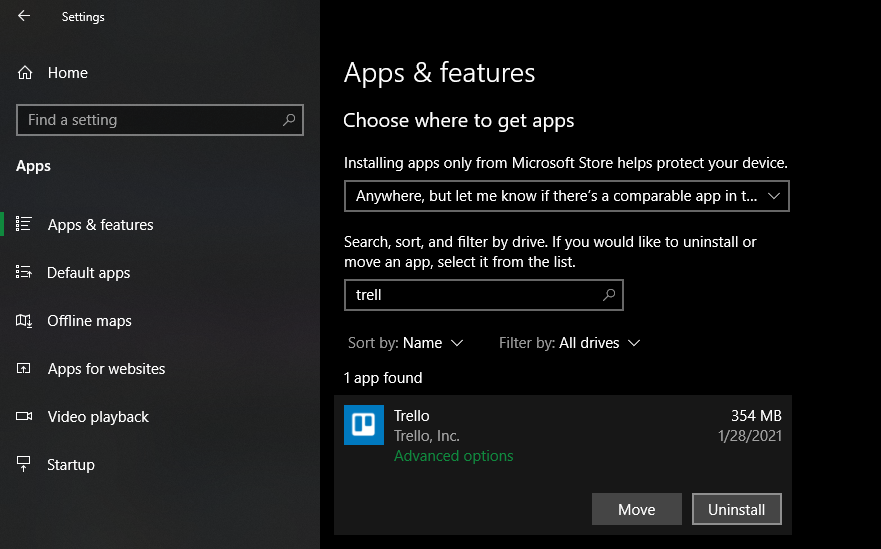
Once you cut out the apps you don’t use anyway, only a handful of apps that you actually care about will remain. With fewer apps from the Store installed, WSAPPX won’t need resources as often.
一旦你剪掉了你无论如何都不使用的应用程序,就只剩下你真正关心的少数应用程序。由于安装的 Store 中的应用程序较少,WSAPPX 将不需要那么频繁的资源。
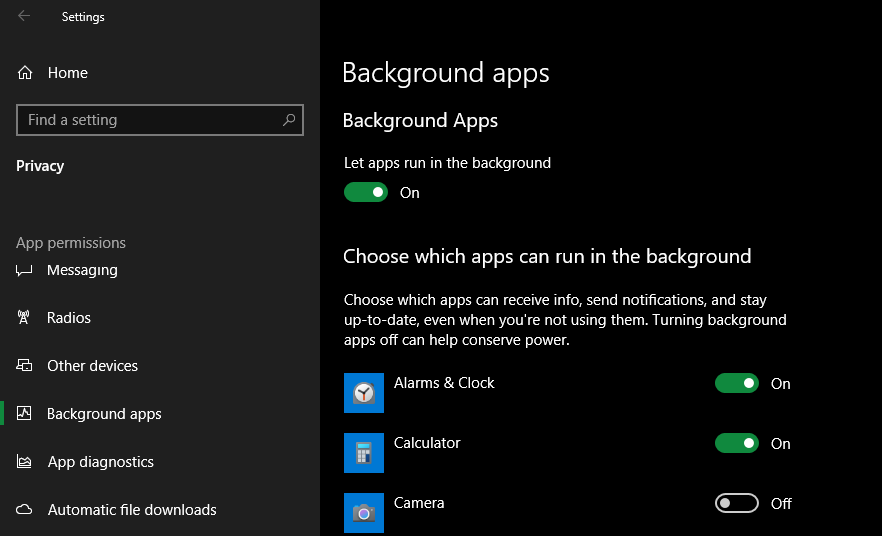
Another step you should take is preventing apps from running in the background. Visit Settings > Privacy > Background apps (under App permissions in the sidebar) to toggle this on a per-app basis.
您应该采取的另一个步骤是防止应用程序在后台运行。访问 Settings > Privacy > Background apps(在侧边栏中的 App permissions(应用程序权限下))以按应用程序切换此选项。
If you disable an app from running in the background, it can’t check for new notifications or do anything else when you’re not using it. Feel free to disable ones you never use, but take care not to disable anything you actually rely on.
如果您禁用应用程序在后台运行,则当您不使用该应用程序时,它将无法检查新通知或执行任何其他操作。随意禁用您从未使用过的那些,但请注意不要禁用您真正依赖的任何东西。
You can also toggle the Let apps run in the background slider at the top of the screen to completely disable background apps, though this is a nuclear option.
您还可以切换屏幕顶部的 Let apps run in the background 滑块以完全禁用后台应用程序,尽管这是一个核心选项。
Can I Kill the WSAPPX Process?
可以终止 WSAPPX 进程吗?
Windows considers WSAPPX a vital system process.. Thus, if you try to end it via the Task Manager, it warns you that ending the process can cause Windows to become unstable and shut down.
Windows 将 WSAPPX 视为一个重要的系统进程。因此,如果您尝试通过任务管理器结束它,它会警告您结束该过程可能会导致 Windows 变得不稳定并关闭。
You don’t have any control over when WSAPPX starts and stops. It will pop up when needed (if you’re browsing the Microsoft Store or interacting with apps) and stop when it’s done. Like other system processes, you don’t need to micromanage this. Windows does a fine job on its own of handling processes, and the above steps should take care of any high resource usage you see from WSAPPX.
您无法控制 WSAPPX 的启动和停止时间。它会在需要时弹出(如果您正在浏览 Microsoft Store 或与应用程序交互),并在完成后停止。与其他系统进程一样,您无需对此进行微观管理。Windows 本身在处理进程方面做得很好,上述步骤应该可以处理您从 WSAPPX 看到的任何高资源使用率。
WSAPPX Is Essential and Simple
WSAPPX 是必不可少的和简单的
That’s all there is to know about WSAPPX and what causes it to use resources. It’s tied to Microsoft Store apps and only runs when needed. If WSAPPX uses a lot of your CPU or disk, uninstall any Store apps you don’t use, prevent little-used apps from running in the background, and turn off automatic updates (if you want to go that far).
这就是关于 WSAPPX 以及导致它使用资源的原因的全部信息。它与 Microsoft Store 应用程序相关联,并且仅在需要时运行。如果 WSAPPX 使用大量 CPU 或磁盘,请卸载您不使用的任何 Store 应用程序,防止很少使用的应用程序在后台运行,并关闭自动更新(如果您想走得更远)。
Remember that a system process running is a normal part of Windows operation, so you shouldn’t worry unless WSAPPX constantly uses large amounts of resources.
请记住,正在运行的系统进程是 Windows 操作的正常部分,因此除非 WSAPPX 经常使用大量资源,否则您不必担心。
Fix WSAPPX High Disk Usage in Windows 10
修复 Windows 10 中的 WSAPPX 高磁盘使用率
By Elon Decker | November 22, 2022
WSAPPX is listed by Microsoft as a vital process for Windows 8 & 10. Truth be told, WSAPPX process does need to use a good amount of system resources to carry out the designated tasks. Although, if you notice WSAPPX high disk or CPU usage error or any of its apps to be inactive, consider disabling it. The process contains two sub-services:
WSAPPX被Microsoft列为Windows 8和10的重要过程。说实话,WSAPPX 进程确实需要使用大量的系统资源来执行指定的任务。不过,如果您发现 WSAPPX 磁盘或 CPU 使用率过高错误或其任何应用程序处于非活动状态,请考虑禁用它。该流程包含两个子服务:
-
AppX Deployment Service (AppXSVC) – It is the one responsible for installing, updating, and removing apps. AppXSVC is triggered when the Store is open
AppX 部署服务 (AppXSVC) – 它是负责安装、更新和删除应用程序的服务。AppXSVC 在应用商店打开时触发 -
Client License Service (ClipSVC) – It officially provides infrastructure support for Microsoft Store and gets activated when one of the Store apps is launched to perform a license check.
客户端许可证服务 (ClipSVC) – 它正式为 Microsoft Store 提供基础设施支持,并在启动其中一个 Microsoft Store 应用程序以执行许可证检查时激活。
How to Fix WSAPPX High Disk & CPU Usage Error in Windows 10
如何修复Windows 10中的WSAPPX高磁盘和CPU使用率错误
On most days, we do not need to worry about the hundreds of system processes and services running in the background allowing the Windows operating system to work flawlessly. Although, often, system processes can exhibit abnormal behavior such as consuming unnecessarily high resources. The WSAPPX system process is infamous for the same. It manages the installation, updates, removal of applications from Windows Store viz Microsoft Universal app platform.
在大多数日子里,我们无需担心数百个系统进程和服务在后台运行,从而使 Windows 操作系统能够完美运行。虽然系统进程通常可能会出现异常行为,例如消耗不必要的高资源。WSAPPX 系统进程也因此臭名昭著。它管理从 Windows 应用商店(即 Microsoft Universal 应用程序平台)安装、更新和删除应用程序。
There are four different ways to limit WSAPPX high disk & CPU usage, which are explained, in detail, in the subsequent sections:
有四种不同的方法可以限制WSAPPX的高磁盘和CPU使用率,这些方法将在后续部分中详细解释:
-
If you seldom find yourself using any of the native Store apps, disable the auto-update feature and even uninstall a few of them.
如果您发现自己很少使用任何原生 Store 应用程序,请禁用自动更新功能,甚至卸载其中一些应用程序。 -
Since the process is involved with the Microsoft Store application, disabling the store will prevent it from using unnecessary resources.
由于该过程涉及 Microsoft Store 应用程序,因此禁用该 Store 将防止它使用不必要的资源。 -
You can also disable AppXSVC and ClipSVC from Registry Editor.
您还可以从注册表编辑器中禁用 AppXSVC 和 ClipSVC。 -
Increasing the Virtual memory may also fix this issue.
增加 Virtual memory (虚拟内存) 也可能解决此问题。
Method 1: Turn Off Auto App Updates
方法 1:关闭自动应用程序更新
The easiest way to restrict WSAPPX process, particularly, the AppXSVC sub-service, is to disable the auto-update feature of Store applications. With auto-update disabled, the AppXSVC will no longer be triggered or cause high CPU & disk usage when you open the Windows Store.
限制 WSAPPX 进程(特别是 AppXSVC 子服务)的最简单方法是禁用 Store 应用程序的自动更新功能。禁用自动更新后,当您打开Windows商店时,AppXSVC将不再被触发或导致CPU和磁盘使用率高。
Note: If you wish to keep your applications up-to-date, consider updating them manually every now and then.
注意:如果您希望使应用程序保持最新状态,请考虑不时手动更新它们。
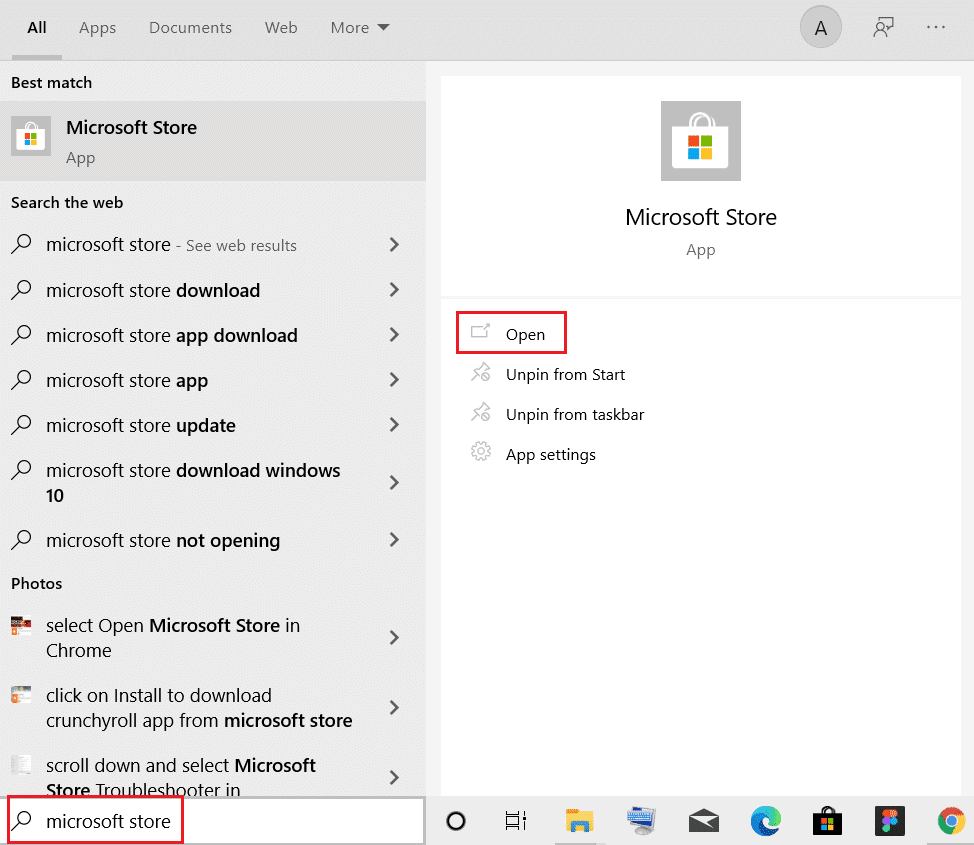
- Open the Start menu and type Microsoft Store. Then, click on Open in the right pane.
打开“开始”菜单并键入 Microsoft Store。然后,单击右侧窗格中的 Open。
- Click on the three-dotted icon and choose Settings from the ensuing menu.
单击三点图标,然后从随后的菜单中选择 个人设置 。
3 On the Home tab, toggle off Update apps automatically option shown highlighted.
在主页选项卡上,关闭突出显示的自动更新应用程序选项。
Pro Tip: Update Microsoft Store Apps Manually
专业提示:手动更新 Microsoft Store 应用程序
- Type, search & Open Microsoft Store, as shown.
如图所示,输入、搜索并打开Microsoft Store。
- Click three-dotted icon and select Downloads and updates, as depicted below.
单击三点图标,然后选择下载和更新,如下所示。
- Lastly, click on the Get updates button.
最后,单击“获取更新”按钮。
Method 2: Disable Windows Store 方法 2:禁用 Windows 应用商店
As mentioned earlier, disabling the store will prevent WSAPPX high CPU usage and any of its sub-services from consuming excessive system resources. Now, depending on your Windows version, there are two different methods to disable Windows store.
如前所述,禁用存储将防止 WSAPPX 高 CPU 使用率及其任何子服务消耗过多的系统资源。现在,根据您的 Windows 版本,有两种不同的方法可以禁用 Windows 商店。
Option 1: Through Local Group Policy Editor
选项 1:通过本地组策略编辑器
This method is for Windows 10 Pro & Enterprise users as Local Group Policy Editor is not available for Windows 10 Home Edition.
此方法适用于Windows 10 Pro和Enterprise用户,因为本地组策略编辑器不适用于Windows 10家庭版。
-
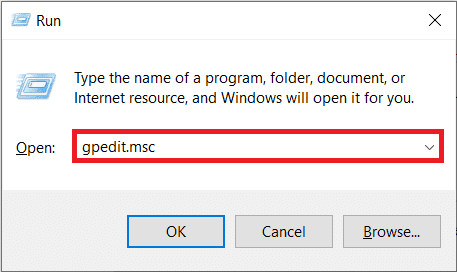
Press Windows + R keys together in the Run dialog box.
按 Windows + R 键一起 运行 对话框。 -
Type gpedit.msc and hit Enter key to launch Local Group Policy Editor.
键入 gpedit.msc 并按 Enter 键以启动本地组策略编辑器。
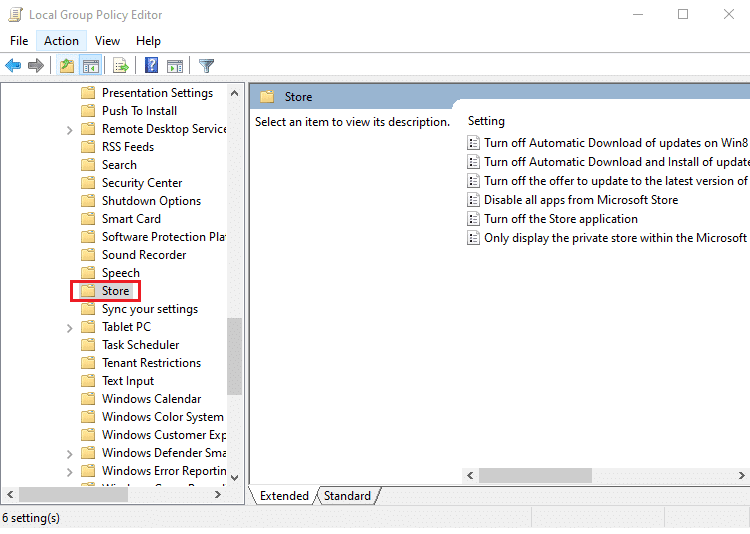
- Navigate to Computer Configuration > Administrative Templates > Windows Components > Store by double-clicking on each folder.
双击每个文件夹,导航到 Windows 组件> Store > 计算机配置>管理模板。
-
In the right pane, choose the Turn off the Store application setting.
在右侧窗格中,选择 Turn off the Store application (关闭 Store 应用程序) 设置。 -
Once selected, click on the Edit policy setting shown highlighted in the pic below.
选择后,单击下图中突出显示的 Edit policy 设置。
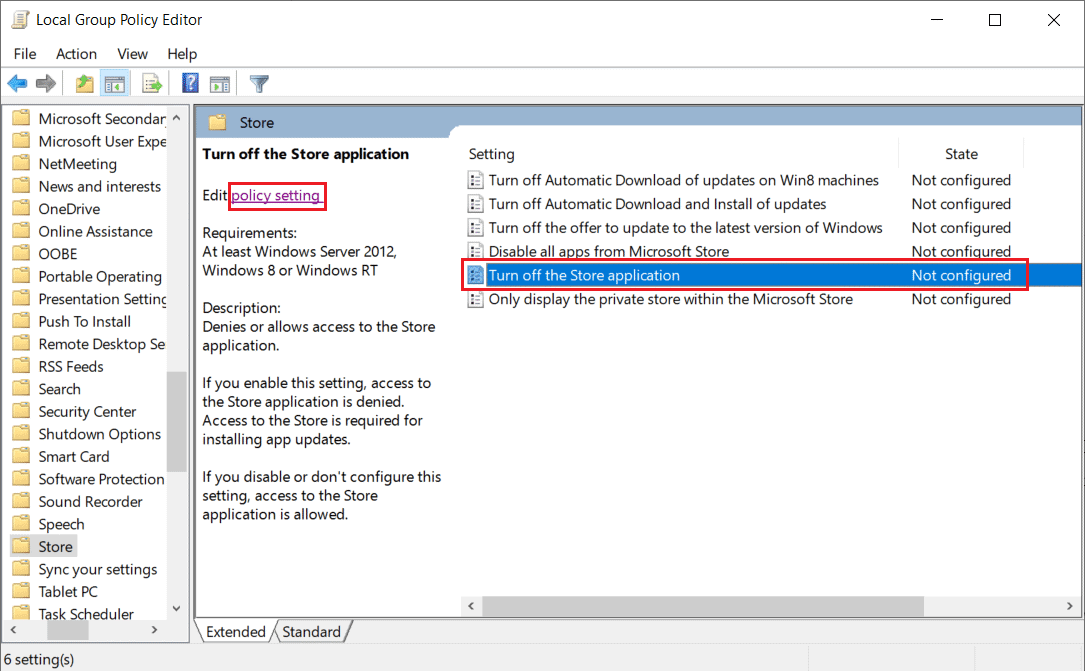
Note: By default, the Turn off the Store application State will be set to Not Configured.
注意:默认情况下,Turn off the Store application State(关闭 Store 应用程序状态)将设置为 Not Configured(未配置)。
- Simply, select the Enabled option and click on Apply > OK to save & exit.
只需选择启用选项,然后点击应用>确定以保存并退出。
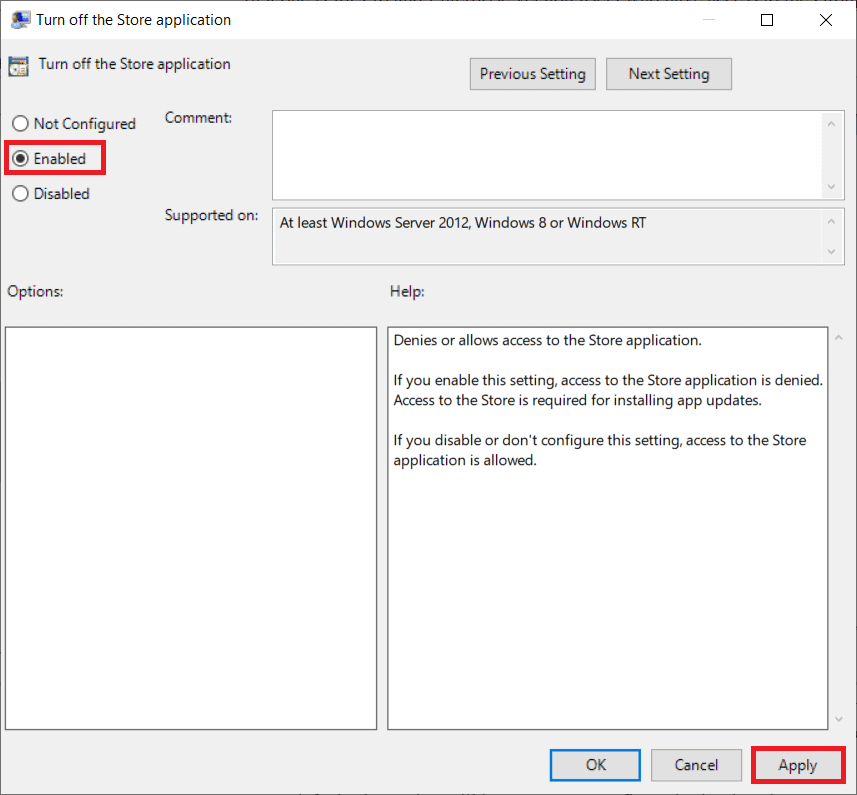
- Restart the computer to implement these changes.
重新启动计算机以实施这些更改。
Option 2: Through Registry Editor 选项 2:通过注册表编辑器
For Windows Home Edition, disable the Windows Store from Registry Editor to fix WSAPPX high disk usage error.
对于 Windows 家庭版,从注册表编辑器中禁用 Windows 应用商店以修复 WSAPPX 高磁盘使用率错误。
-
Press Windows + R keys together to open Run dialog box.
按 Windows + R 键一起打开“运行”对话框。 -
Type regedit in the Run dialog box, and click on OK to launch Registry Editor.
在“运行”对话框中键入 regedit,然后单击“确定”以启动注册表编辑器。
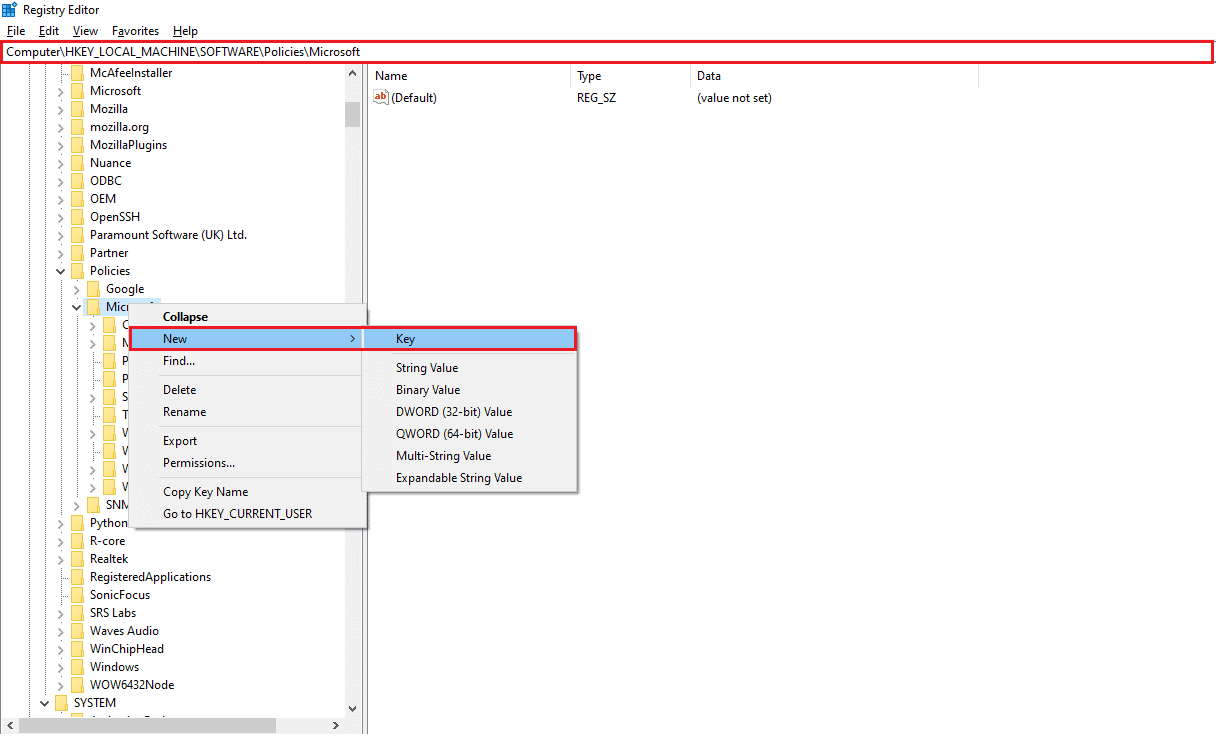
- Navigate to the given location path below from the address bar.
从地址栏导航到下面的给定位置路径。
HKEY_LOCAL_MACHINE\SOFTWARE\Policies\Microsoft\WindowsStore
Note: If you do not find a WindowsStore folder under Microsoft, create one yourself. Right-click on Microsoft. Then, click New > Key, as depicted. Carefully name the key as WindowsStore.
注意:如果您在 Microsoft 下找不到 WindowsStore 文件夹,请自行创建一个。右键单击 Microsoft。然后,单击 New > Key,如图所示。仔细地将密钥命名为 WindowsStore。
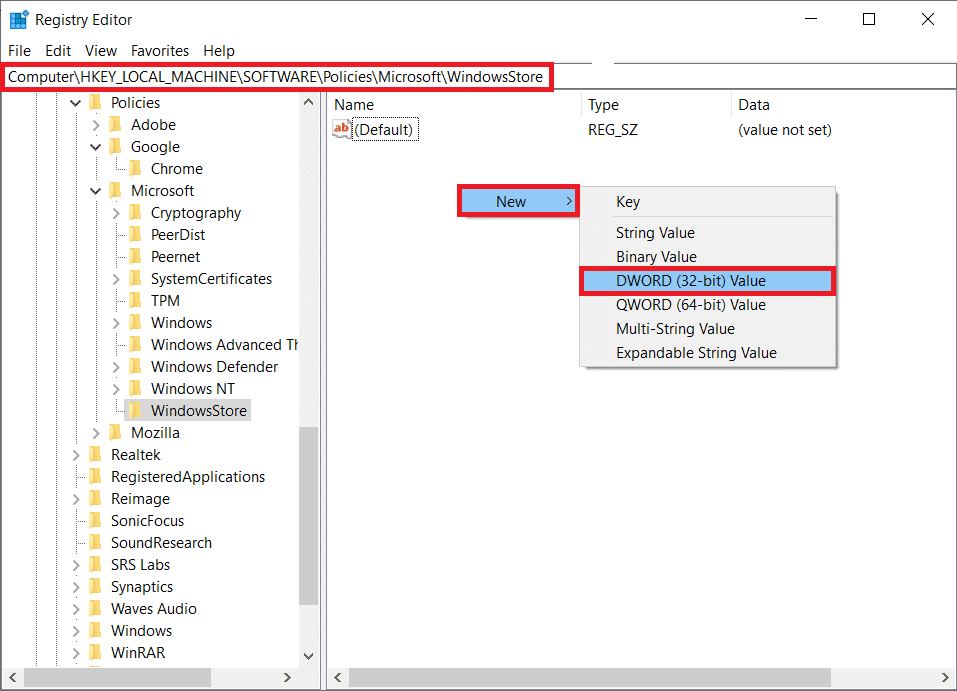
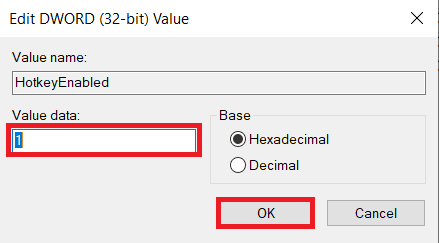
- Right-click on the empty space in the right pane and click New > DWORD (32-bit) Value. Name the value as RemoveWindowsStore.
右键单击右侧窗格中的空白区域,然后单击 新建 > DWORD (32 位) 值.将值命名为 RemoveWindowsStore。
- Once the RemoveWindowsStore value is created, right-click on it and select Modify… as shown.**
创建 RemoveWindowsStore 值后,右键单击它并选择 Modify…如图所示。
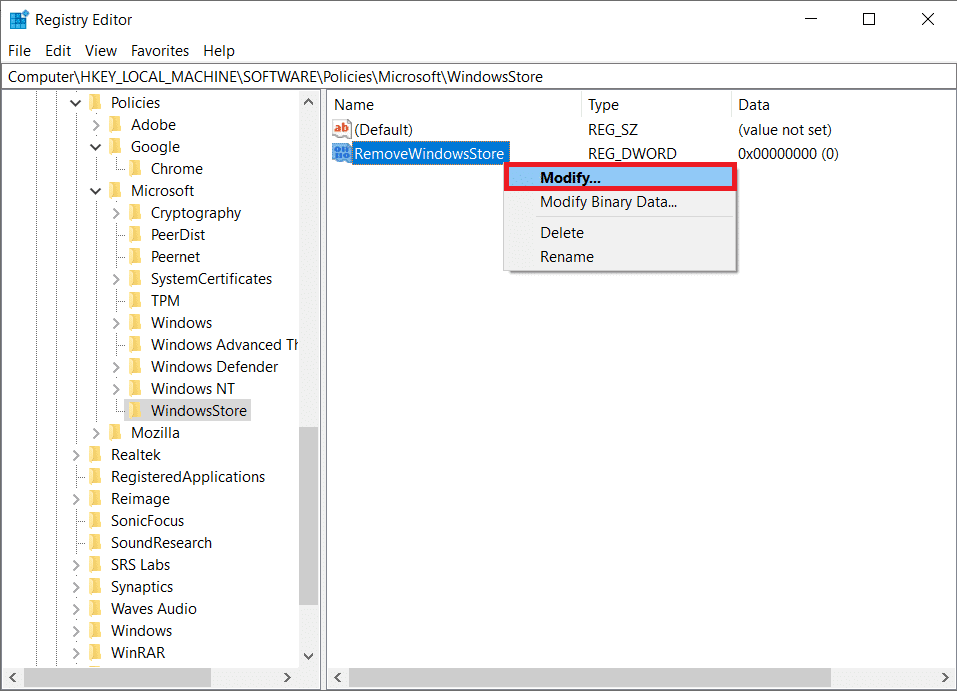
- Enter 1 in the Value Data box and click on OK, as illustrated below.
在“值数据”框中输入 1,然后单击“确定”,如下图所示。
Note: Setting the value data to 1 for the key will disable the Store while value 0 will enable it.
注意:将键的值 data 设置为 1 将禁用 Store,而值 0 将启用它。
- Restart your Windows PC.
重新启动您的 Windows PC。
Method 3: Disable AppXSVC and ClipSVC
方法 3:禁用 AppXSVC 和 ClipSVC
Users also have the option to disable the AppXSVC, ClipSVC and WaasMedicSVC.exe services manually from the registry editor to fix WaasMedicSVC.exe or WSAPPX high disk and CPU usage in Windows 8 or 10 . ._
用户还可以选择从注册表编辑器中手动禁用 AppXSVC、ClipSVC 和 WaasMedicSVC.exe 服务,以修复 Windows 8 或 10 中 WaasMedicSVC.exe 或 WSAPPX 磁盘和 CPU 使用率过高的问题。
- Launch Registry Editor as before and navigate to the following location path.
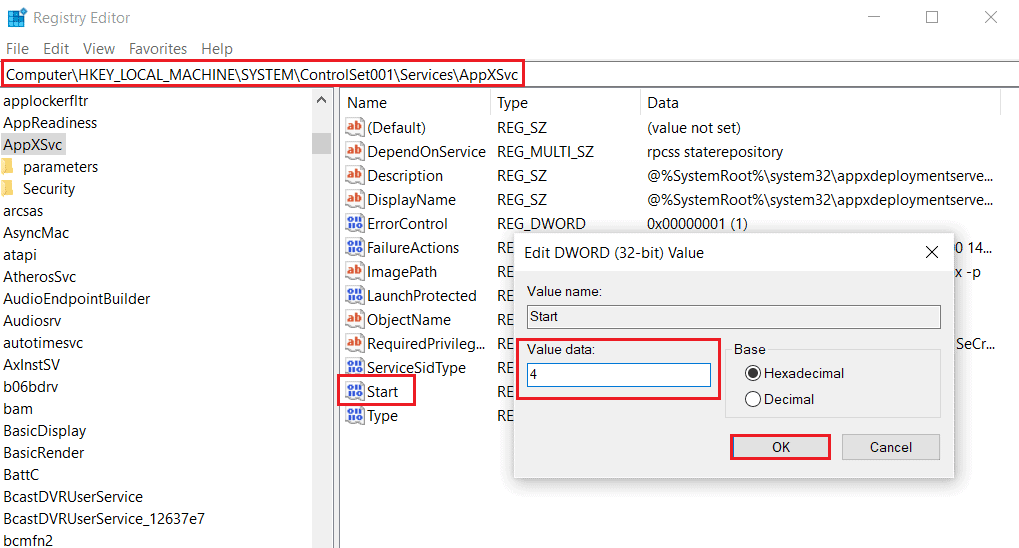
像以前一样启动 Registry Editor 并导航到以下位置路径。
HKEY_LOCAL_MACHINE\SYSTEM\ControlSet001\Services\AppXSvc
- Double-click on the Start value, change the Value Data from 3 to 4. Click on OK to save.
双击 Start 值,将 Value Data 从 3 更改为 4。点击 OK 保存。
Note: Value data 3 will enable AppXSvc whereas Value data 4 will disable it.
注意:值数据 3 将启用 AppXSvc,而值数据 4 将禁用它。
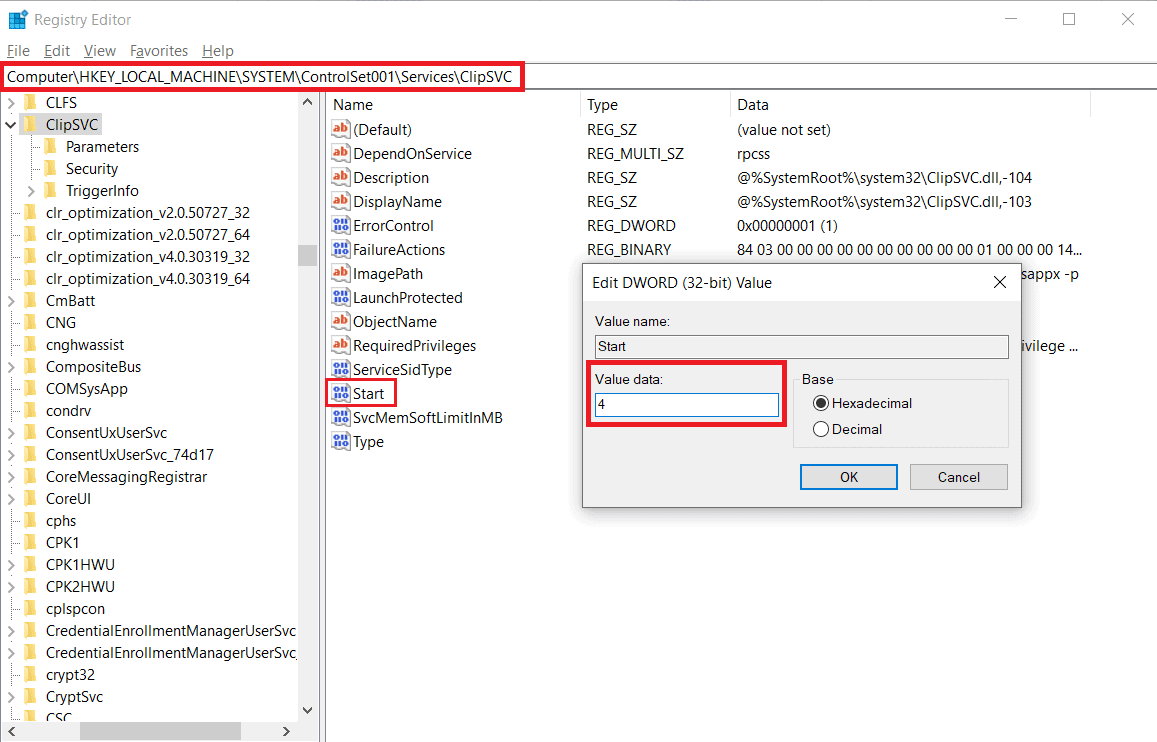
- Again, go to the following location path and double-click on the Start value.
再次转到以下位置路径,然后双击 Start 值。
HKEY_LOCAL_MACHINE\SYSTEM\ControlSet001\Services\Clipsvc
- Here, change the Value data to 4 to disable ClipSVC and click on OK to save.
在这里,将 值数据 更改为 4 以禁用 ClipSVC,然后单击 OK 保存。
- Restart your Windows PC for changes to take effect.
重新启动 Windows PC 以使更改生效。
Method 4: Increase Virtual Memory
方法 4:增加虚拟内存
Another trick many users have employed to reduce the nearly 100% CPU and Disk usage due to Sedlauncher.exe. or WSAPPX is to increase PC virtual memory. To learn more about virtual memory, check out our article on Virtual Memory (Pagefile) in Windows 10.. Follow these steps to increase virtual memory in Windows 10:__
许多用户为减少由于 Sedlauncher.exe 或 WSAPPX 而导致的近 100% CPU 和磁盘使用率的另一个技巧是增加 PC 虚拟内存。按照以下步骤增加 Windows 10 中的虚拟内存:
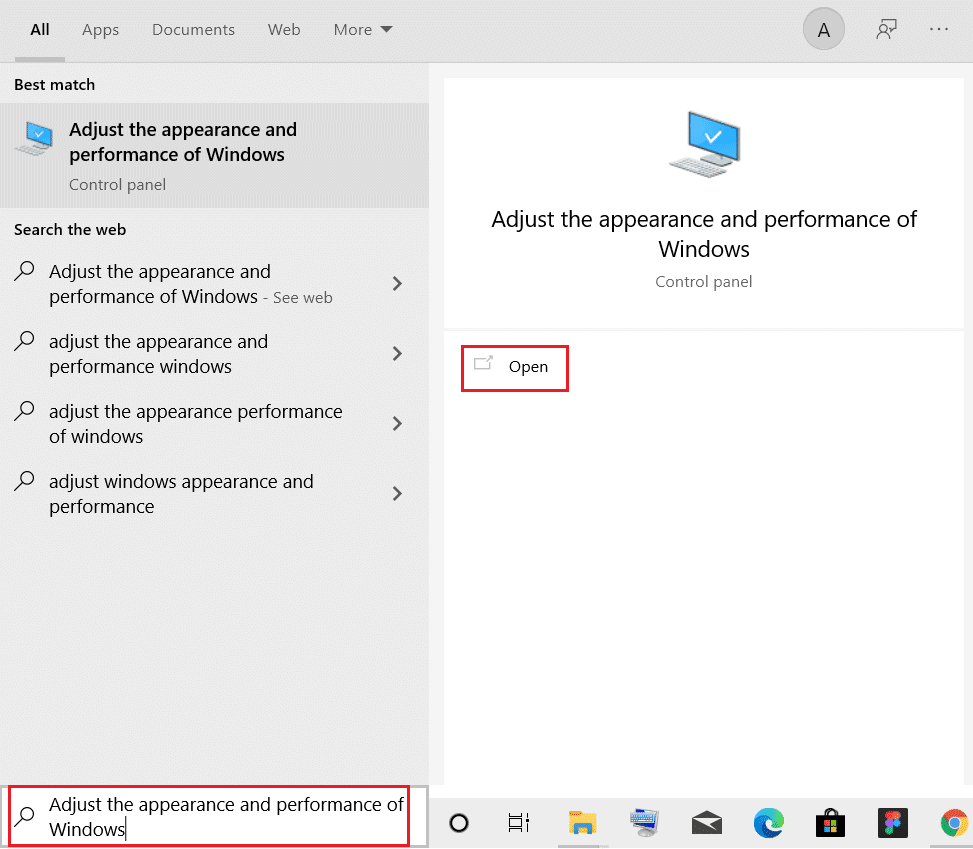
- Hit the Windows key, type Adjust the appearance and performance of Windows and click Open, as shown.
点击 Windows 键,键入 调整 Windows 的外观和性能,然后单击 可选,如图所示。
-
In the Performance Options window, switch to the Advanced tab.
在 Performance Options 窗口中,切换到 Advanced 选项卡。 -
Click on the Change… button under Virtual memory section.
单击更改…Virtual memory 部分下的按钮。
- Here, uncheck the Automatically manage paging file size for all drives option shown highlighted. This will unlock the Paging file size for each drive section, allowing you to manually enter the desired value.
在此处,取消选中突出显示的 Automatically manage paging file size for all drives 选项。这将解锁每个驱动器部分的 Paging 文件大小,允许您手动输入所需的值。
- Under the Drive section, choose the drive on which Windows is installed (normally C:) and select Custom size.
在驱动器部分下,选择安装了 Windows 的驱动器(通常为 C:),然后选择自定义大小。
- Enter Initial size (MB) and Maximum size (MB) in MB (Megabyte).
输入初始大小 (MB) 和最大大小 (MB),以 MB 为单位。
Note: Type your actual RAM size in megabytes in the Initial size (MB): entry box and type double its value in the Maximum size (MB).
注意:在 初始大小 (MB):输入框中键入实际 RAM 大小(以兆字节为单位),然后在 最大大小 (MB) 中键入其值的两倍。
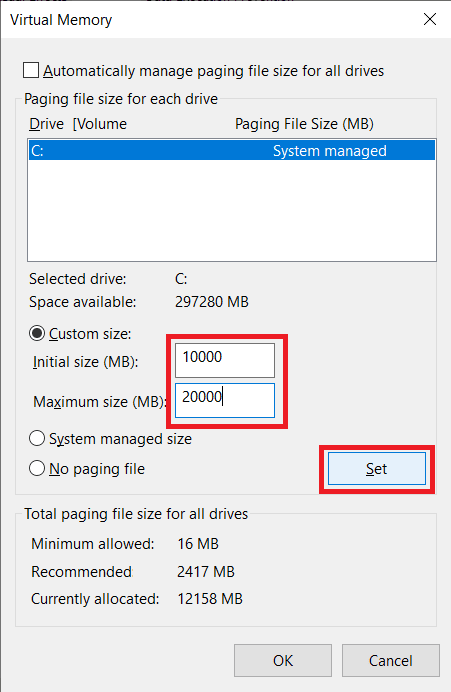
- Finally, click on Set > OK to save changes and exit.
最后,单击“设置>确定”以保存更改并退出。
Pro Tip: Check Windows 10 PC RAM
专业提示:检查 Windows 10 PC RAM
- Hit the Windows key, type About your PC, and click Open.
点击 Windows 键,键入 关于您的 PC,然后单击 可选.
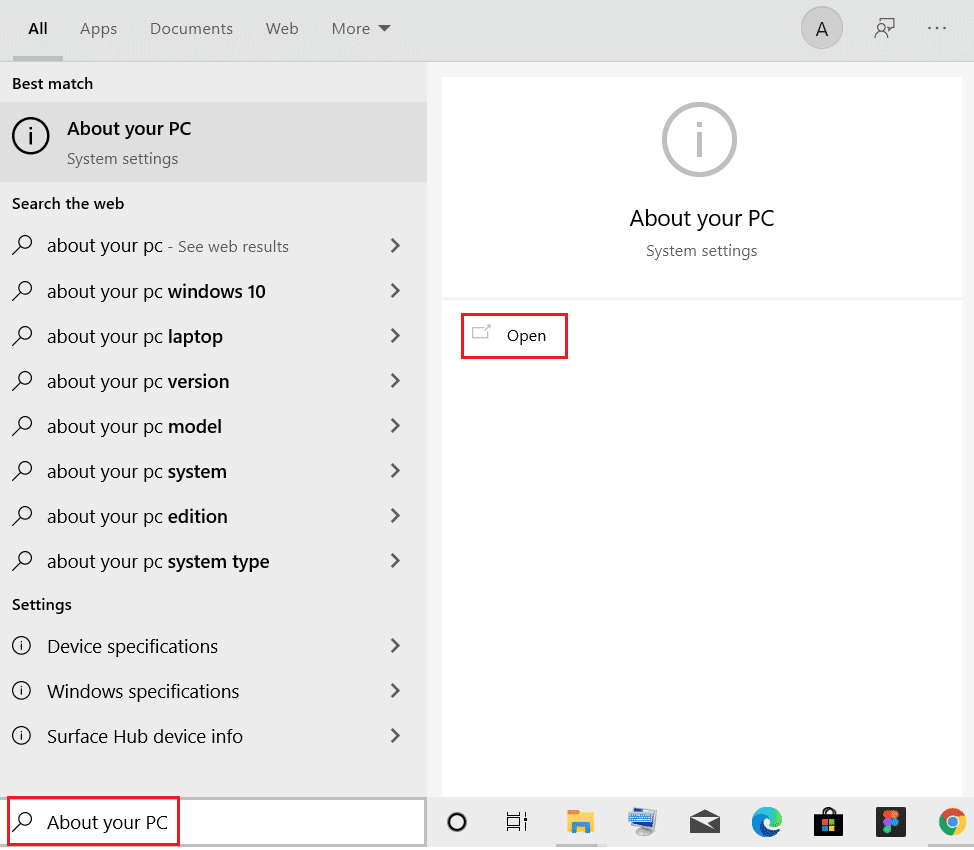
- Scroll down and check the Installed RAM label under Device specifications.
向下滚动并检查设备规格下的已安装 RAM 标签。
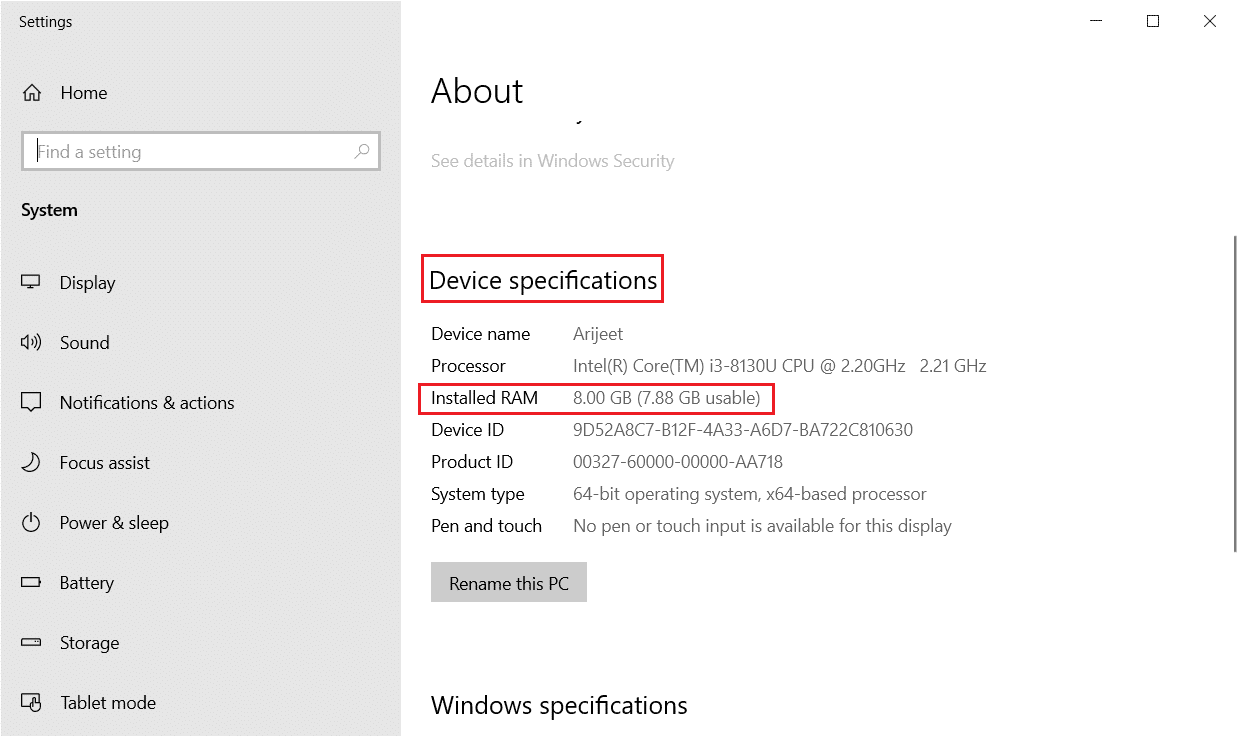
- To convert GB to MB, either perform a Google Search or use calculator as 1GB = 1024MB.
要将 GB 转换为 MB,请执行 Google 搜索或使用计算器,因为 1GB = 1024MB。
Sometimes apps running in the background will slow down your CPU due to high usage. So, to improve your PC performance you can disable your background apps. If you wish to improve the overall performance of your computer and reduce the number of system resources used by background processes/services, consider uninstalling applications that you rarely use. Read our guide on How to Fix High CPU Usage on Windows 10. to learn more._
有时,由于使用率高,在后台运行的应用程序会降低 CPU 的速度。因此,要提高您的 PC 性能,您可以禁用后台应用程序。如果您希望提高计算机的整体性能并减少后台进程/服务使用的系统资源数量,请考虑卸载您很少使用的应用程序。
Windows 系统总是占用内存过高的解决方法
緈福的街口于 2024-10-16 20:53:42 发布
最近发现 Windows 系统更新后系统变卡了,打开任务管理器发现主要以下两个进程占用内存较大
-
Antimalware Service Executable
-
wsappx
还有内存总是大于 50%,刚买的电脑也是这样,下面是解决方法。
1. Antimalware Service Executable 占用 CPU 过多
1.1 问题
Antimalware Service Executable 在后台会扫描自己的文件夹,会出现占用 CPU 过多的情况。

1.2 解决方法:关闭实时保护,并且添加排除项
1、在设置中打开 Windows 安全中心,点击病毒和威胁防护

2、进入管理设置

3、将实时保护和云提供的保护关闭

4、找到下面的排除项,点击或删除排除项

5、添加排除项,选择文件夹,这里我选择的是 C 盘和 D 盘


2. wsappx 占用 CPU 过多
2.1 问题
wsappx 进程的两个子服务主要负责处理、安装、删除和更新 Windows Store 应用程序,wsappx 显示占用 CPU 过多

2.2 解决方法:关闭应用更新等选项
1、点击开始菜单,打开 Microsoft Store
2、点击右上角头像的设置

3、将应用更新等红框部分全部关闭

3. 内存一直高于 50%
3.1 解决方法 1:关机,重启
如果一直不关机或者开启快速启动,即使关闭了所有应用程序,内存显示也会一直大于 50%,这时候需要关机一会儿,再重启。
3.2 解决方法 2:关闭快速启动
1、打开控制面板(从桌面进入此电脑,回退一级目录)


2、进入系统和安全

3、进入电源选项

4、选择电源按钮的功能

5、更改当前不可用设置
6、将启用快速启动关闭

via:
-
What is WSAPPX? WSAPPX High Disk Usage Issue [Fixed]
https://www.thewindowsclub.com/wsappx-fix-high-disk-usage-issue -
What Is WSAPPX? Why Does It Cause High Disk and CPU Usage in Windows 10?
https://www.makeuseof.com/tag/wsappx-high-disk-cpu-usage-windows-10/ -
Fix WSAPPX High Disk Usage in Windows 10 – TechCult
https://techcult.com/fix-wsappx-high-disk-usage-in-windows-10/ -
Desktop vs. Microsoft Store Apps: Which Should You Download?
https://www.makeuseof.com/tag/desktop-vs-windows-store-apps-download/ -
How to Turn Off Automatic App Updates in Windows 10
https://www.makeuseof.com/tag/turn-off-automatic-app-updates-windows-10/ -
How to Fix hkcmd High CPU Usage – TechCult
https://techcult.com/how-to-fix-hkcmd-high-cpu-usage/ -
Fix DISM Host Servicing Process High CPU Usage – TechCult
https://techcult.com/fix-dism-host-servicing-process-high-cpu-usage/ -
8 Common Microsoft Store and App Issues in Windows 10 (With Fixes)
https://www.makeuseof.com/tag/5-tips-fix-windows-store-app-issues-windows-10/ -
关闭 WIN10 的 wsappx 进程服务_svchost.exe wsappx-CSDN 博客 qubernet 于 2018-10-06 17:02:13 发布
https://blog.csdn.net/qubernet/article/details/82952239 -
wsappx 是什么进程?wsappx 怎么关闭?-CSDN 博客 石大师 于 2022-05-12 17:35:07 发布
https://blog.csdn.net/xitongzhijianet/article/details/124736123 -
win10 的高占用 CPU 的进程 wsappx 关闭指南 + 解决 win10 应用商店打不开_win10 突然被 uwp 高占用 - CSDN 博客 狂小虎 已于 2023-10-11 11:28:59 修改
https://blog.csdn.net/Davidietop/article/details/111303807 -
Windows 系统总是占用内存过高的解决方法_antimalware service executa 占内存 - CSDN 博客 緈福的街口 于 2024-10-16 20:53:42 发布
https://blog.csdn.net/qq_38473254/article/details/142873057


 288
288

 被折叠的 条评论
为什么被折叠?
被折叠的 条评论
为什么被折叠?
 到【灌水乐园】发言


