


 本文详细指导了如何通过蓝牙与串口在香橙派Zero3上实现WiFi配网,包括准备工作、硬件连接、Python脚本的编写与运行,以及注意事项和总结。
【香橙派zero3蓝牙串口wifi配网教程】
1. 简介
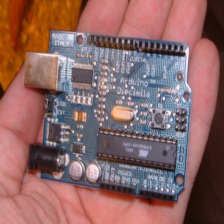
香橙派Zero3是一款基于H618处理器的单板计算机,具有丰富的接口和强大的性能。本教程将指导您如何通过蓝牙串口实现WiFi配网。

香橙派是一款开源的单板卡片电脑,新一代的arm64开发板,它可以运行AndroidTV 12、Ubuntu 和 Debian等操作系统。香橙派开发板(Orange Pi Zero 3)使用全志H618 系统级芯片,同时拥有 1GB 或 1.5GB 或 2GB 或4GB LPDDR4 内存。
2. 准备工作
- 确保香橙派Zero3已经安装了Linux 桌面版或服务器系统。
- 准备一块支持蓝牙5.0模块,用于连接香橙派Zero3串口5和电脑。
2.1 zero3串口5开启

- 下载 wiringOP 的代码
orangepi@orangepi:~$ sudo apt update
orangepi@orangepi:~$ sudo apt install -y git
orangepi@orangepi:~$ git clone https://github.com/orangepi-xunlong/wiringOP.git -b next
- 编译安装 wiringOP
orangepi@orangepi:~$ cd wiringOP
orangepi@orangepi:~/wiringOP$ sudo ./build clean
orangepi@orangepi:~/wiringOP$ sudo ./build
-
由 26pin 接口的原理图可知,可用的 uart 为 uart5

-
Linux 系统中 uart5 默认是关闭的,需要手动打开才能使用。打开步骤如下所示:
a. 首先运行下 orangepi-config,普通用户记得加 sudo 权限
orangepi@orangepi:~$ sudo orangepi-config
b. 然后选择 System

c. 然后选择 Hardware

d. 然后使用键盘的方向键定位到下图所示的位置,再使用空格选中 ph-uart5

e. 然后选择保存

f. 然后选择

g. 然后选择重启系统使配置生效

- 进入 linux 系统后,先确认下/dev 下是否存在 uart5 的设备节点
注意,linux5.4 系统为/dev/ttyAS5。
orangepi@orangepi:~$ ls /dev/ttyS5
/dev/ttyS5
- 然后开始测试 uart5 接口,先使用杜邦线短接要测试的 uart5 接口的
rx 和 tx
| uart5 | |
|---|---|
| tx 引脚 | 对应 26pin 的 8 号引脚 |
| rx 引脚 | 对应 26pin 的 10 号引脚 |
- 使用 wiringOP 中的 gpio 命令测试串口的回环功能如下所示,如果能看到下面的
打印,说明串口通信正常
orangepi@orangepi:~$ gpio serial /dev/ttyS5 # linux-6.1 测试命令
Out: 0: -> 0
Out: 1: -> 1
Out: 2: -> 2
Out: 3: -> 3^C
2.2 硬件连接
香橙派Zero3串口5的RXTX分别接蓝牙TXRX,然后正常供电3.3v和GND

蓝牙可以用5.0或者esp32c3模块
esp32c3main.c程序
#include <WiFi.h>
#include <WebServer.h>
#include <SoftwareSerial.h>
// #include "HardwareSerial.h"
#include <WiFi.h>
#include <BLEDevice.h>
#include <BLEServer.h>
#include <BLEUtils.h>
#include <BLE2902.h>

BLECharacteristic *pCharacteristic;
bool deviceConnected = false;
// char BLEbuf[40] = { 0 };
// uint32_t cnt = 0;
String message_c;
#define SERVICE_UUID "6E400001-B5A3-F393-E0A9-E50E24DCCA9E"  // UART service UUID
SoftwareSerial myPort(0, 1);                                 //,与短信模块通信
class MyServerCallbacks : public BLEServerCallbacks {
  void onConnect(BLEServer *pServer) {
    deviceConnected = true;
  };

  void onDisconnect(BLEServer *pServer) {
    deviceConnected = false;
  }
};

class MyCallbacks : public BLECharacteristicCallbacks {
  void onWrite(BLECharacteristic *pCharacteristic) {
    String ssid;
    String password;
    const char *message;
    uint8_t count = 0;
    char ssidBuf[20];
    char passwordBuf[20];
    std::string rxValue = pCharacteristic->getValue();
    if (rxValue.length() > 0) {
      // Serial.println(String(rxValue));
      message = rxValue.c_str();
      if (sscanf(message, "%19[^:]:%19s", ssidBuf, passwordBuf) == 2) {
        // Convert C strings to String objects
        ssid = String(ssidBuf);
        password = String(passwordBuf);
      } else {
        Serial.println("Failed to parse SSID and password");
      }
      WiFi.begin(ssid.c_str(), password.c_str());
      while (WiFi.status() != WL_CONNECTED) {
        count++;
        // Serial.println("Connecting WiFi");
        pCharacteristic->setValue("Connecting");
        pCharacteristic->notify();  // Send the value to the app!
        if (count >= 20) {
          Serial.println("connect fail!");
          pCharacteristic->setValue("connect fail");
          pCharacteristic->notify();  // Send the value to the app!
          ESP.restart();              // 执行软件重启
        }
        delay(200);
      }
      pCharacteristic->setValue(" success");
      pCharacteristic->notify();  // Send the value to the app!
      // Serial.println("Connected");
      // Print the values
      myPort.write(message);
      myPort.write('\n');
      Serial.println(message);
    }
  }
};

void smartConfig() {
  // Create the BLE Device
  BLEDevice::init("ESP32 BLE");
  // 创建蓝牙服务器
  BLEServer *pServer = BLEDevice::createServer();
  pServer->setCallbacks(new MyServerCallbacks());
  // // 创建广播服务的UUID
  BLEService *pService = pServer->createService(SERVICE_UUID);
  // 创建广播服务的UUID
  pCharacteristic = pService->createCharacteristic(SERVICE_UUID, BLECharacteristic::PROPERTY_NOTIFY);
  pCharacteristic->addDescriptor(new BLE2902());
  BLECharacteristic *pCharacteristic = pService->createCharacteristic(SERVICE_UUID, BLECharacteristic::PROPERTY_WRITE);
  pCharacteristic->setCallbacks(new MyCallbacks());
  // 开始蓝牙服务
  pService->start();
  // 开始广播
  pServer->getAdvertising()->start();
  Serial.println("Waiting");
}
void setup() {
  Serial.begin(115200);
  myPort.begin(115200);
  myPort.println("ok");
  // if (!AutoConfig()) {
  smartConfig();
  // }
}

void loop() {
  // WiFiClient client;
  // const char* host = "www.baidu.com";
  // const int httpPort = 80;

  // Serial.print("Connecting to ");
  // Serial.println(host);

  // if (!client.connect(host, httpPort)) {
  //   Serial.println("Connection failed");
  //   return;
  // }

  // Serial.println("Connected to server successfully");
  // client.stop();
  delay(5000);
}
3. 配网步骤
3.1 连接串口
使用USB转串口线将香橙派Zero3的串口与电脑连接。
3.2 打开串口终端
在电脑上打开串口终端软件,如PuTTY或Tera Term,设置正确的串口参数(波特率115200,数据位8,停止位1,无校验位)。
3.3 运行配网脚本
在香橙派Zero3上运行以下Python脚本,实现WiFi配网:
bluetooth.py
import serial
import subprocess
import time

# UART5配置
uart_port = '/dev/ttyS5'
baud_rate = 115200
ser = serial.Serial(uart_port, baud_rate)

while True:
     print(f"Smartconfig")
     with serial.Serial(uart_port, baud_rate) as ser:
         ser.write(b'Hello, world!\n')
         try:
             # 从UART5接收Wi-Fi信息
             wifi_info = ser.readline().decode('utf-8').strip()
             print(f"Received Wi-Fi info from UART5: {wifi_info}")

             # 解析Wi-Fi名称和密码
             wifi_parts = wifi_info.split(':')
             if len(wifi_parts) != 2:
                 print("Invalid Wi-Fi info format. Expected 'Wi-Fi_name:Wi-Fi_password'.")
                 continue

             wifi_name, wifi_password = wifi_parts
             orangepi_password = "orangepi"

             # 验证密码有效性(此处仅为示例,实际验证逻辑请根据需求定制)
             if len(wifi_password) < 8:
                 print("Invalid Wi-Fi password. Minimum length is 8 characters.")
                 continue

             # 扫描Wi-Fi网络
             print("Scanning Wi-Fi networks...")
             scan_process = subprocess.Popen(['nmcli', 'dev', 'wifi'], stdout=subprocess.PIPE )
             time.sleep(5)   # 等待一段时间,以便接收扫描结果(可根据实际响应时间调整)
             scan_process.send_signal(subprocess.signal.SIGINT )   # 发送Ctrl+C终止扫描
             scan_output, _ = scan_process.communicate()
             print("Scan completed.")

             # 连接Wi-Fi
             print(f"Connecting to Wi-Fi {wifi_name}...")
             expect_script = f"""
                 spawn sudo nmcli dev wifi connect "{wifi_name}" password "{wifi_password}"
                 expect "*?assword*"
                 send "{orangepi_password}\r"
                 interact
             """
             with open('/tmp/connect_wifi.exp', 'w') as f:
                 f.write(expect_script)
             subprocess.run(['/usr/bin/expect', '/tmp/connect_wifi.exp'])

             # 检查当前Wi-Fi连接状态
             status_command = 'nmcli dev status'
             status_process = subprocess.run(status_command, shell=True, capture_output=True, text=True)
             if wifi_name in status_process.stdout:
                 print(f"Currently connected to Wi-Fi {wifi_name}.")
             else:
                 print("Not currently connected to Wi-Fi.")

             ser.write(b'ok\n')
             break   # 如果成功连接Wi-Fi,跳出循环

         except Exception as e:
             print(f"An error occurred: {str(e)}")

         finally:
             ser.close()
然后添加bluetooth.py脚本权限,python3运行脚本,就可以开始配网
sudo chmod +x bluetooth.py
python3 bluetooth.py
3.4 输入WiFi信息
连接你的蓝牙设备ESP32 ble,然后安装蓝牙调试助手。在中输入WiFi名称和密码,格式为“Wi-Fi名称:Wi-Fi密码”(iQ00:12345678),然后按回车键。
如果输入的WiFi信息正确,香橙派Zero3将自动连接到WiFi网络。连接成功后,串口终端会显示“Currently connected to Wi-Fi Wi-Fi名称”。

4. 注意事项
- 请确保输入的WiFi密码长度至少为8个字符。
- 如果配网失败,请检查WiFi名称和密码是否正确,以及WiFi网络是否可用。
- 本配网python脚本没有设置自启动,大家可以自己设置自启动就可以愉快配网啦。
5. 总结
🥳🥳🥳现在,通过以上步骤,您已经成功地为香橙派Zero3配置了WiFi网络。现在,您可以开始探索香橙派Zero3的无限可能了!🥳🥳🥳科学地合理地进行创作和发挥效益,然后为人类社会发展贡献一点微薄之力。🤣🤣🤣
如果你有任何问题,可以通过下面的二维码加入鹏鹏小分队,期待与你思维的碰撞😘😘😘


 1427
1427

 被折叠的 条评论
为什么被折叠?
被折叠的 条评论
为什么被折叠?
 到【灌水乐园】发言


