


 本文介绍如何在Xcode项目中整合Maxwell LUX SDK,通过使用Cocoapods或Swift Package Manager,实现应用程序外观的实时更新。通过LUX Streams功能,开发者能够即时预览Maxwell App中的UI更改,提升开发效率。
f.lux使用
在本教程中,我们将学习如何将Maxwell应用程序与Xcode集成。 (In this tutorial we will learn how to integrate Maxwell app with Xcode.)
Lets start by creating a new project with xcode and then heading to the Maxwell design repo in github, from here you can find the instructions to install the lux dependency as an SMP library or Cocoapod.
让我们先用xcode创建一个新项目,然后转到github中的Maxwell设计仓库,从这里您可以找到将lux依赖项安装为SMP库或Cocoapod的说明。
Install the Maxwell App for free at http://maxwell.design
在http://maxwell.design免费安装Maxwell App
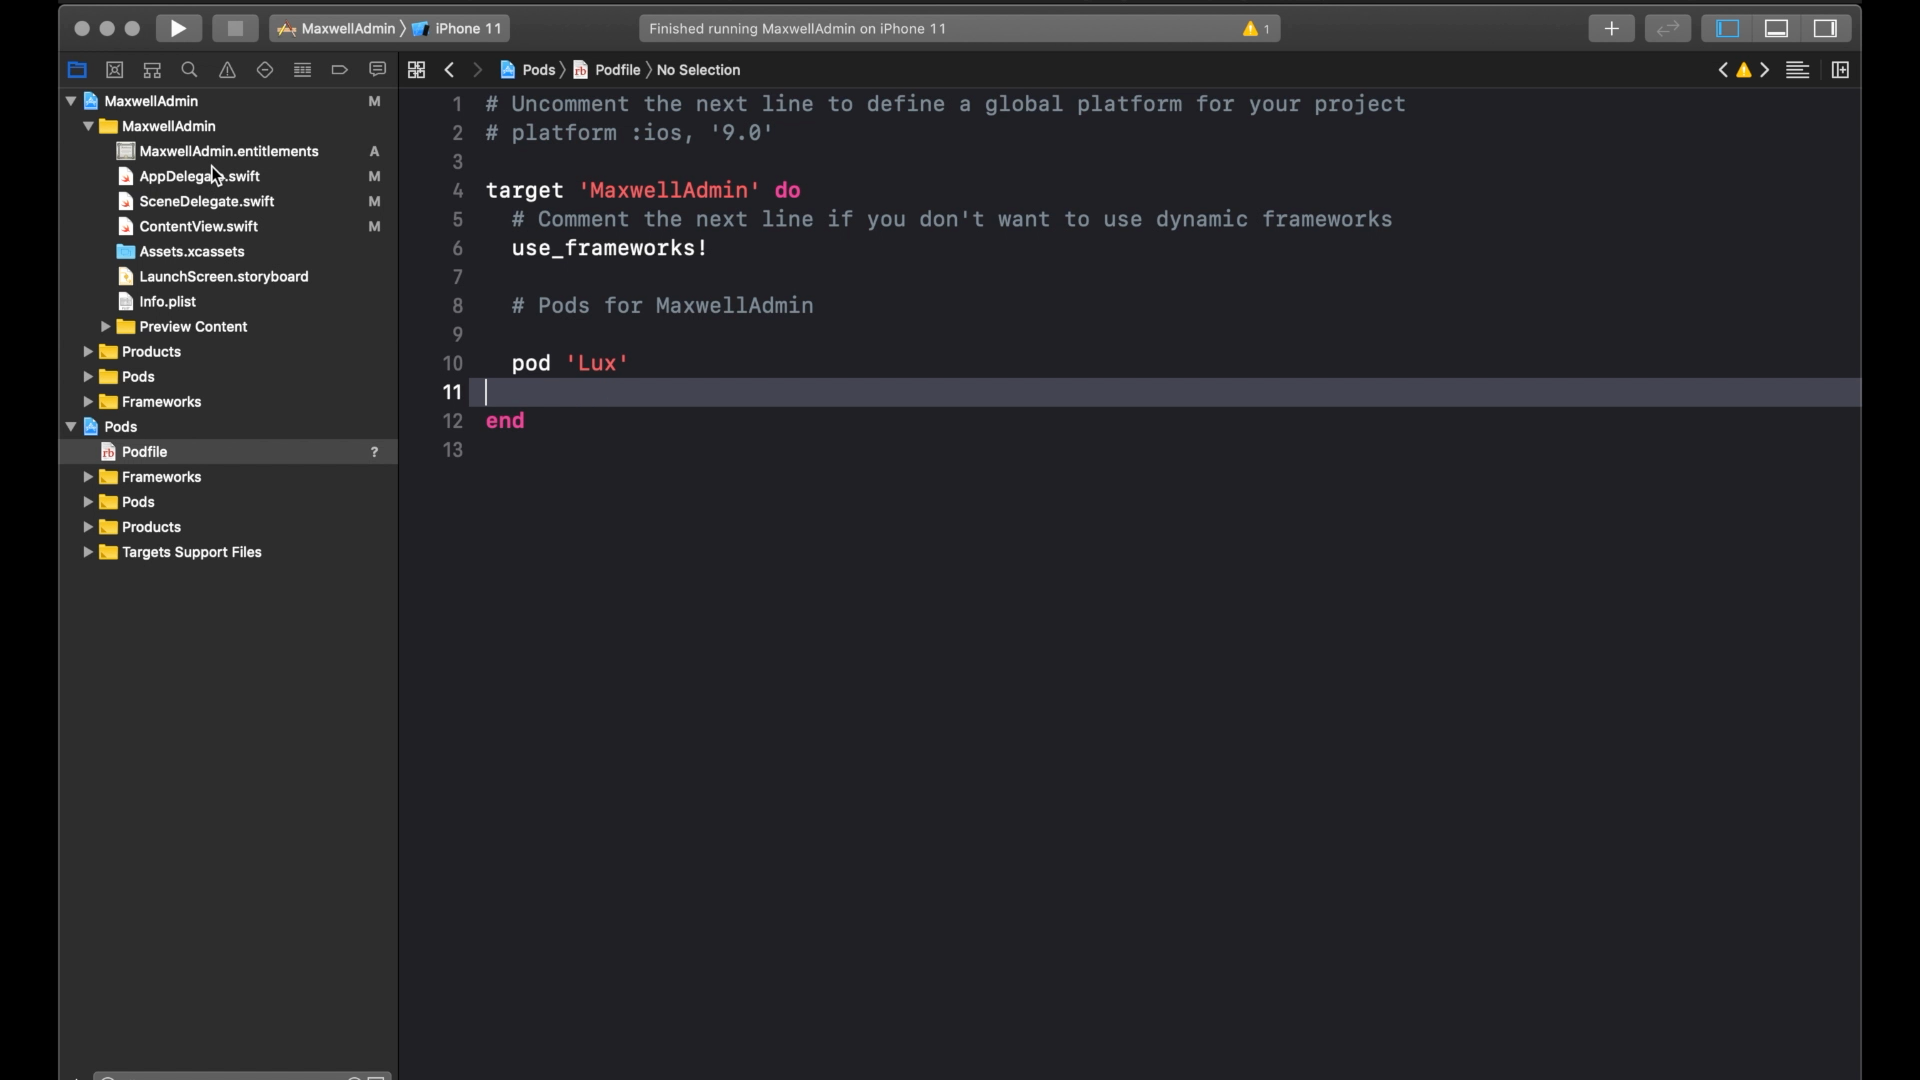
In this example we have configured cocoapods, but we recommend to use SPM dependency as these are officially supported by apple.
在此示例中,我们配置了cocoapods,但是我们建议使用SPM依赖关系,因为Apple正式支持这些依赖关系。

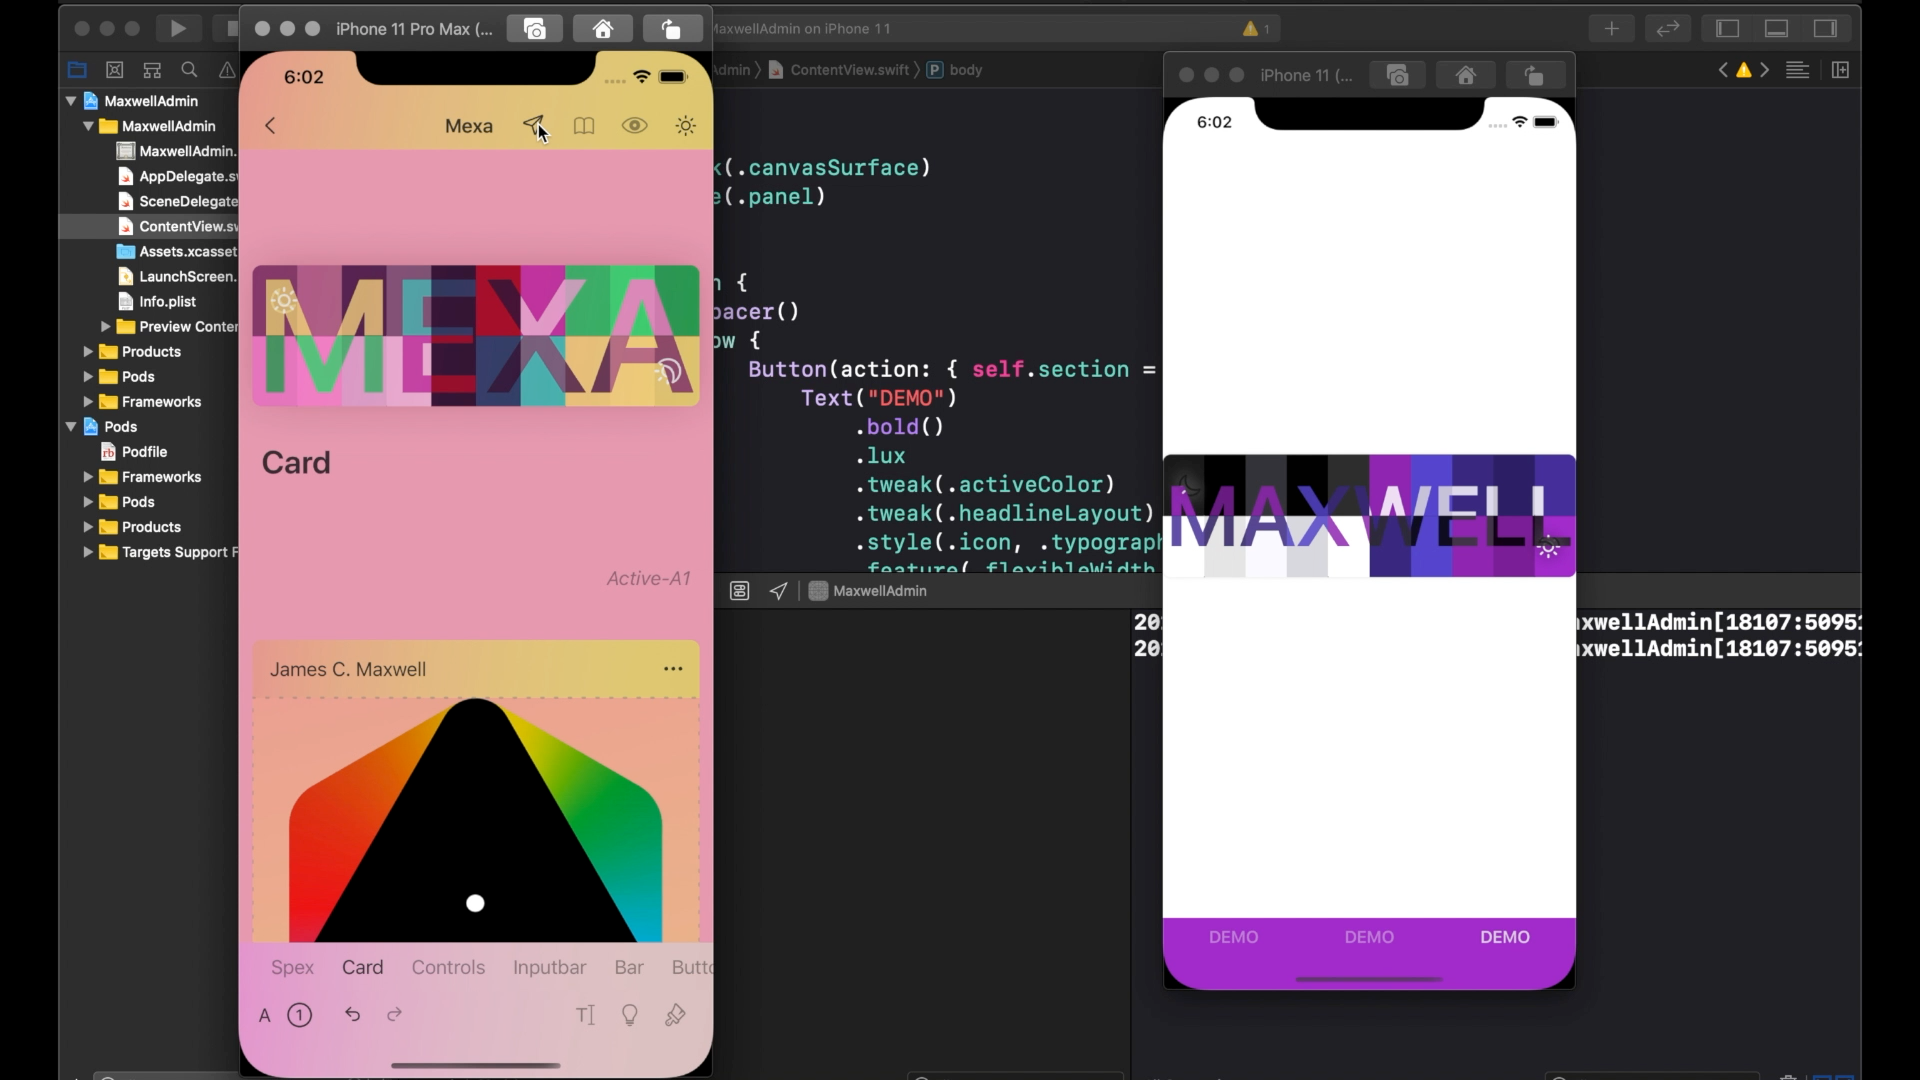
Once ready let’s head to the content view and import the lux framework. We’ll be looking to the sample sample app present in some promotional materials. This simple app allows us to display the active Look in the application. It also display a basic bottom bar with three options to demo the bar surface.
准备就绪后,让我们进入内容视图并导入lux框架。 我们将寻找一些促销材料中的示例应用样本。 这个简单的应用程序使我们能够在应用程序中显示活动的外观。 它还显示带有三个选项的基本底部条,以演示条表面。
So now let’s see how we can customize it.
现在,让我们看看如何自定义它。
Lets go back to the Maxwell app and select one look.
让我们回到Maxwell应用程序并选择一种外观。
- Open the editor. 打开编辑器。
- From the editor start on the paper plane icon, this will open the publishing and sharing options. 从编辑器的图纸平面图标开始,这将打开发布和共享选项。

- From here tap Xcode options and then Xcode init. 从这里点击Xcode选项,然后点击Xcode初始化。

- This will copy the required configuration! 这将复制所需的配置!
Now we can go back to the Xcode and select the scene delegate.
现在我们可以回到Xcode并选择场景委托。

Right after configuring the main window, lets create a new setup look function, This will contain a simple do catch statement.
在配置主窗口之后,让我们创建一个新的设置外观函数,它将包含一个简单的do catch语句。
Inside it lets paste new code coming from the Maxwell app,
在其中可以粘贴来自Maxwell应用程序的新代码,

( If you are using the Simulator, you may need to select “get paste board” )
(如果您使用的是模拟器,则可能需要选择“获取粘贴板”)
- Just paste it inside the try closure and we are ready! 只需将其粘贴到try闭包中,我们就可以准备好!

Now we need to recompile the application. As you can see, the application is opened and it’s showing the look that we have just configured!
现在我们需要重新编译应用程序。 如您所见,该应用程序已打开,并显示了我们刚刚配置的外观!
This is super cool, but this entire process might be a bit convoluted, especially when you are iterating through many UI changes.
这非常酷,但是整个过程可能有些麻烦,尤其是当您迭代许多UI更改时。
For this we imagined a better way: Introducing LUX Streams.
为此,我们设想了一种更好的方法:引入LUX流。
勒克斯溪流 (Lux Streams)

To access the LUX Streams simply tap on the antenna icon then from the Maxwell app,
要访问LUX Stream,只需点击天线图标,然后在Maxwell应用中,

- Then select stream, 然后选择流
- When ready select play. 准备就绪后,选择播放。
If you are using the simulator, your might see an authorization dialog, accept it.
如果使用模拟器,则可能会看到一个授权对话框,请接受它。
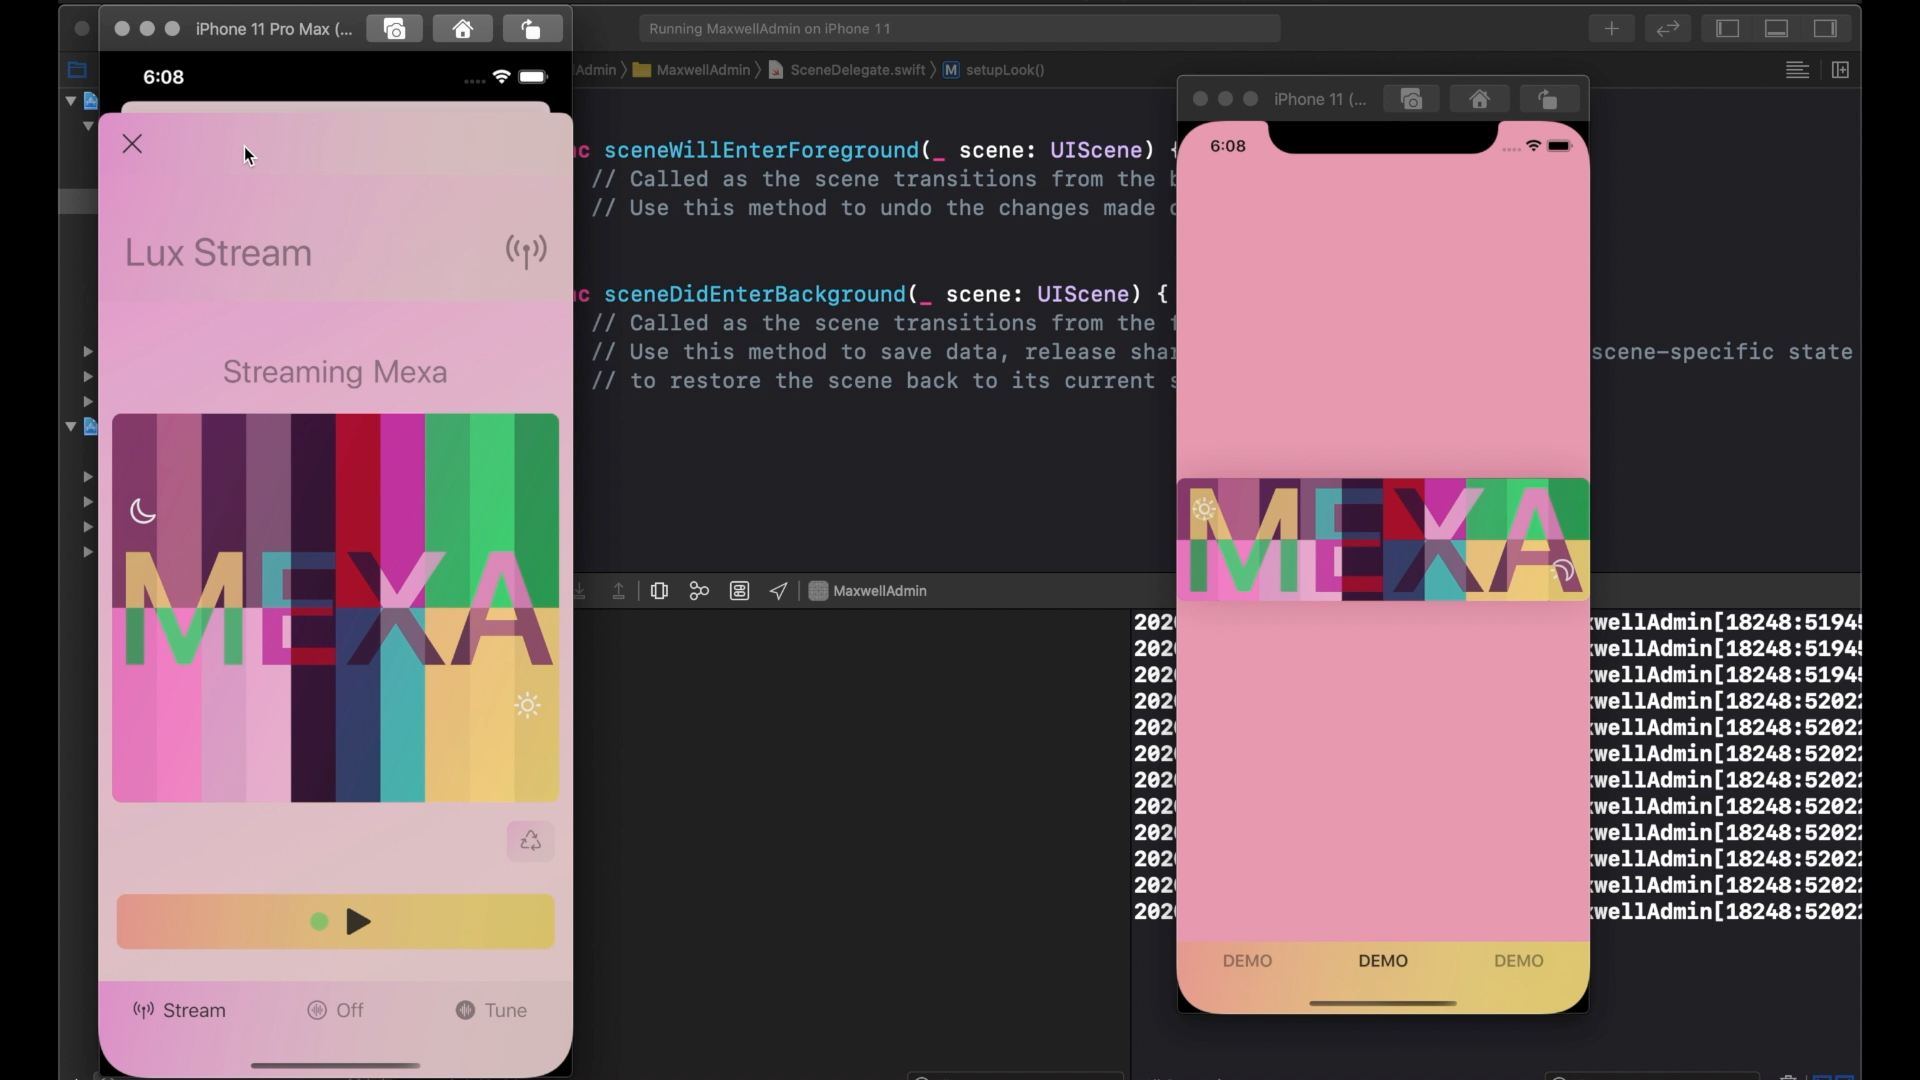
- The play button indicator will change to green once our connection is established! 建立连接后,播放按钮指示灯将变为绿色!
From the demo app, we just need to add a configuration line to any lux file application to receive connections from any nearby Maxwell application.
从演示应用程序中,我们只需要向任何lux文件应用程序添加配置行即可接收来自附近任何Maxwell应用程序的连接。
Let’s go back to Xcode, from the scene delegate return to the setup look function and right after the try/catch block add the following command:
让我们回到Xcode,从场景委托返回到设置外观函数,然后在try / catch块之后添加以下命令:
Look.tunning()
Look.tunning()

And that’s it, the next time the application launches it will automatically receive any LUX Stream from a nearby Maxwell App.
就是这样,下次启动应用程序时,它将自动从附近的Maxwell App接收任何LUX Stream。
Now back to the Maxwell App, let’s hit play again. This time we get the registration dialog, let’s allow it.
现在回到Maxwell App,让我们再次点击播放。 这次我们得到了注册对话框,让我们允许它。
When we see a green next to the play button, it means the connection is fully established, from here on any changes performed in the Maxwell will reflect live in the demo app. Let’s try it!
当我们在播放按钮旁边看到绿色时,表明连接已完全建立,从此处开始,在Maxwell中执行的任何更改都会反映在演示应用程序中。 试试吧!
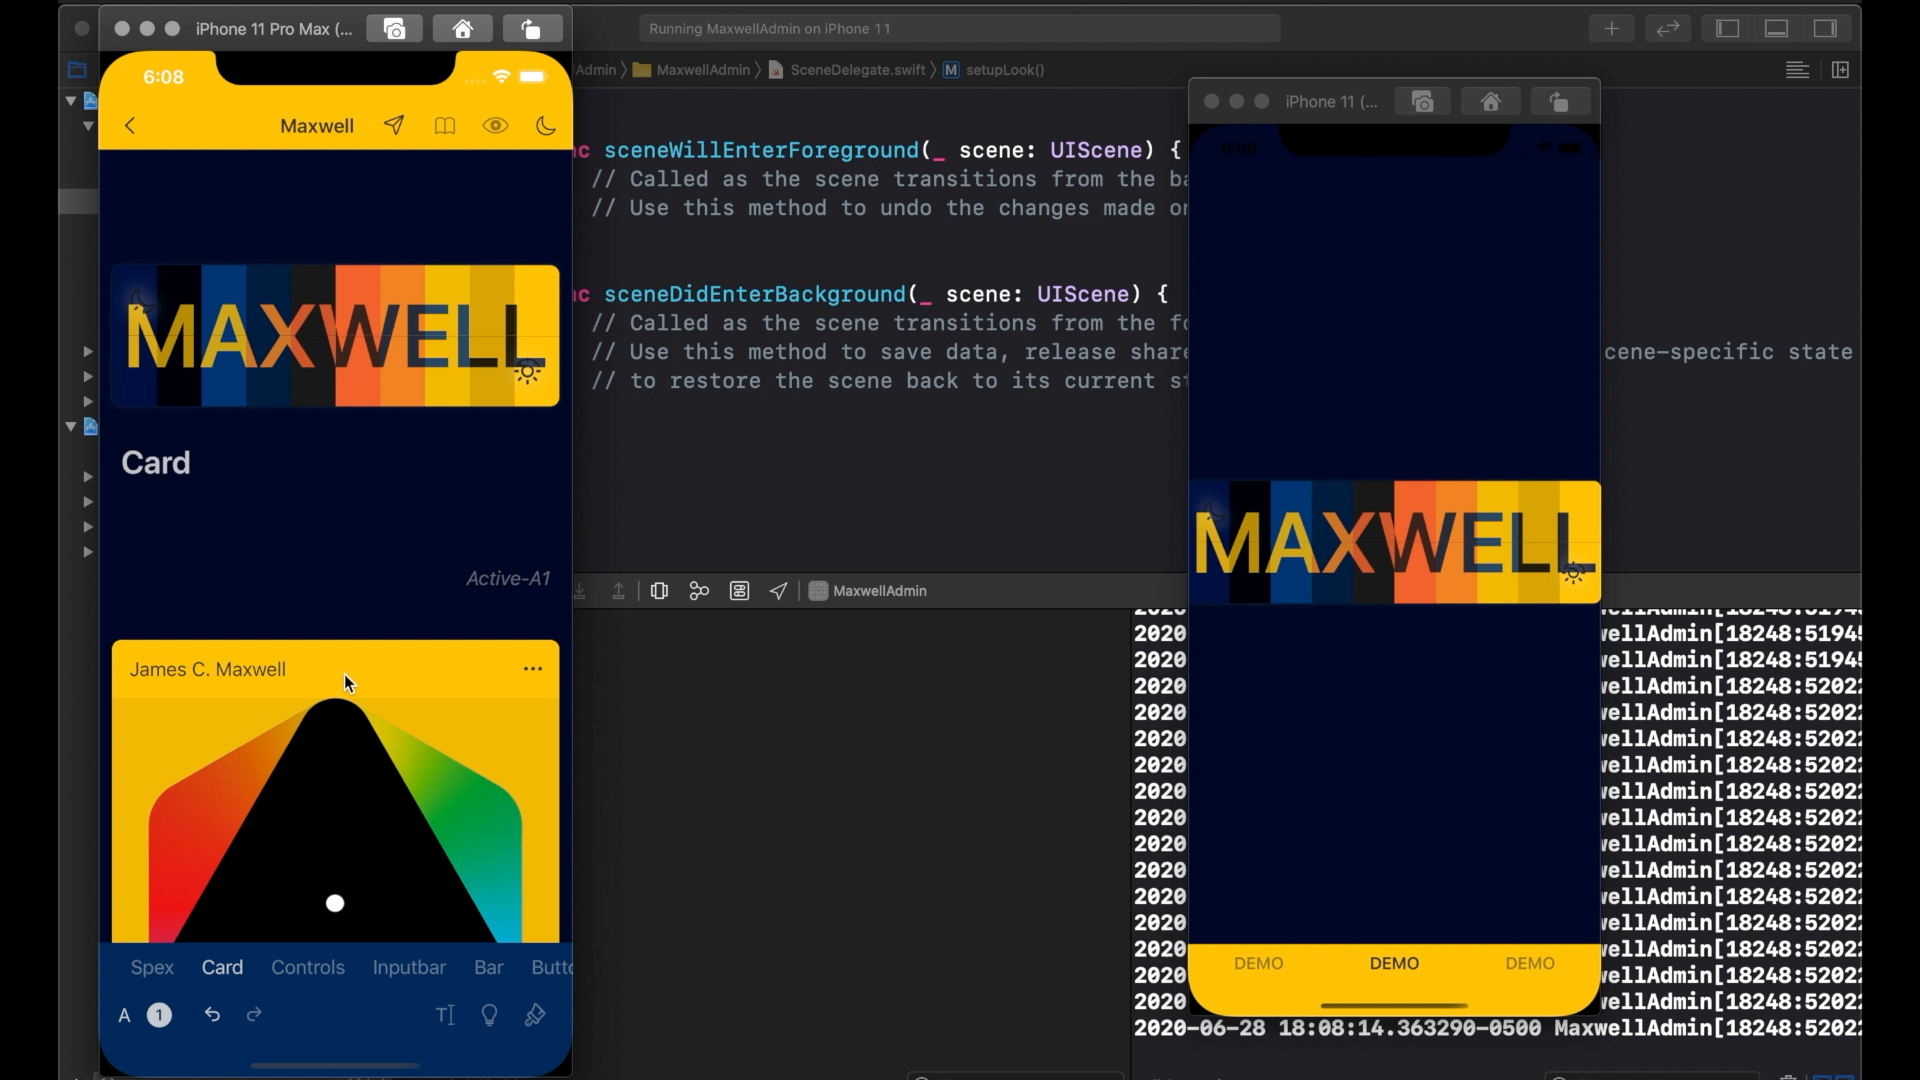
For example let’s select a different Look. Voila, it changed!
例如,让我们选择其他外观。 瞧,它变了!
Now let make a changes to this Look specification: Notice how all changes are reflecting immediately in the demo application.
现在,让我们对该外观规范进行更改:注意所有更改如何立即反映在演示应用程序中。

Lux Streams are far superior to Xcode canvas previews. The Canvas preview only work with individual and specialized Views during development, while the Maxwell+LUX SDK will update your entire application at any moment even after launch.
Lux Streams远远优于Xcode画布预览。 在开发过程中,Canvas预览仅适用于单个视图和专用视图,而Maxwell + LUX SDK即使在启动后也可以随时更新整个应用程序。
Further more, you can enable this functionality to your end users, so they can create their own looks from the Maxwell app or import it from your social channels, you can also allow users to import lux from the files app or from the photo library.
此外,您可以为最终用户启用此功能,以便他们可以从Maxwell应用程序创建自己的外观或从您的社交渠道导入它,还可以允许用户从文件应用程序或照片库导入勒克斯。
It’s very easy to change the Application Look at any moment. When required just call again the “look set data” function.
随时更改应用程序外观非常容易。 需要时,只需再次调用“外观设置数据”功能即可。

In order to receive updates for Look changes in any view, It’s enough to observe the changes in the Look state. Just by implementing this line, any View will be will recreated on every look update.
为了在任何视图中接收外观更改的更新,只需在外观状态下观察更改即可。 只需实施这一行,任何外观更新都将重新创建任何View。

And that’s it.This is how easy is to integrate Maxwell LUX in your coming application!
就是这样,将Maxwell LUX集成到您即将到来的应用程序中变得如此容易!
Continue here:
在这里继续:
翻译自: https://medium.com/maxwell-lux/develop-with-lux-8fc1b8aeae3c
f.lux使用


 1498
1498

 被折叠的 条评论
为什么被折叠?
被折叠的 条评论
为什么被折叠?
 到【灌水乐园】发言


