


In this article, I’m sharing how to modularize both iOS and Android apps into different modules. There are many benefits of modularizing our apps into smaller parts, such as cleaner architecture code (i.e., preventing circular dependencies) and scaling mobile development.
在本文中,我将分享如何将iOS和Android应用模块化到不同的模块中。 将我们的应用程序模块化为更小的部分有很多好处,例如更简洁的体系结构代码(即,防止循环依赖)和扩展移动开发。
示例应用 (Example App)
To share how to modularize the app, I’ll be using a simple networking app that’s shared below.
为了共享如何模块化应用程序,我将使用下面共享的简单网络应用程序。
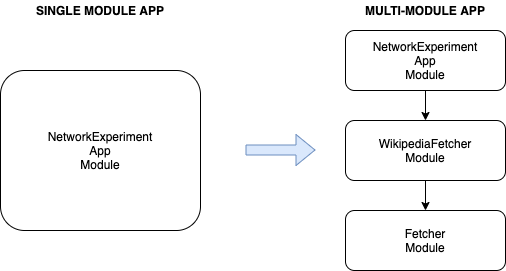
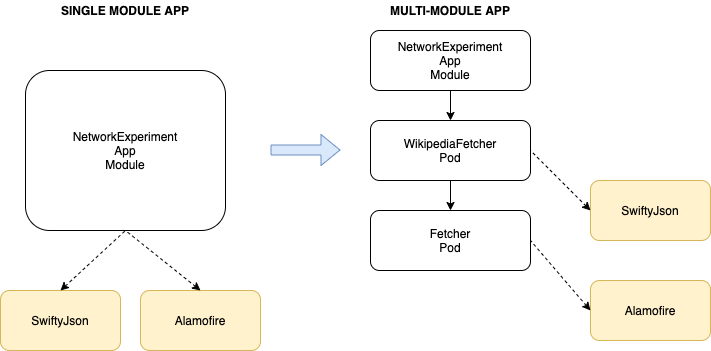
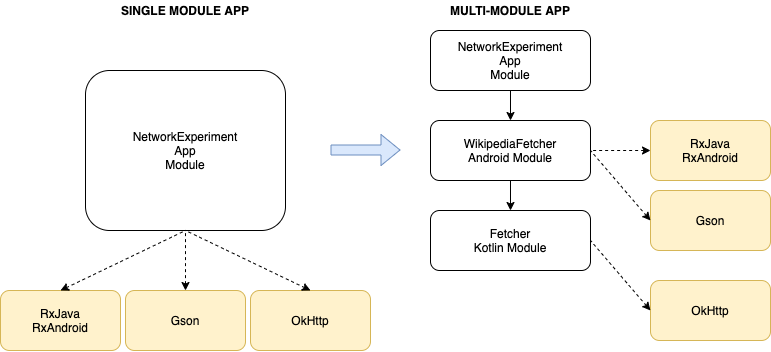
In order to demonstrate modularization, I’ll be partitioning the app structure into different parts, as shown below. This also demonstrates the transitive module-relationship linkage.
为了演示模块化,我将把应用程序结构划分为不同的部分,如下所示。 这也说明了传递模块-关系链接。
Besides, we shall also leverage the knowledge of how to manage dependencies (e.g., a third-party library) to handle the link between different modules.
此外,我们还将利用如何管理依赖项的知识(例如,第三方库)来处理不同模块之间的链接。
在iOS中模块化 (Modularize in iOS)
We’re using the CocoaPods pod lib create feature to create the pod module. Each module will now link to their needed external pods, as shown below.
我们正在使用CocoaPods pod lib create功能创建pod模块。 每个模块现在将链接到其所需的外部Pod,如下所示。
Before creating it, I made a folder named modules under my project root folder so all the custom-created pods can be group together there. In our case, it’ll look like this:
在创建它之前,我在项目根文件夹下创建了一个名为modules文件夹,以便可以将所有自定义创建的Pod组合在一起。 在我们的情况下,它将如下所示:
RootProjectFolder
|-modules
  |-Fetcher
  |-WikipediaFetcher
Now we’re ready to create those pods.
现在我们准备创建这些吊舱。
创建广告连播(用于Fetcher) (Create the pod (for Fetcher))
Get into the modules folder, and just use the below command:
进入modules文件夹,只需使用以下命令:
pod lib create <Pod Name>In our case, the pod’s name is Fetcher.
在我们的案例中,广告连播的名称为Fetcher 。
A list of questions will be asked:
将询问以下问题:
What platform do you want to use?? [ iOS / macOS ]
What language do you want to use?? [ Swift / ObjC ]
Would you like to include a demo application with your library? [ Yes / No ]
Which testing frameworks will you use? [ Quick / None ]
Would you like to do view based testing? [ Yes / No ]
Click Enter to get the default settings. The pod will be created.
单击Enter以获取默认设置。 吊舱将被创建。
Note: The example project will be automatically launched in Xcode if you like to work from there. If not, you could just close it and delete it.
注意:如果您想在Xcode中工作,示例项目将在Xcode中自动启动。 如果没有,您可以将其关闭并删除。

编辑Podspec(用于Fetcher) (Edit the Podspec (for Fetcher))
After the pod is increased, get into the module folder (e.g., Fetcher). You’ll find this file: fetcher.podspec.
吊舱增加后,进入模块文件夹(例如Fetcher )。 您将找到此文件: fetcher.podspec 。
The header shows you the name and version, as well as a description you can edit.
标题显示您的名称和版本,以及您可以编辑的描述。
Pod::Spec.new do |s|
s.name             = 'Fetcher'
s.version          = '0.1.0'
s.summary          = 'A short description of Fetcher.'
The other part you need to notice is in the below section, where you can add further dependencies. For our case, I changed the target from '8.0' to '9.0' and added s.dependency 'Alamorefire', '4.8.1' .
您需要注意的另一部分在以下部分中,您可以在其中添加更多的依赖关系。 对于我们的情况,我将target从'8.0'更改为'9.0'并添加了s.dependency 'Alamorefire', '4.8.1' 。
s.ios.deployment_target = '9.0's.dependency 'Alamofire', '4.8.1'
s.source_files = 'Fetcher/Classes/**/*'
The other part to notice is s.source_files. It’s showing where you’ll put your .swift codes in. By default, there’s a file named ReplaceMe.swift there, which you could delete and replace with your own source file.
需要注意的另一部分是s.source_files 。 它显示了将.swift代码放入的位置。默认情况下,这里有一个名为ReplaceMe.swift的文件,您可以删除该文件并将其替换为自己的源文件。
Note: There are other parts in the Podspec that you could modify as you see appropriate.
注意: Podspec中还有其他部分,您可以根据需要进行修改。
将主项目与吊舱链接 (Link the main project with the pod)
The main project won’t know the pod exists yet. To let it know, you can edit the Podfile of the project by adding the following line:
主项目尚不知道豆荚存在。 要知道,您可以通过添加以下行来编辑项目的Podfile :
target 'NetworkExperiment' do
  # Comment the next line if you're not using Swift ....
  use_frameworks!# Pods for NetworkExperiment  pod 'Fetcher', :path => './modules/Fetcher'end
After saving the file, you should do a pod install command to load that to the project workspace.
保存文件后,应执行pod install命令将其加载到项目工作区。
创建pod(WikipediaFetcher) (Create the pod (the WikipediaFetcher))
Following the same steps as for the Fetcher pod, we shall:
遵循与Fetcher窗格相同的步骤,我们将:
Create the pod by running
pod lib create WikipediaFetcherin themodulesfolder.通过在
modules文件夹中运行pod lib create WikipediaFetcher来pod lib create WikipediaFetcher。Edit the
Wikipedia.podspecby adding the needed libraries.通过添加所需的库来编辑
Wikipedia.podspec。
s.ios.deployment_target = '9.0's.dependency 'SwiftyJSON', '5.0.0'
s.dependency 'Fetcher', '0.1.0'
s.source_files = 'WikipediaFetcher/Classes/**/*'
Note: Other than adding the SwiftyJSON, we’ll also need to add the Fetcher as a pod library. Do note that this can only be done after Fetcher is added to the Podfile of the main project.
注意:除了添加SwiftyJSON ,我们还需要将Fetcher添加为Pod库。 请注意,只有在将Fetcher添加到主项目的Podfile后才能执行此操作。
Lastly, add the WikipediaFetcher pod to the main project Podfile.
最后,将WikipediaFetcher窗格添加到主项目Podfile。
target 'NetworkExperiment' do
  # Comment the next line if you're not using Swift...
  use_frameworks!# Pods for NetworkExperiment  pod 'WikipediaFetcher', :path => './modules/WikipediaFetcher'  pod 'Fetcher', :path => './modules/Fetcher'
end
Now, remember to do pod install. That’s it! You have your project set up.
现在,请记住执行pod install 。 而已! 您已经设置了项目。

其他注意事项 (Other notes)
Each of the pods, including the project, needs to access some classes in Alamofire. Each of them access Alamoefire through the
Fetcherpod.每个吊舱(包括项目)都需要访问Alamofire中的某些类。 他们每个人都通过
Fetcher窗格访问Alamoefire。All of the classes and functions in the pod that should be accessible by other pods should be declared
public. This also includes theinitfunction, where one needs to explicitly declare an emptyinit, as below.应当由其他Pod访问的Pod中的所有类和函数都应声明为
public。 这也包括init函数,其中需要显式声明一个空的init,如下所示。
public init() {}From the experiment, even though the pods aren’t linked to the iOS UIKit framework, we could still access them by just using
import UIKit. Personally, I thought it’d bes.ios.framework = 'UIKit'in the Podspec file, but I’m not entirely sure why I could get it without adding the framework. More details here.通过实验,即使Pod没有链接到iOS UIKit框架,我们仍然可以通过使用
import UIKit来访问它们。 就个人而言,我认为Podspec文件中的名称为s.ios.framework = 'UIKit',但我不完全确定为什么不添加框架就可以获取它。 更多细节在这里 。
在Android中模块化 (Modularize in Android)
In Android, we modularize using Android Studio directly. We’ll partition the code, where the libraries will be loaded by individual modules.
在Android中,我们直接使用Android Studio进行模块化。 我们将对代码进行分区,在此库将由各个模块加载。
Here we’ll just create the module at the top level, as they’re handled the same way as the main project (i.e., a single build.gradle file for each of them).
在这里,我们将仅在顶层创建模块,因为它们的处理方式与主项目相同(即,每个模块都有一个build.gradle文件)。
Unlike with iOS, Android has different types of modules to pick from. Here, I’m creating an Android module and a plain Kotlin module, as stated in the diagram above.
与iOS不同,Android具有不同类型的模块可供选择。 如上图所示,在这里,我正在创建一个Android模块和一个普通的Kotlin模块。
创建Fetcher模块 (Create the Fetcher module)
The Fetcher module will only have more Kotlin code accessing the OkHttp library (which doesn’t need an Android framework). Hence, I shall only create a Kotlin module, as below.
Fetcher模块将只有更多的Kotlin代码访问OkHttp库(不需要Android框架)。 因此,我将只创建一个Kotlin模块,如下所示。
Go to File → New → New Module…
转到文件→新建→新建模块…

Then pick “Java or Kotlin Library.”
然后选择“ Java或Kotlin库”。

After that, type the module name. We use lowercase, as typically the package name is in lowercase as well.
之后,键入模块名称。 我们使用小写字母,因为包名通常也是小写字母。
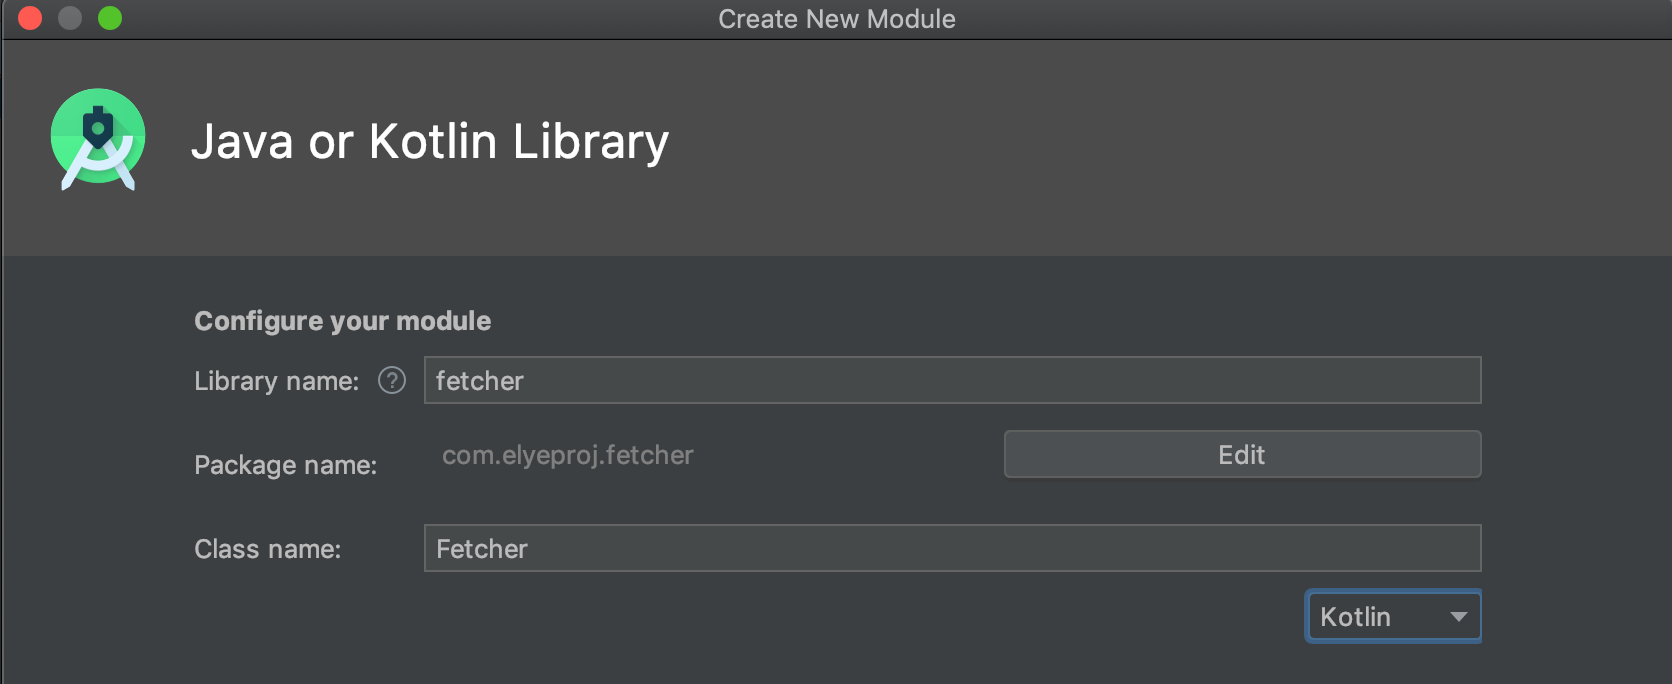
When you click Finish, the module will be generated.
当您单击完成时,将生成该模块。
修改build.gradle文件 (Modify the build.gradle file)
Look for the Fetcher build.gradle file (located in the Fetcher module root folder).
查找Fetcher build.gradle文件(位于Fetcher模块根文件夹中)。
You just need to add your dependencies there. In our case, it’s the okhttp library.
您只需要在此处添加依赖项。 在我们的例子中,它是okhttp库。
dependencies {
    implementation fileTree(dir: 'libs', include: ['*.jar'])
    implementation
        "org.jetbrains.kotlin:kotlin-stdlib-jdk7:$kotlin_version"    api 'com.squareup.okhttp3:okhttp:3.12.0'}
Note: We’re using api instead of implementation because we’re letting the top module (WikipediaFetcher and App) access the okhttp library from here as well.
注意:我们使用的是api而不是implementation因为我们也允许顶部模块( WikipediaFetcher和App )从此处访问okhttp库。
The better practice is to avoid using api and using implementation. This way, all modules will need to include their own okhttp library to avoid an unnecessary reliance on the bottom module internally changing and speeding up compilation.
更好的做法是避免使用api和使用implementation 。 这样,所有模块都需要包括自己的okhttp库,以避免不必要地依赖于底部模块内部更改和加快编译速度。
There will be some versioning synchronization and exclusion handling (e.g., if both libraries are using different versions of okhttp). To avoid getting into those discussions, I simplify it using api.
将有一些版本同步和排除处理(例如,如果两个库都使用okhttp不同版本)。 为了避免进入这些讨论,我使用api对其进行简化。
After doing that, you could sync your project and add the code intp the respective package folder (e.g., com/elyeproject/fetcher) created for you.
之后,您可以同步您的项目,并将代码添加到为您创建的相应包文件夹(例如com/elyeproject/fetcher )中。
创建WikipediaFetcher模块 (Create the WikipediaFetcher module)
We’ll create an Android library for this instead because it needs to access AndroidSchedulers.mainThread(), which requires the Android framework.
我们将为此创建一个Android库,因为它需要访问需要Android框架的AndroidSchedulers.mainThread() 。
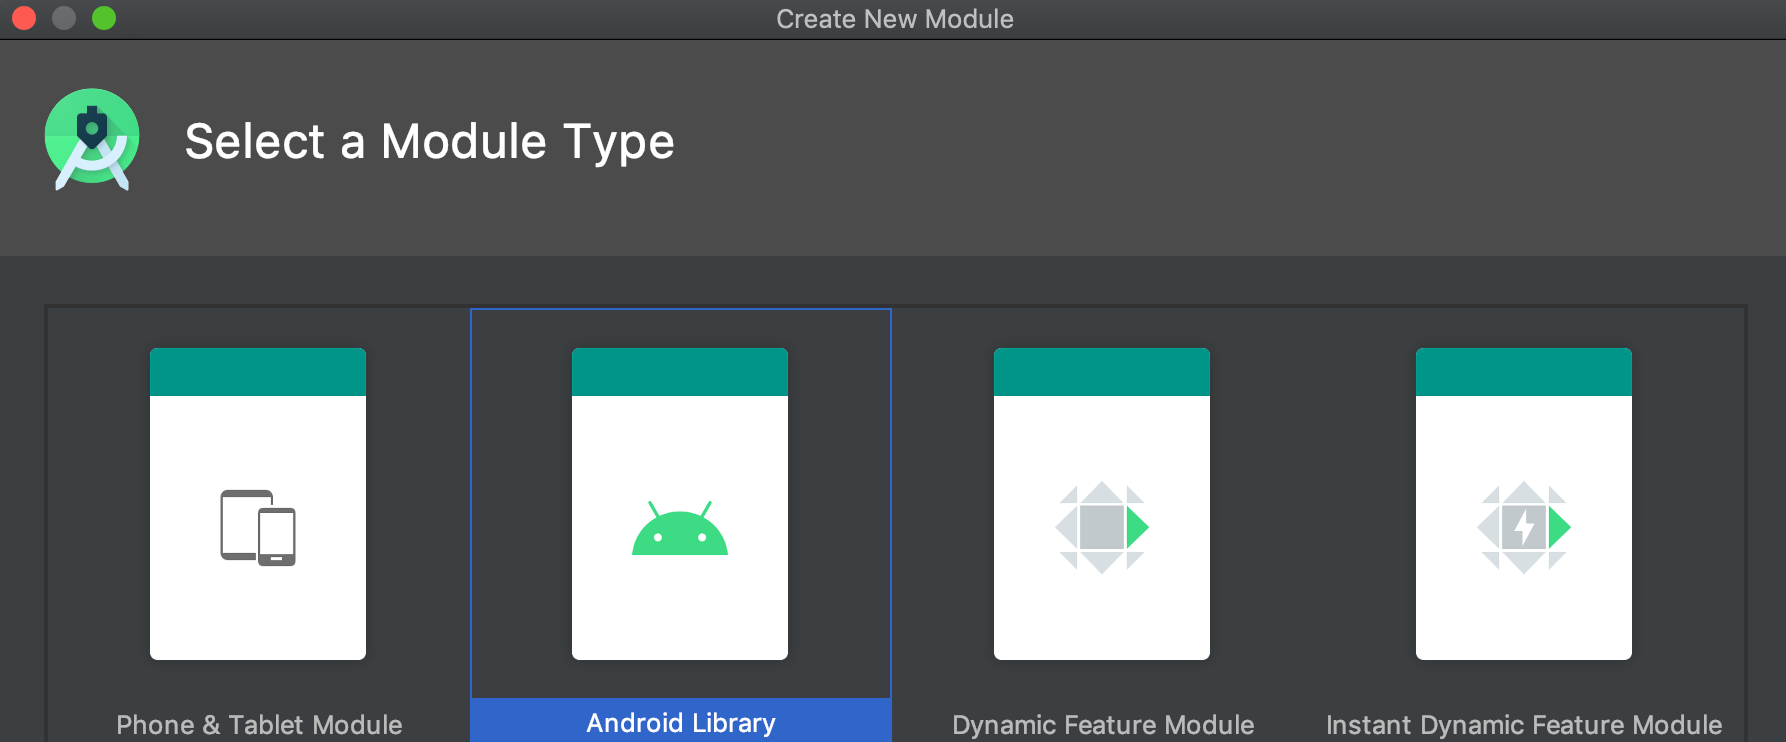
Go to File → New → New Module…, and instead of creating a Java or Kotlin library, select “Android Library.”
转到文件→新建→新模块…,然后选择“ Android库”,而不是创建Java或Kotlin库。
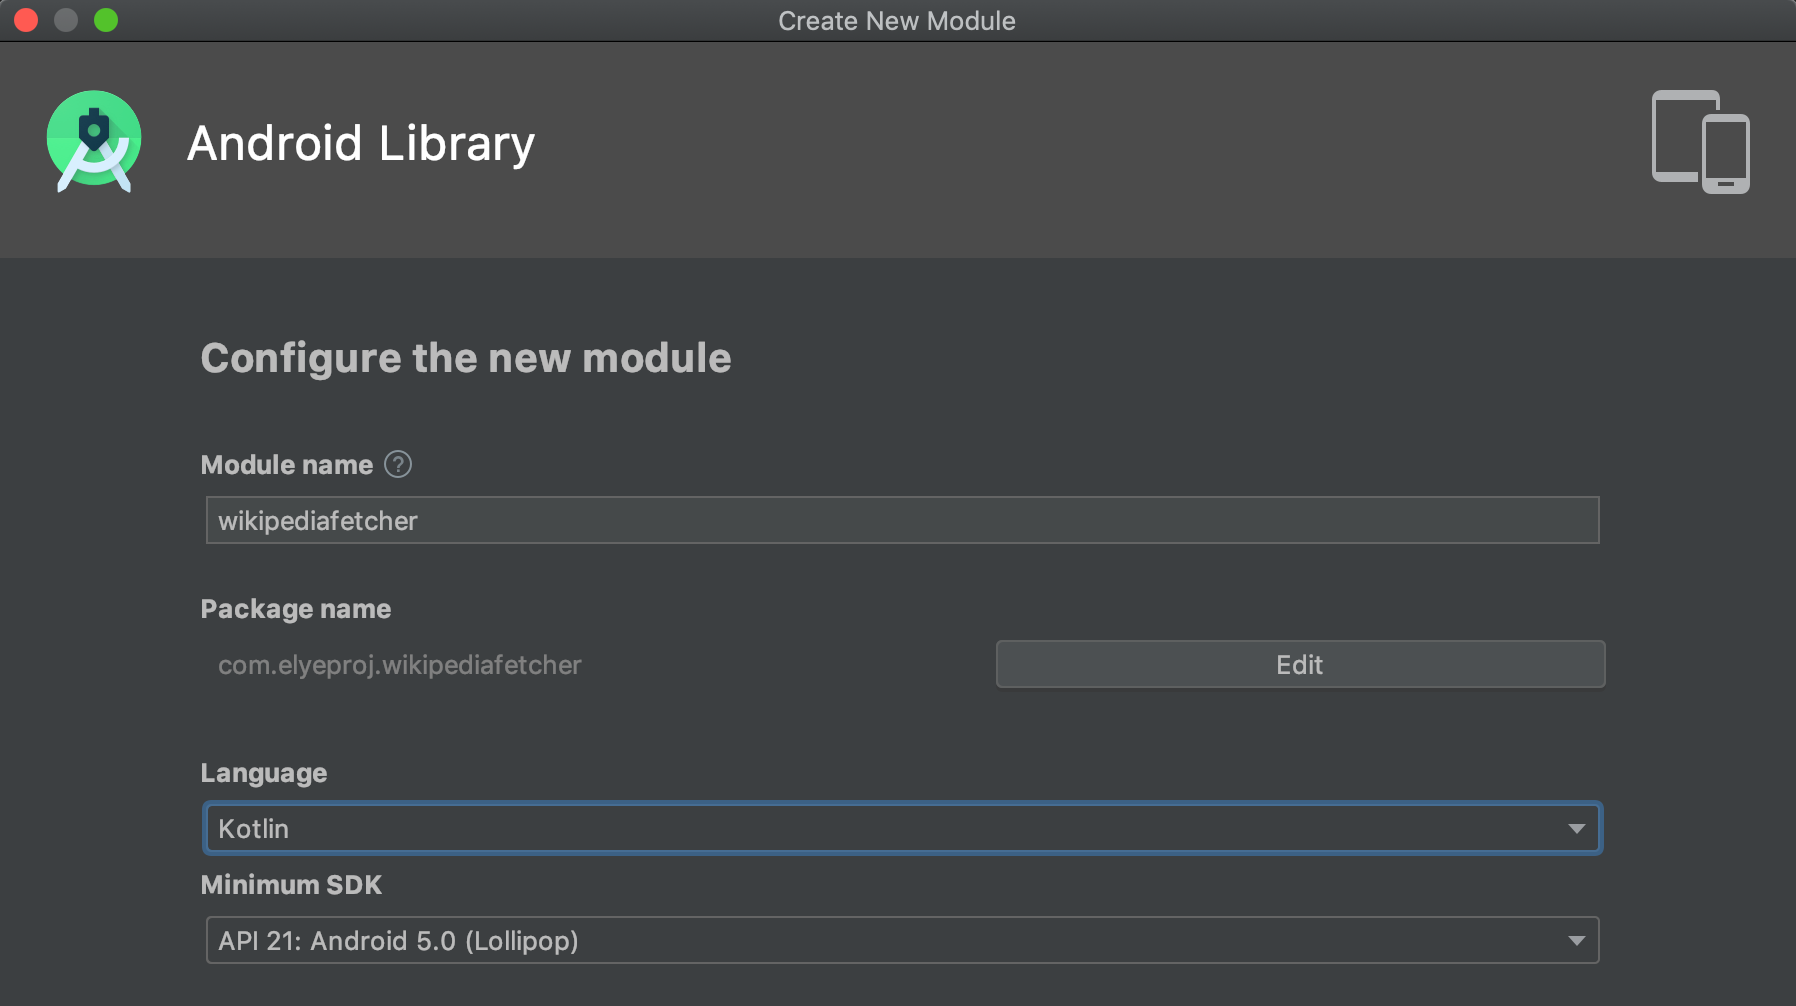
Fill up the name accordingly, and ensure all settings match with what you want.
相应地填写名称,并确保所有设置与所需内容匹配。
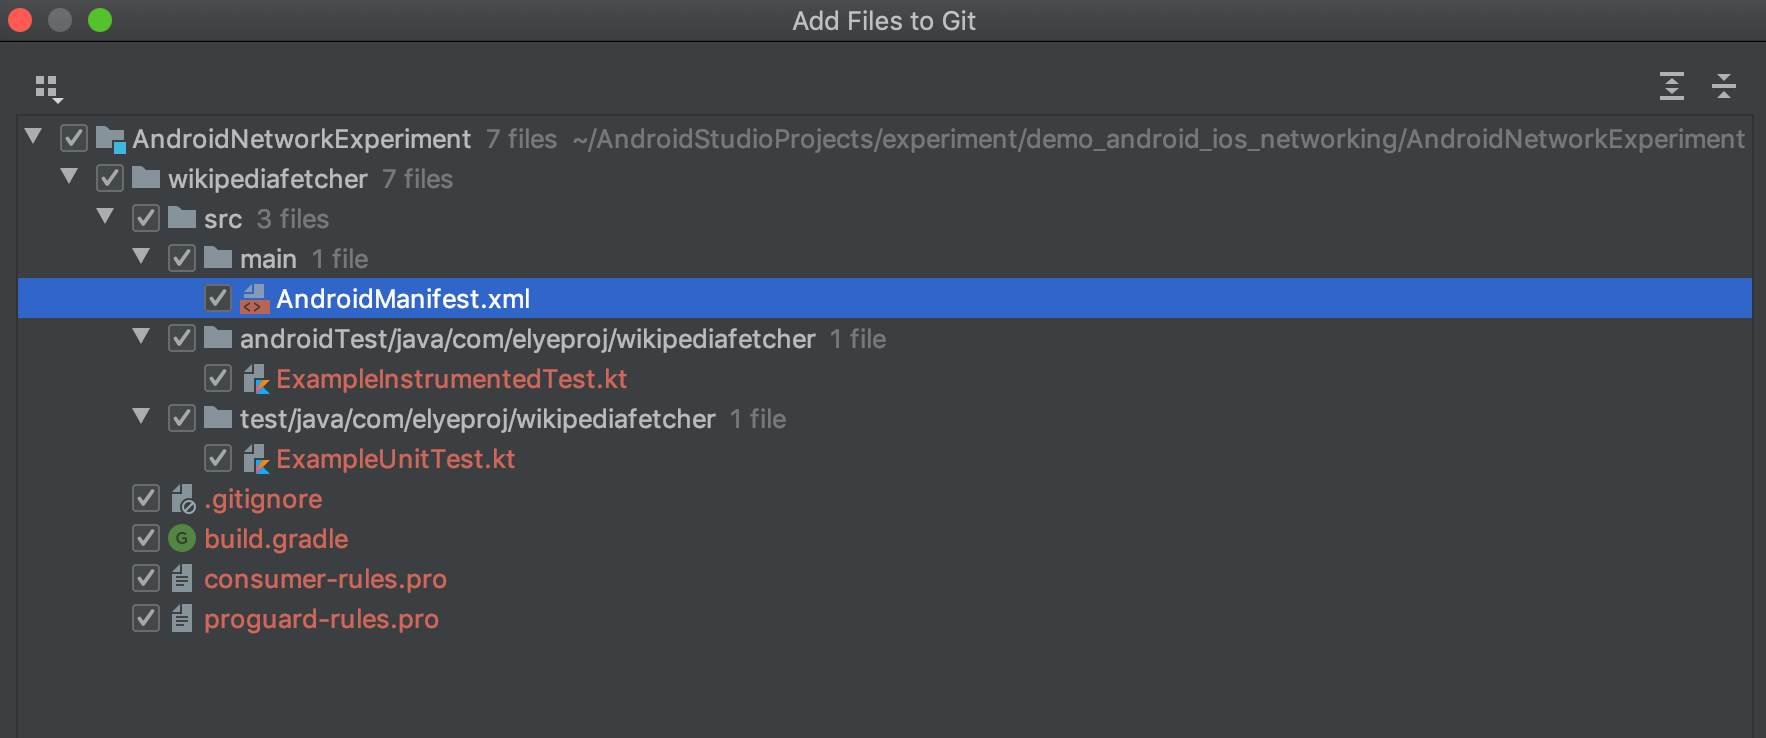
Click Finish, and you’ll get the following. You could remove the test if you’re not using it. Keep the others.
单击完成,您将获得以下内容。 如果不使用测试,可以将其删除。 保留其他人。
After this, you could modify the build.gradle file that’s found in the WikipediaFetcher module folder.
之后,您可以修改在WikipediaFetcher模块文件夹中找到的build.gradle文件。
Add the needed libraries there:
在此处添加所需的库:
dependencies {
    implementation fileTree(dir: "libs", include: ["*.jar"])    api project(':fetcher')
    implementation
        "org.jetbrains.kotlin:kotlin-stdlib:$kotlin_version"
    implementation 'androidx.appcompat:appcompat:1.1.0'    implementation 'com.google.code.gson:gson:2.8.6'
    api "io.reactivex.rxjava2:rxjava:2.2.19"
    implementation "io.reactivex.rxjava2:rxandroid:2.1.1"
    testImplementation 'junit:junit:4.13'
    androidTestImplementation 'androidx.test.ext:junit:1.1.1'
    androidTestImplementation
        'androidx.test.espresso:espresso-core:3.2.0'}
To access the fetcher module here, we add api project(':fetcher'). It’s using api, as we need to access the okHttp within the fetcher, too.
要在此处访问fetcher模块,我们添加api project(':fetcher') 。 它使用api ,因为我们需要访问okHttp的内fetcher了。
Note: We use implementation for gson and rxandroid, as the top-level module doesn’t require to access it. But we add api to rxjava, as the top-level module needs to access the disposable.
注意:我们在 implementation了gson和rxandroid ,作为顶层模块并不需要访问它。 但是我们将api添加到rxjava ,因为顶级模块需要访问disposable 。
After doing that, you could sync your project, and add the code into the respective package folder (e.g., com/elyeproject/wikipediafetcher) created for you.
之后,您可以同步您的项目,并将代码添加到为您创建的相应包文件夹(例如com/elyeproject/wikipediafetcher )中。
链接到顶部的应用程序模块 (Link to the top app module)
After creating both the Fetcher and WikipediaFetcher modules, we now need to inform the top-level app module to link to them.
创建Fetcher和WikipediaFetcher模块之后,我们现在需要通知顶级应用程序模块链接到它们。
Open the build.gradle file of the app module, and add the WikipediaFetcher module there.
打开app模块的build.gradle文件,然后在其中添加WikipediaFetcher模块。
dependencies {
    implementation fileTree(dir: 'libs', include: ['*.jar'])    api project(':wikipediafetcher')
    implementation
        "org.jetbrains.kotlin:kotlin-stdlib-jdk7:$kotlin_version"
    implementation 'androidx.appcompat:appcompat:1.1.0'
    implementation
        'androidx.constraintlayout:constraintlayout:1.1.3'
    testImplementation 'junit:junit:4.13'
    androidTestImplementation 'androidx.test.ext:junit:1.1.1'
    androidTestImplementation
        'androidx.test.espresso:espresso-core:3.2.0'}
As mentioned earlier, we’re using api here because the app module needs to access the underlying module that’s linked from wikipediaFetcher as well (i.e., RxJava’s disposable and OkHttp’s interceptor).
如前所述,我们在这里使用api是因为app模块还需要访问从wikipediaFetcher链接的基础模块(即RxJava的可抛弃型和OkHttp的拦截器)。
After you’ve done this, you could sync the project and import code from the bottom module.
完成此操作后,您可以同步项目并从底部模块import代码。
Once the code is ready, you could compile and run. Everything should work seamlessly like in a single project.
代码准备好后,就可以编译并运行。 一切都应该像在单个项目中一样无缝地工作。
翻译自: https://medium.com/mobile-app-development-publication/modularize-ios-and-android-app-67678f2688dc


 221
221


 被折叠的 条评论
为什么被折叠?
被折叠的 条评论
为什么被折叠?
 到【灌水乐园】发言


