


firebase
Here we will be talking about creating, configuring and using Firebase in React.js application. We will take a look on user authentication basics and firestore collections.
在这里,我们将讨论在React.js应用程序中创建,配置和使用Firebase。 我们将介绍用户身份验证基础知识和Firestore集合。
先决条件 (Prerequisites)
I will use React.js + Redux + Saga + Typescript + ESLint + SASS for our project. WOW! “Isn’t those too much for a simple example”, you might ask and you are right, but… I would like to show you a real-world example so you could use it for yourself. I will leave a link to the GitHub project at the end of this article.
我将在我们的项目中使用React.js + Redux + Saga + Typescript + ESLint + SASS 。 哇! 您可能会问:“对于一个简单的例子来说,这些内容是否太多”,您是对的,但是……我想向您展示一个真实的例子,以便您可以自己使用它。 我将在本文结尾处留下指向GitHub项目的链接。
本文将涵盖的内容 (What will be covered in this article)
- 1. Creating new firebase project1.创建新的firebase项目
- 2. Add firebase to the project2.将firebase添加到项目
- 3. Set sign-in methods3.设置登录方式
- 4. Sign in with email and password4.使用电子邮件和密码登录
- 5. Sign in with Google5.使用Google登录
- 6. Create a Firestore database6.创建一个Firestore数据库
- 7. Firestore CRUD operations7. Firestore CRUD操作
- 8. Creating Firebase Storage8.创建Firebase存储
- 9. Adding a Profile image9.添加个人资料图片
Other Firebase stories: Cloud Functions, Admin SDK, Facebook Sign-in method
其他Firebase故事:云功能,管理SDK , Facebook登录方法
1.创建新的firebase项目(1. Creating new firebase project)
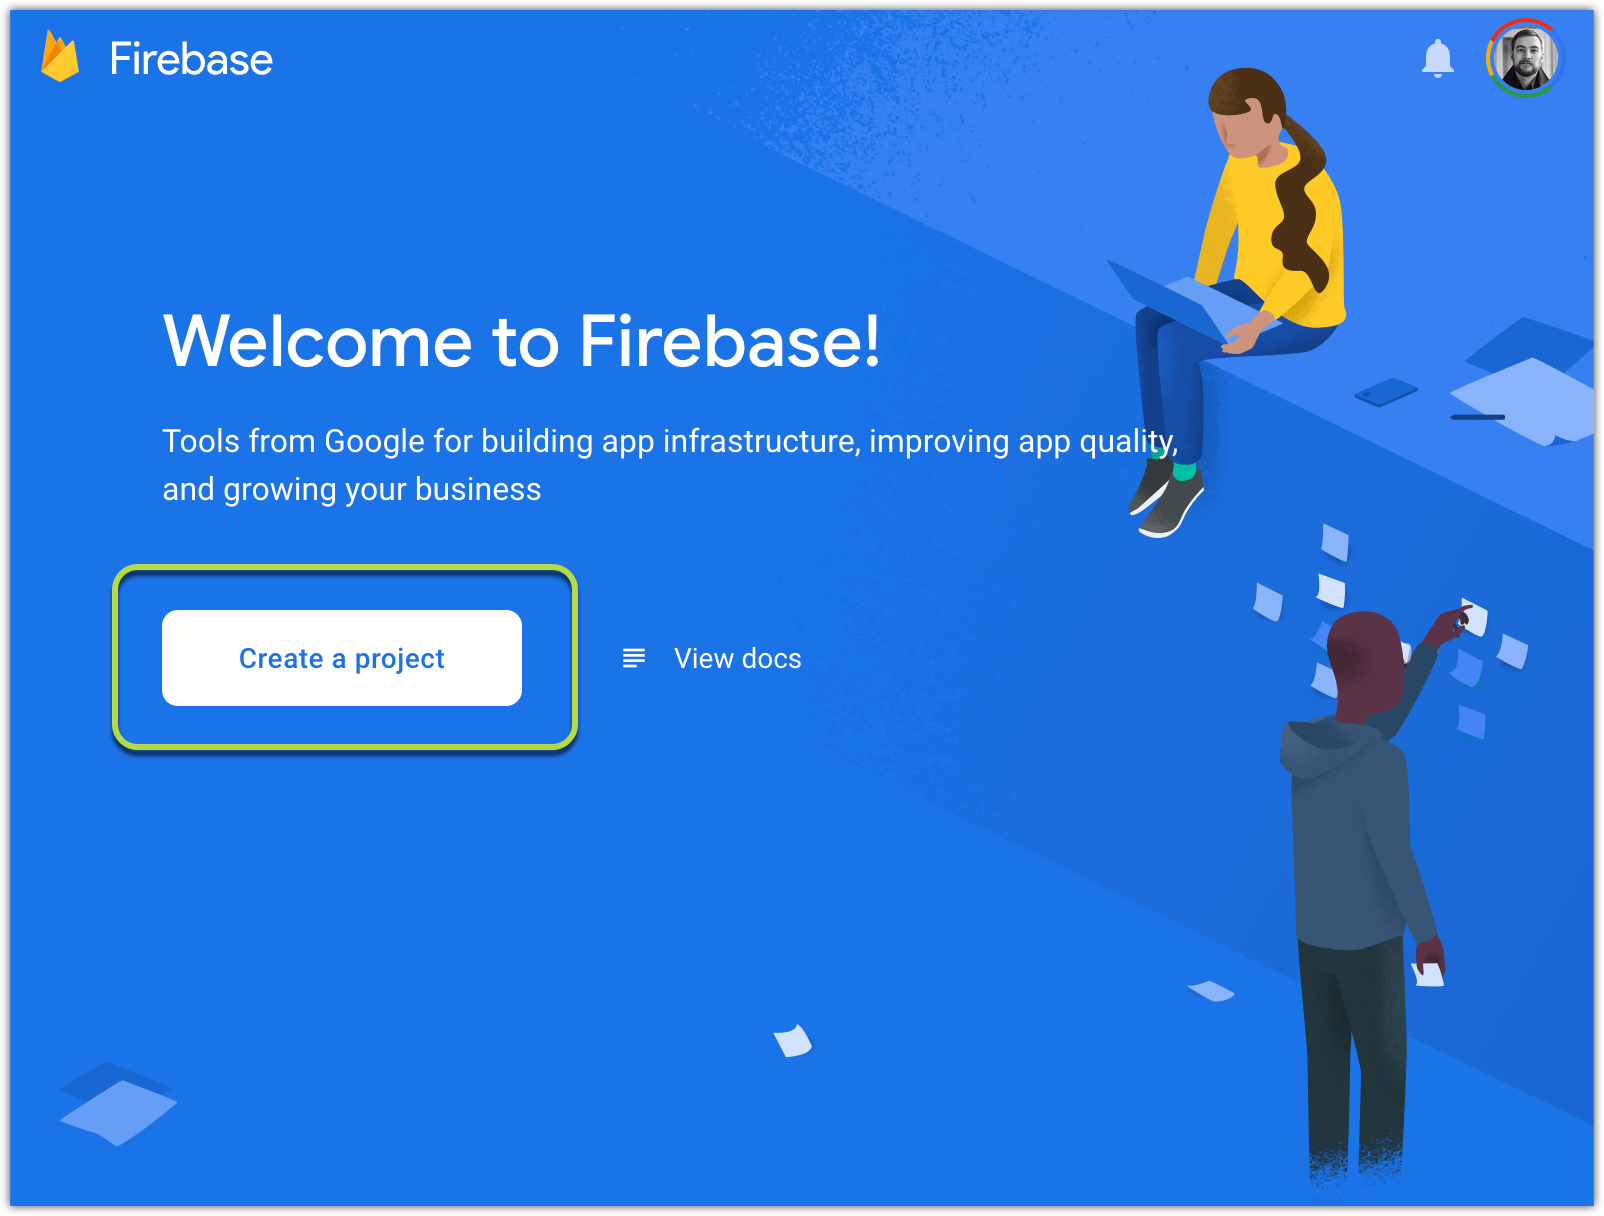
First of all, we need to create a firebase project, and we can do that by this link https://console.firebase.google.com/
首先,我们需要创建一个firebase项目,我们可以通过此链接https://console.firebase.google.com/
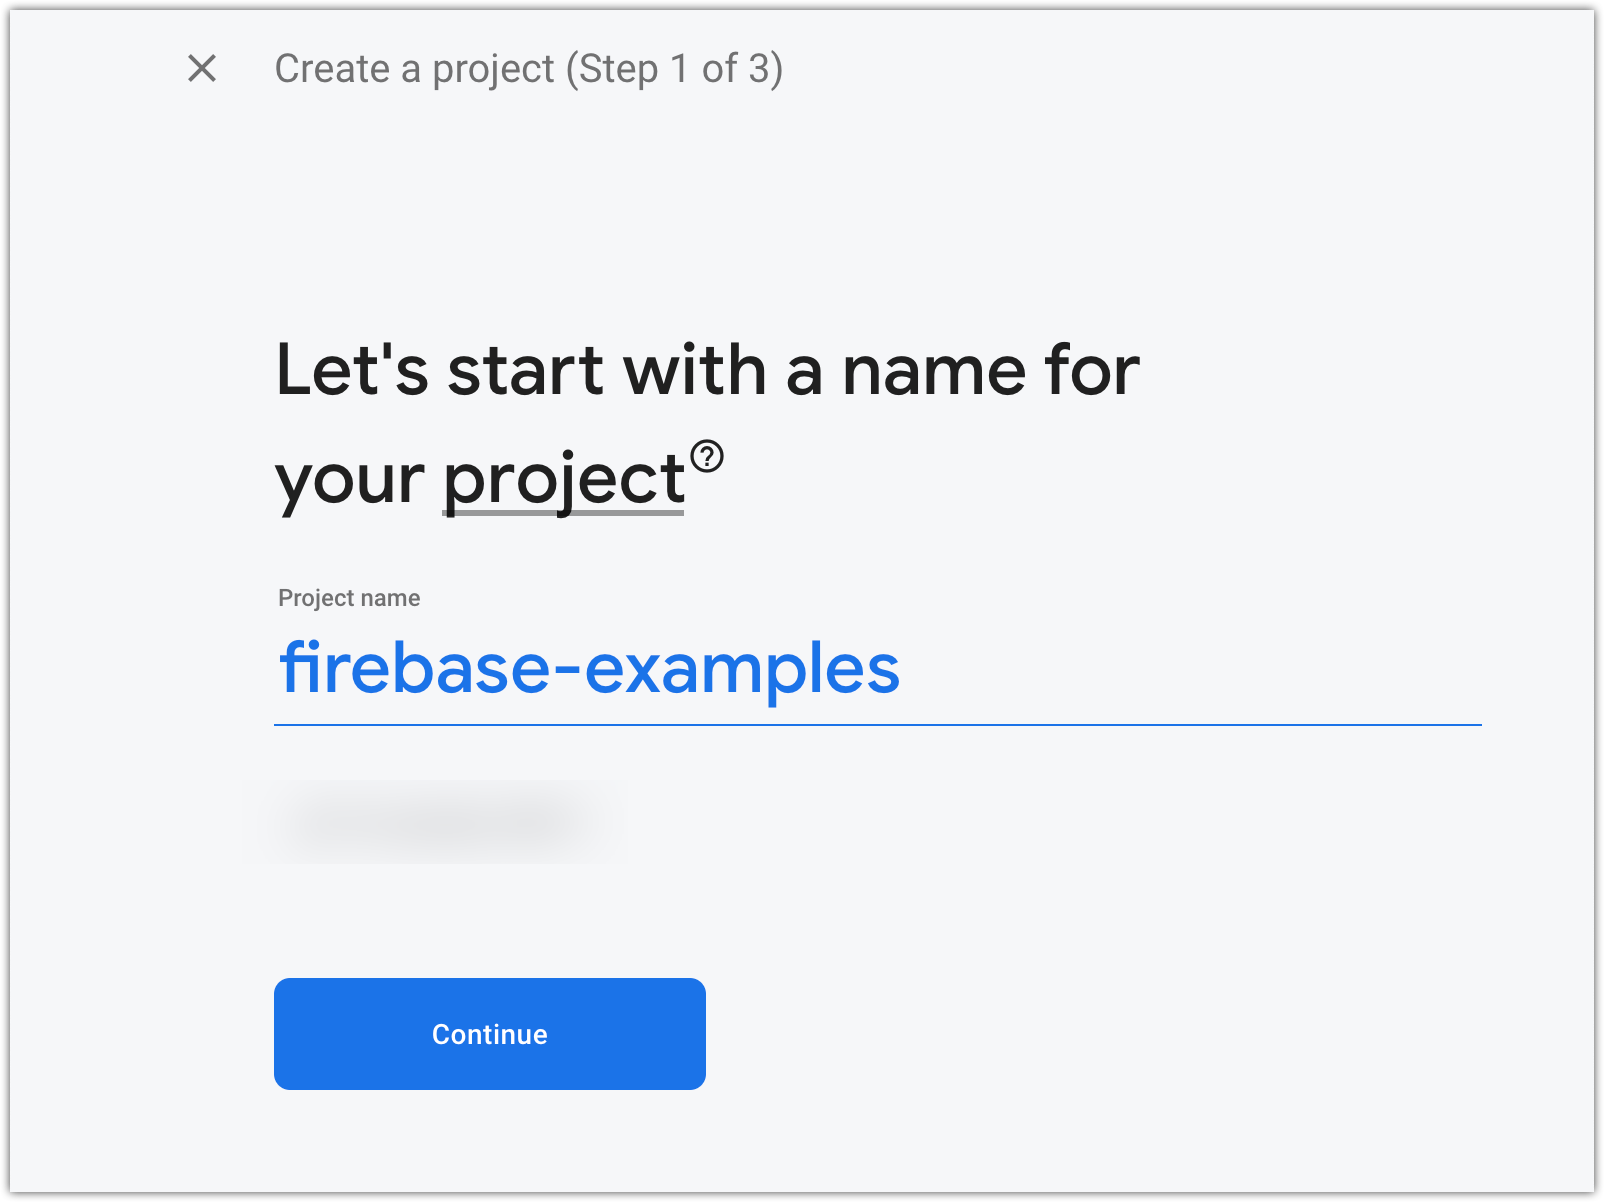
Type project’s name (you can choose any name you like):
输入项目的名称(您可以选择任何喜欢的名称):
You can Enable/Disable analytics, you can change it in the future:
您可以启用/禁用分析,以后可以更改它:

If you Enabled analytics, Firebase will show you a configuration analytics window (“analytics” is not covered in this article, but I will leave screenshots here, just in case, if you are curious):
如果您启用了分析功能,Firebase将为您显示一个配置分析窗口(本文未介绍“分析”,但是我会在此处保留屏幕截图,以防万一,如果您好奇的话):

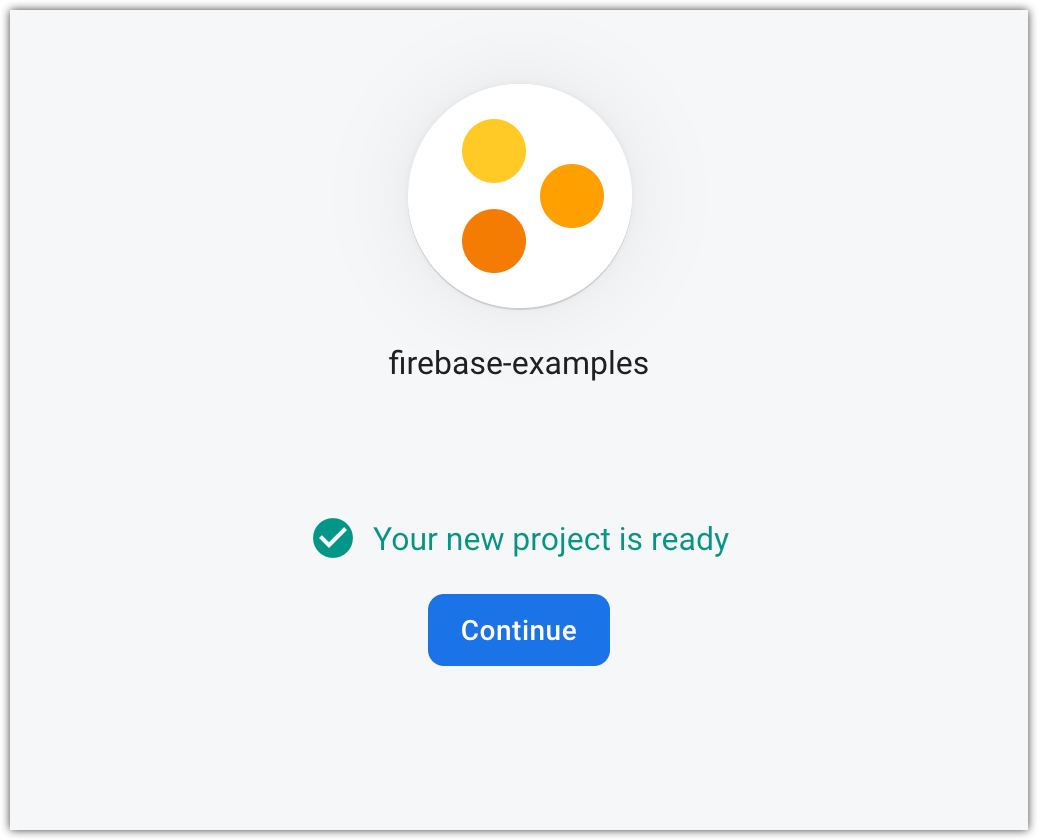
Wait some time after clicking “Create project”:
单击“创建项目”后,请等待一段时间:

Done…
完成...
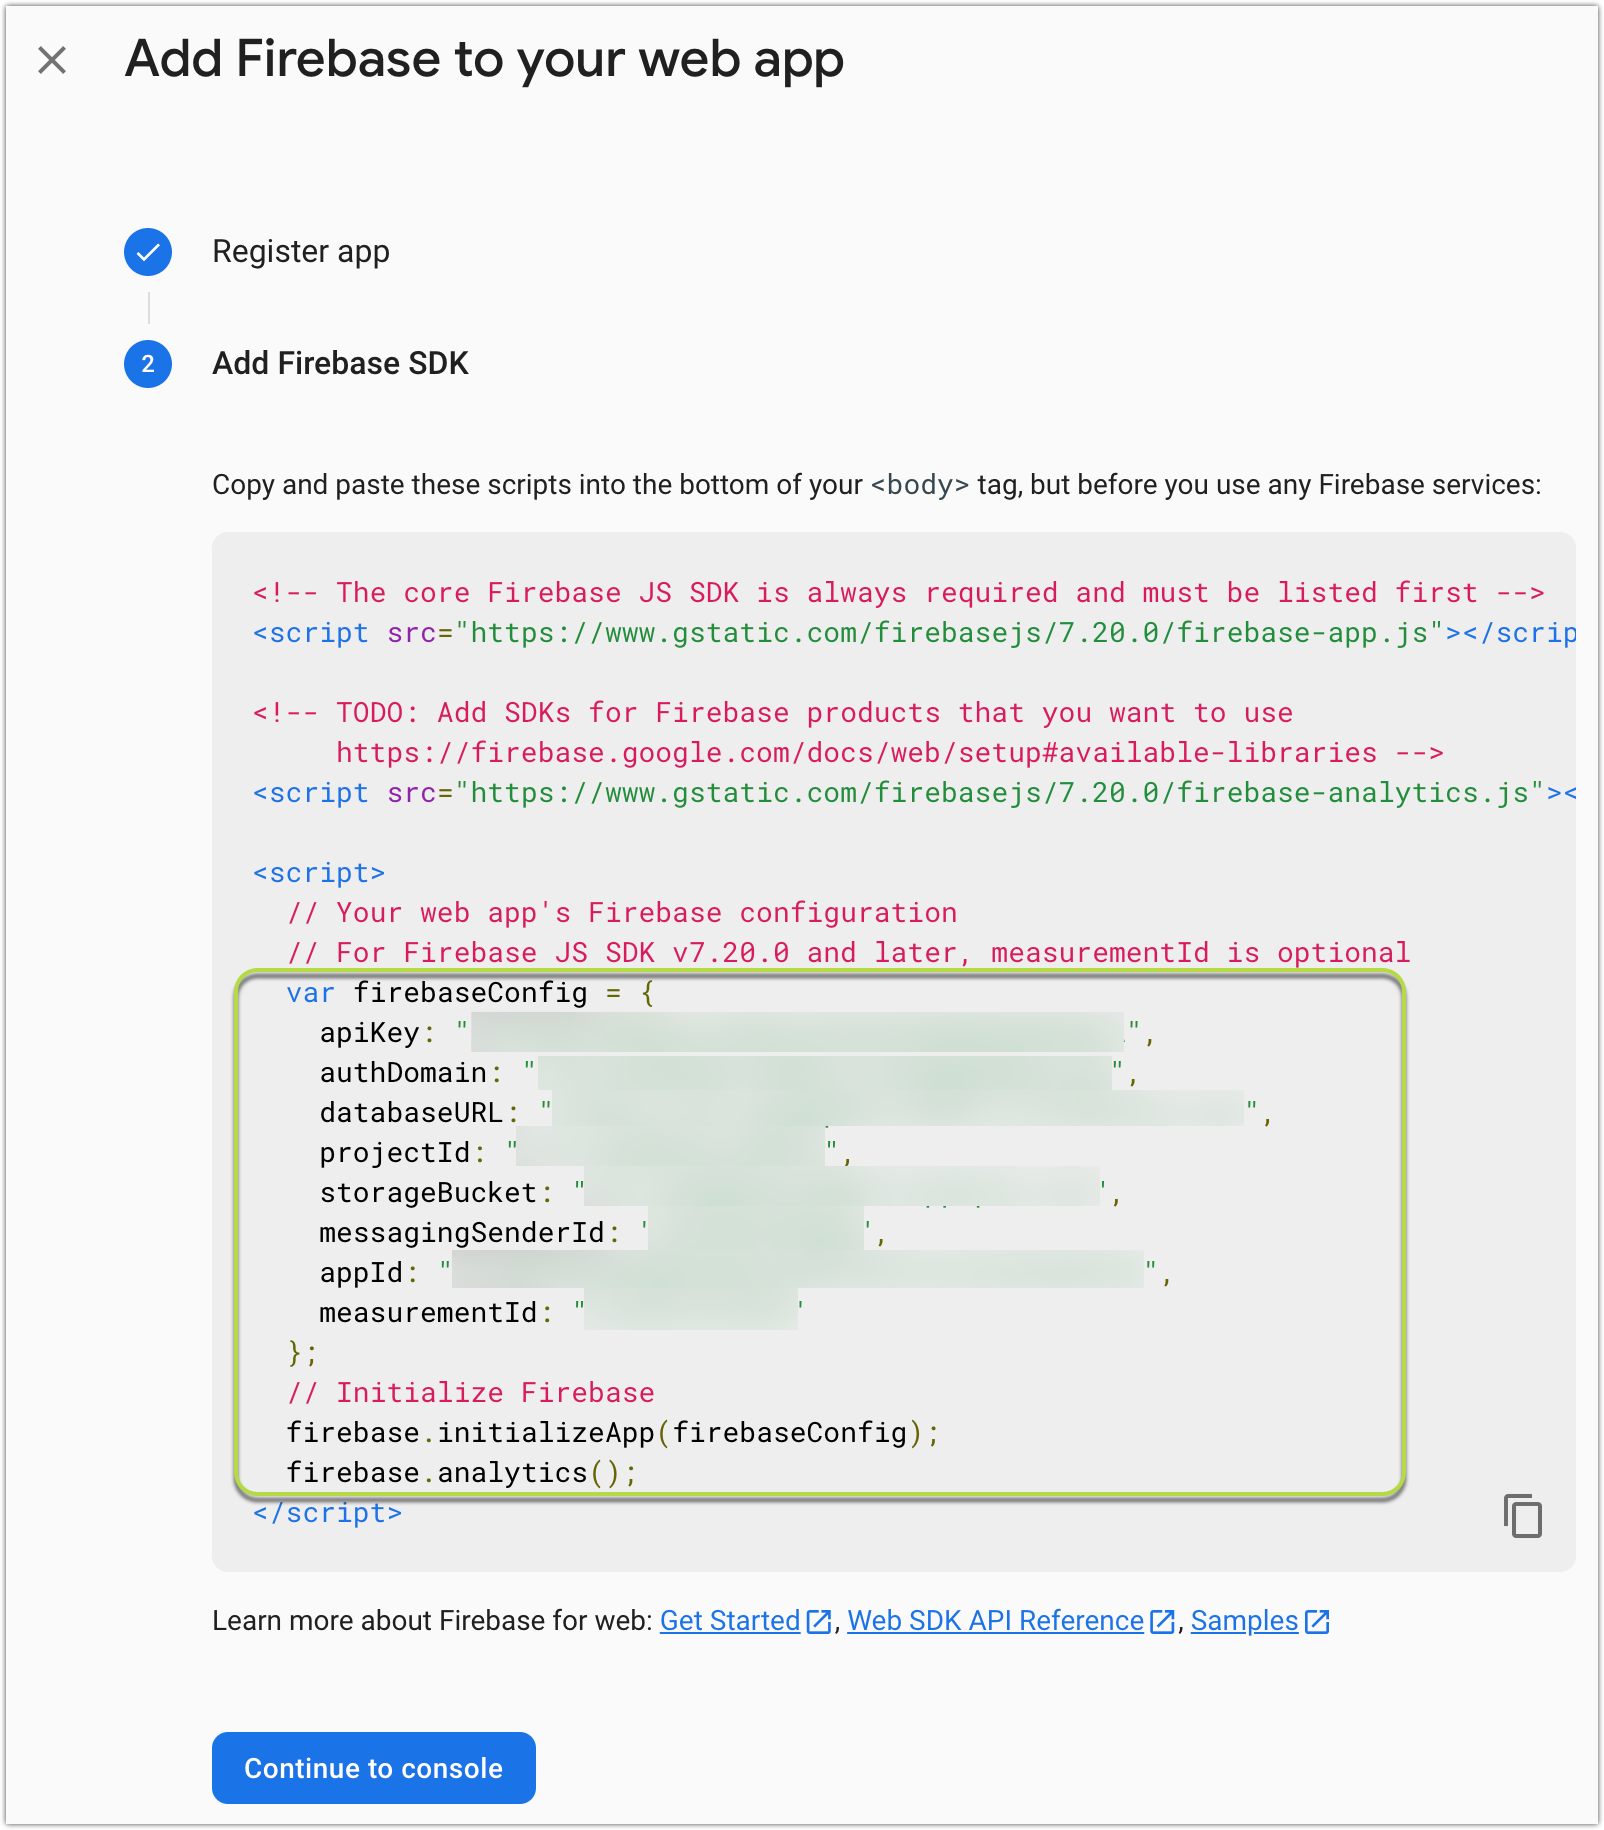
To use firebase in our React app we will need to create a Web app. We can do that by clicking “Project settings”:
要在我们的React应用程序中使用firebase,我们需要创建一个Web应用程序。 我们可以通过点击“项目设置”来做到这一点:

And register your new Web-app with some custom-name. After that, you will need to copy-paste configuration values:
并使用一些自定义名称注册新的Web应用程序。 之后,您将需要复制粘贴配置值:
2.将firebase添加到项目 (2. Add firebase to the project)
First, we will need to add firebase npm package to our project:
首先,我们需要在项目中添加firebase npm软件包:
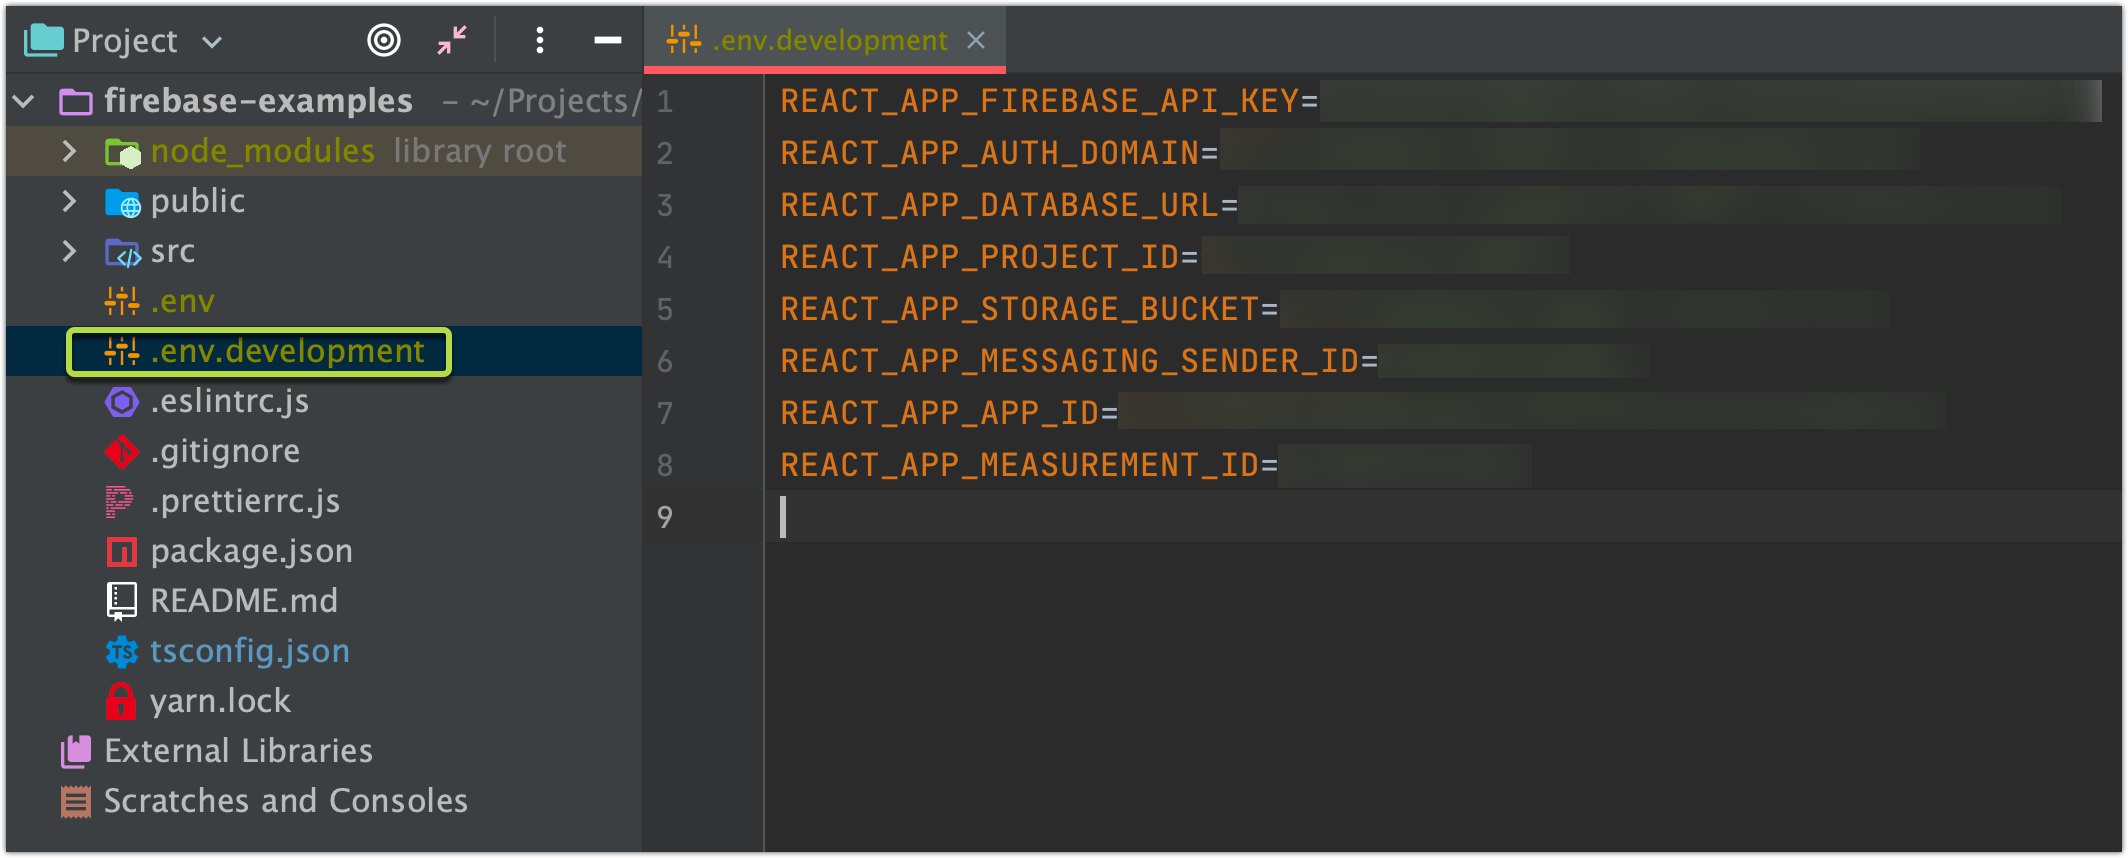
yarn add firebaseNext, copy-paste configuration from your firebase Web-app:
接下来,从您的Firebase Web应用程序复制粘贴配置:
import firebase from 'firebase';


const {
    REACT_APP_FIREBASE_API_KEY,
    REACT_APP_AUTH_DOMAIN,
    REACT_APP_DATABASE_URL,
    REACT_APP_PROJECT_ID,
    REACT_APP_STORAGE_BUCKET,
    REACT_APP_MESSAGING_SENDER_ID,
    REACT_APP_APP_ID,
    REACT_APP_MEASUREMENT_ID,
} = process.env;


export const firebaseConfig = {
    apiKey: REACT_APP_FIREBASE_API_KEY,
    authDomain: REACT_APP_AUTH_DOMAIN,
    databaseURL: REACT_APP_DATABASE_URL,
    projectId: REACT_APP_PROJECT_ID,
    storageBucket: REACT_APP_STORAGE_BUCKET,
    messagingSenderId: REACT_APP_MESSAGING_SENDER_ID,
    appId: REACT_APP_APP_ID,
    measurementId: REACT_APP_MEASUREMENT_ID,
};


export const firebase_app = firebase.initializeApp(firebaseConfig);
I will be using environment variables here:
我将在这里使用环境变量:
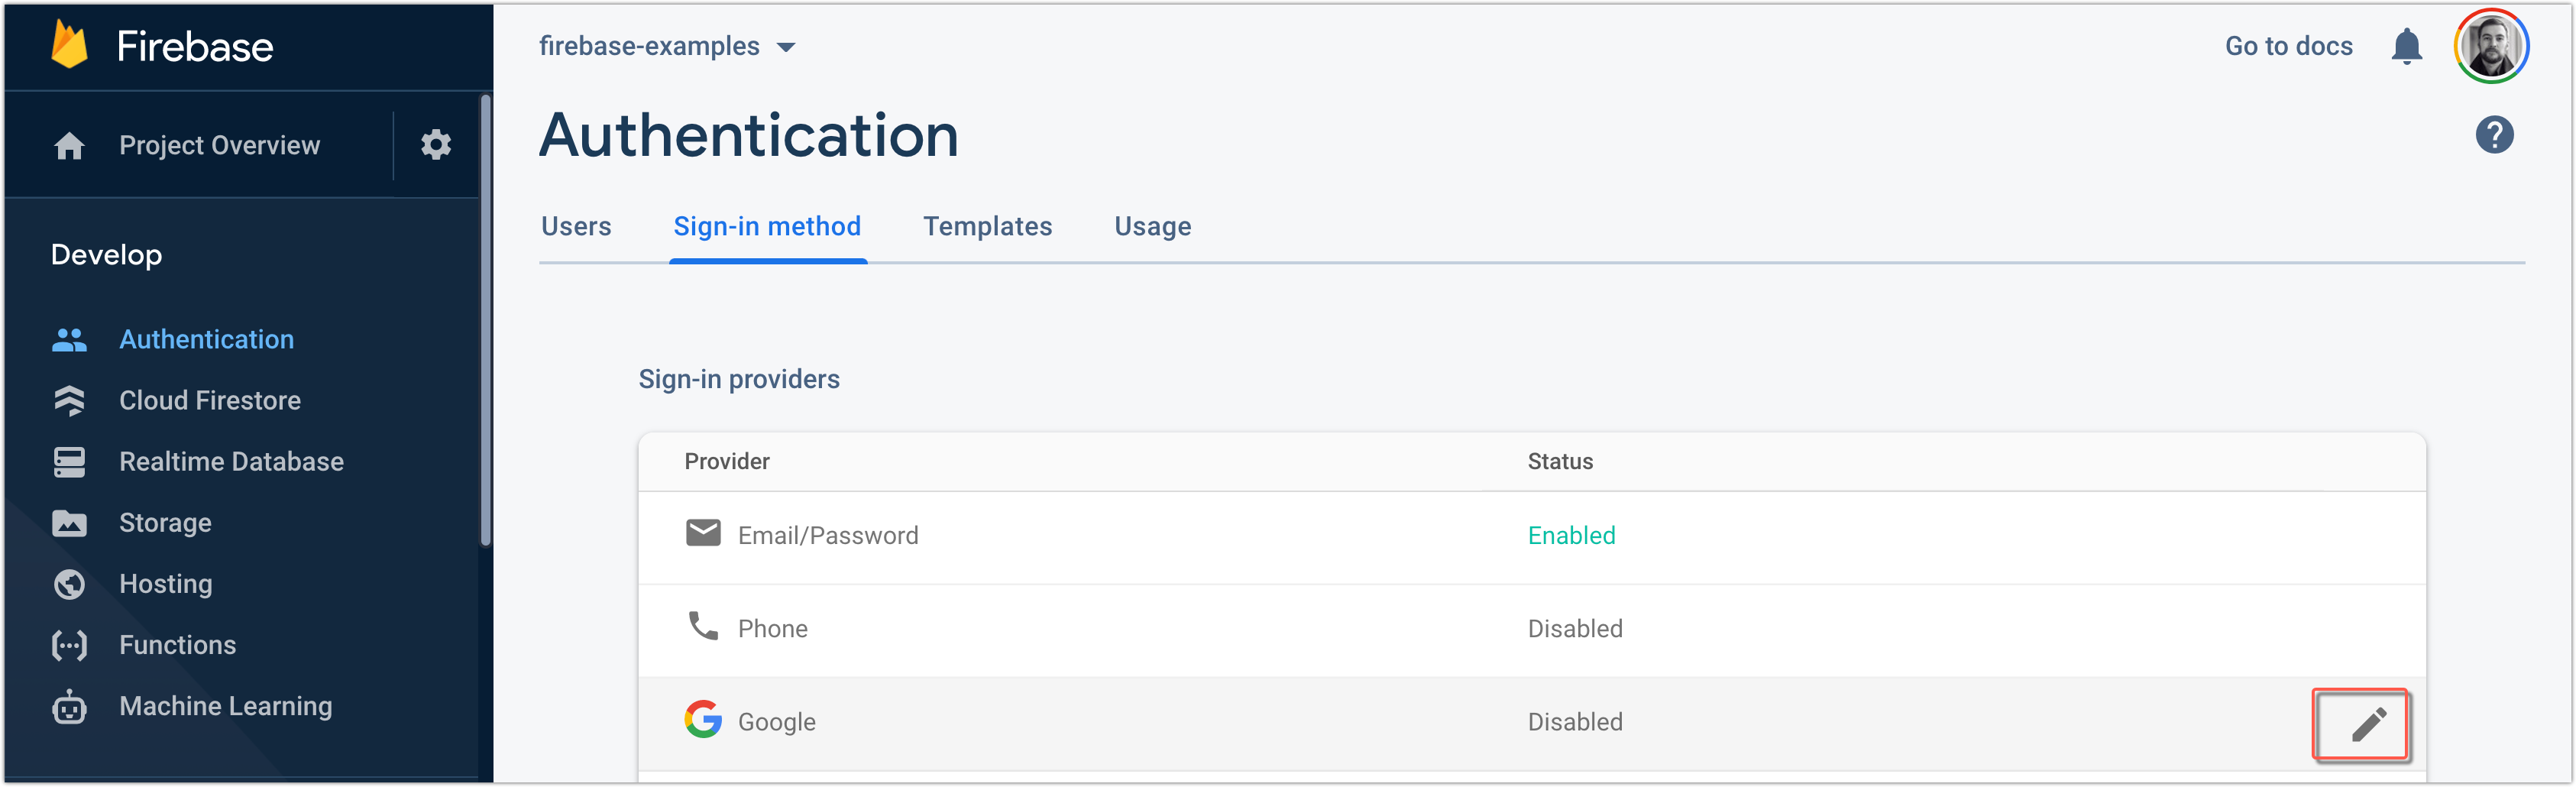
3.设置登录方式 (3. Set sign-in methods)
Before adding new users you will need to specify sign-in methods that will be available/activated for your created project:
在添加新用户之前,您需要指定对创建的项目可用/激活的登录方法:
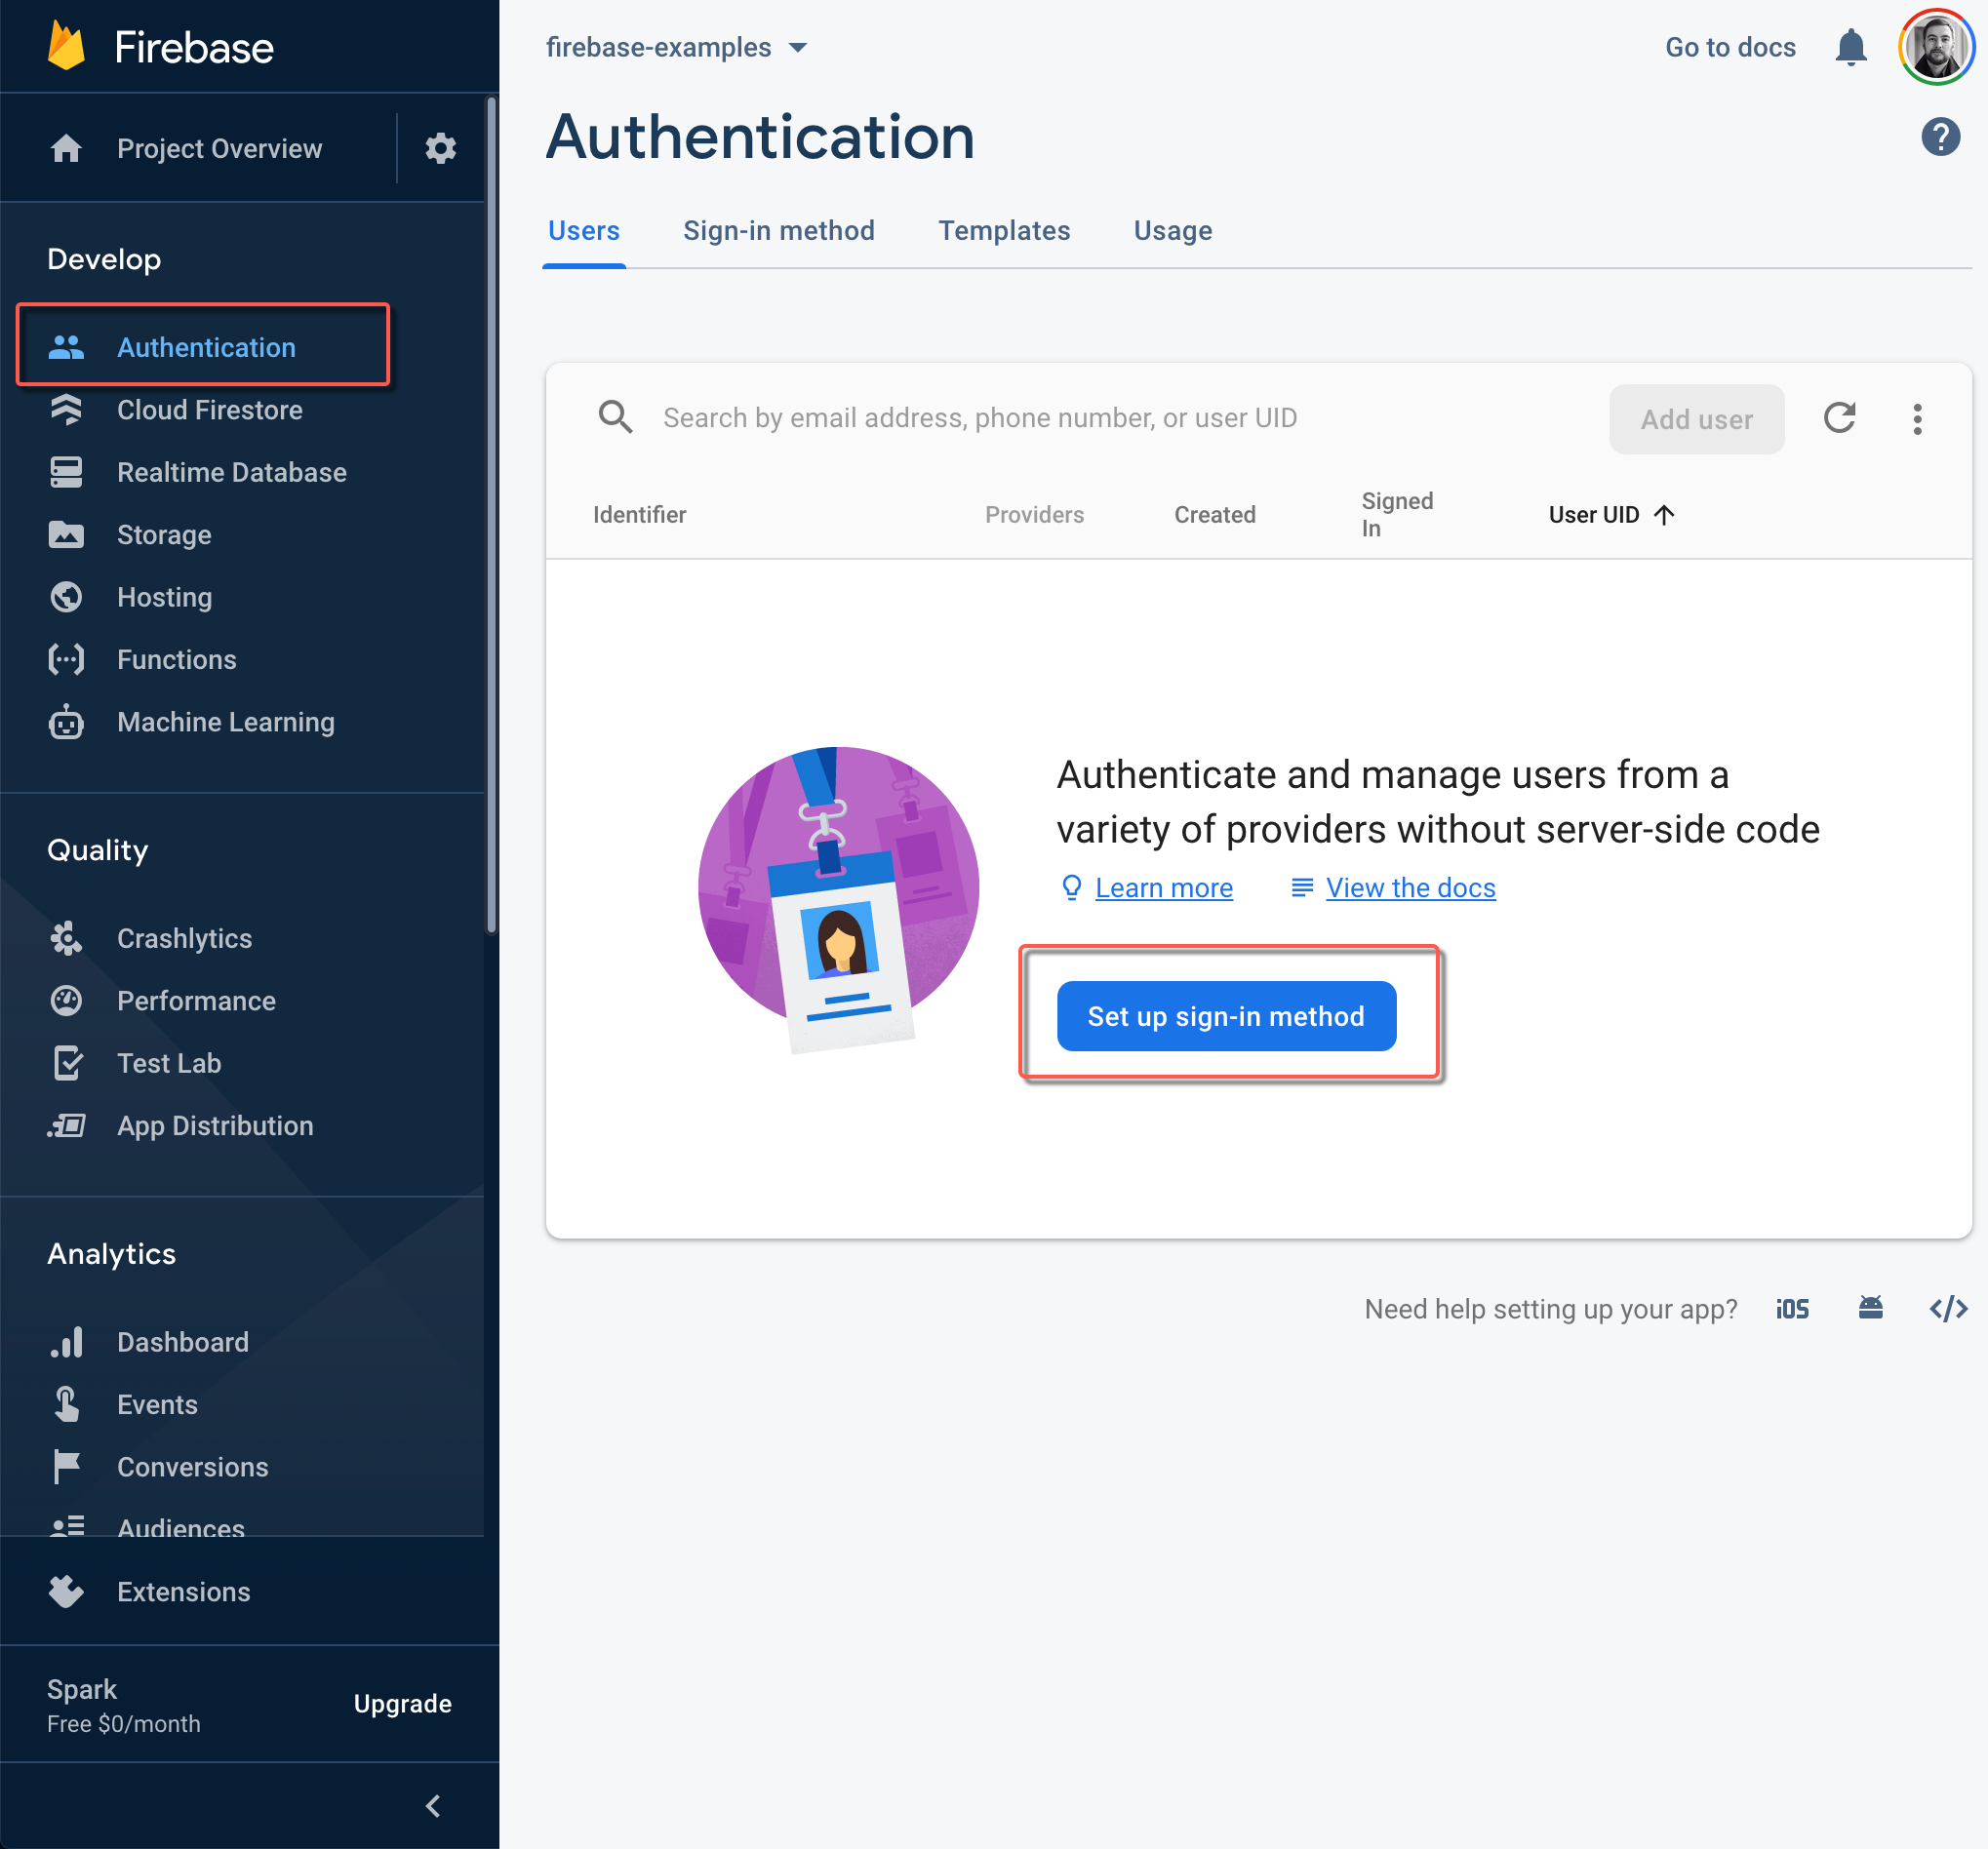
As you can see from the list, Firebase provides a bunch of sign-in methods, but we will start from the most common one — email and password :
从列表中可以看到,Firebase提供了许多登录方法,但我们将从最常用的方法开始- email和password :

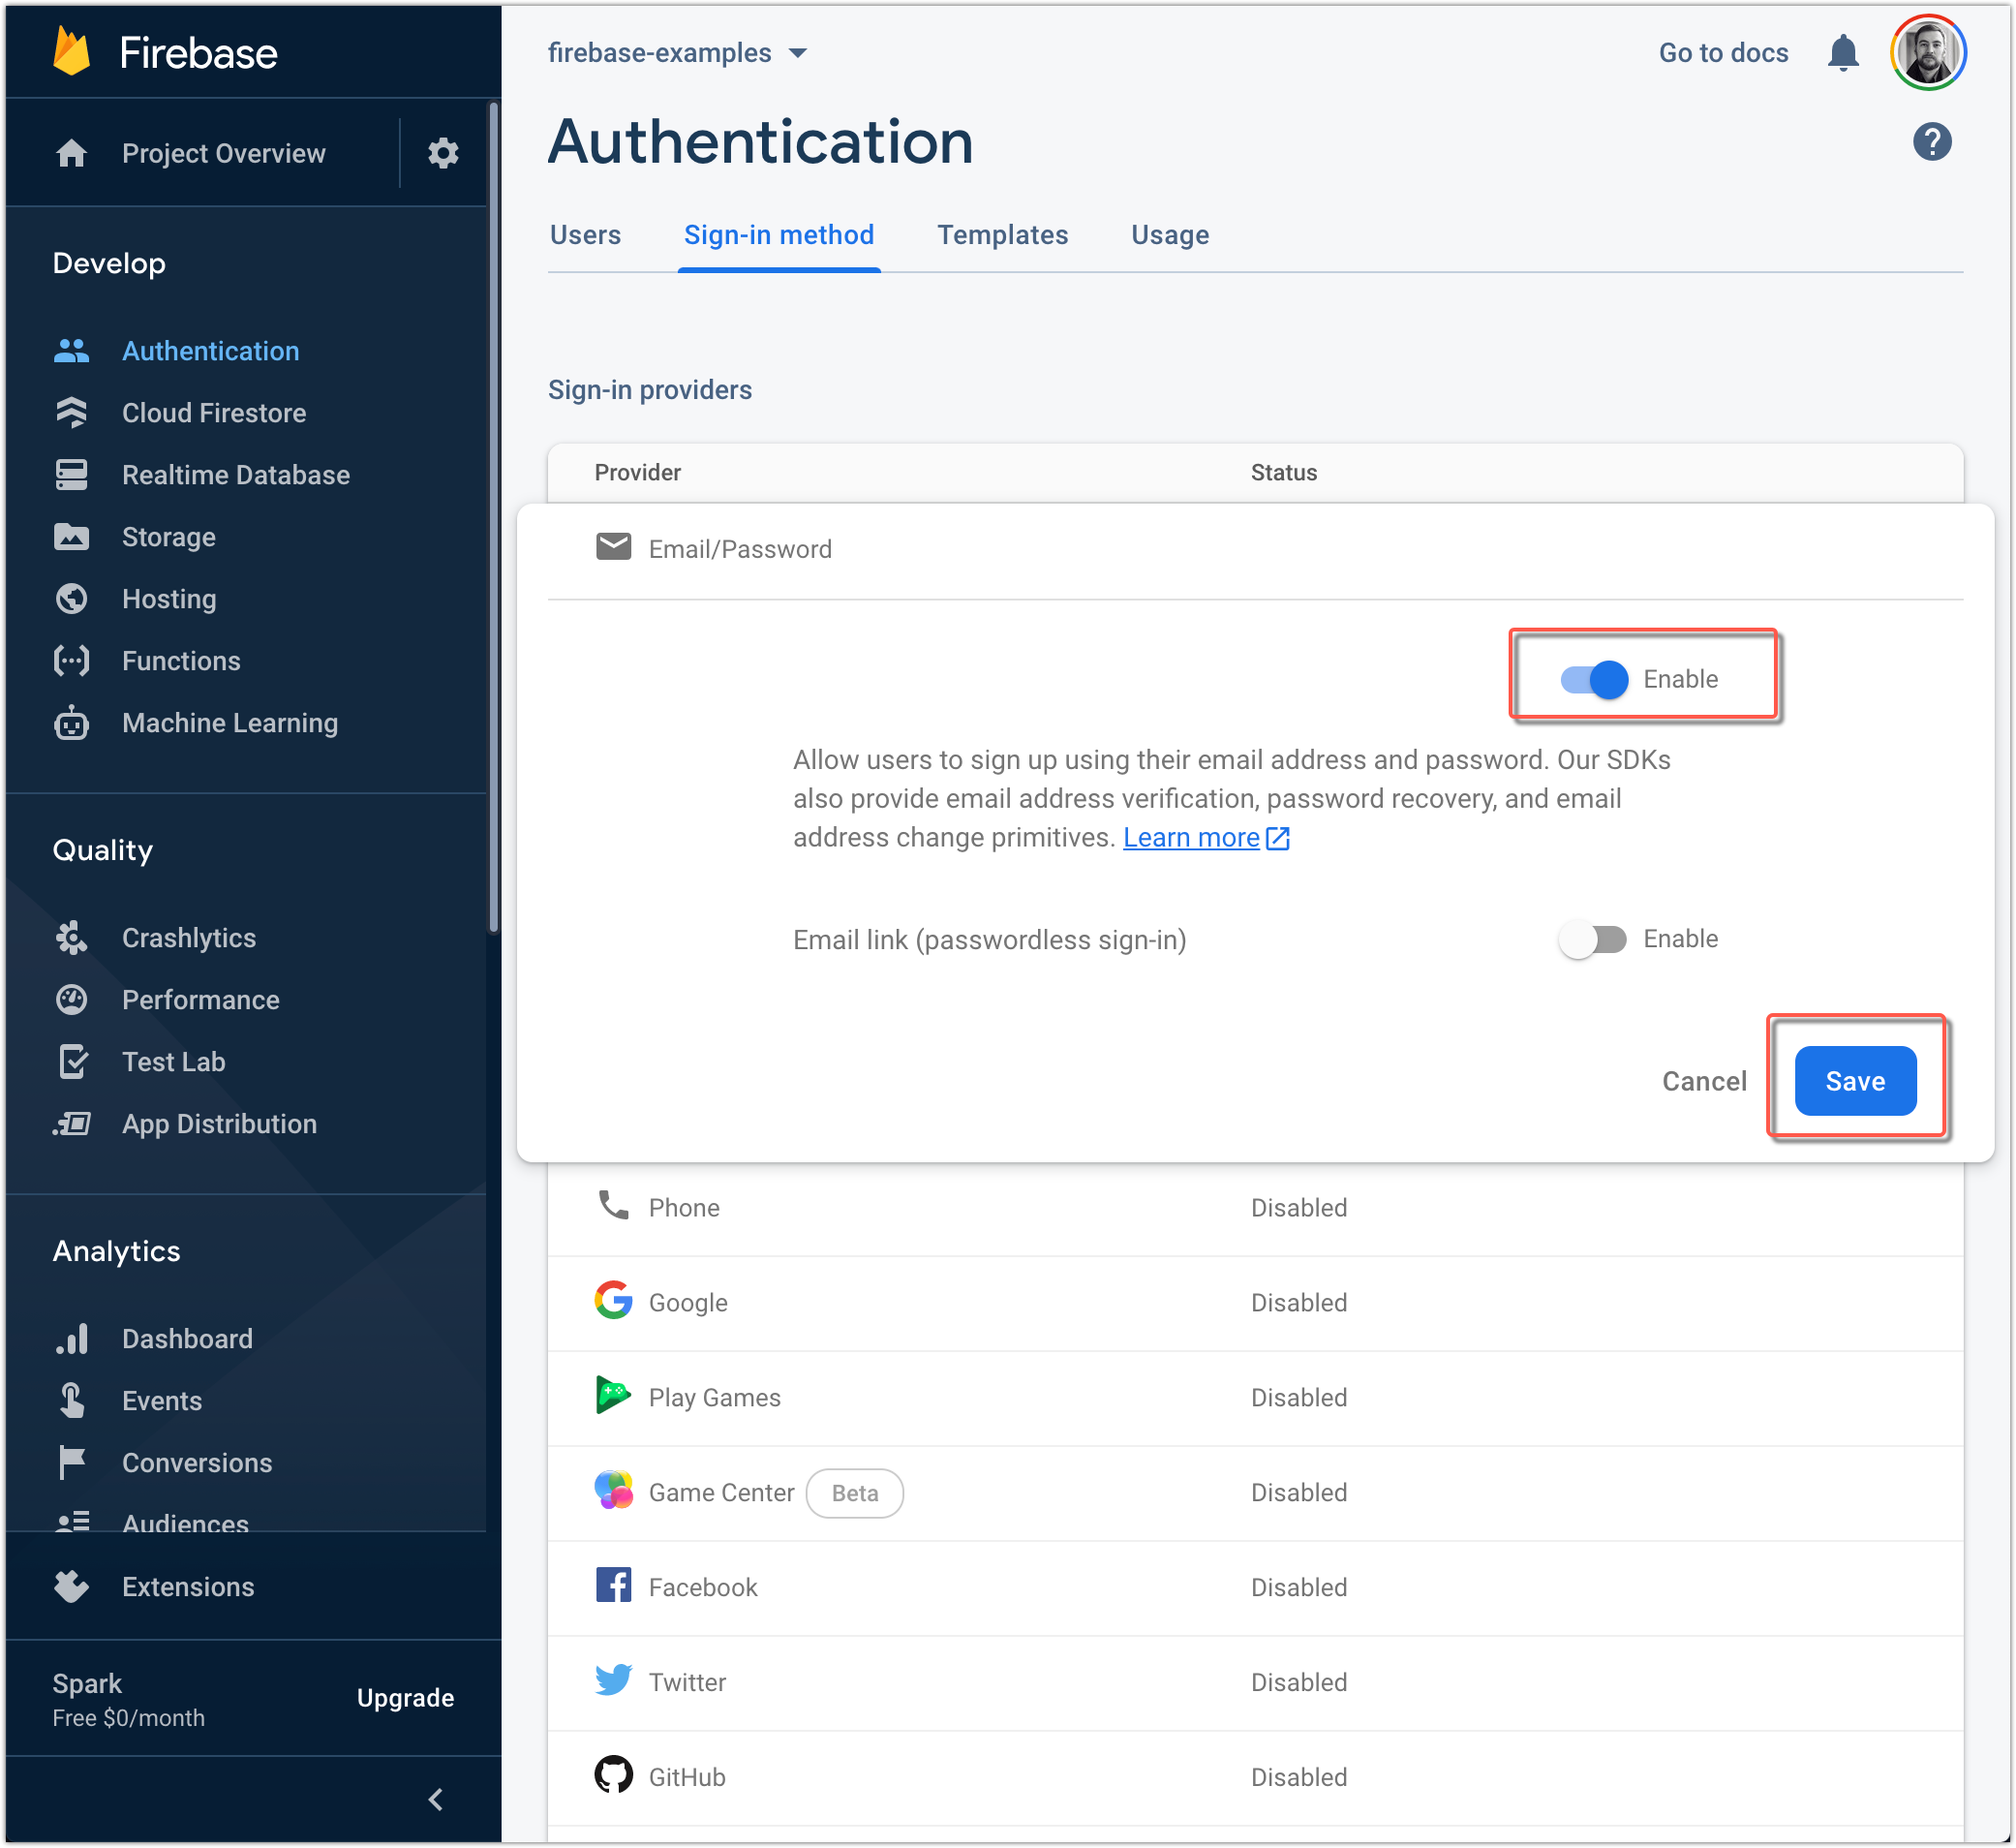
Enable that and Save:
启用并保存:
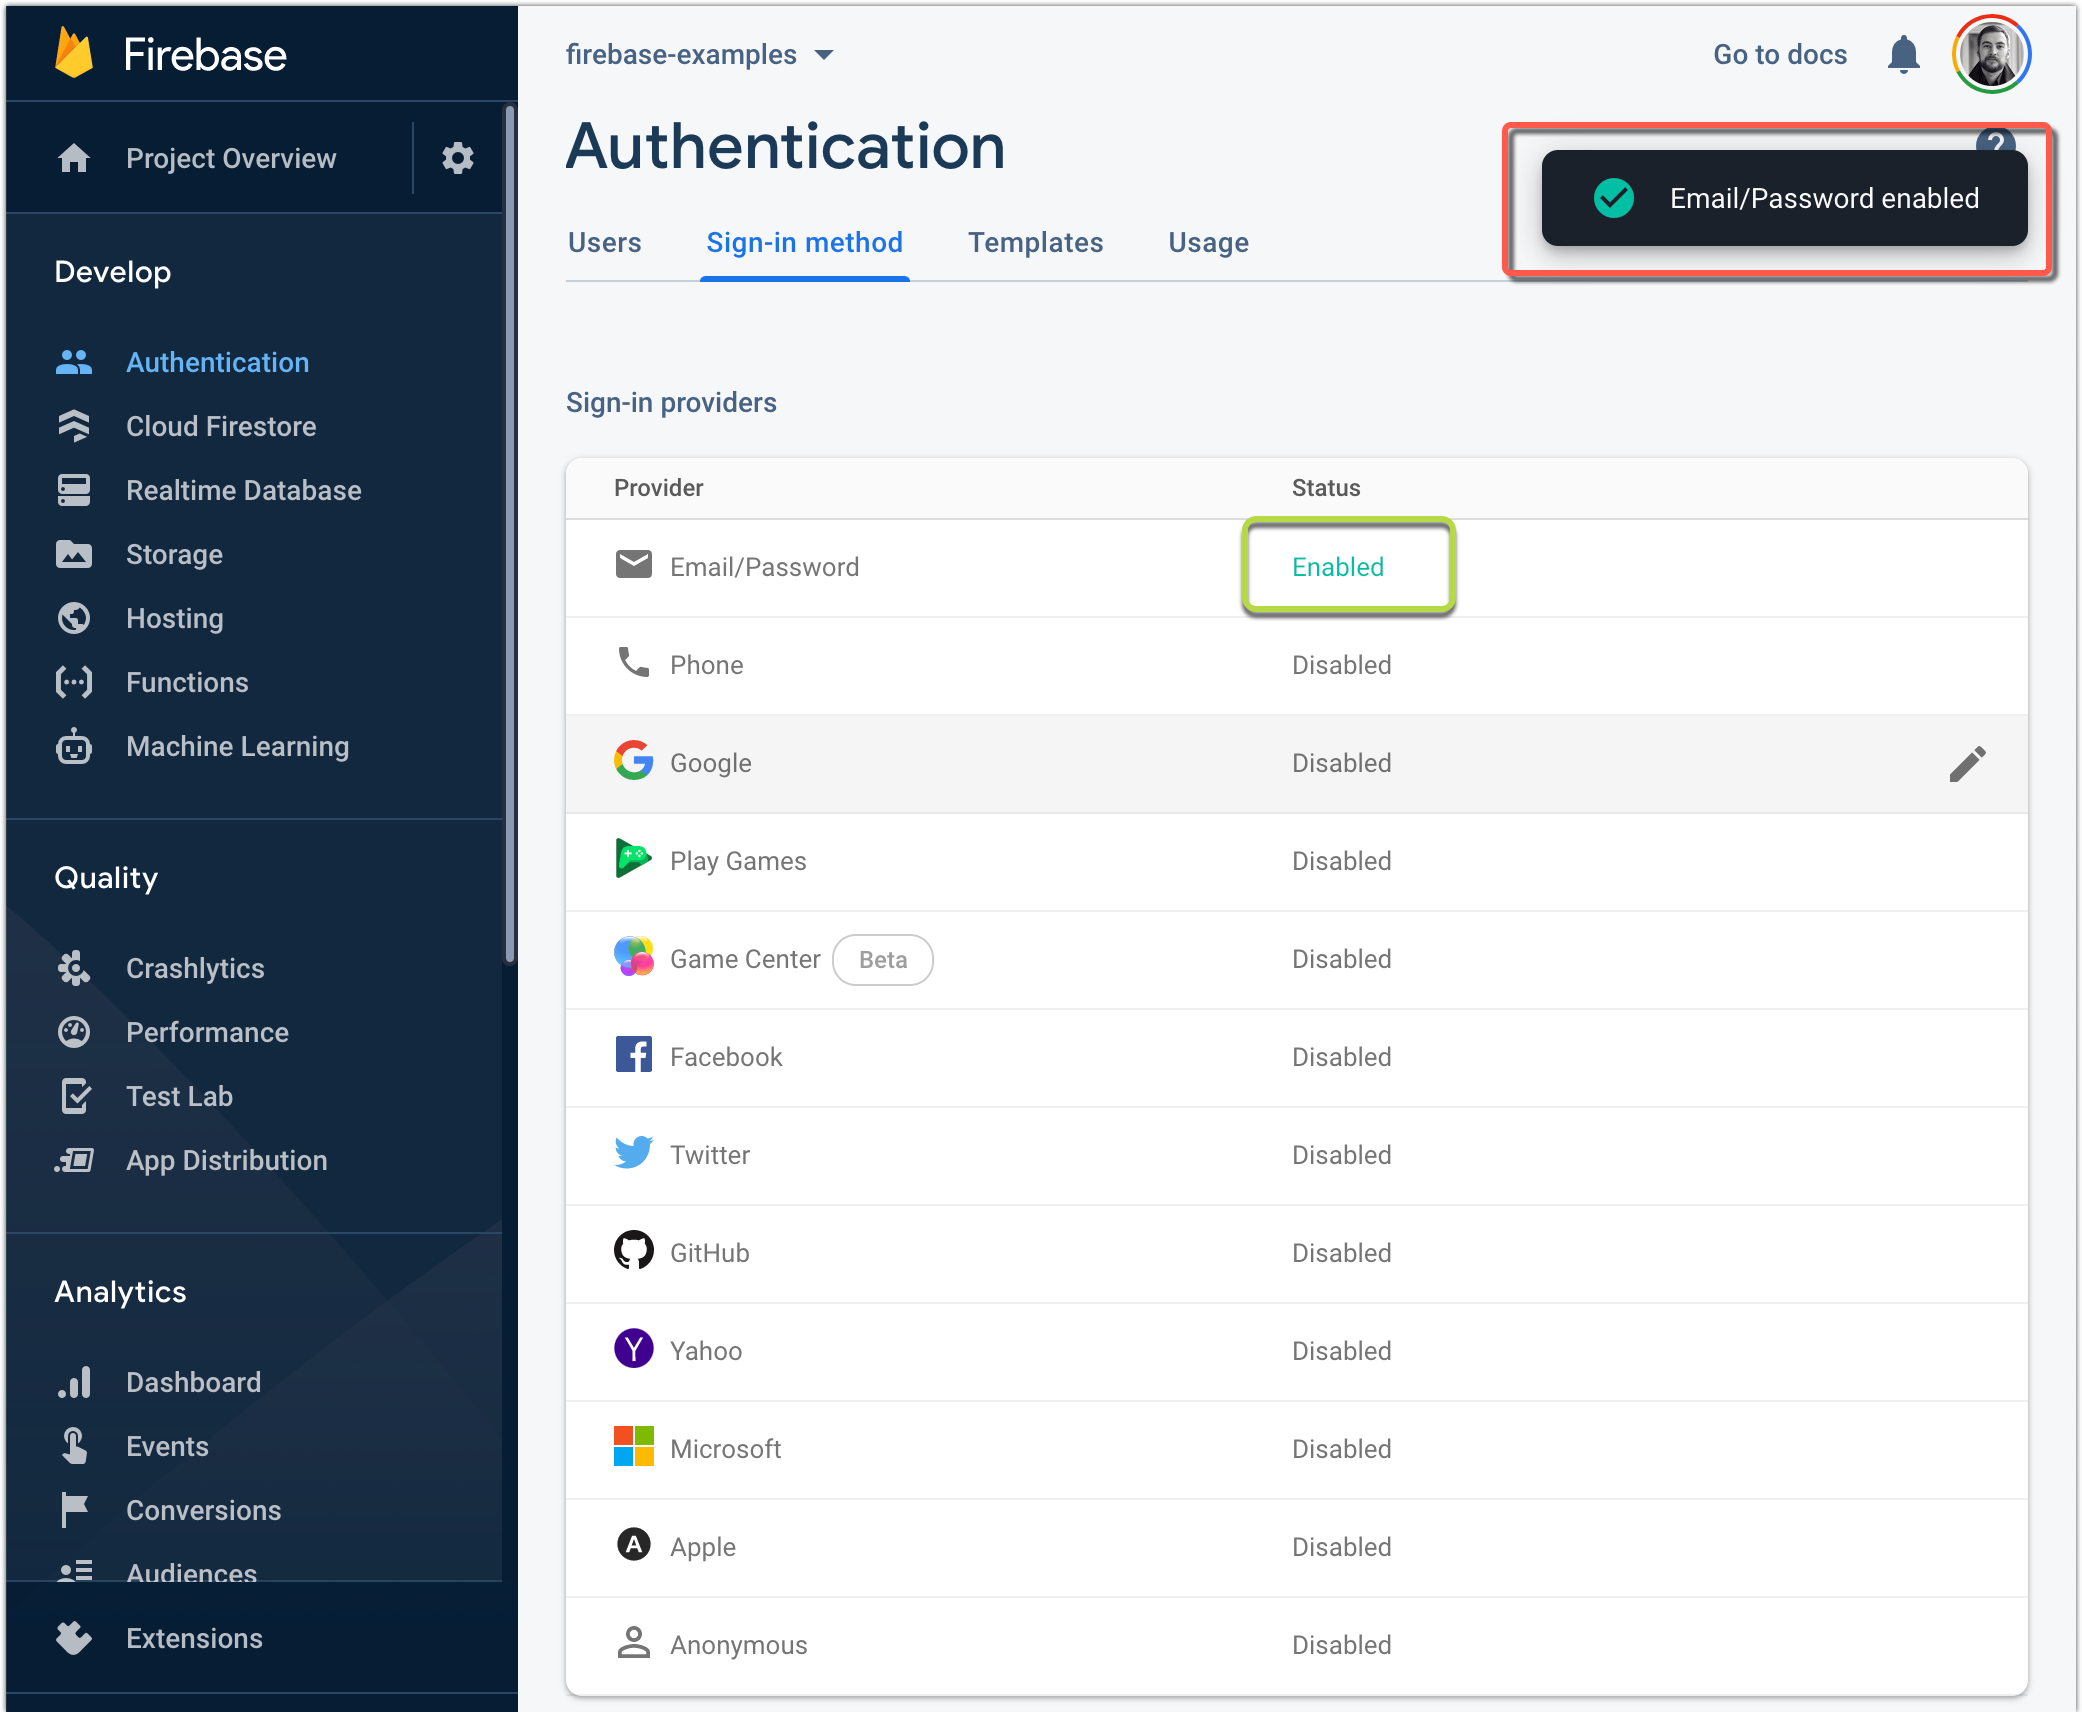
Now, we can see that only one sign-in method is Enabled:
现在,我们可以看到只有一种登录方法是Enabled :
Now you are ready to use firebase in your project. Will will start from a simple example — create a new user with Email and Password:
现在,您可以在项目中使用firebase了。 将从一个简单的示例开始-使用Email和Password创建一个新用户:
const confirmationResult = yield firebase_app
            .auth()
            .createUserWithEmailAndPassword(email, password);
firebase_app is a firebase instance that is returned after initializing it.
firebase_app是初始化后返回的firebase实例。

Please, note. When a user is created he is automatically logged in. You can add this function for checking is user logged-in:
请注意。 创建用户后,他将自动登录。您可以添加此功能以检查用户是否登录:
firebase_app.auth().onAuthStateChanged((user) => {
        if (user) {
            // User is signed in.
            // Do something...
        }
    });
For user logout you can use this simple function:
对于用户注销,您可以使用以下简单功能:
firebase_instance.auth().signOut();Let's test it out (gif):
让我们对其进行测试(gif):
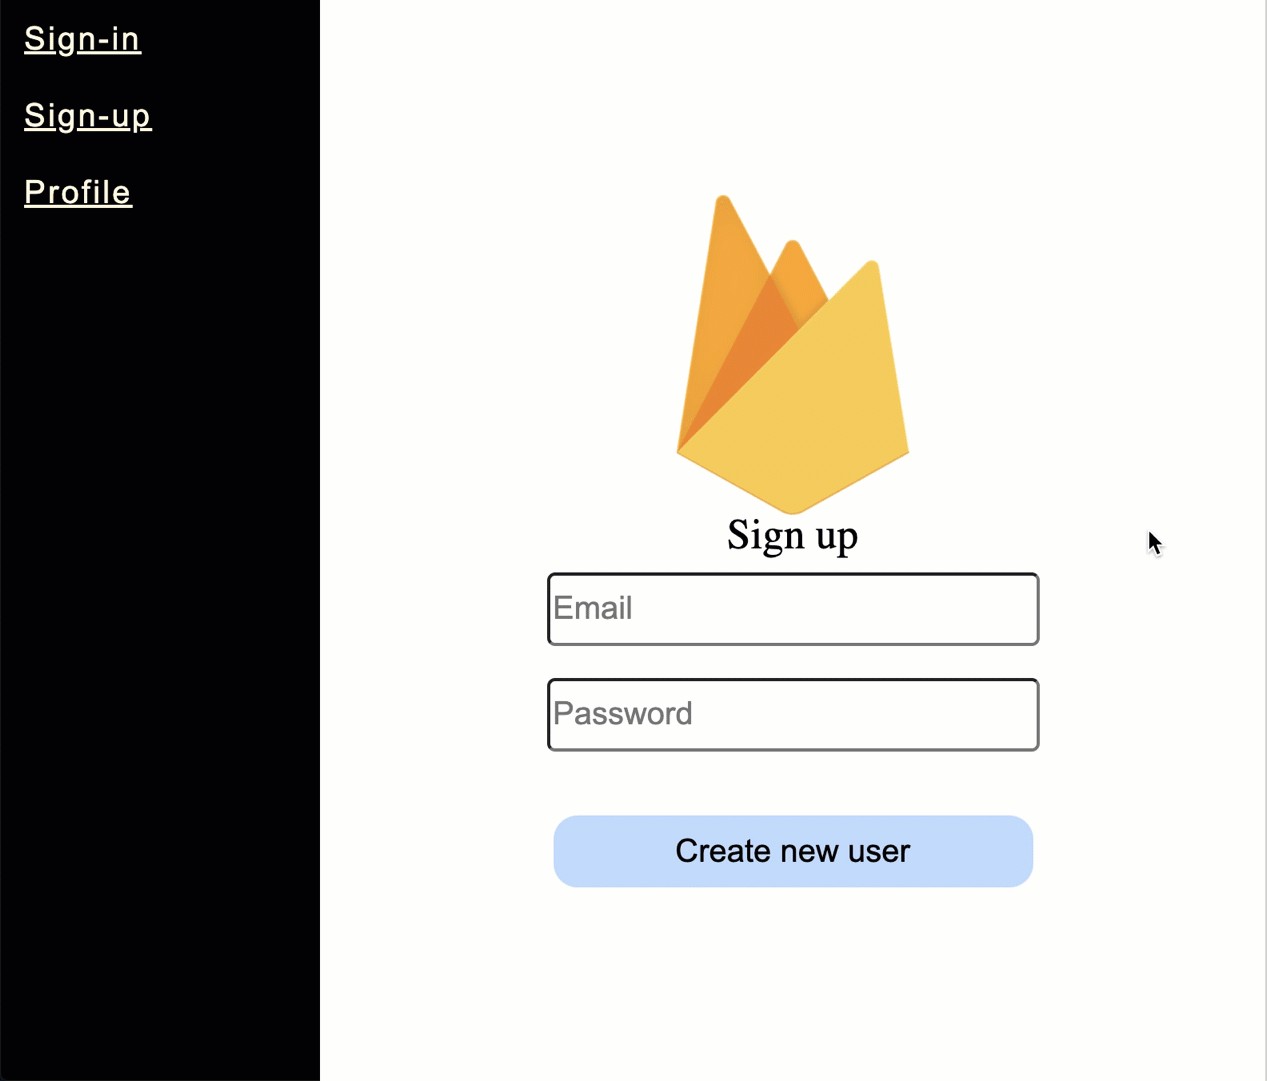
The nice this is that I haven’t written a single line of code for field validation, firebase validated them for me.
令人高兴的是,我没有为现场验证编写任何代码, firebase为我验证了它们。
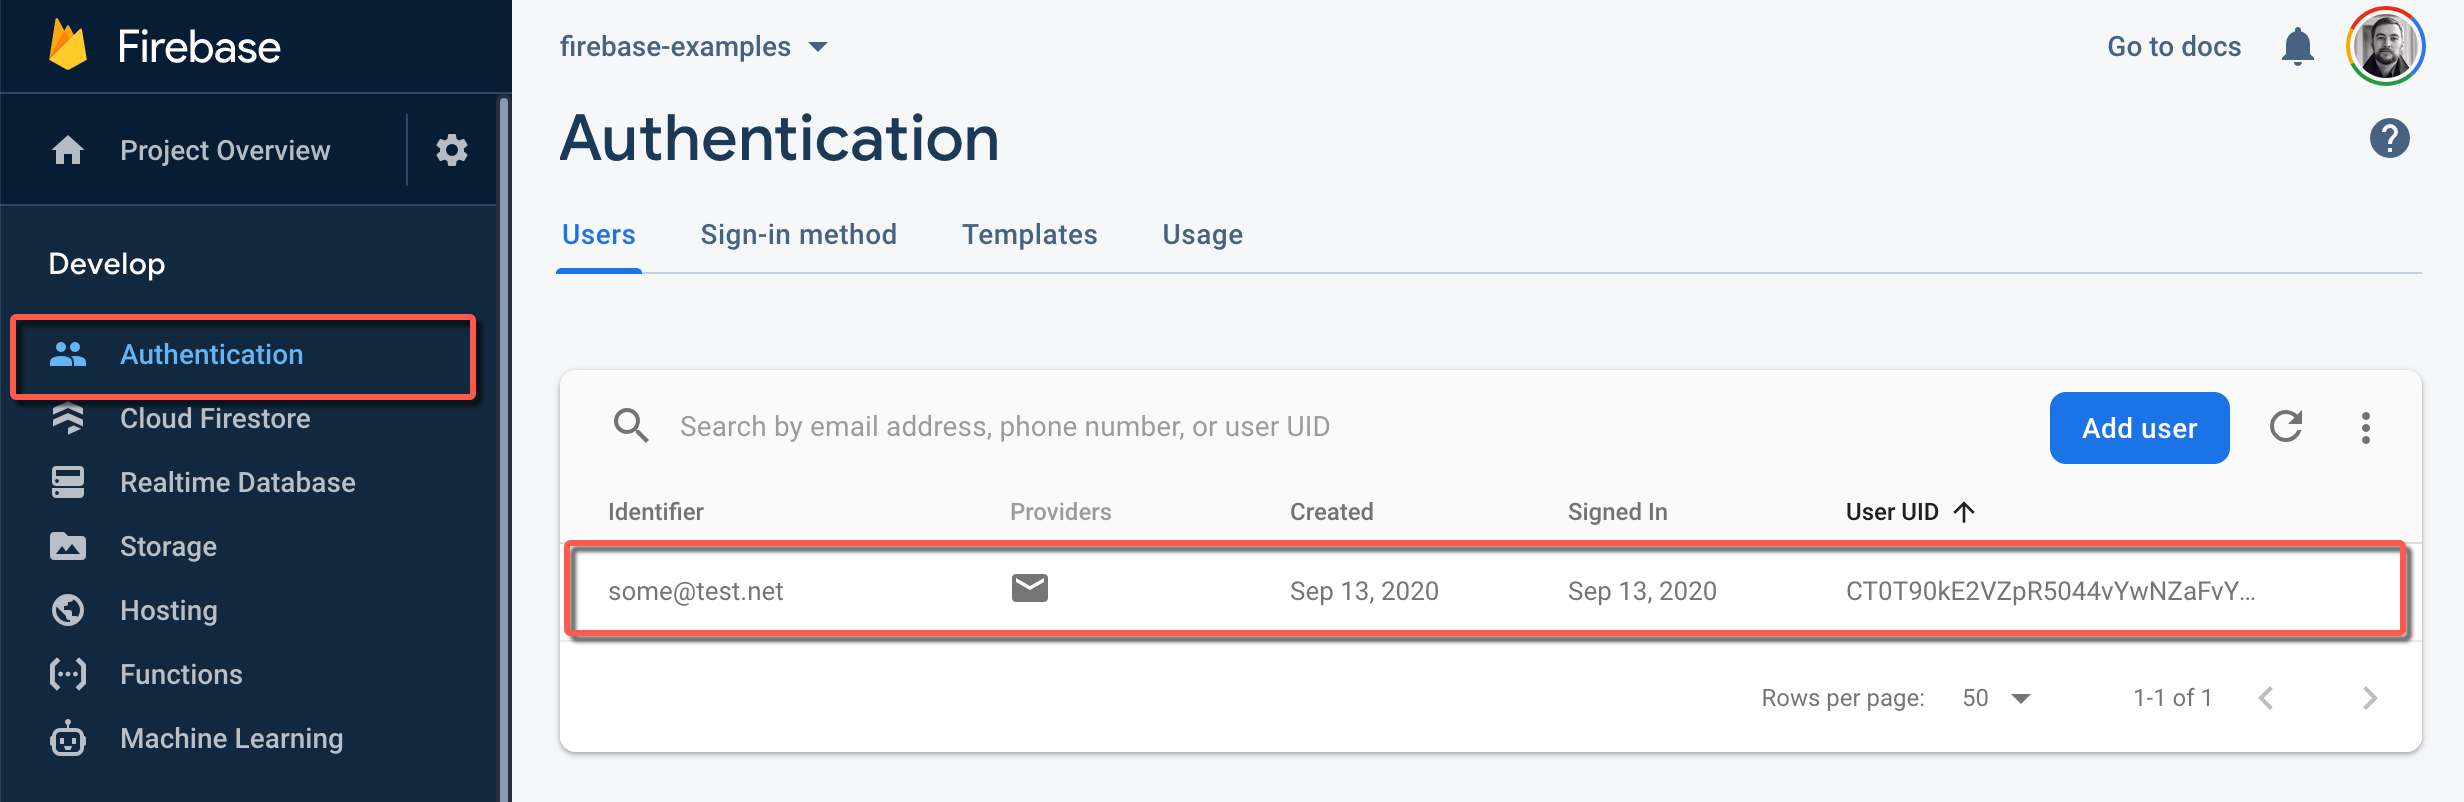
Let’s check “Authentication” tab:
让我们检查“身份验证”标签:
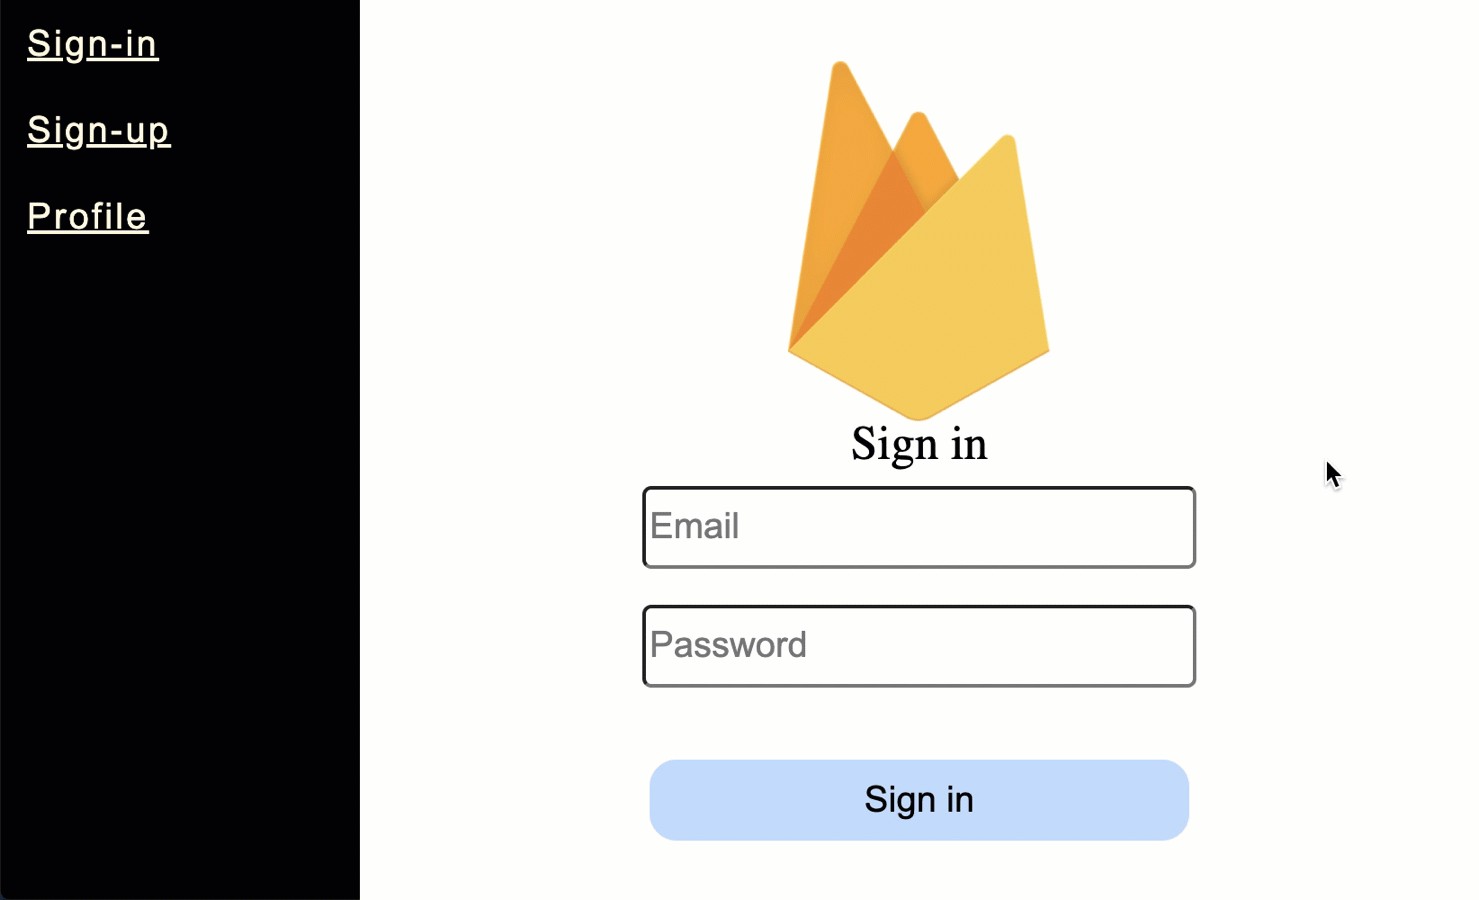
4.使用电子邮件和密码登录 (4. Sign in with email and password)
For sign-in use signInWithEmailAndPassword (obviously, Carl 🧐) function:
对于登录,请使用signInWithEmailAndPassword (显然是Carl🧐)函数:
const userCredential = yield firebase_app
            .auth()
            .signInWithEmailAndPassword(email, password);
userCredentials's type is…
userCredentials's类型是…
/**
   * A structure containing a User, an AuthCredential, the operationType, and
   * any additional user information that was returned from the identity provider.
   * operationType could be 'signIn' for a sign-in operation, 'link' for a linking
   * operation and 'reauthenticate' for a reauthentication operation.
   */
  type UserCredential = {
    additionalUserInfo?: firebase.auth.AdditionalUserInfo | null;
    credential: firebase.auth.AuthCredential | null;
    operationType?: string | null;
    user: firebase.User | null;
  };
… you can get the user’s information (like user’s id) after sign-in.
…登录后即可获取用户信息(例如用户ID)。
const userId = userCredential.user?.uid;You can check all about User properties and values by this link: https://firebase.google.com/docs/reference/js/firebase.User
您可以通过以下链接检查有关用户属性和值的所有信息: https : //firebase.google.com/docs/reference/js/firebase.User
SignIn component looks like this (if you are interested 😉):
登录组件如下所示(如果您对😉感兴趣):
import React, { useState } from 'react';
import firebaseImage from '../../assets/firebase.png';
import { useDispatch } from 'redux-react-hook';


import './signIn.scss';
import { signIn } from '../../store/auth/signIn';


export const SignIn: React.FC = () => {
    const [email, setEmail] = useState<string>('');
    const [password, setPassword] = useState<string>('');


    const dispatch = useDispatch();


    return (
        <div className="sign-up">
            <img src={firebaseImage} />


            <span>Sign in</span>
            <input
                id="email"
                name="email"
                type="input"
                placeholder="Email"
                value={email}
                onChange={(event) => setEmail(event.currentTarget.value)}
            />
            <input
                placeholder="Password"
                value={password}
                type="password"
                onChange={(event) => setPassword(event.currentTarget.value)}
            />
            <button onClick={() => dispatch(signIn({ email, password }))}>Sign in</button>
        </div>
    );
};
signIn saga function:
signIn传奇功能:
import { put } from 'redux-saga/effects';
import { toast } from 'react-toastify';


import { signInError, signInSuccess } from './actions';
import { firebase } from '../../../api/firebase';


export function* worker_signIn(
    action: Record<'payload', { email: string; password: string }>,
): IterableIterator<any> {
    let infoToastID;
    try {
        infoToastID = toast.info('Loading');


        const { email, password } = action.payload;


        const userCredential = yield firebase.auth().signInWithEmailAndPassword(email, password);


        toast.dismiss(infoToastID);
        toast.success('User logged in');


        yield put(signInSuccess(userCredential));
    } catch (error) {
        toast.dismiss(infoToastID);
        toast.error(error.message);


        yield put(signInError(error));
    }
}
Result (gif):
结果(gif):
5.使用Google登录 (5. Sign in with Google)
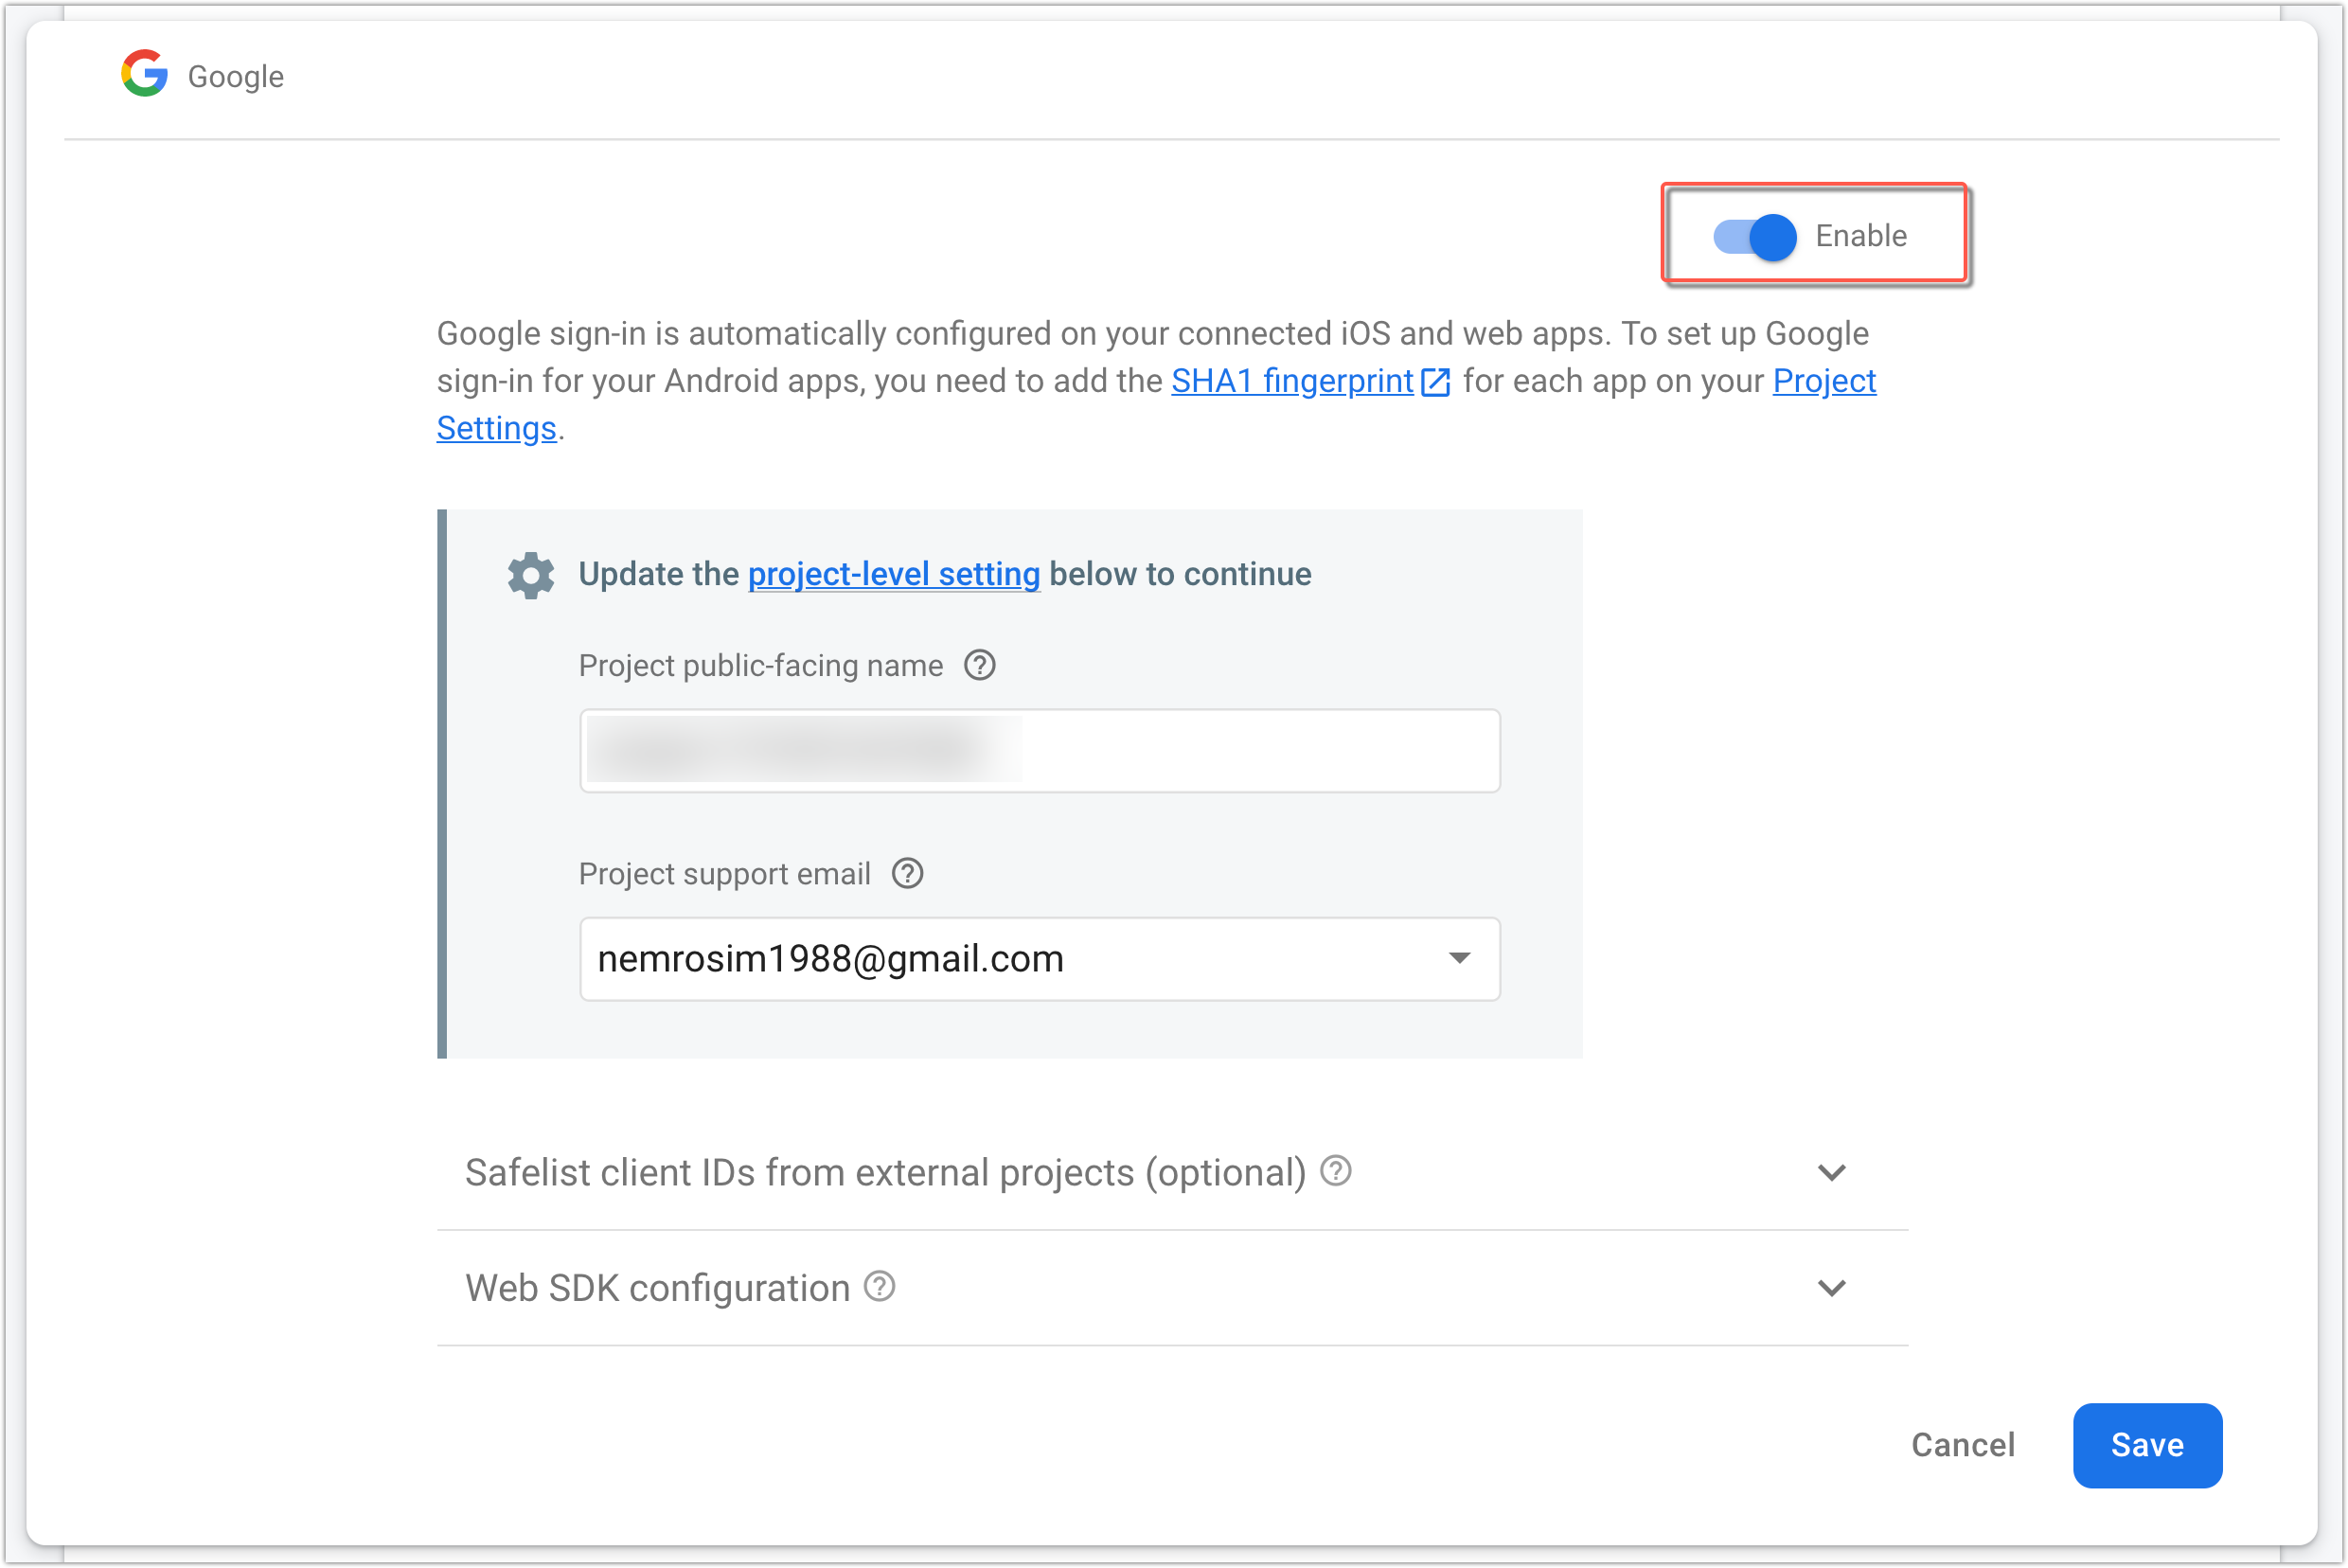
Now, let’s check sign-in method with Google. Just like we did with email and password method — we will need to Enable Google sigh-in method:
现在,让我们检查一下Google的登录方法。 就像我们使用email和password方法一样-我们将需要启用Google叹息方法:
Enable…
启用…
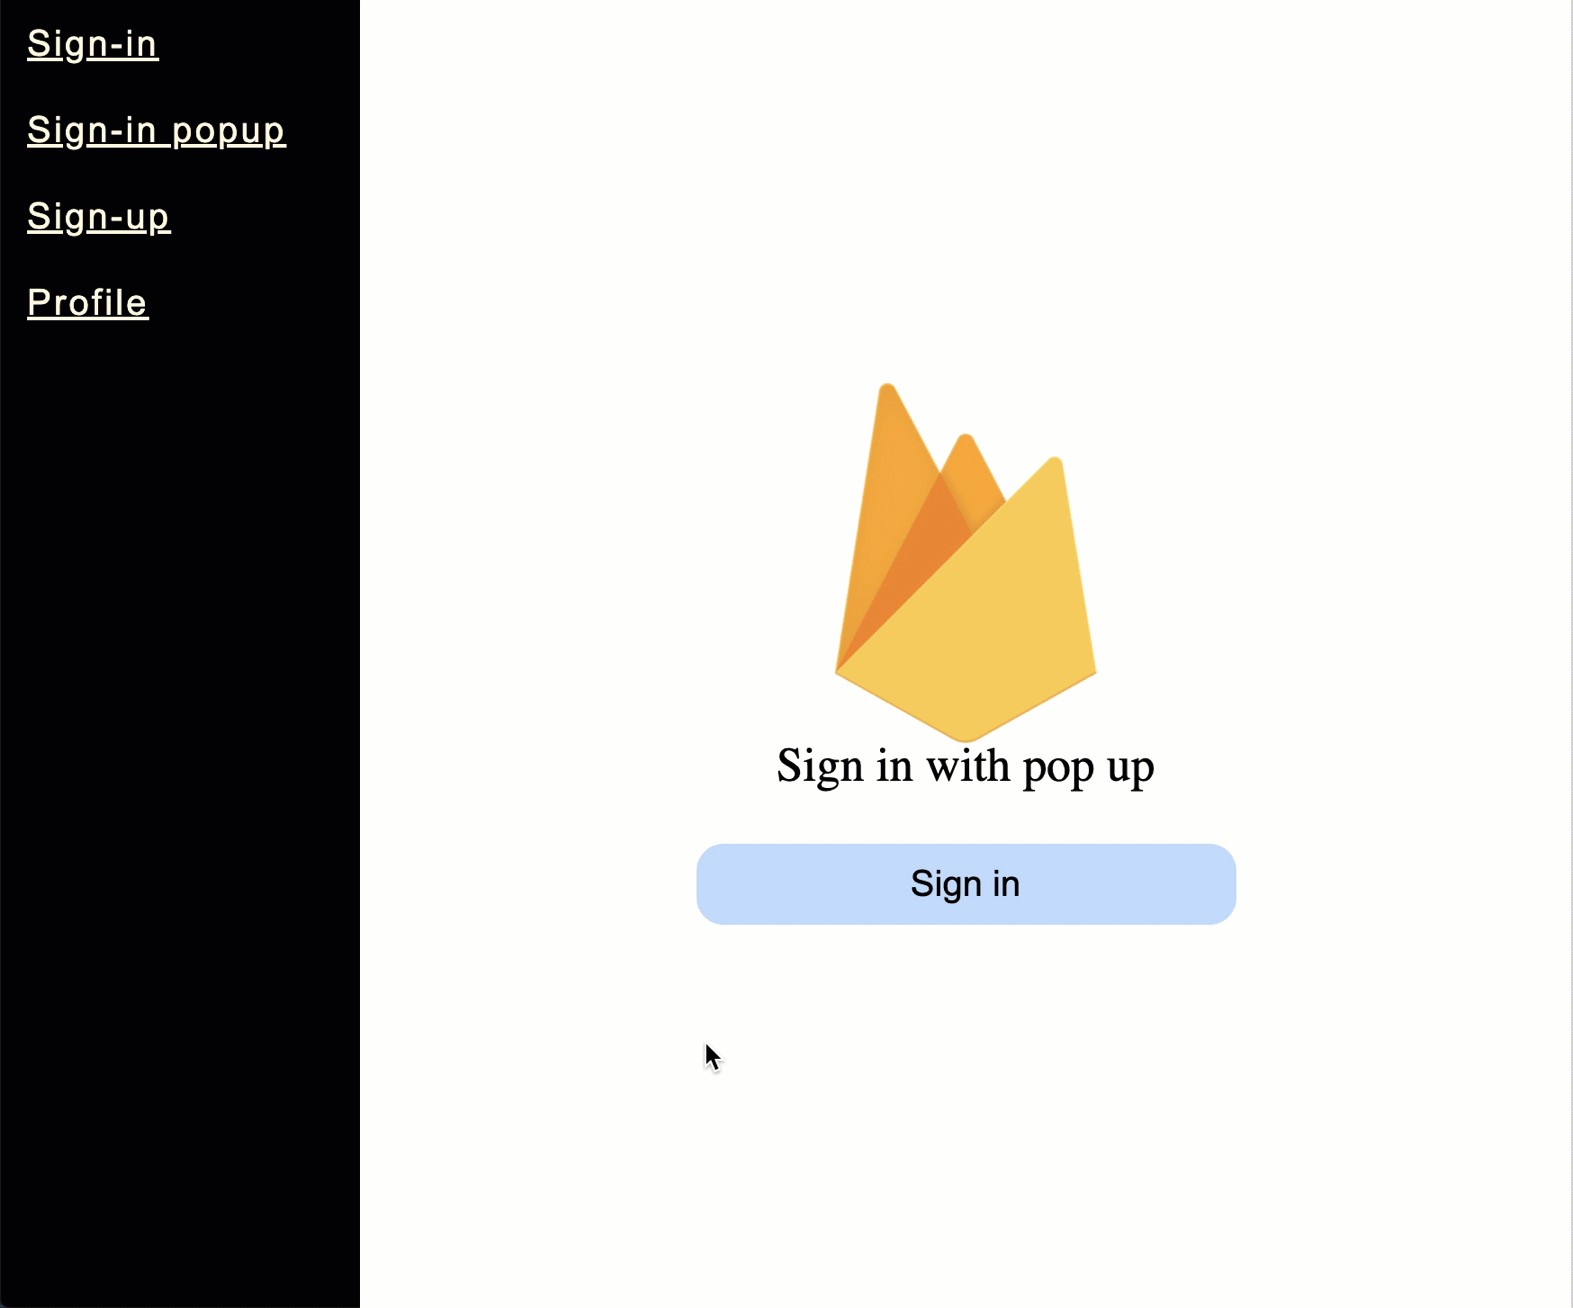
Unfortunately, it’s not called signInWithGoogle or something similar, it is called signInWithPopup
不幸的是,它不称为signInWithGoogle或类似名称,它称为signInWithPopup
SignInWithPopup component (just in case):
SignInWithPopup组件(以防万一):
import React from 'react';
import firebaseImage from '../../assets/firebase.png';
import { useDispatch } from 'redux-react-hook';
import { signInPopup } from '../../store/auth/signInWithPopUp';


import './signInWithPopup.scss';


export const SignInWithPopUp: React.FC = () => {
    const dispatch = useDispatch();


    return (
        <div className="sign-in-with-popup">
            <img src={firebaseImage} />


            <span>Sign in with pop up</span>
            <button
                onClick={() => {
                    dispatch(signInPopup());
                }}
            >
                Sign in
            </button>
        </div>
    );
};
SignInWithPopup saga function:
SignInWithPopup传奇功能:
import { put } from 'redux-saga/effects';
import { toast } from 'react-toastify';
import firebase from 'firebase';


import { signInPopupError, signInPopupSuccess } from './actions';
import { firebase_app } from '../../../api/firebase';


export function* worker_signInPopup(): IterableIterator<any> {
    let infoToastID;
    try {
        infoToastID = toast.info('Loading');


        let provider = new firebase.auth.GoogleAuthProvider();
        provider.addScope('email');


        const userCredential = yield firebase_app.auth().signInWithPopup(provider);


        toast.dismiss(infoToastID);
        toast.success('User logged in');


        yield put(signInPopupSuccess(userCredential));
    } catch (error) {
        toast.dismiss(infoToastID);
        toast.error(error.message);


        yield put(signInPopupError(error));
    }
}
This popup window will appear when the user clicks the sign-in button:
当用户单击登录按钮时,将显示此弹出窗口:
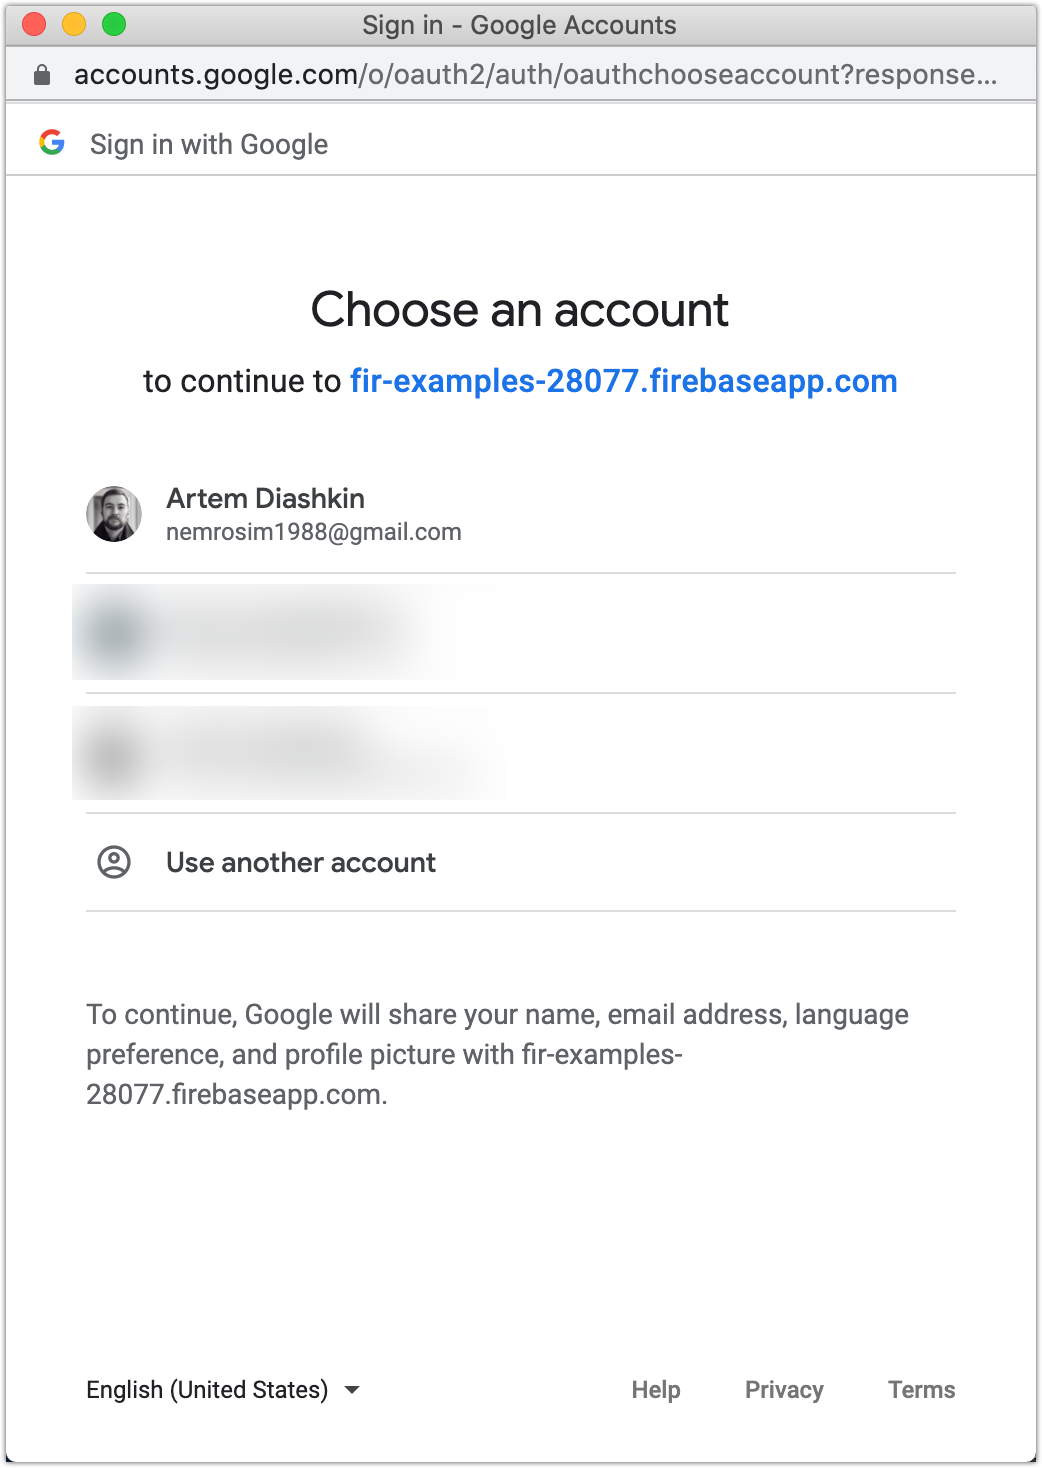
There is no need to add some additional configuration, components, or something like that. It will work right of the box.
无需添加一些其他配置,组件或类似内容。 它将在盒子右边工作。
Result (gif):
结果(gif):
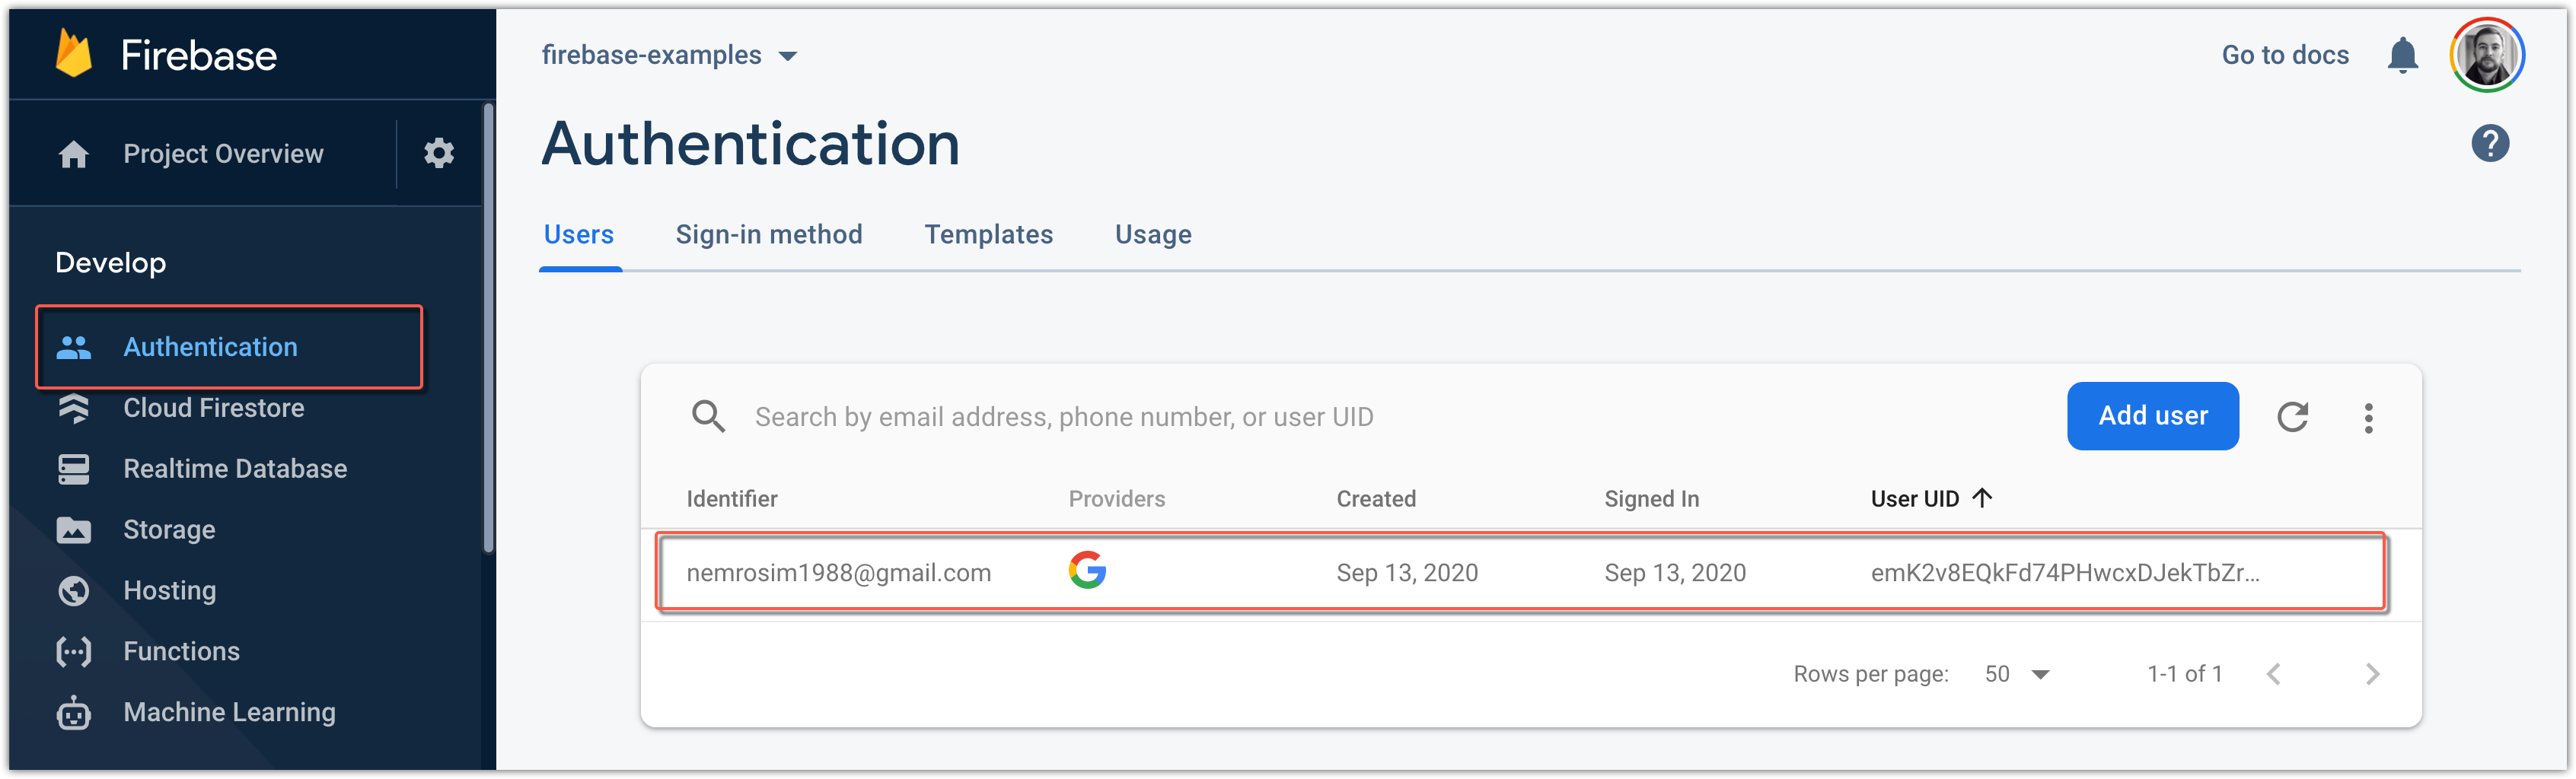
Firebase “Authentication” tab:
Firebase的“身份验证”标签:
6.创建一个Firestore数据库 (6. Create a Firestore database)
Before we will be able to use Firestore database in our React.js project we will need to create it…
在我们能够在我们的React.js项目中使用Firestore数据库之前,我们需要创建它…

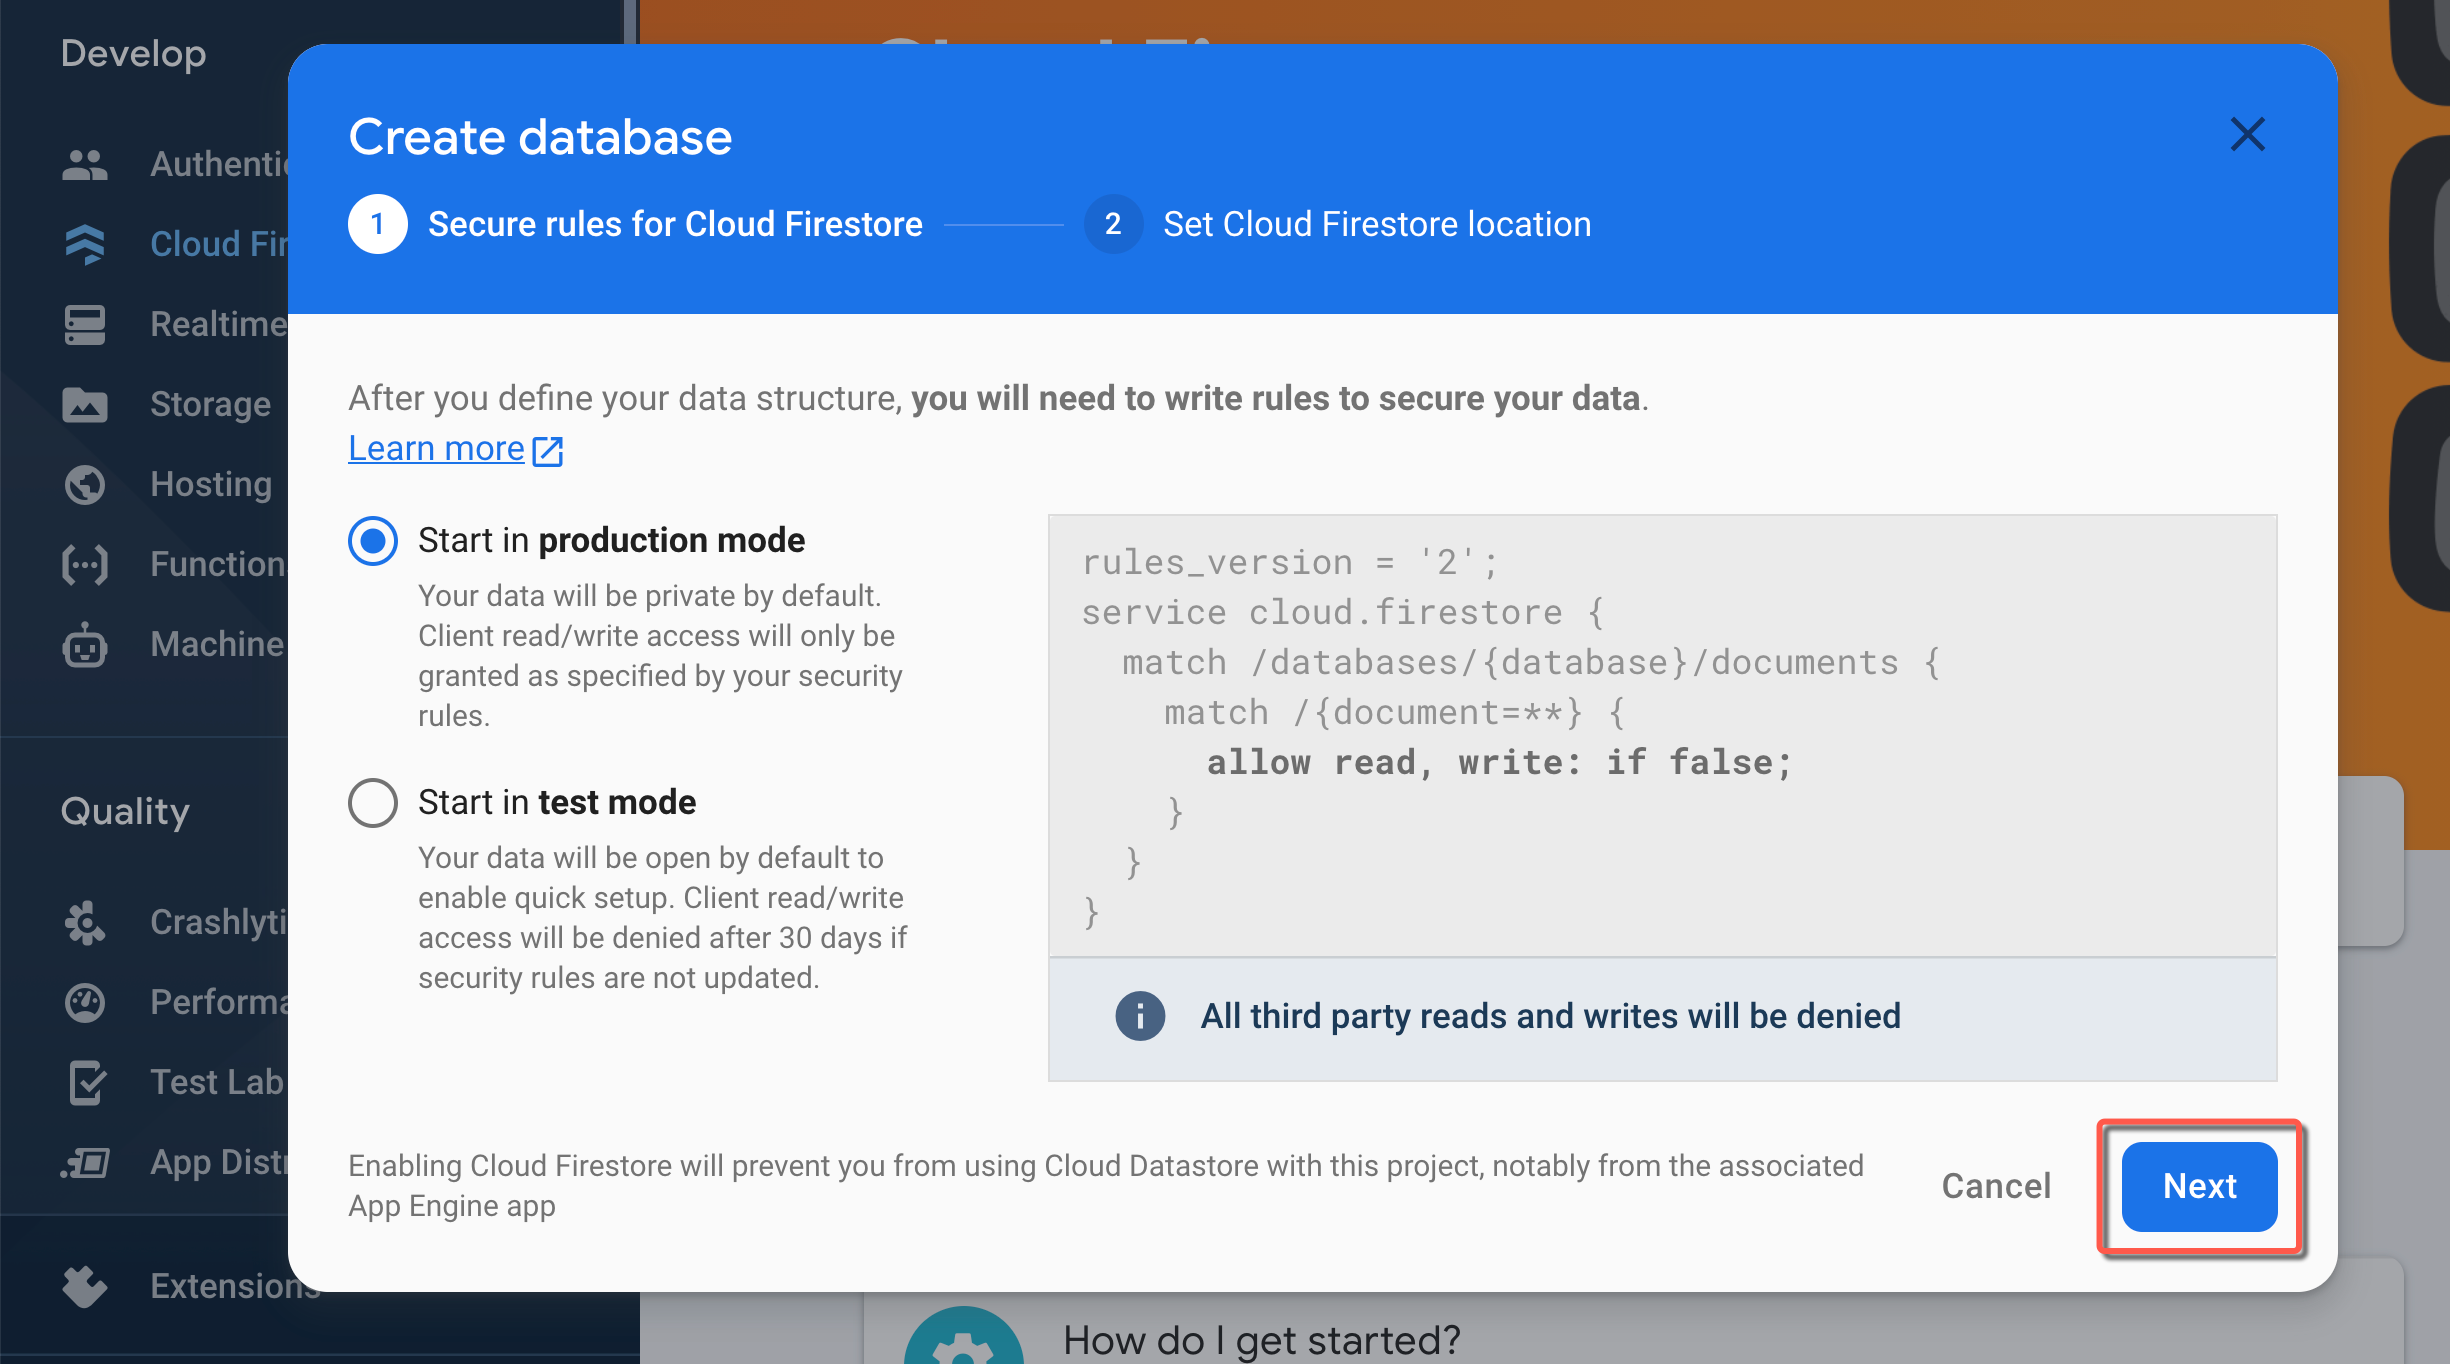
Firebase will ask you about the database access rules. You can change them later. Just select production mode for now, and click “Next”:
Firebase将询问您有关数据库访问规则的信息。 您可以稍后更改它们。 现在就选择production mode ,然后单击“下一步”:
Next, select location settings:
接下来,选择位置设置:
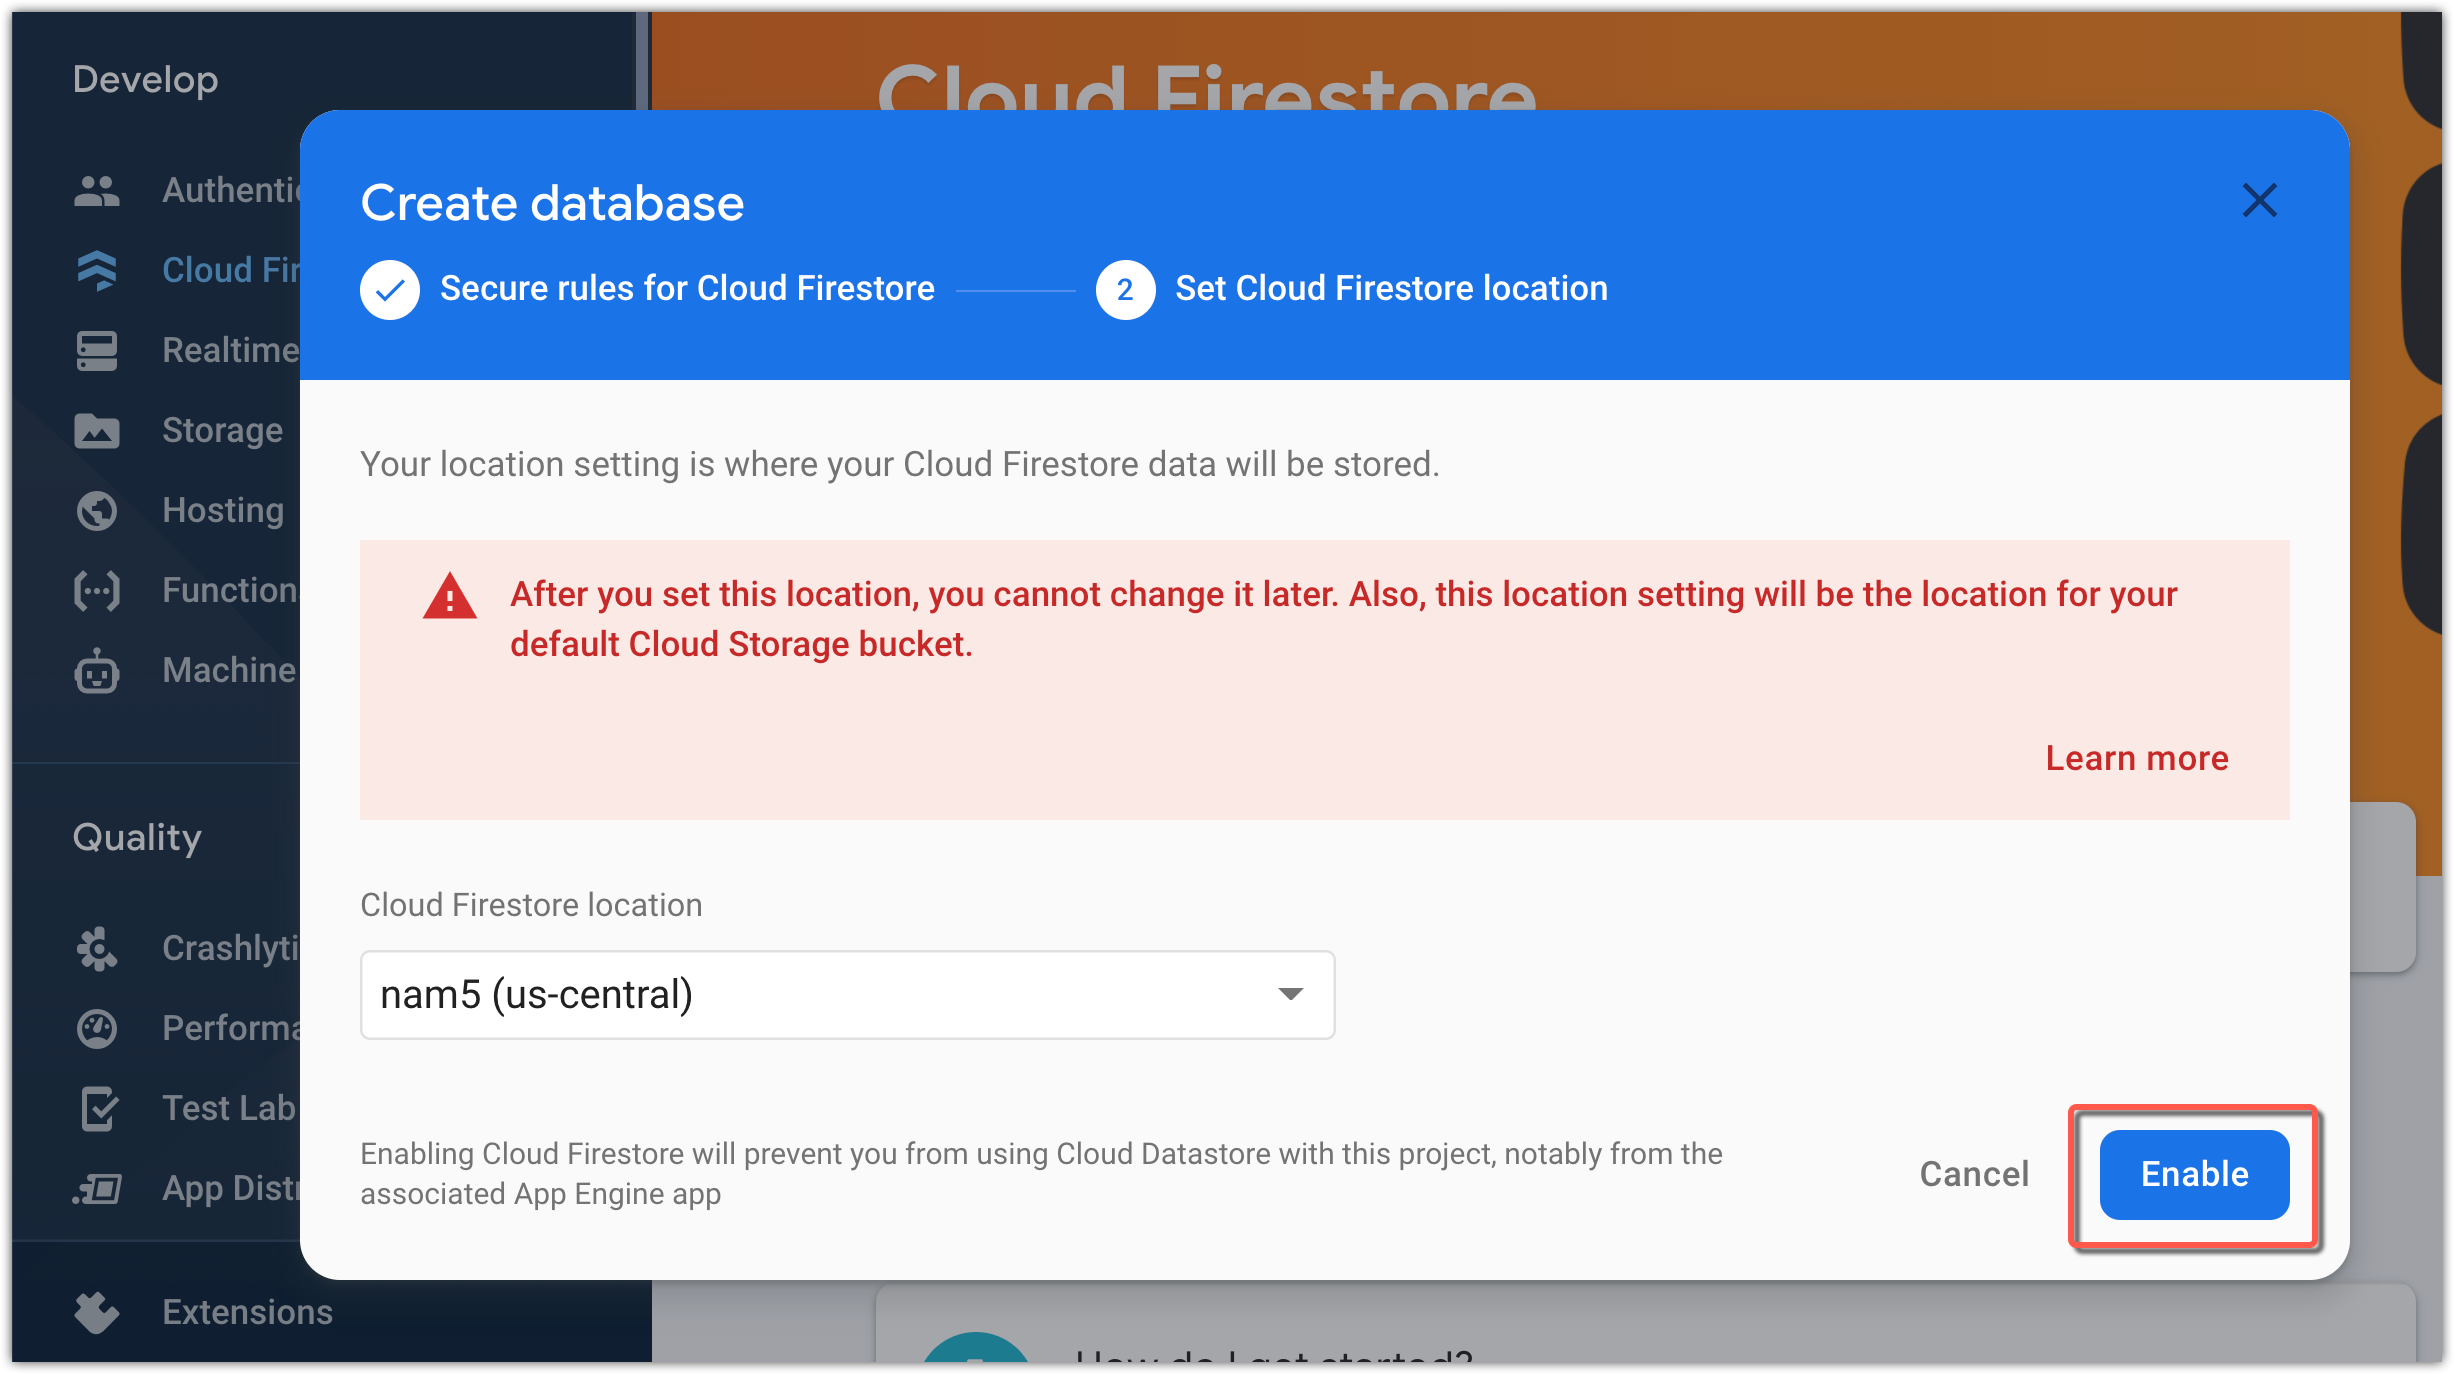
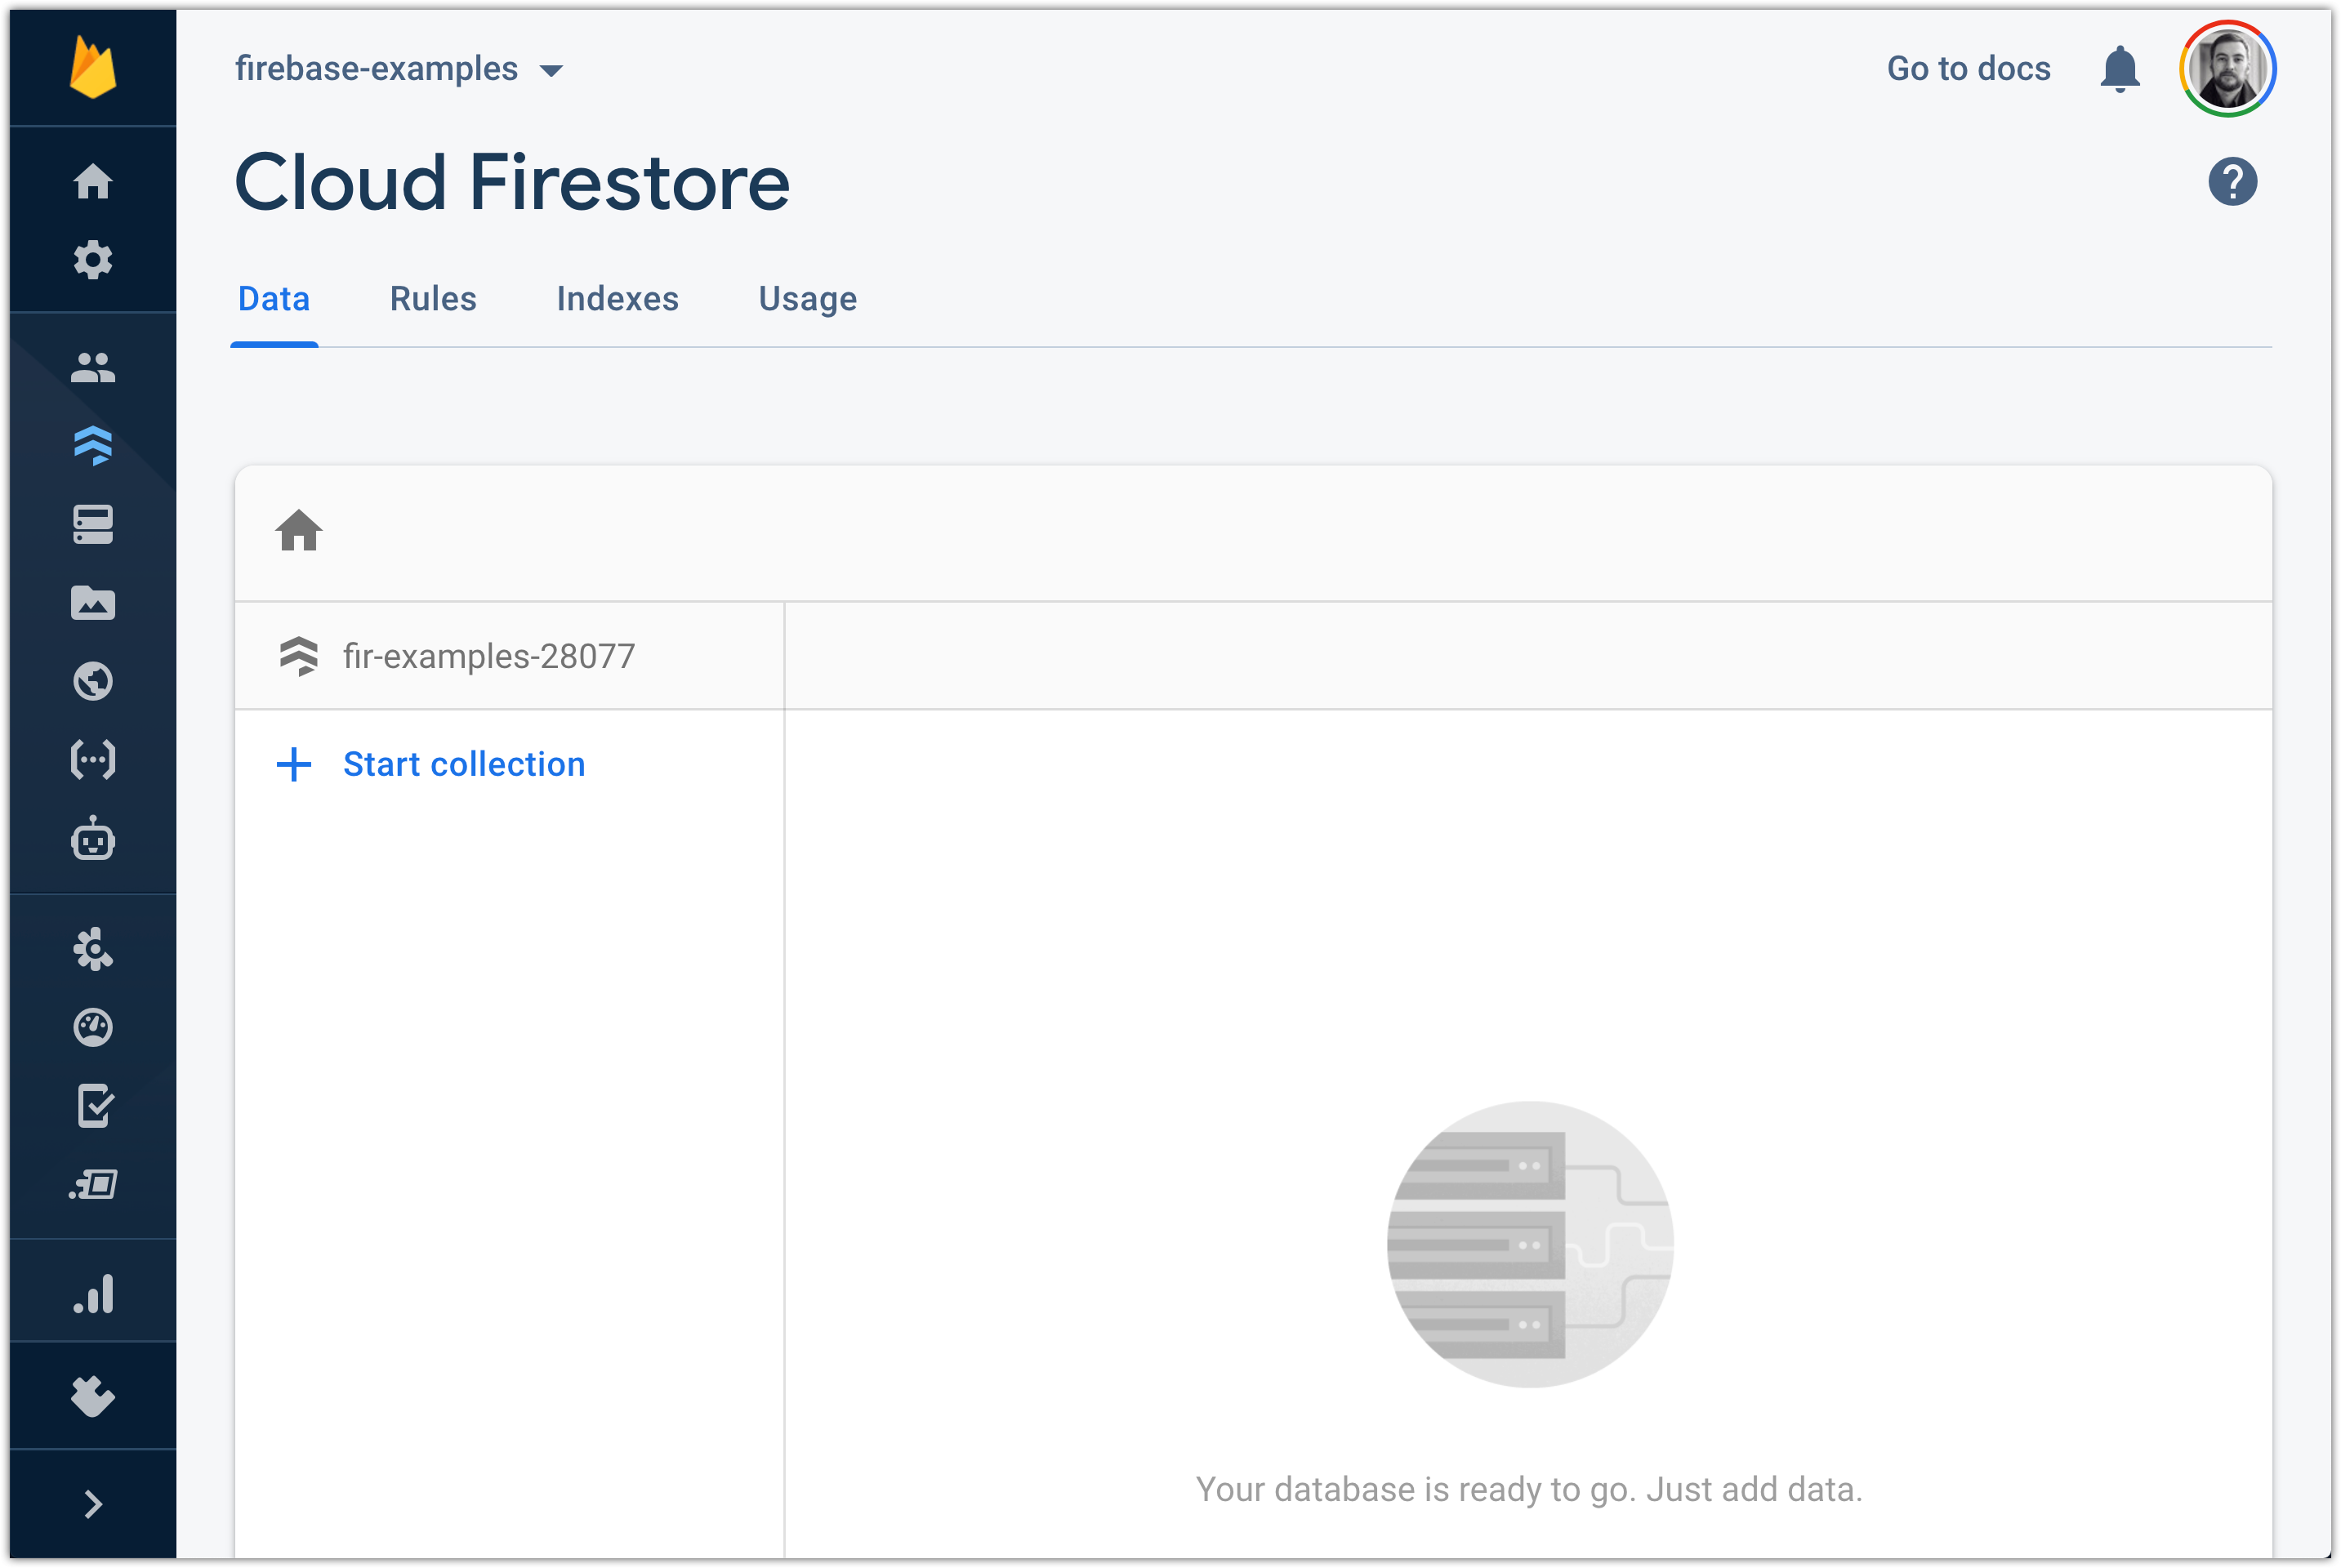
Press “Enable”. Firestore is ready.
按“启用”。 消防站已准备就绪。
But before we start creating collections and adding some data, we will need to change access rules.
但是在开始创建集合并添加一些数据之前,我们将需要更改访问规则。
Change false to request.auth != null . This will tell Firestore that we are allowing read and write to/from our database only for authenticated users.
将false更改为request.auth != null 。 这会告诉公司的FireStore,我们允许读取和写入/从我们的数据库只有通过验证的用户。

And now we can add some user’s profile information.
现在,我们可以添加一些用户的个人资料信息。
7. Firestore CRUD操作 (7. Firestore CRUD operations)
Before you can read/write some data to the document — you’ll need to get a reference to the document: DocumentReference
在向文档read / write一些数据之前,您需要获得对文档的引用: DocumentReference
const documentReference = firebase_app
                .firestore()
                .collection('profiles')
                .doc(userId);
And after that you can call CRUD methods:
然后,您可以调用CRUD方法:
yield documentReference
                .set({
                    some: 'custom-data',
                    fields: 'Hello World',
                });
There are four main CRUM firebase methods:
有四种主要的CRUM firebase方法:
Create →
set创建→
setRead →
get阅读→
getUpdate →
update更新→
updateDelete →
delete删除→
delete
建立新文件 (Create a new document)
If the document not exist — it will be created.
如果文档不存在,将创建它。
yield firebase_app
                .firestore()
                .collection('profiles')
                .doc(userId)
                .set({
                    something: 'some',
                    you: 'you',
                    want: 'want',
                    toAdd: 'toAdd',
                });
Let’s test it (gif):
让我们对其进行测试(gif):
Result in our’s app collection:
结果是我们的应用程序集合:
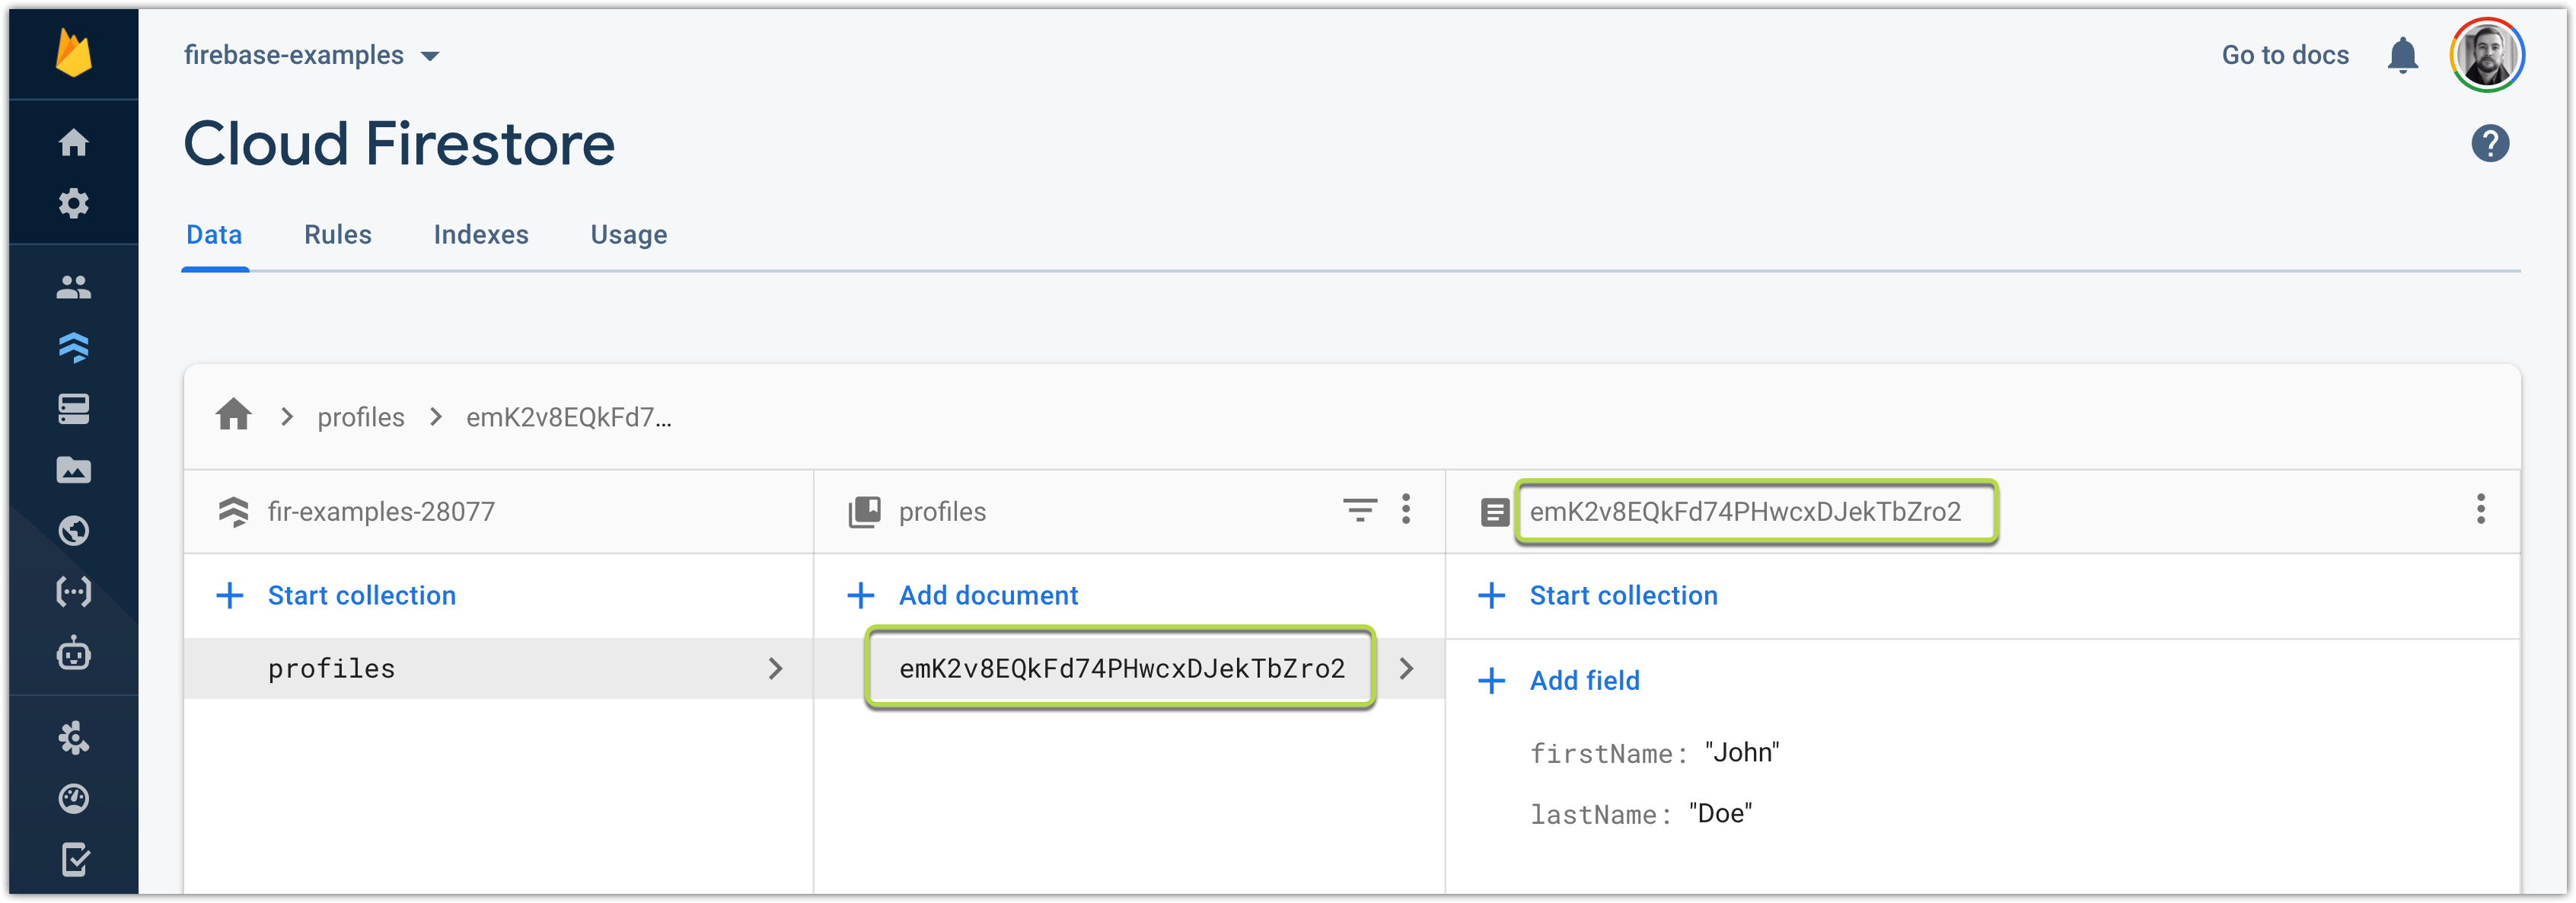
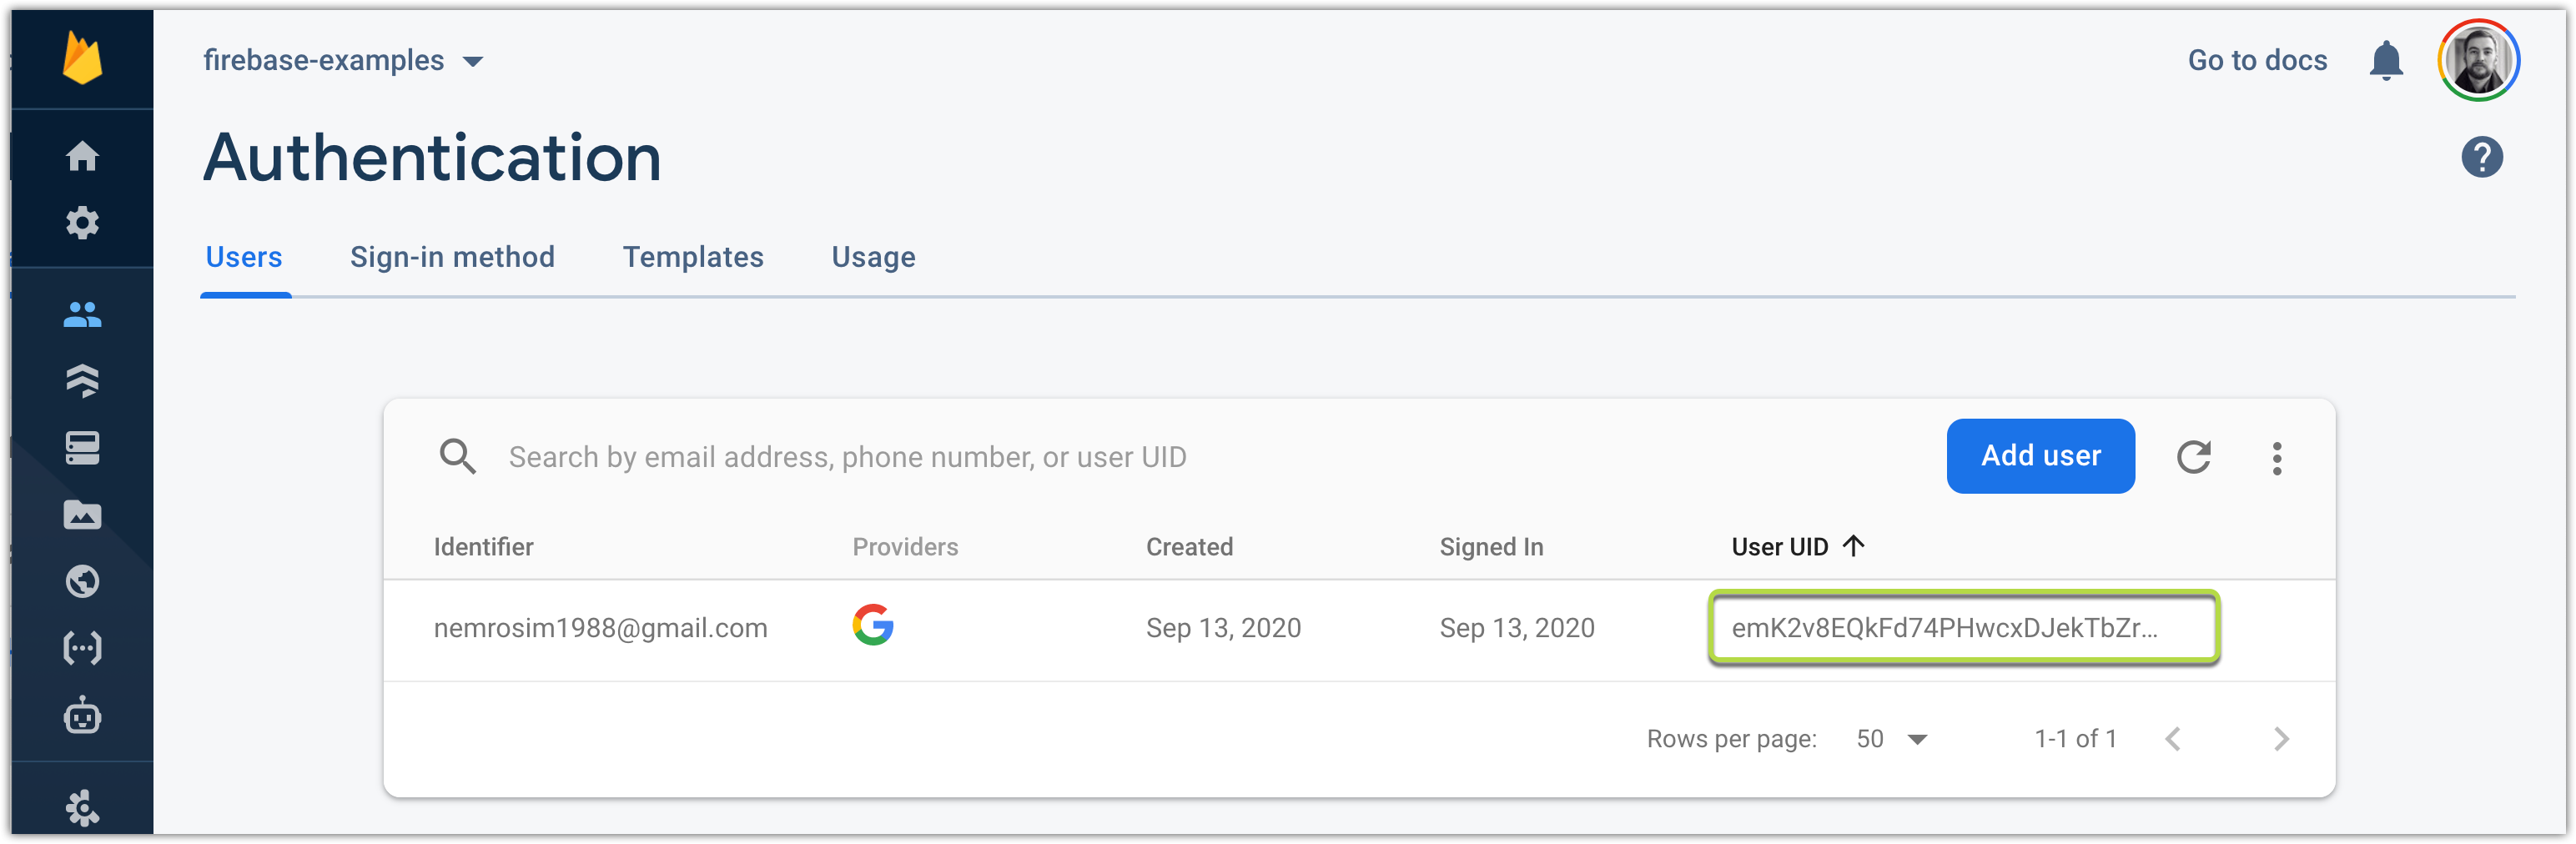
The document’s ID in profiles collection will be exactly the same as the authorized user ID:
配置文件集合中的文档ID将与授权用户ID完全相同:
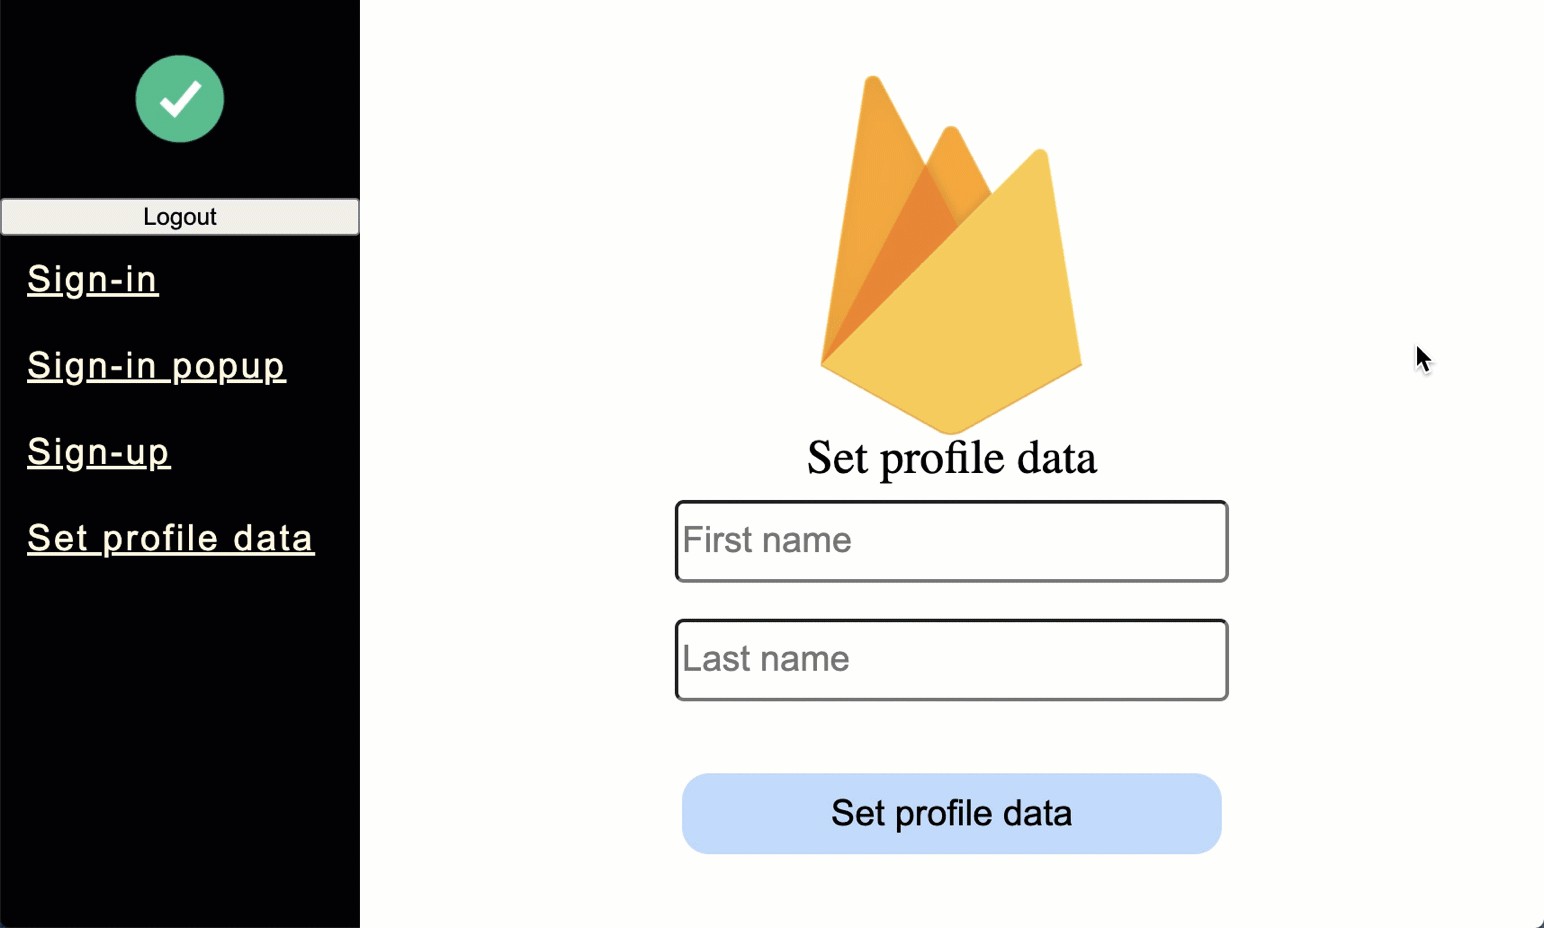
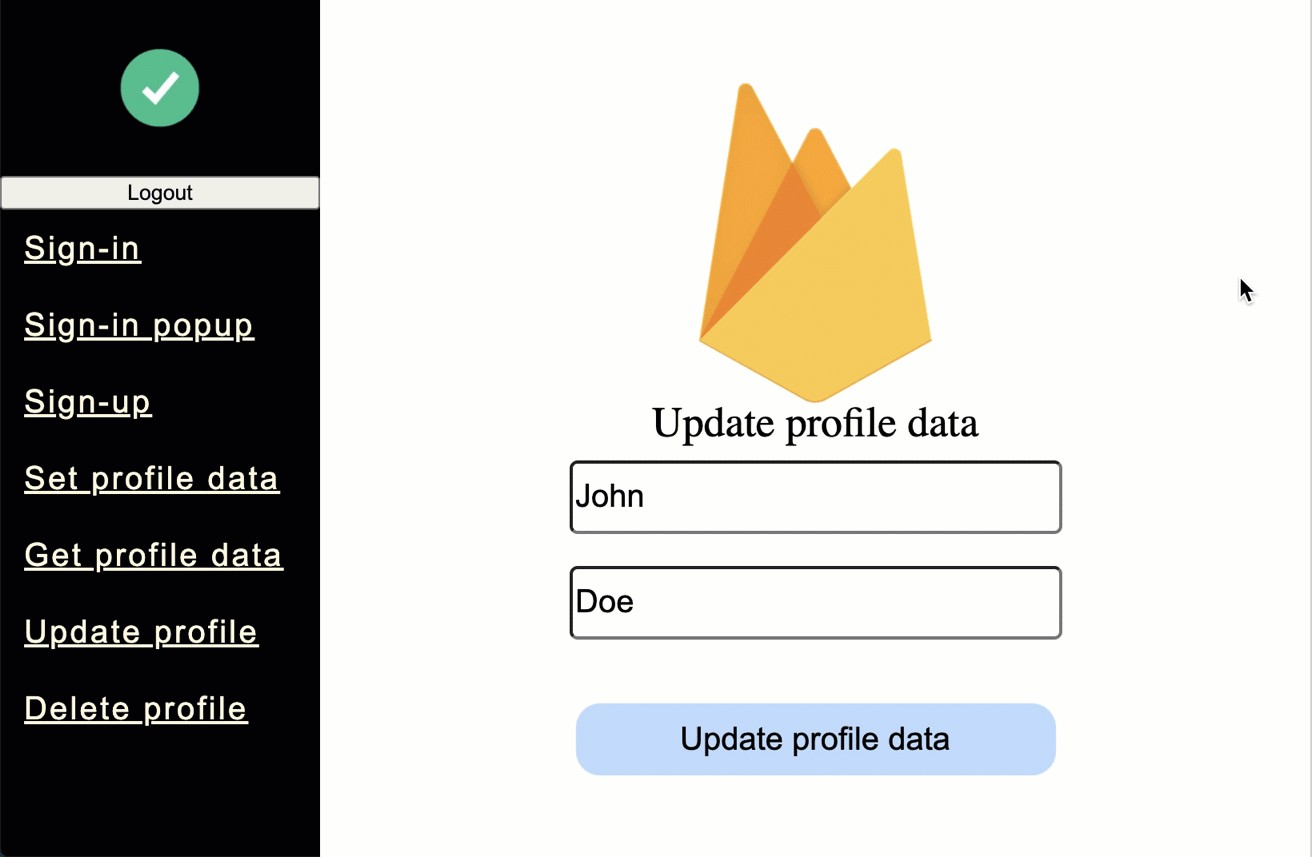
Just in case, this is SetProfileData component:
以防万一,这是SetProfileData组件:
import React, { useState } from 'react';
import firebaseImage from '../../assets/firebase.png';
import { useDispatch } from 'redux-react-hook';
import { action_setProfileData } from '../../store/profile/setProfileData';


import './setProfileData.scss';


export const SetProfileData: React.FC = () => {
    const [firstName, setFirstName] = useState<string>('');
    const [lastName, setLastName] = useState<string>('');


    const dispatch = useDispatch();


    return (
        <div className="set-profile-data">
            <img src={firebaseImage} />


            <span>Set profile data</span>
            <input
                placeholder="First name"
                value={firstName}
                onChange={(event) => setFirstName(event.currentTarget.value)}
            />
            <input
                placeholder="Last name"
                value={lastName}
                onChange={(event) => setLastName(event.currentTarget.value)}
            />
            <button
                onClick={() => {
                    if (firstName && lastName) {
                        dispatch(action_setProfileData({ firstName, lastName }));
                    }
                }}
            >
                Set profile data
            </button>
        </div>
    );
};
and setProfileData saga function:
和setProfileData传奇函数:
import { put } from 'redux-saga/effects';
import { toast } from 'react-toastify';
import { setProfileDataError, setProfileDataSuccess } from './actions';
import { firebase_app } from '../../../api/firebase';
import { Profile } from '../../../types/Profile';


export function* worker_setProfileData(action: Record<'payload', Profile>): IterableIterator<any> {
    let infoToastID;
    try {
        const userId = firebase_app.auth().currentUser?.uid;
        if (userId) {
            infoToastID = toast.info('Loading');


            const doc = firebase_app.firestore().collection('profiles').doc(userId);


            const { firstName, lastName } = action.payload;


            yield doc.set({ firstName, lastName } as Profile); // create new


            toast.dismiss(infoToastID);
            toast.success('Profile data saved');


            yield put(setProfileDataSuccess());
        } else {
            toast.error('You are not logged in');
        }
    } catch (error) {
        toast.dismiss(infoToastID);
        toast.error(error.message);


        yield put(setProfileDataError(error));
    }
}阅读文件(Read document)
const document = yield firebase_app
                .firestore()
                .collection('profiles')
                .doc(userId)
.get();更新文件(Update document)
If the document not exist — will throw an error:
如果文档不存在,将引发错误:
const documentReference = firebase_app
                .firestore()
                .collection('profiles')
                .doc(userId);


yield documentReference.update({ firstName, lastName } as Profile);删除文件(Delete document)
If the document not exists — will not throw any errors:
如果文档不存在,将不会引发任何错误:
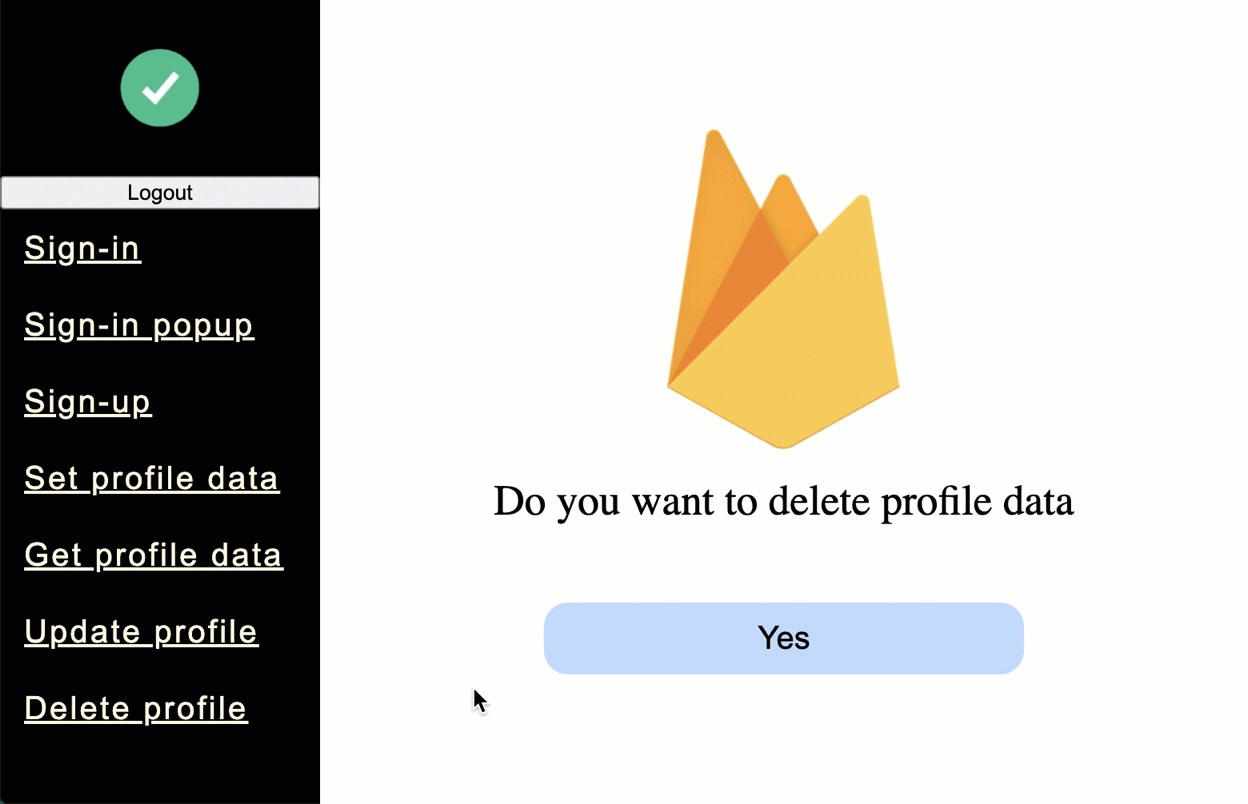
const documentReference = firebase_app
                .firestore()
                .collection('profiles')
                .doc(userId);


            yield documentReference.delete();
Now, let’s add the user’s avatar image and add it to the profile data.
现在,让我们添加用户的头像图像并将其添加到配置文件数据中。
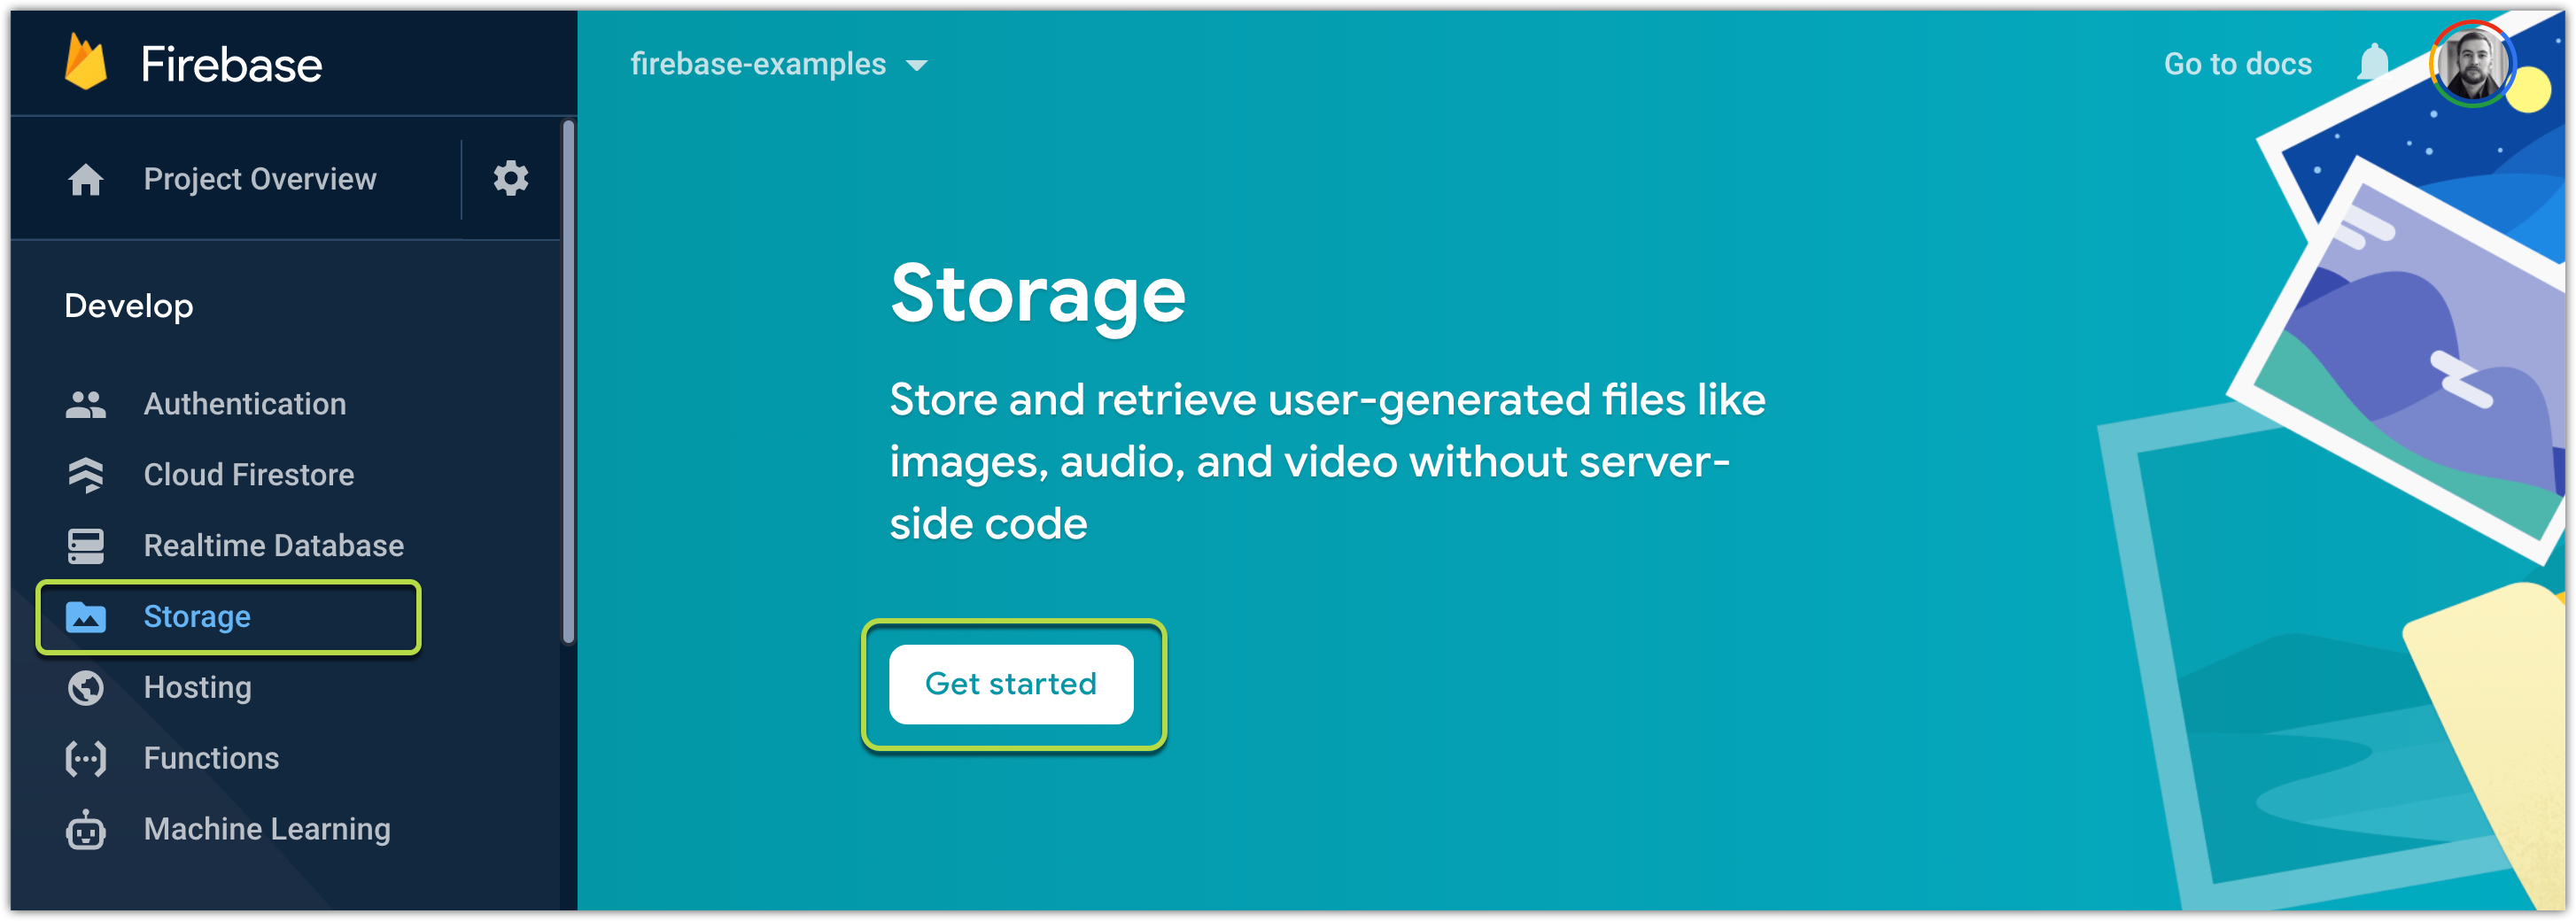
8.创建Firebase存储 (8. Creating Firebase Storage)
First, we’ll need to create a Storage exactly as we did with the Firestore:
首先,我们需要创建与Firestore完全相同的存储:
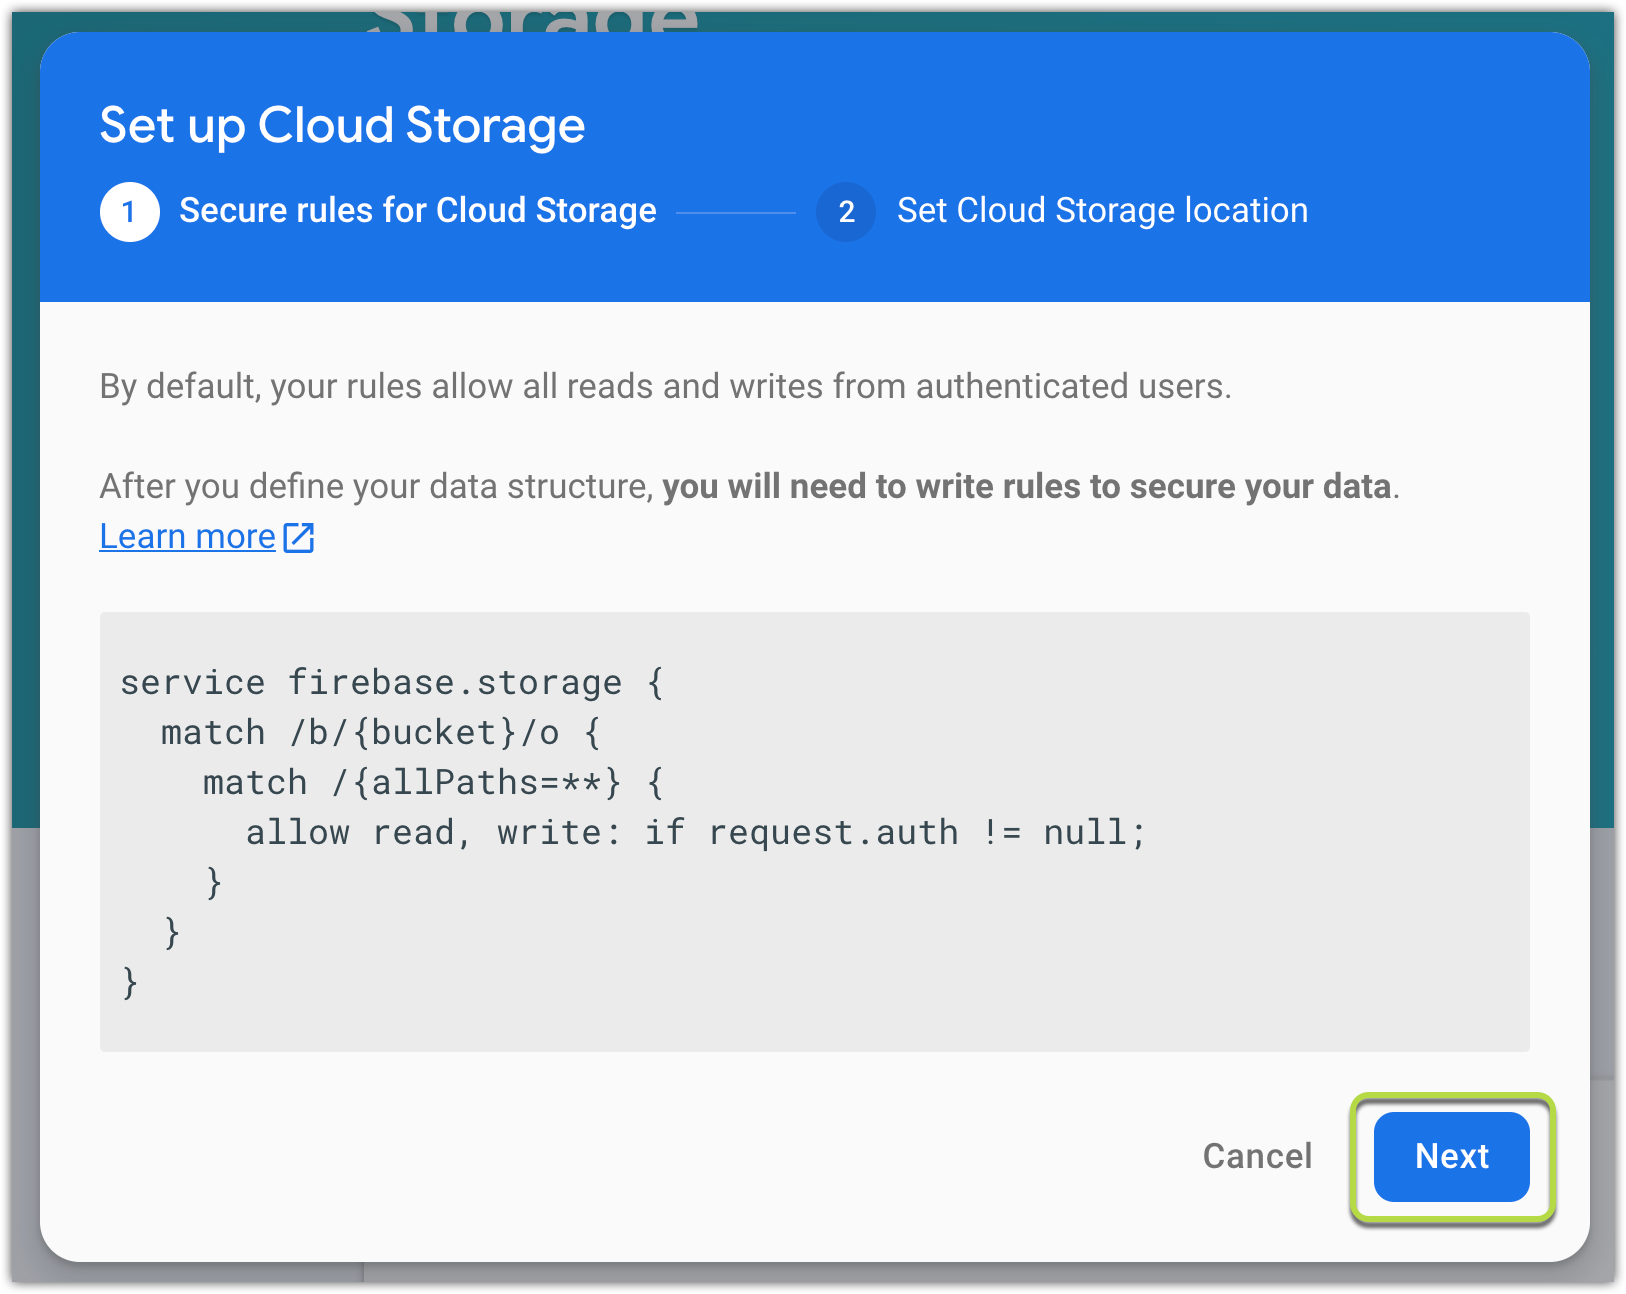
Next, save access rules (default values are fine for now):
接下来,保存访问规则(现在可以使用默认值):
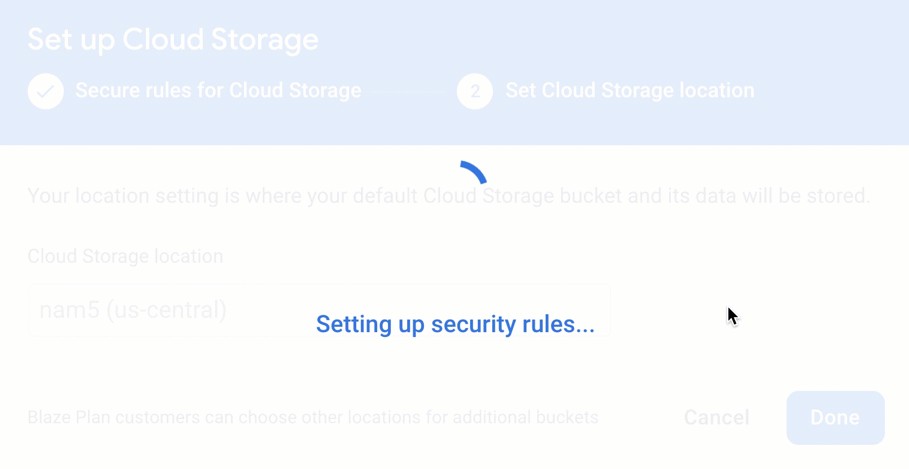
Location setting”:
位置设置”:
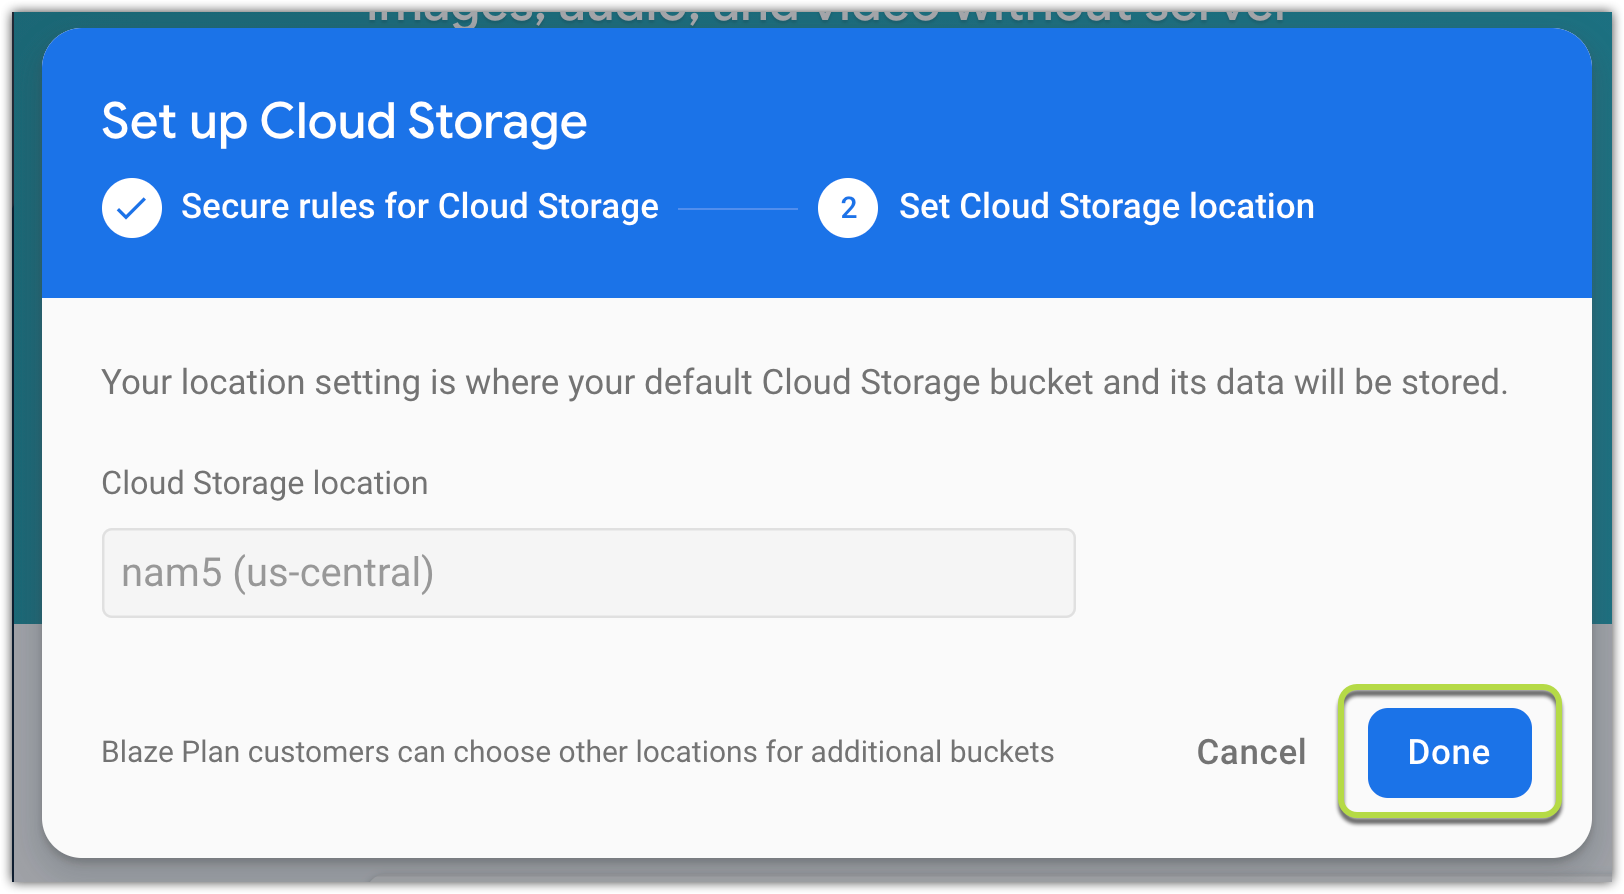
Press “Done”, wait a moment:
按“完成”,请稍等:
Firebase Storage is ready…
Firebase存储已准备就绪……
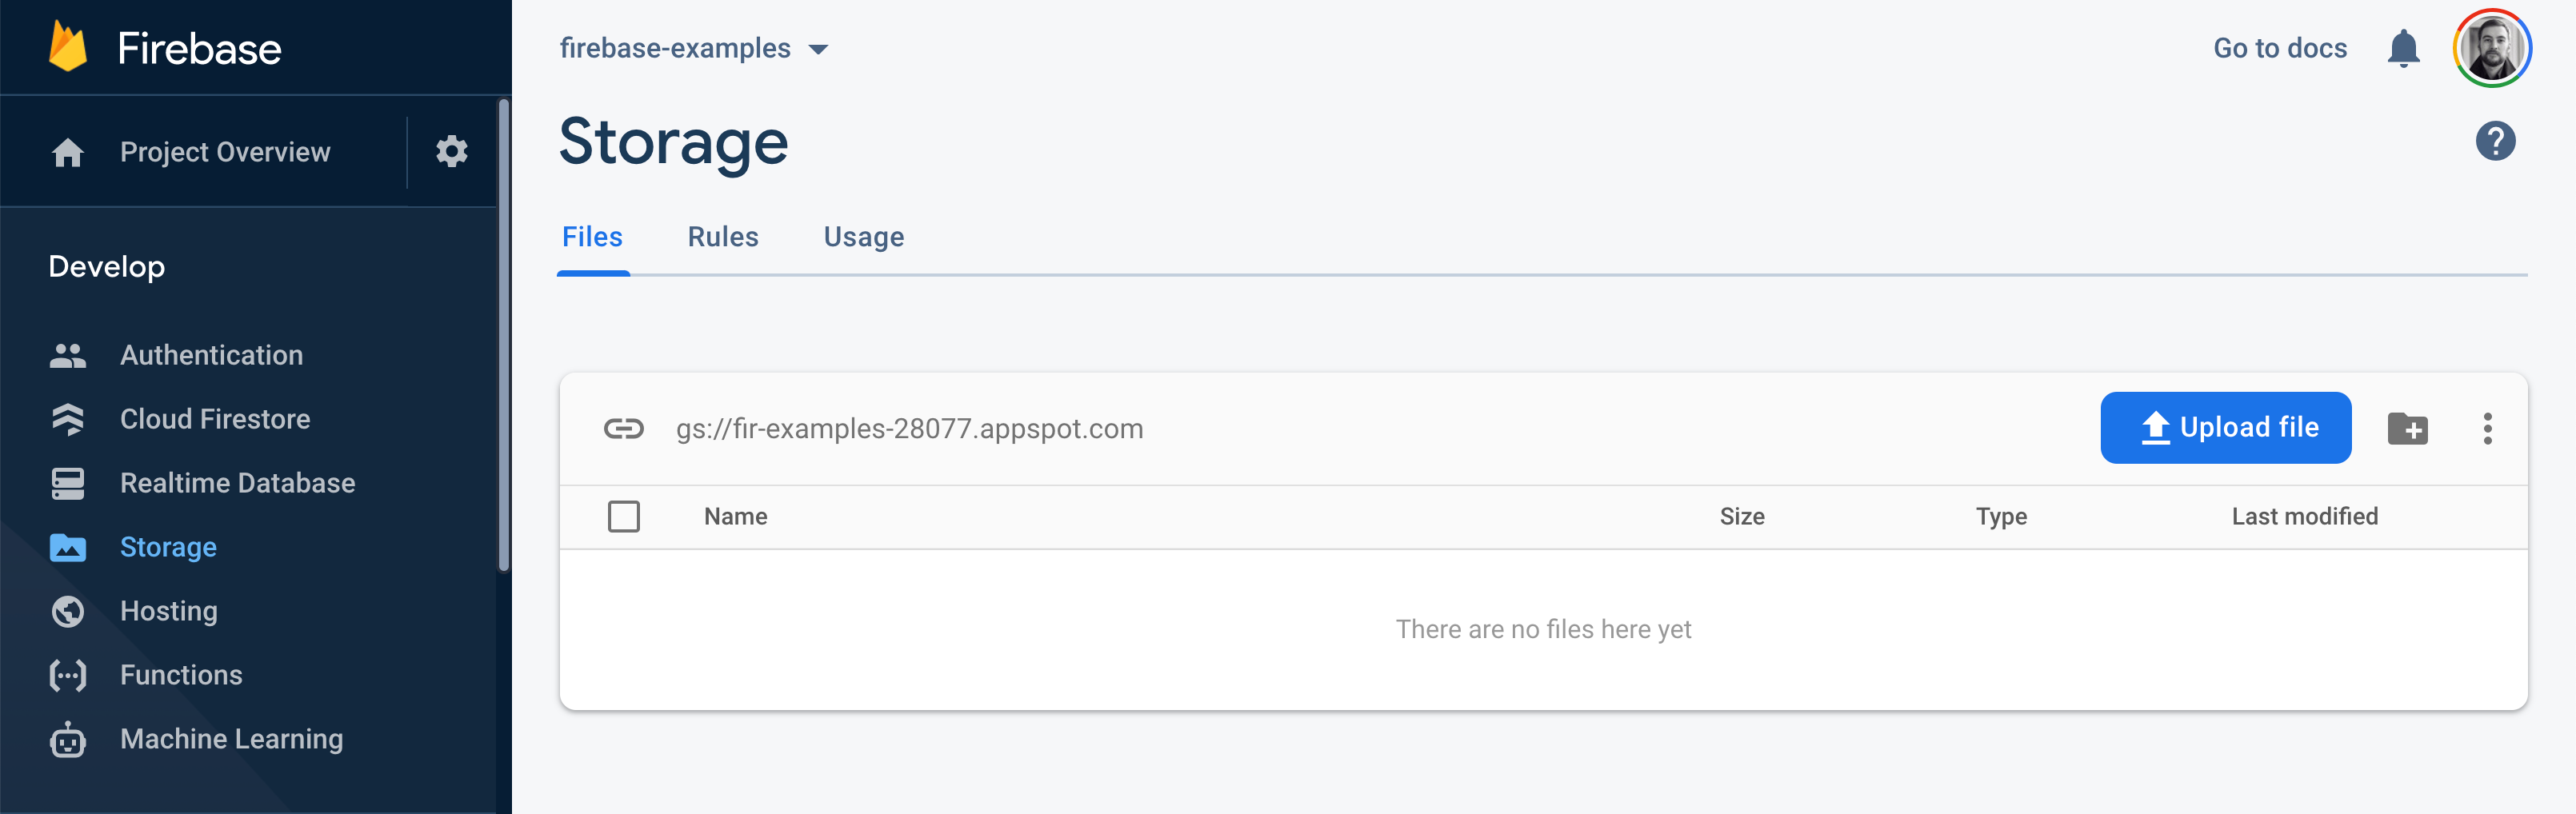
Now we can add some files to our Storage. Let’s do that.
现在,我们可以向存储中添加一些文件。 来做吧。
9.添加个人资料图片 (9. Adding a Profile image)
to add some file you will need:
添加一些文件,您将需要:
const userId = firebase_app.auth().currentUser?.uid;
const storageReference = firebase_app
.storage()
.ref()
.child(`images/${userId}/avatar.jpg`);
return yield storageReference.put(imageBlob, {
contentType: 'image/jpeg',
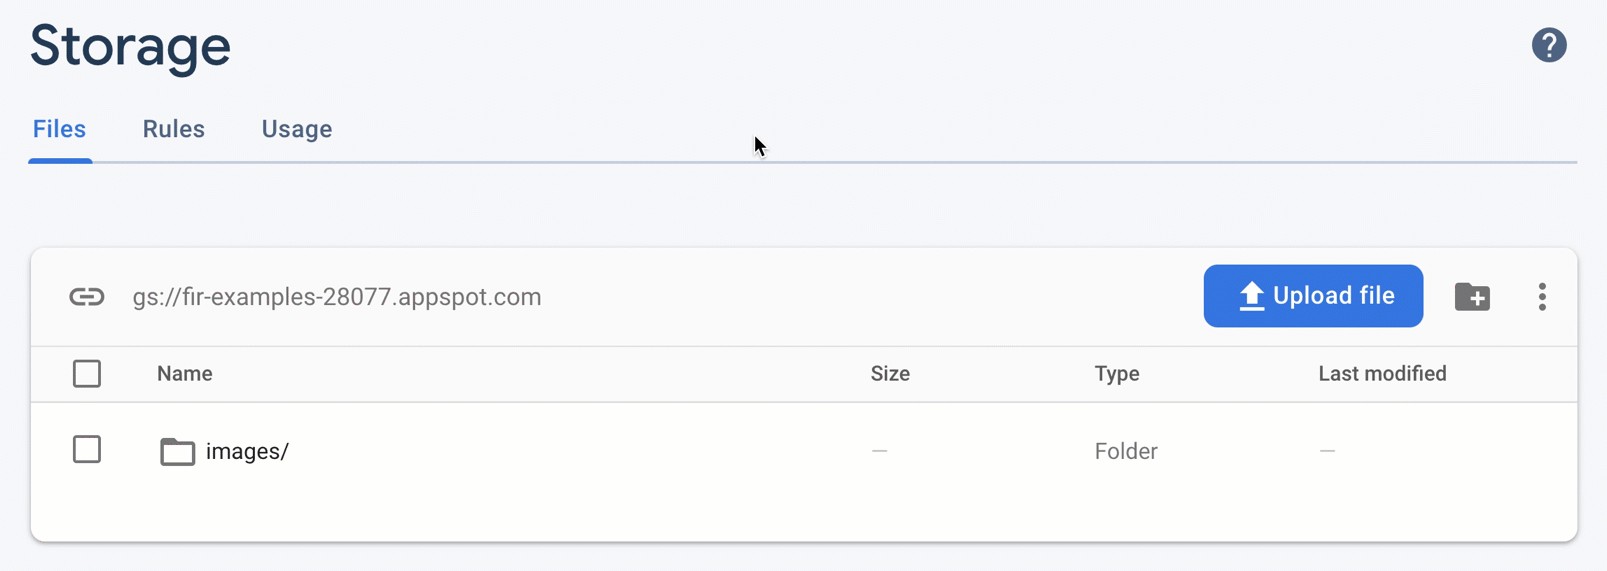
});Les’st take a look at how it will be stored /images/${userId}/avatar.jpg:
Les'st看看如何存储它/images/${userId}/avatar.jpg :
But we will need to get the public URL to the user’s avatar image:
但是我们需要获取用户头像图像的公共URL:
const downloadURL = yield uploadedImage.ref.getDownloadURL();SetAvatar saga function:
SetAvatar传奇功能:
export function* worker_setAvatar(action: Record<'payload', Blob>): IterableIterator<any> {
let infoToastID;
try {
infoToastID = toast.info('Loading');
const uploadedImage = yield saveImageToTheStorage(action.payload);
const isDocumentExists = yield getIsUserIdDocumentExists();
// @ts-ignore
const downloadURL = yield uploadedImage.ref.getDownloadURL();
const userId = firebase_app.auth().currentUser?.uid;
const doRef = firebase_app.firestore().collection('profiles').doc(userId);
if (isDocumentExists) {
yield doRef.update({
avatar: downloadURL,
});
} else {
yield doRef.set({
avatar: downloadURL,
});
}
toast.dismiss(infoToastID);
toast.success('Avatar image saved');
yield put(setAvatarSuccess(uploadedImage));
} catch (error) {
toast.dismiss(infoToastID);
toast.error(error.message);
yield put(setAvatarError(error));
}
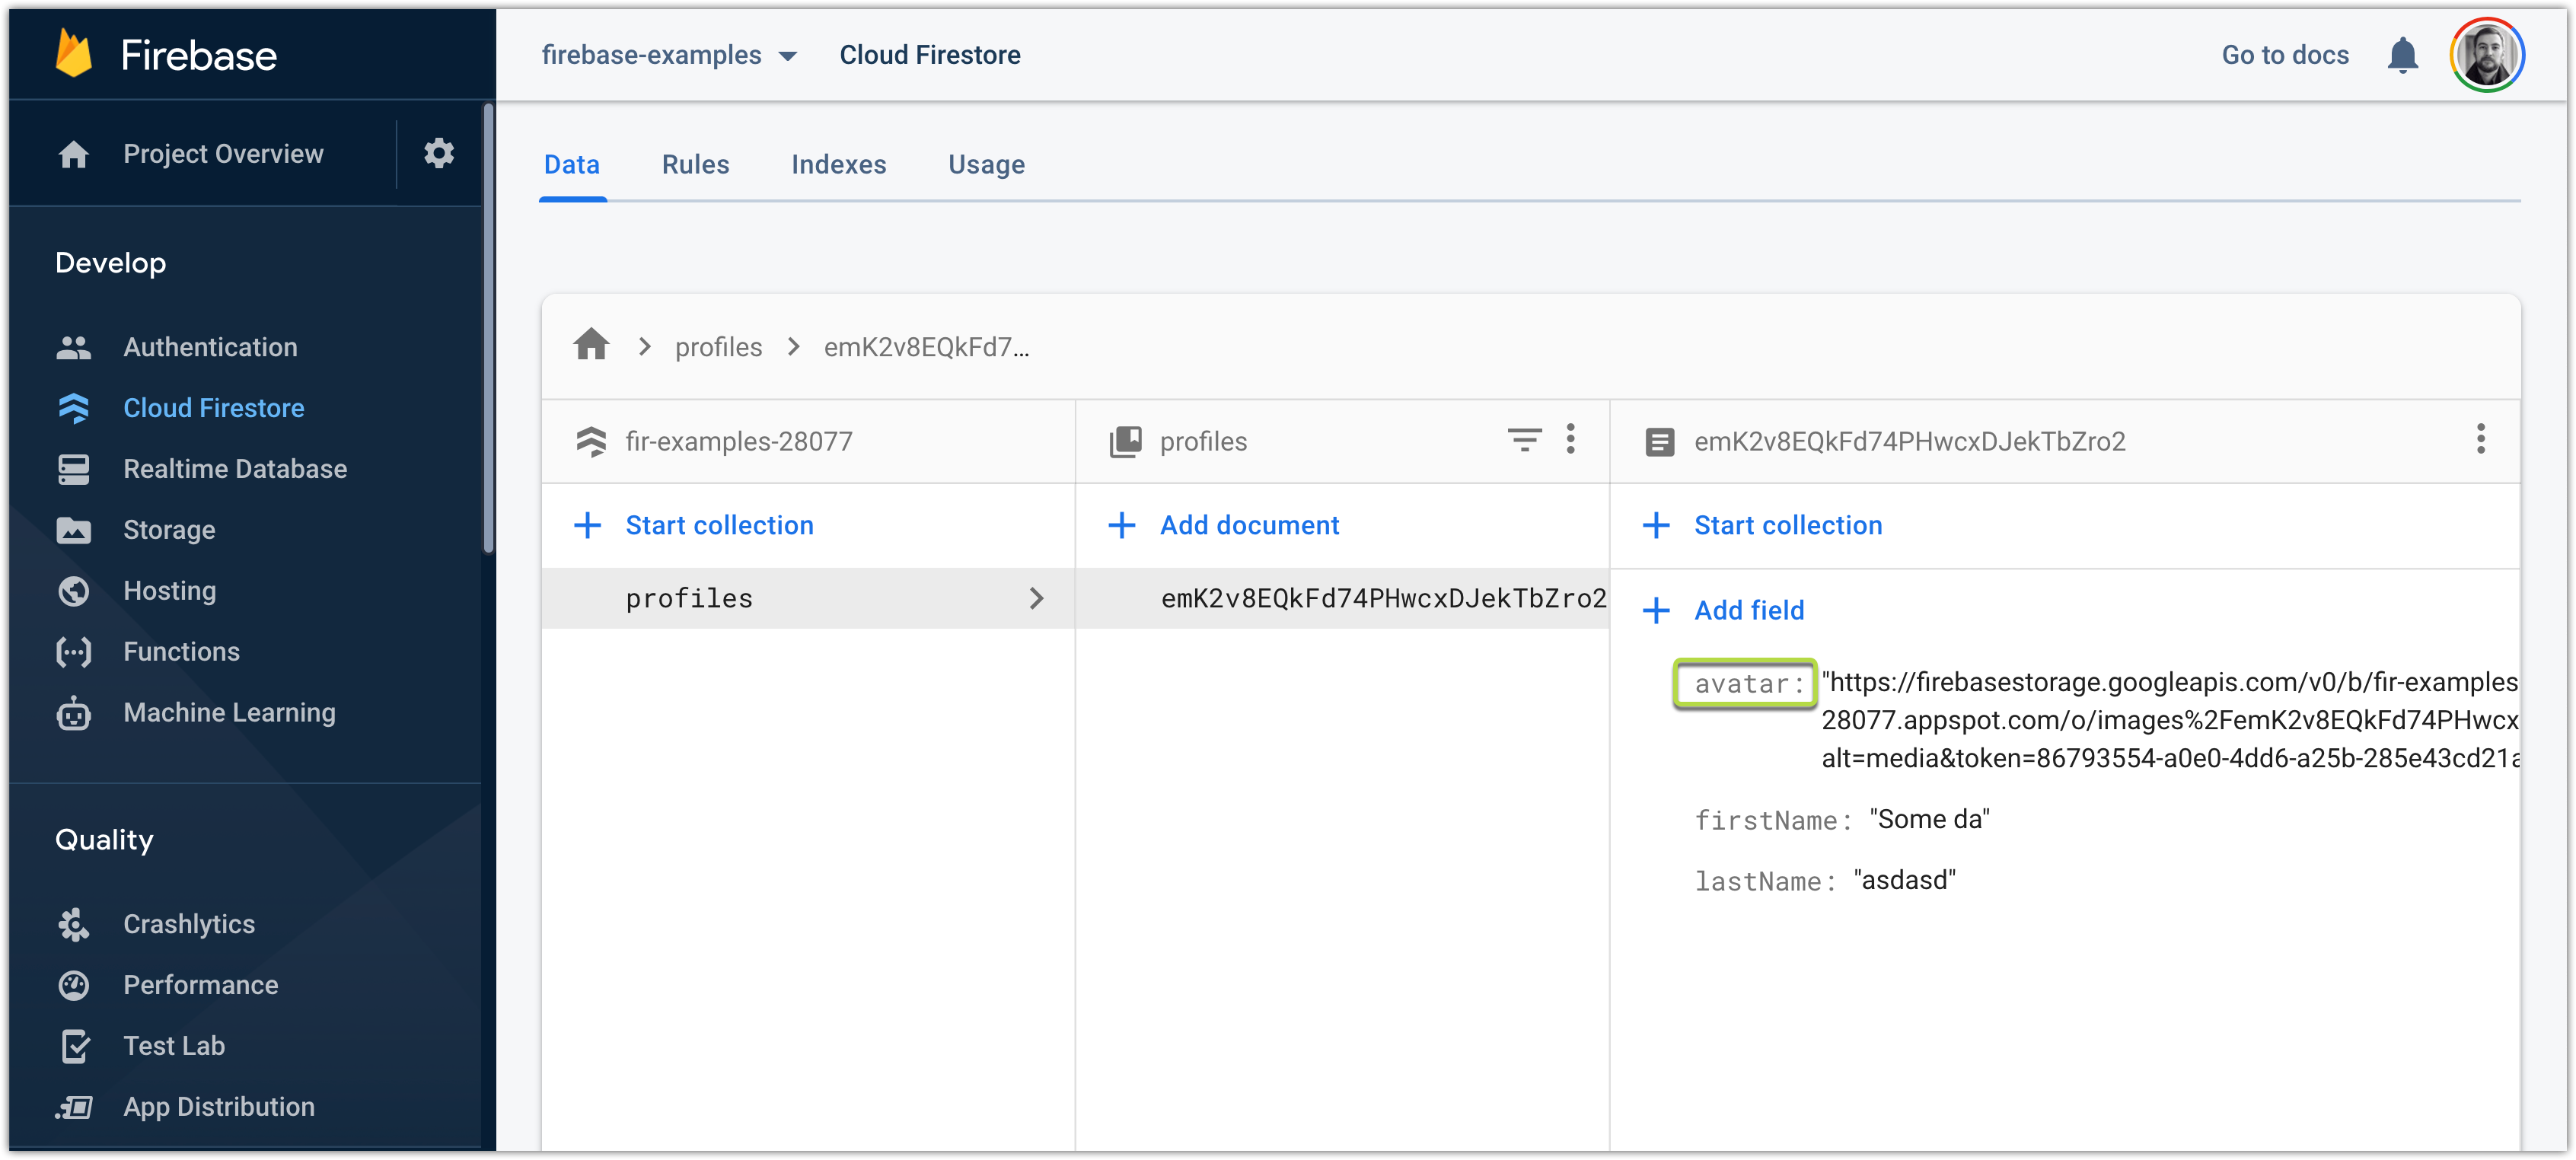
}This will create/update profile data:
这将创建/更新配置文件数据:
Result (gif):
结果(gif):
Those are the basics. Cloud Functions will be covered in next article.
这些是基础。 云功能将在下一篇文章中介绍。

How to work with images in React.js is out of the scope of this article, but, if you are interested I will leave a code snippet of that component, and link to the GitHub of this project.
如何在React.js中使用图像不在本文的讨论范围之内,但是,如果您有兴趣,我将留下该组件的代码片段,并链接到该项目的GitHub。
I’m usingreact-avatar-editor npm package in this project (it is not required, but it is very helpful when it come to editing avatar image)
我在此项目中使用react-avatar-editor npm包(不是必需的,但是在编辑头像图像时非常有帮助)
yarn add react-avatar-editorAnd SetProfileImage component looks like this:
SetProfileImage组件如下所示:
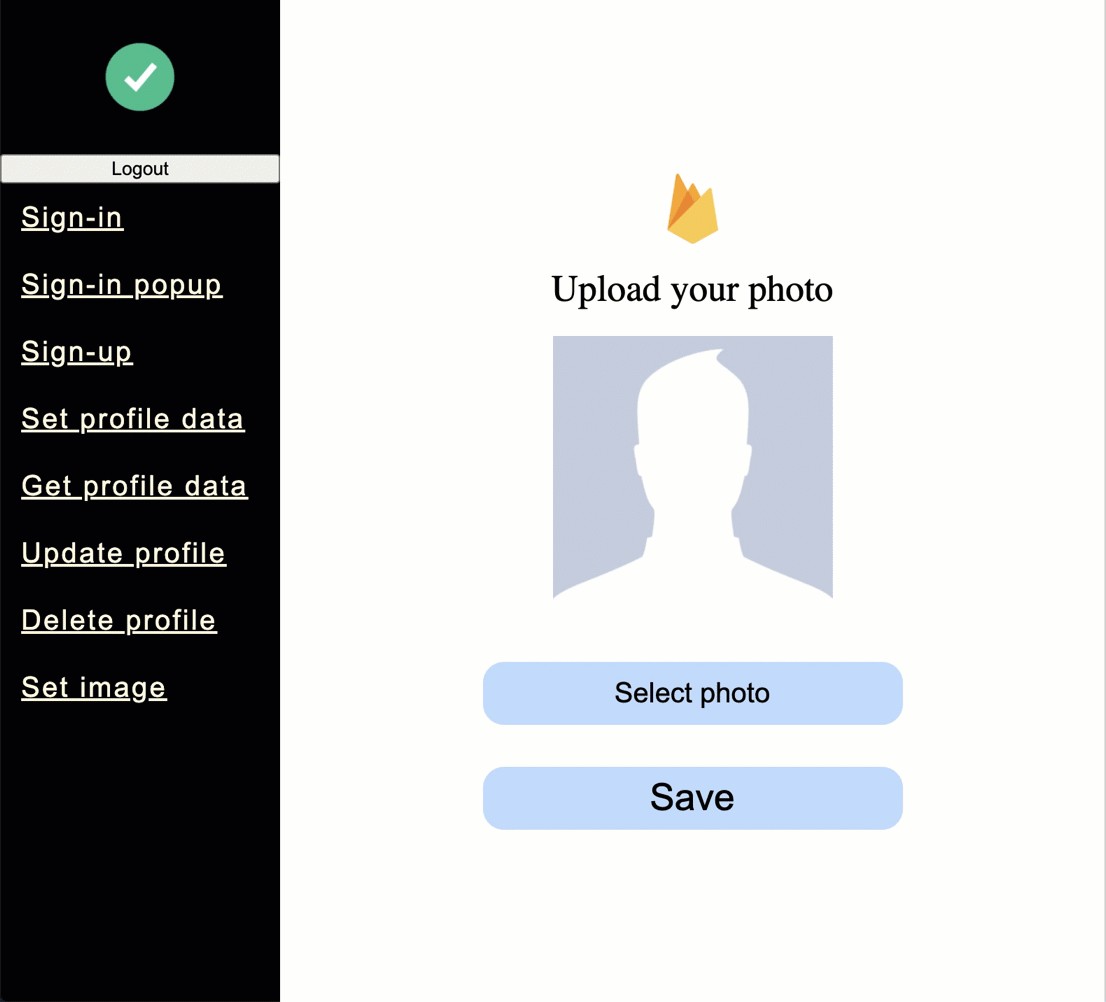
import React, { useRef, useState } from 'react';
import AvatarEditor from 'react-avatar-editor';


import noAvatarImage from '../../../assets/no-avatar.jpg';
import firebaseImage from '../../../assets/firebase.png';


import './setProfileImage.scss';
import { useDispatch, useMappedState } from 'redux-react-hook';
import { action_setAvatar } from '../../../store/profile/setAvatar';
import { isAvatarImageUploading } from '../../../store/profile/selectors';


const NoAvatar = () => {
    return (
        <div className="image-container">
            <img style={{ width: '200px' }} alt="profile" src={noAvatarImage} />
        </div>
    );
};


export const SetProfileImage = () => {
    const dispatch = useDispatch();


    const isLoading = useMappedState(isAvatarImageUploading);


    const [imageRef, setImageRef] = useState<AvatarEditor | null>(null);
    const [avatar, setAvatar] = useState<File>();
    const uploadImageInputRef = useRef<HTMLInputElement>(null);


    const setEditorRef = (editor: AvatarEditor | null) => setImageRef(editor);


    if (isLoading) {
        return (
            <div className="set-profile-image">
                <img src={firebaseImage} />
                <span>Processing...</span>
            </div>
        );
    }


    return (
        <div className="set-profile-image">
            <img src={firebaseImage} />
            <span>Upload your photo</span>
            {avatar ? (
                <AvatarEditor
                    style={{
                        margin: '20px',
                        marginTop: '0px',
                        width: '250px',
                        height: '378px',
                    }}
                    ref={setEditorRef}
                    image={URL.createObjectURL(avatar)}
                    border={0}
                    width={852}
                    height={1280}
                    borderRadius={0}
                    color={[255, 255, 255, 0.6]}
                    scale={1}
                />
            ) : (
                <NoAvatar />
            )}
            <button onClick={() => uploadImageInputRef.current?.click()}>Select photo</button>
            <input
                ref={uploadImageInputRef}
                type="file"
                accept=".jpg, .jpeg"
                onChange={(e) => {
                    const { files } = e.target;
                    if (files) {
                        const file = files[0];
                        if (file) {
                            setAvatar(file);
                        }
                    }
                }}
                style={{ display: 'none' }}
            />
            <button
                type="submit"
                disabled={false}
                onClick={() => {
                    if (imageRef && avatar) {
                        const canvasScaledImage: HTMLCanvasElement = imageRef.getImageScaledToCanvas();
                        canvasScaledImage.toBlob(
                            (imageBlob: Blob | null) => {
                                dispatch(action_setAvatar(imageBlob));
                            },
                            'image/jpeg',
                            0.9,
                        );
                    }
                }}
            >
                <span>Save</span>
            </button>
        </div>
    );
};翻译自: https://medium.com/weekly-webtips/react-js-firebase-basics-in-examples-cfc980e6b144
firebase


 212
212

 被折叠的 条评论
为什么被折叠?
被折叠的 条评论
为什么被折叠?
 到【灌水乐园】发言


