


Authentication is hard! Nowadays, to create a simple login or logout feature, we require a considerable amount of boilerplate code. Now picture we want to add authentication with Google or Facebook? More boilerplate, right?
认证很难! 如今,要创建一个简单的登录或注销功能,我们需要大量的样板代码。 现在图片我们要添加Google或Facebook的身份验证? 更多样板,对吗?
What if I told you that in React you can do that just by wrapping your code with a context provider and by using a custom react hook?
如果我告诉您,在React中,您可以通过使用上下文提供程序包装代码并使用自定义的React钩子来做到这一点呢?
In this blog post, I’ll show you how to add authentication to your React application using the Auth0 useAuth0 custom hook, how to display the authenticated user information, and how to authenticate with a social provider like GitHub.
在此博客文章中,我将向您展示如何使用Auth0 useAuth0自定义钩子向您的React应用程序添加身份验证,如何显示经过身份验证的用户信息以及如何通过GitHub之类的社交服务提供商进行身份验证。
建立 (Setup)
Auth0资讯主页 (Auth0 dashboard)
So the first thing you need is an Auth0 account. You can sign up for free at https://auth0.com/signup.
因此,您首先需要的是Auth0帐户。 您可以在https://auth0.com/signup免费注册。
Once you have your account setup, on the application settings dashboard create a new application with the Single Page Web Application type.
设置好帐户后,在“ 应用程序设置”仪表板上创建具有“ 单页Web应用程序”类型的新应用程序 。

Now that you have your application, you will need to get some data and do some configurations first, here’s what you need to do:
有了应用程序后,您将需要获取一些数据并首先进行一些配置,这是您需要做的:
- Copy your Domain value (we’ll use it in the next step) 复制您的域值(我们将在下一步中使用它)
- Copy your Client ID value (we’ll use it in the next step) 复制您的客户ID值(我们将在下一步中使用它)

Add
http://localhost:3000to the Allowed Callback URLs so that it can call back to it after logging in将
http://localhost:3000添加到允许的回调URL中,以便它可以在登录后对其进行回调Add
http://localhost:3000to the Allowed Logout URLs so that it can redirect to it after logging out将
http://localhost:3000添加到允许的注销URL,以便注销后可以重定向到该URLAdd
http://localhost:3000to the Allowed Web Origins to make it an allowed origin for use with Cross-Origin Authentication将
http://localhost:3000添加到允许的Web起源,使其成为允许与跨域身份验证一起使用的起源

Now we configured everything on the dashboard, the next thing you will need is an application.
现在我们在仪表板上配置了所有内容,接下来您需要的是一个应用程序。
React应用 (React Application)
On this project you should do two things first:
在这个项目上,您应该首先做两件事:
1.安装auth0-react SDK (1. Install auth0-react SDK)

2.将您先前复制的域和客户端ID添加到您的.env文件中 (2. Add your previously copied domain and client id to your .env file)

Now we finished all the setup needed to add authentication to our application. To be able to make use of the useAuth0 hook we need to wrap our application the Auth0 context provider.
现在,我们完成了向应用程序添加身份验证所需的所有设置。 为了能够使用useAuth0挂钩,我们需要将应用程序包装为Auth0上下文提供程序。
Auth0Provider (Auth0Provider)
On this snippet, we wrap our App component with the Auth0Provider which is a context provider that stores the authentication state of our users and allows for children of this component to access it. This provider receives 3 parameters:
在此代码段中,我们将App组件与Auth0Provider封装在一起, Auth0Provider是一个上下文提供程序,用于存储用户的身份验证状态并允许该组件的子代访问它。 此提供程序接收3个参数:
the
domainandclientIdparams which we can get thanks to our setup on the .env file由于我们在.env文件中进行了设置,因此可以获取
domain和clientId参数the
redirectUriwhich is the default URL where Auth0 redirects the browser to with the authentication results. In the snippet above we use the origin property from the location object to get the current page URLredirectUri,这是Auth0将浏览器重定向到身份验证结果的默认URL 。 在上面的代码段中,我们使用location对象中的origin属性来获取当前页面的URL
Having our App wrapped with the Auth0Provider, now we can start using the useAuth0 hook.
通过Auth0Provider包装我们的应用程序,现在我们可以开始使用useAuth0挂钩了。
useAuth0 (useAuth0)
useAuth0 is a custom React hook that's part of the Auth0 React SDK. This hook provides you with some helpers and functions that you can use to abstract all the authentication logic and often immense boilerplate code from your code. On the next sections, I'll present you to some auth methods for login ( loginWithRedirect) and logout ( logout) as well as some auth state for obtaining the authenticated state ( isAuthenticated) and the authenticated user date ( user).
useAuth0是自定义的React挂钩,它是Auth0 React SDK的一部分。 该挂钩为您提供了一些帮助程序和功能,可用于抽象所有身份验证逻辑,并且经常从代码中提取大量的样板代码。 在下一部分中,我将向您介绍一些用于登录的auth方法( loginWithRedirect )和注销( logout ),以及一些用于获取认证状态( isAuthenticated )和认证用户日期( user )的认证状态。
登录 (Login)
For adding the ability to login to your application, you can make use of the loginWithRedirect method.
为了增加登录到您的应用程序的功能,可以使用loginWithRedirect方法。
Here we show our LoginButton component. In this component, we destructure the loginWithRedirect method from the useAuth0 hook and assign its call to the button onClick event. After pressing the button, you will be redirected to the Auth0 Universal Login page where the user can either sign in or sign up.
在这里,我们显示了LoginButton组件。 在此组件中,我们从useAuth0挂钩解构loginWithRedirect方法,并将其调用分配给按钮onClick事件。 按下按钮后,您将被重定向到Auth0通用登录页面,用户可以在其中登录或注册。

Note: if you want to avoid being redirected to a new page, you use instead the loginWithPopup method to open a popup with the Auth0 Universal Login page.
注意 :如果要避免重定向到新页面,可以使用loginWithPopup方法打开带有Auth0通用登录页面的弹出窗口。
登出 (Logout)
For adding the ability to log out to your application, you can make use the logout method
为了增加logout ,您可以使用logout方法
Here we show our LogoutButton component. In this component, we destructure the logout method from the useAuth0 hook and assign its call to the button onClick event. This method receives a returnTo parameter where, thanks to the origin property from the location object, we specify the URL where Auth0 will redirect the browser after the logout process.
在这里,我们显示了LogoutButton组件。 在此组件中,我们从useAuth0挂钩解构logout方法,并将其调用分配给按钮onClick事件。 此方法接收returnTo参数,由于location对象的origin属性,我们在其中指定了Auth0将在注销过程后重定向浏览器的URL。
身份验证状态:isAuthenticated和用户 (Authentication State: isAuthenticated and User)
As mentioned above, besides the functions that you gain access thanks to the useAuth0 hook you also can access some authentication state properties like isAuthenticated and user
如上所述,除了通过useAuth0钩子获得访问的功能外,还可以访问某些身份验证状态属性,例如isAuthenticated和user
In the snippet above, by combining the isAuthenticated property with the user property we guarantee that we'll only display the user data once we're sure that the user is authenticated.
在上面的代码段中,通过将isAuthenticated属性与user属性结合在一起,我们保证只有在确定用户已通过身份验证后,我们才会显示用户数据。
By default on the Auth0 Universal Login page, you’ll only be able to use Google as a Social Identity Provider. In this section, I’ll show you how Auth0 makes it easy for you to add a new social provider to your application.
默认情况下,在Auth0通用登录页面上,您只能将Google用作社交身份提供商 。 在本节中,我将向您展示Auth0如何使您轻松地向应用程序添加新的社交提供程序。
奖励:在Auth0门户中添加新的社交身份验证 (Bonus: Adding new social authentication within the Auth0 portal)
第1步 (Step 1)
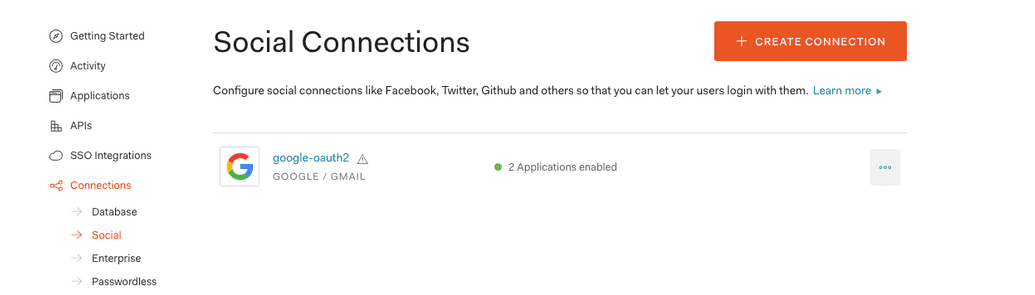
On the application settings dashboard go to the social connections tab to see all the currently configured social connections you have. Click on the Create Connection button. (Click here to skip this and the previous step).
在应用程序设置仪表板上,转到“ 社交关系”选项卡以查看您当前拥有的所有已配置社交关系。 单击创建连接按钮。 ( 单击此处跳过此步骤和上一步)。
第2步 (Step 2)
Select one provider. In this example, I’ll be choosing GitHub (Click here to skip this and the previous steps).
选择一个提供商。 在此示例中,我将选择GitHub( 单击此处跳过此步骤和之前的步骤)。

第三步 (Step 3)
Scroll down and click on the Create button.
向下滚动并单击创建按钮。

第4步 (Step 4)
You now can toggle this provider for your application.
现在,您可以为应用程序切换此提供程序。

第5步 (Step 5)
Try to log in on your application again.
尝试再次登录您的应用程序。

TLDR (TLDR)
Just in case you want a quick summary of everything here it is:
以防万一,您需要这里的所有内容的快速摘要:
Create an Auth0 account at https://auth0.com/signup
通过https://auth0.com/signup创建Auth0帐户
Get the Domain and Client ID from your application at https://manage.auth0.com/#/applications and add them to your application .env
通过https://manage.auth0.com/#/applications从您的应用程序获取域和客户端ID,并将它们添加到您的应用程序.env中
Configure your Allowed Callback URLs, in this case, add
http://localhost:3000配置您的允许的回调URL,在这种情况下,添加
http://localhost:3000Configure your Allowed Logout URLs, in this case, add
http://localhost:3000配置您的允许注销URL,在这种情况下,添加
http://localhost:3000Configure your Allowed Web Origins, in this case, add
http://localhost:3000配置允许的Web起源,在这种情况下,添加
http://localhost:3000Install Auth0 React SDK
安装Auth0 React SDK
- Wrap your main component with the Auth0Provider and add the domain, client id, and redirectUri parameters to it. 用Auth0Provider包装您的主要组件,并向其添加域,客户端ID和redirectUri参数。
With the
useAuth0hook, destructure the login method (loginWithRedirect or loginWithPopup) and create a login component使用
useAuth0钩子,useAuth0登录方法(loginWithRedirect或loginWithPopup)并创建一个登录组件With the
useAuth0hook, destructure the logout method and create a logout component使用
useAuth0钩子,对注销方法进行解构并创建一个注销组件With the
useAuth0hook, destructure the isAuthenticated variable and user properties to access authentication state inside a component使用
useAuth0钩子,对isAuthenticated变量和用户属性进行解构以访问组件内的身份验证状态
下一步是什么? (What’s next?)
On the next posts of this series, I’ll be showing you how to add protection to a route on your React application and how to use an Access Token to call a protected API.
在本系列的下一篇文章中,我将向您展示如何在React应用程序上为路由添加保护,以及如何使用访问令牌来调用受保护的API。
Hope everyone enjoyed and stay tuned!
希望大家喜欢并继续关注!
Originally published at https://www.danieljcafonso.com.
最初在 https://www.danieljcafonso.com上 发布 。
翻译自: https://medium.com/swlh/react-authentication-made-easy-with-useauth0-5b7674d13da2


 3081
3081

 被折叠的 条评论
为什么被折叠?
被折叠的 条评论
为什么被折叠?
 到【灌水乐园】发言


