


Releasing features into production can be quite the thrill. Surely you’ve tested the feature you’ve been working on locally to ensure that it works. Or you might have even used a preview deployment to your staging environment, on which your PO or a dedicated testing team took the feature for a ride.
将功能发布到生产中可能会很刺激。 当然,您已经在本地测试了正在使用的功能,以确保它可以正常工作。 或者,您甚至可能已在暂存环境中使用了预览部署,您的采购经理或专门的测试团队在此环境中进行了试用。
But there’s still this uncertainty when going live: Will it work in production?
但是,上线时仍然存在不确定性:它将在生产中起作用吗?
And what do we do if it doesn’t?
如果没有,我们该怎么办?
This article shows how to use feature flags to release with confidence, and how to set feature flags up in Next.js.
本文展示了如何使用功能标志来放心发布,以及如何在Next.js中设置功能标志。
放心地发布 (Releasing with confidence)
Feature Flags allow you to do many cool things. The most important for the topic at hand is that they allow you to define who can access new features. That way, you can publish features for your team members only.
功能标志使您可以做很多很酷的事情。 对于当前主题,最重要的是,它们使您可以定义谁可以访问新功能。 这样,您只能为团队成员发布功能。
They can then ensure the feature you’ve been working works as expected, before you turn the new feature on for everyone. And if you later discover something’s wrong, you can even turn the feature off for everyone.
然后,他们可以确保您一直在使用的功能按预期工作,然后再为所有人打开新功能。 如果以后发现有问题,甚至可以为所有人关闭该功能。
This setup allows you to take your changes for a test ride before opening it up to your users. Feature Flags aren’t only useful for big releases, you can use the same strategy for bug fixes or even run A/B testing with feature flags.
通过此设置,您可以在向用户开放之前进行更改以进行测试。 功能标记不仅对大型版本有用,您可以使用相同的策略修复错误,甚至可以对具有功能标记的A / B测试进行测试。
For now, let’s see how to set up Feature Flags in Next.js. We’ll walk through the theory first and get our hands dirty with actual development right after that.
现在,让我们看看如何在Next.js中设置功能标志。 我们将首先讲解理论,然后紧接着进行实际开发。

大图景 (Big Picture)
A feature flag defines whether to show a specific feature to a specific user or not. When evaluated, it holds a boolean value which you can use to show or hide a certain feature using an if-statement.
功能标志定义是否向特定用户显示特定功能。 评估时,它包含一个布尔值,您可以使用布尔值使用if语句显示或隐藏某个功能。
Feature Flags are typically implemented using a combination of a library you embed into your code and a service that library talks to. The feature flagging service offers a UI where you define your feature flags and modify them later on. You create a Feature Flag for every feature you want to release carefully. You set the audience for each feature flag, to define who should have access to the feature hidden behind that specific flag.
功能标志通常是结合使用您嵌入到代码中的库和库与之对话的服务来实现的。 功能标记服务提供了一个UI,您可以在其中定义功能标记并稍后对其进行修改。 您为要仔细发布的每个功能创建一个功能标记。 您可以为每个功能标志设置受众,以定义谁有权访问隐藏在该特定标志后面的功能。
The library embedded into your application then reads and evaluates the flags you created. Based on the evaluated value, you can then show the feature in your code.
然后,嵌入到您的应用程序中的库将读取并评估您创建的标志。 然后,根据评估值,可以在代码中显示功能。
建立 (Setup)
There are many feature flagging services and libraries to choose from. We’ll go with @happykit/flags as they’re specifically designed for Next.js. They support static and server-side rendering and weigh only 1.3kB. They’re great.
有许多功能标记服务和库可供选择。 我们将使用@ happykit / flags,因为它们是专门为Next.js设计的。 它们支持静态和服务器端渲染,重量仅为1.3kB。 他们很棒。
Full disclaimer: I am the author of HappyKit Flags, so I might be a bit biased :)
完全免责声明:我是HappyKit Flags的作者,所以我可能有点偏颇:)
To get started, add @happykit/flags to your Next.js project using
首先,使用以下命令将@ happykit / flags添加到您的Next.js项目中
yarn add @happykit/flagsThe next step is to set up the library. This only needs to be done once. Add the following lines to your _app.js file. If you don’t have one already, see the Custom App section in the Next.js docs. The _app.js file is commonly used for custom configuration.
下一步是设置库。 这仅需要执行一次。 _app.js添加到_app.js文件中。 如果您还没有,请参阅Next.js文档中的“自定义应用程序”部分。 _app.js文件通常用于自定义配置。
import { configure } from '@happykit/flags';

configure({ clientId: process.env.NEXT_PUBLIC_FLAGS_CLIENT_ID });
So it would look like this if you’re using the default Next.js project:
因此,如果您使用默认的Next.js项目,它将看起来像这样:
import "../styles/globals.css";
import { configure } from "@happykit/flags";configure({ clientId: process.env.NEXT_PUBLIC_FLAGS_CLIENT_ID });function MyApp({ Component, pageProps }) {
  return <Component {...pageProps} />;
}export default MyApp;
Now, you might have noticed that we are accessing an environment variable in the configuration file. I assume you already have an .env.local file.
现在,您可能已经注意到我们正在访问配置文件中的环境变量。 我假设您已经有一个.env.local文件。
If not, see the Next.js docs on Environment Variables. Basically, you’ll need to create a file called
.env.localat the root of our project. The environment variables defined in this file will be loaded for local development and accessible underprocess.env.如果不是,请参阅环境变量中的Next.js文档。 基本上,您需要在我们项目的根目录下创建一个名为
.env.local的文件。 该文件中定义的环境变量将被加载以进行本地开发,并可以在process.env下访问。
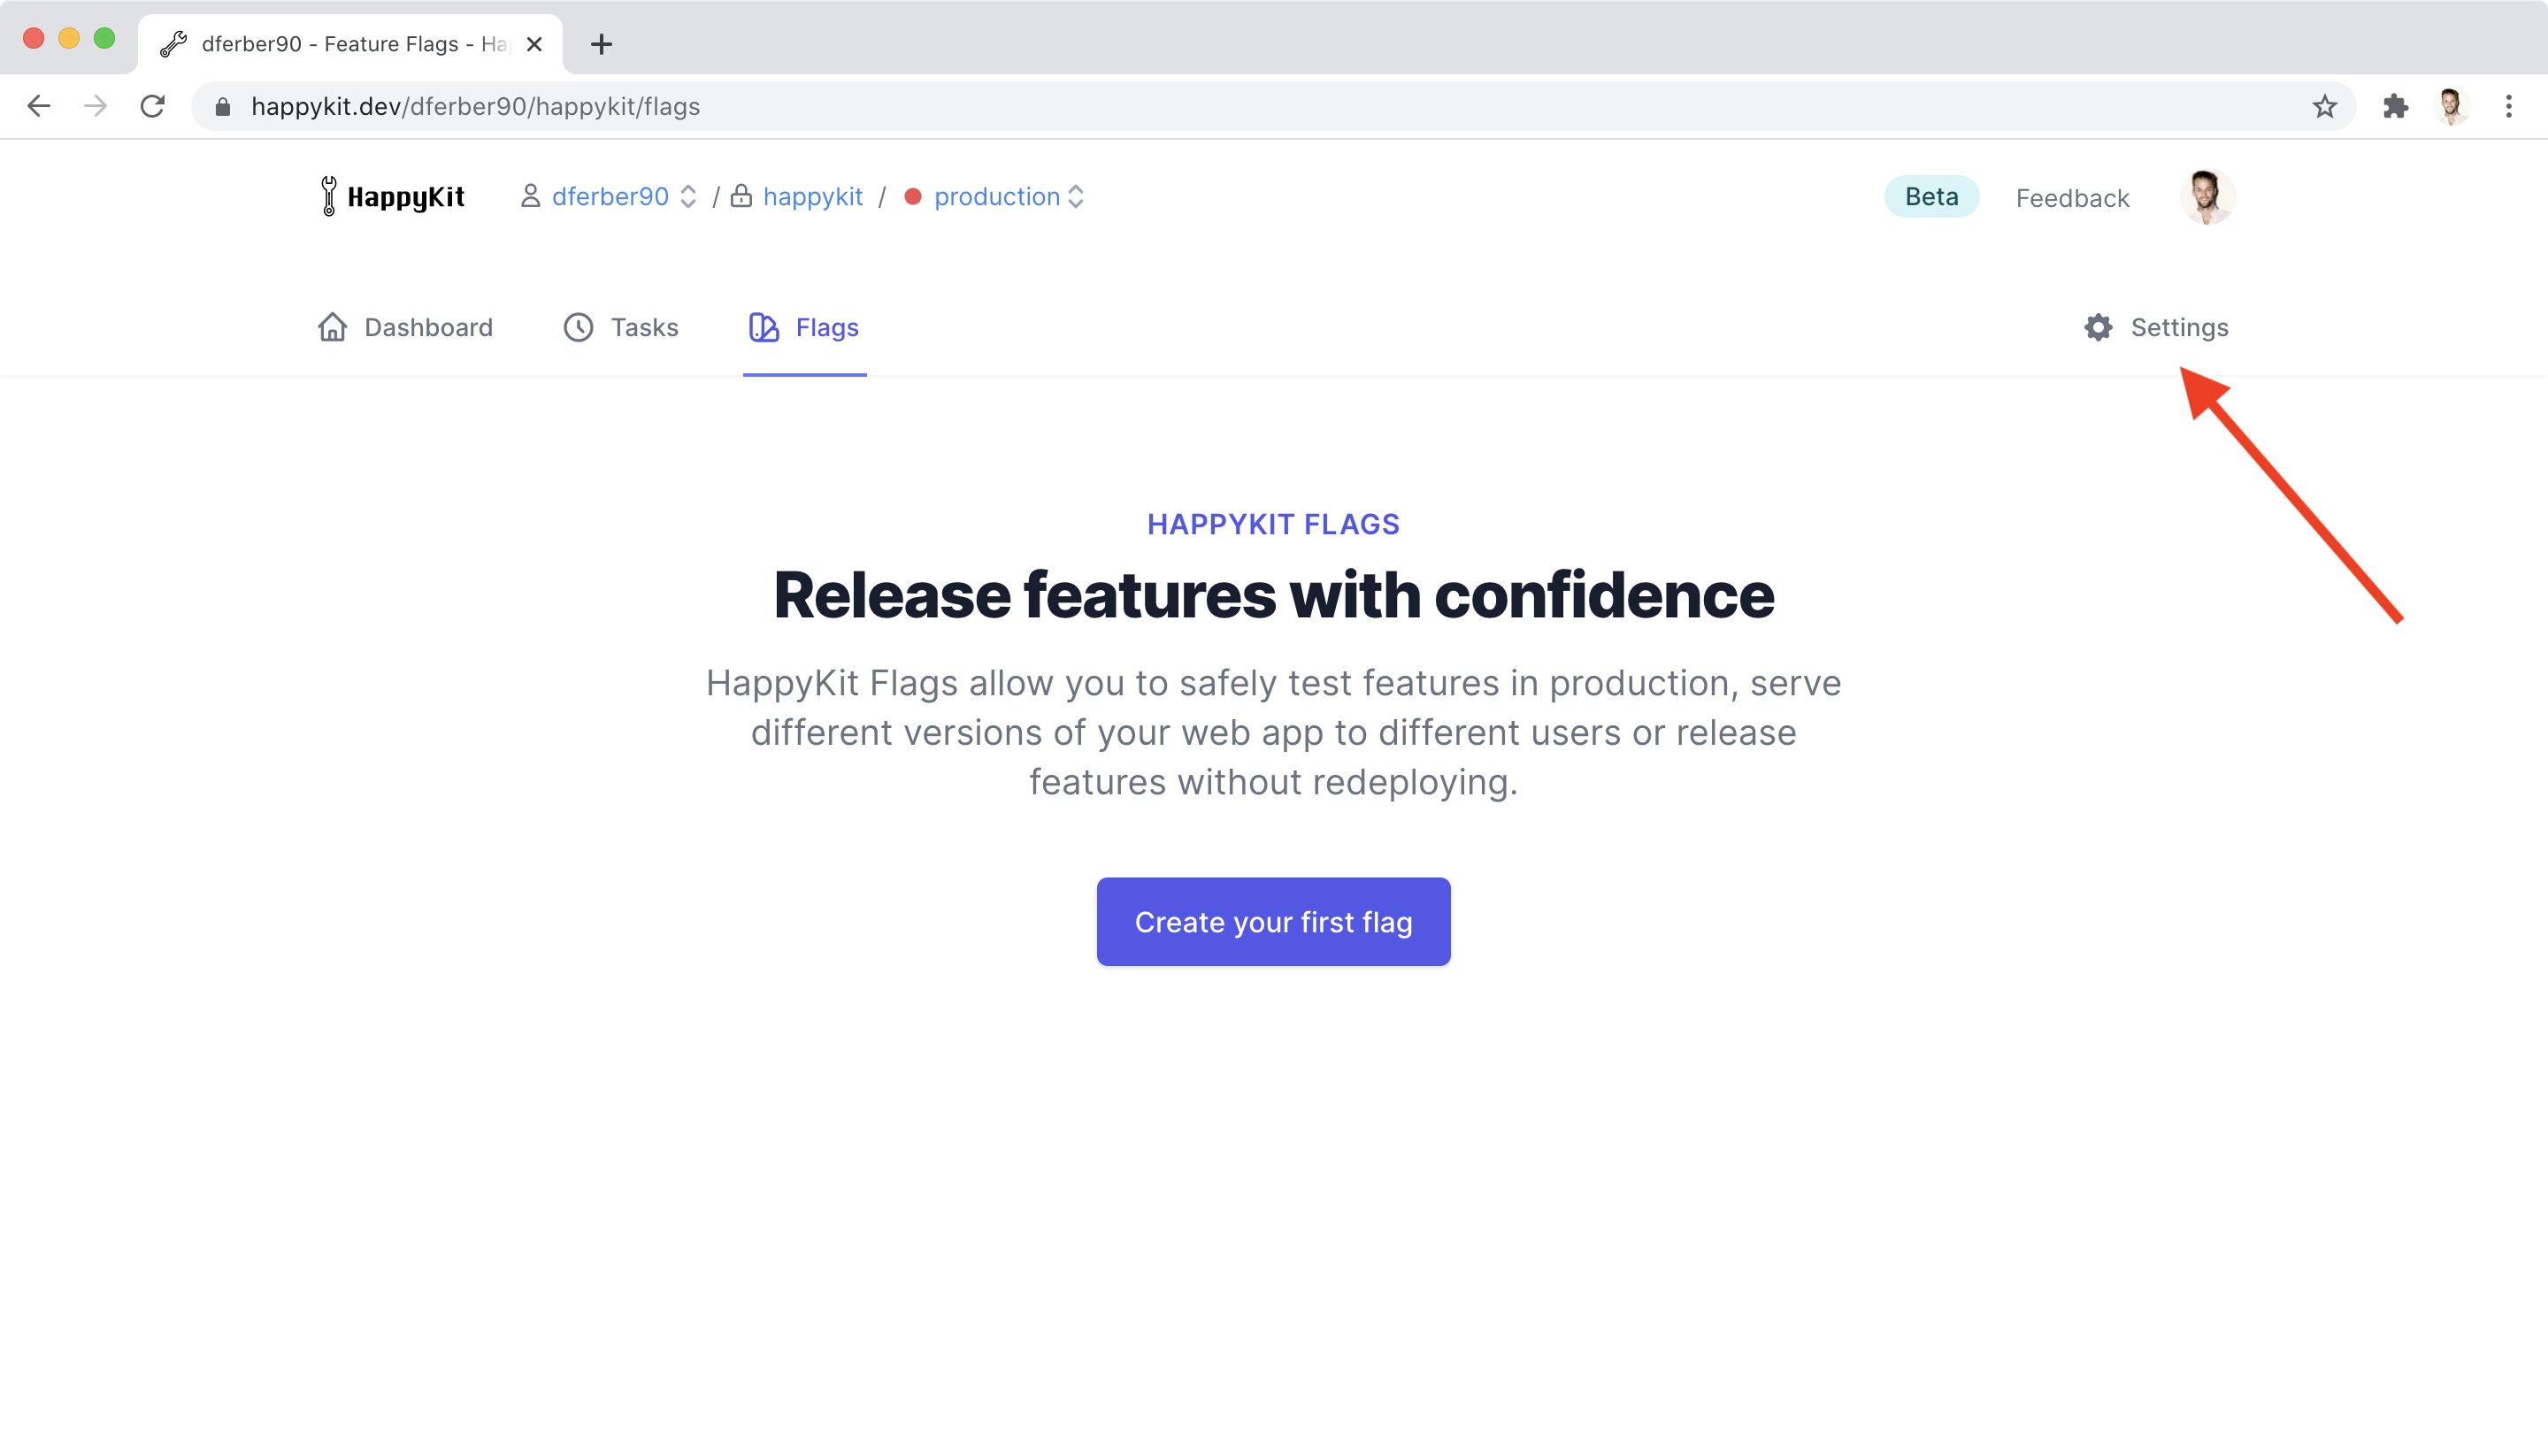
You’ll need to fill .env.local with your HappyKit client id, which we’ll create in second. Sign up for free using GitHub on https://happykit.dev/signup to create a client id. Create your first project once you’re signed in. You don’t need to specify a domain name. You can skip the Analytics setup as well. Head straight to the “Flags” tab after you created your project and you should see something similar to this:
您需要用您的HappyKit客户ID填写.env.local ,我们将在第二时间创建它。 在https://happykit.dev/signup上使用GitHub免费注册以创建客户端ID。 登录后创建您的第一个项目。您无需指定域名。 您也可以跳过Google Analytics(分析)设置。 创建项目后,直接转到“标记”标签,您应该会看到类似以下内容:
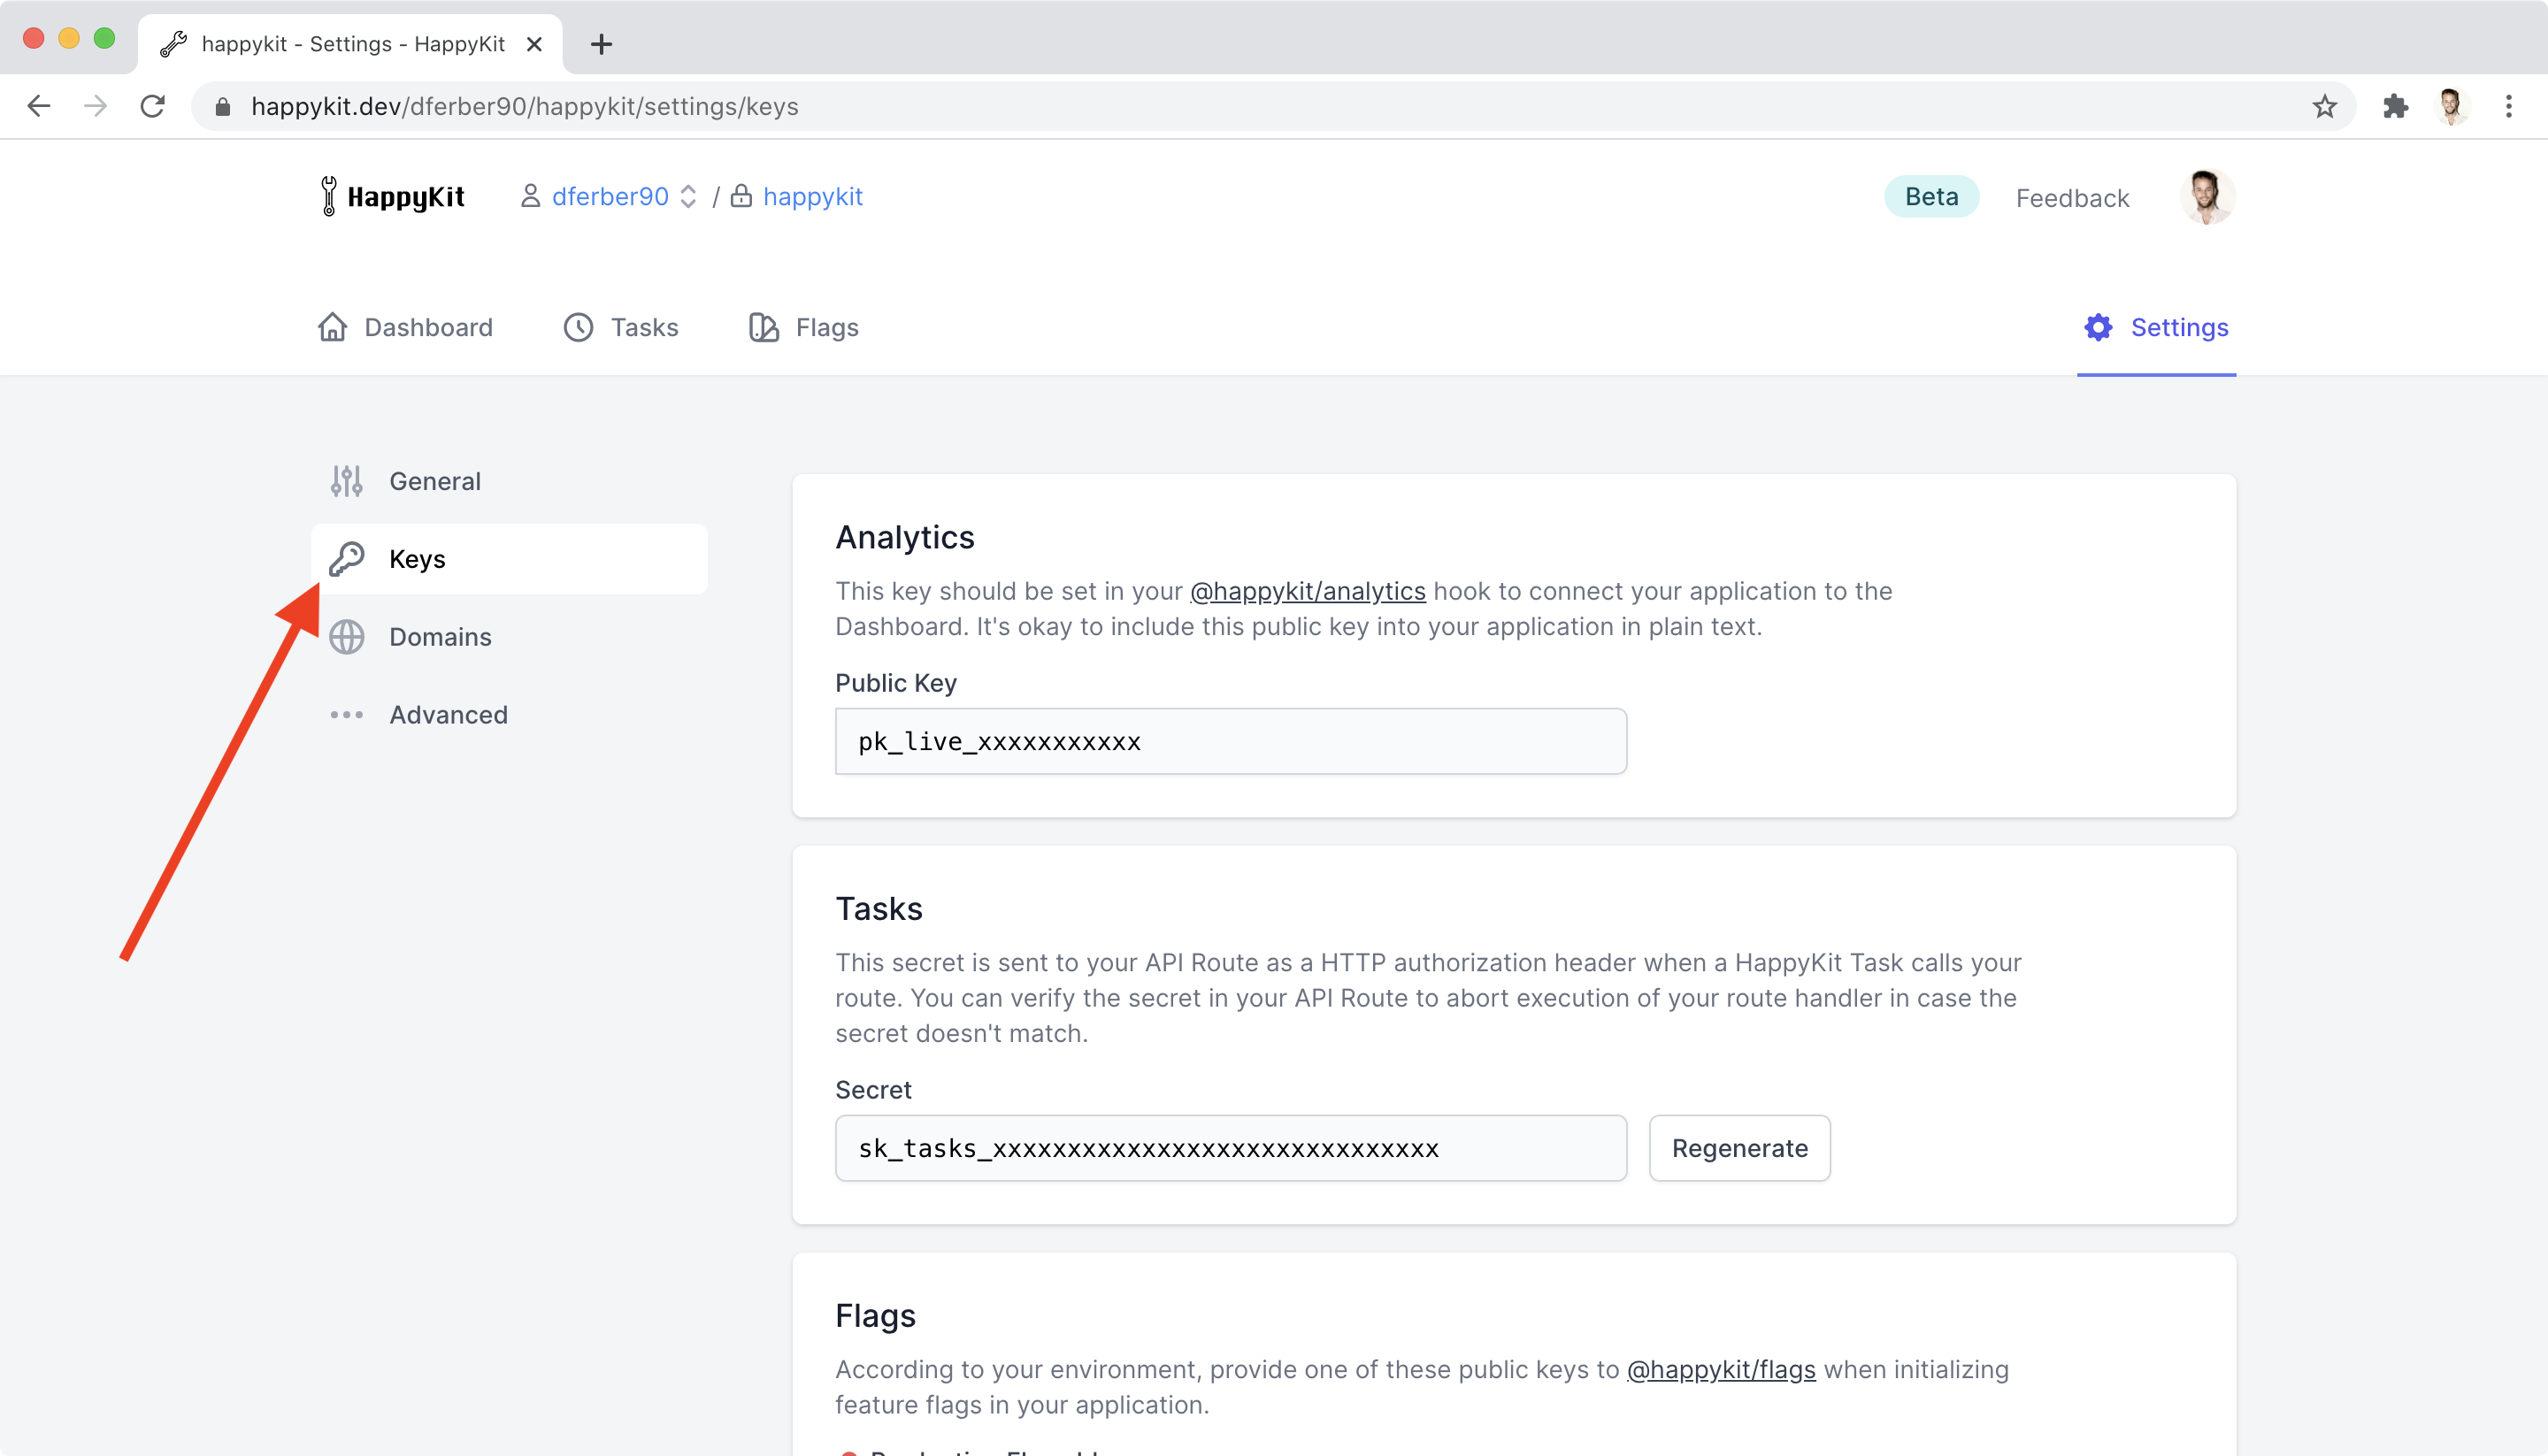
Great, now click on the Settings button at the top right. Then click on “Keys” in the left navigation.
太好了,现在单击右上角的“设置”按钮。 然后点击左侧导航栏中的“按键”。
Scroll down to the “Flags” section and copy the “Development Flags Id”:
向下滚动到“标志”部分,然后复制“开发标志ID”:
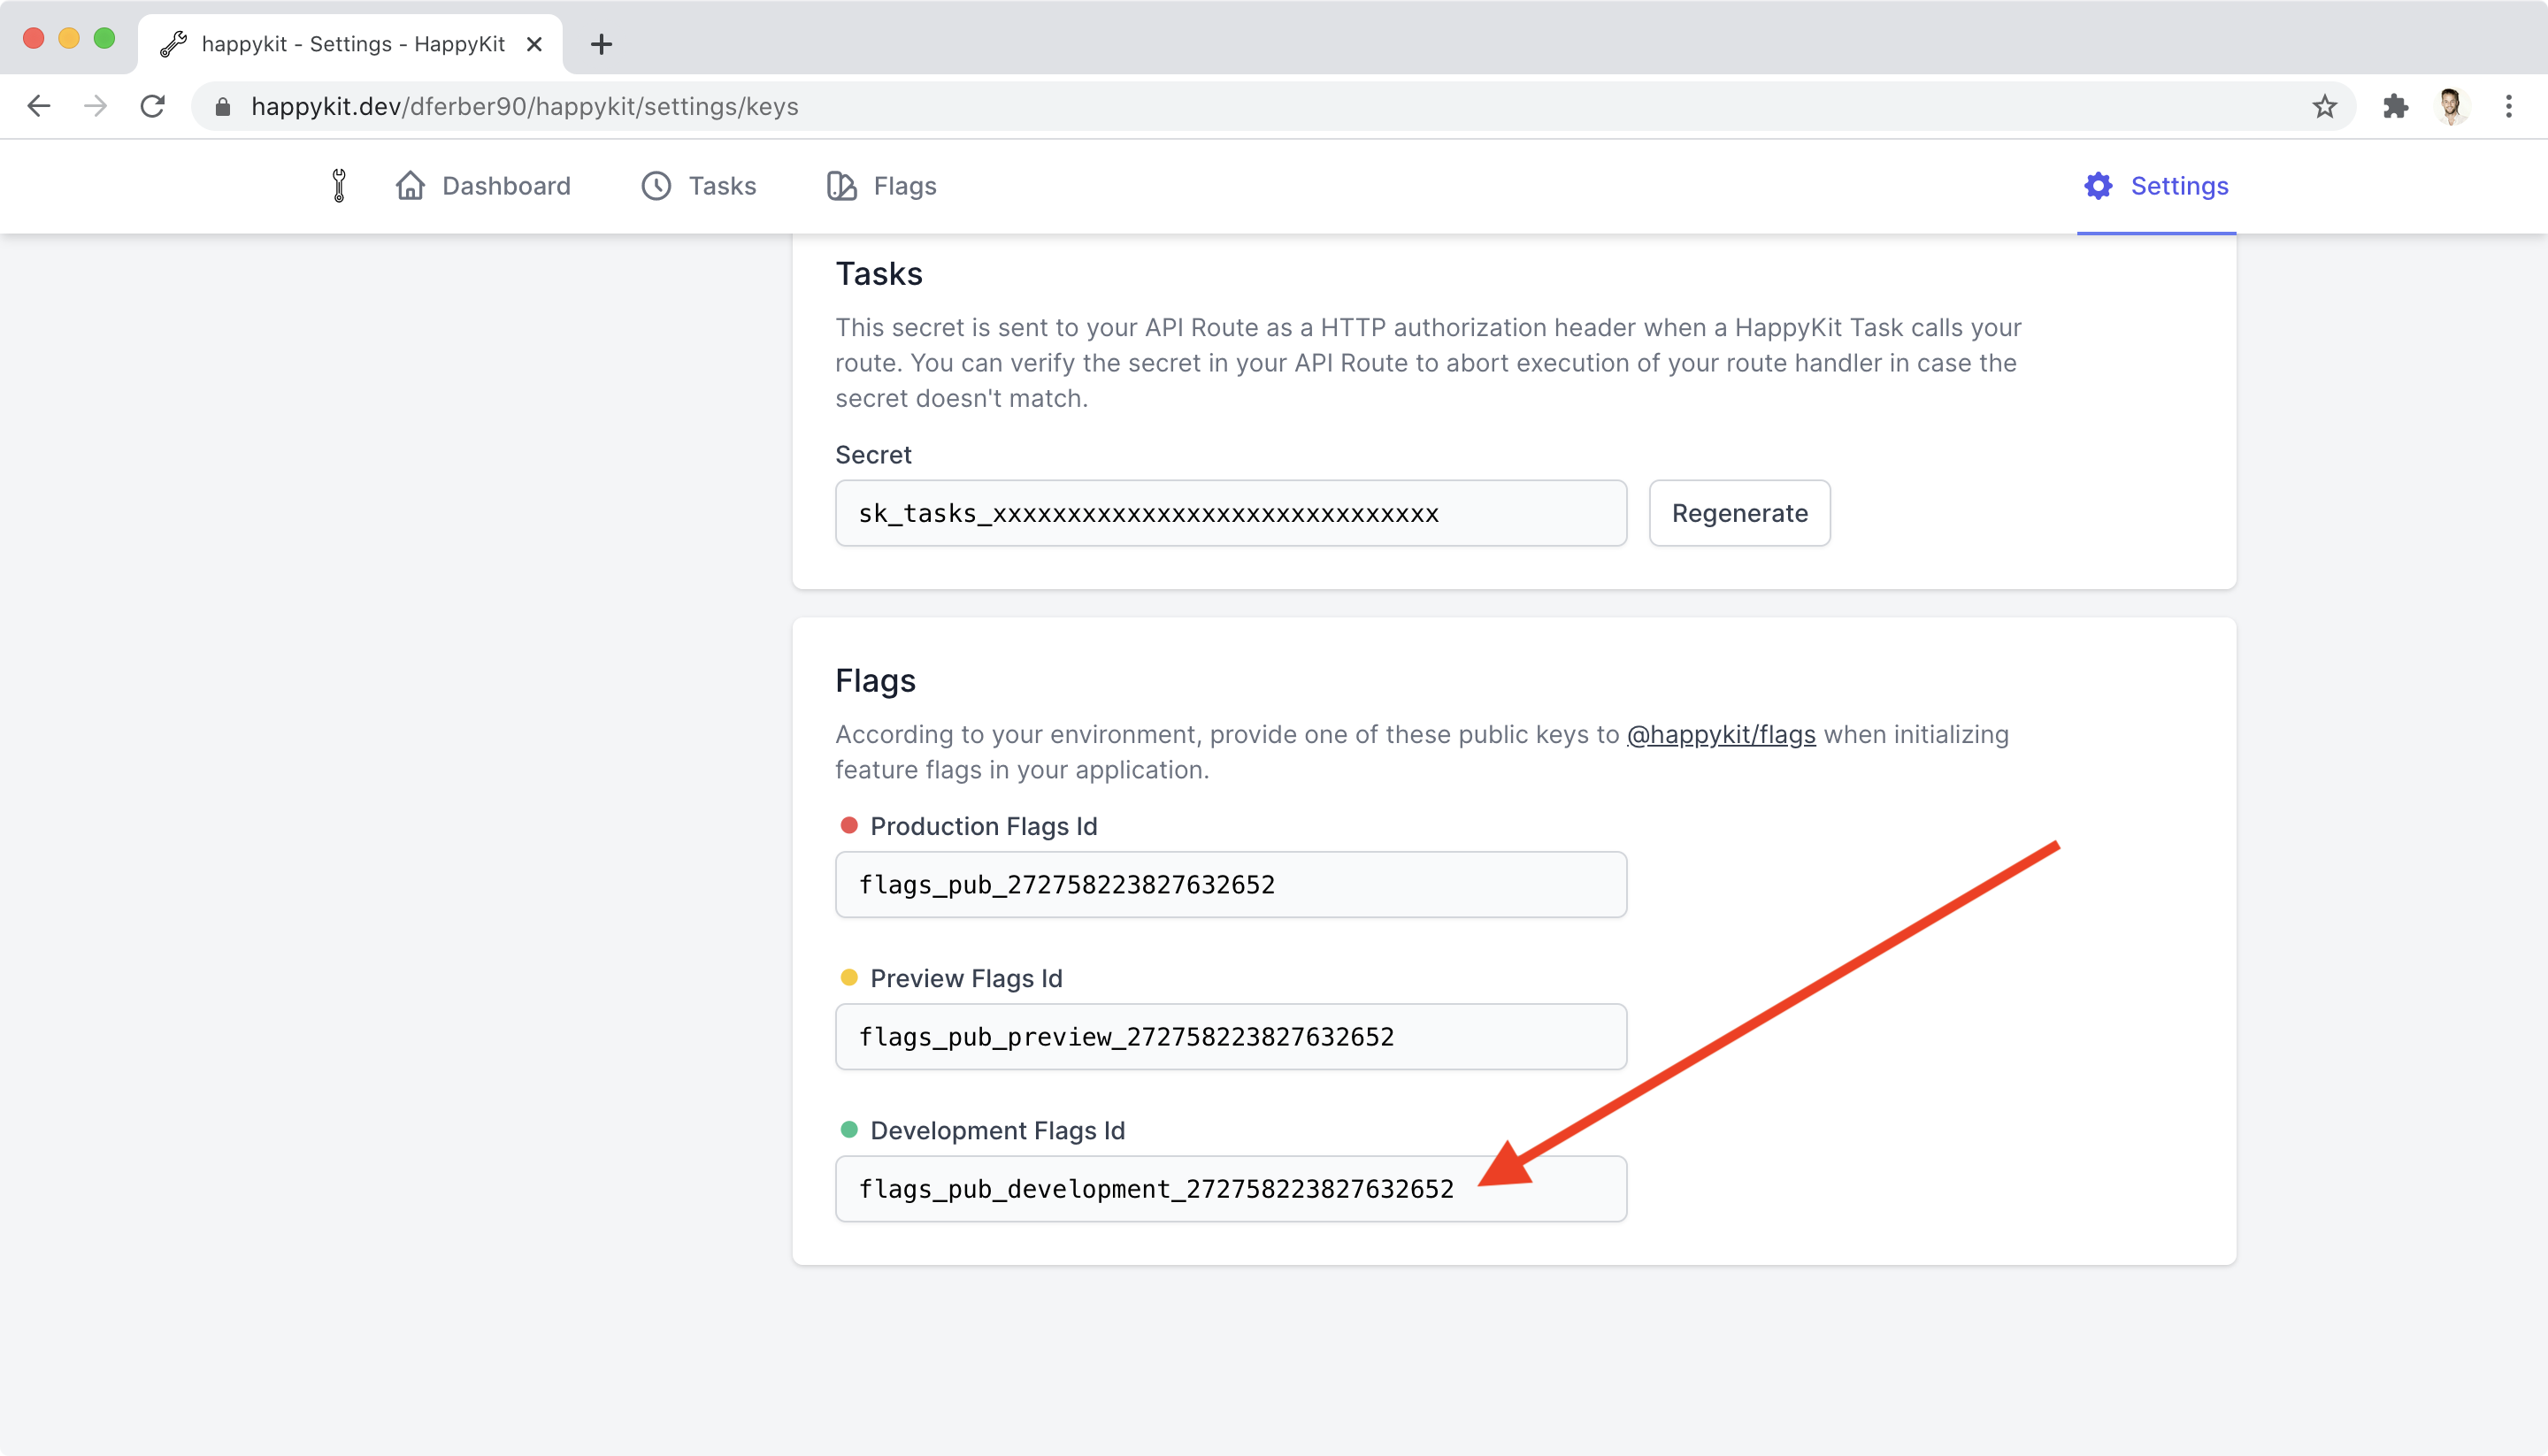
Paste this id into your Next.js application’s .env.local which we created at the project root earlier:
将此ID粘贴到我们之前在项目根目录下创建的Next.js应用程序的.env.local中:
NEXT_PUBLIC_FLAGS_CLIENT_ID=flags_pub_development_xxxxxxxxxxNow restart your Next.js application so it loads the modified environment variables. Great, we’re done with the one-time setup.
现在重新启动Next.js应用程序,以便它加载修改后的环境变量。 太好了,我们已经完成了一次性设置。
You won’t need to do this again :)
您无需再次执行此操作:)
创建我们的第一个功能标志 (Creating our first feature flag)
After the setup, you’re now ready for the first feature flag. Let’s say we were working on a new feature which shows a dog to our users.
设置完成后,您现在就可以准备第一个功能标志了。 假设我们正在开发一项新功能,向用户展示一只狗。

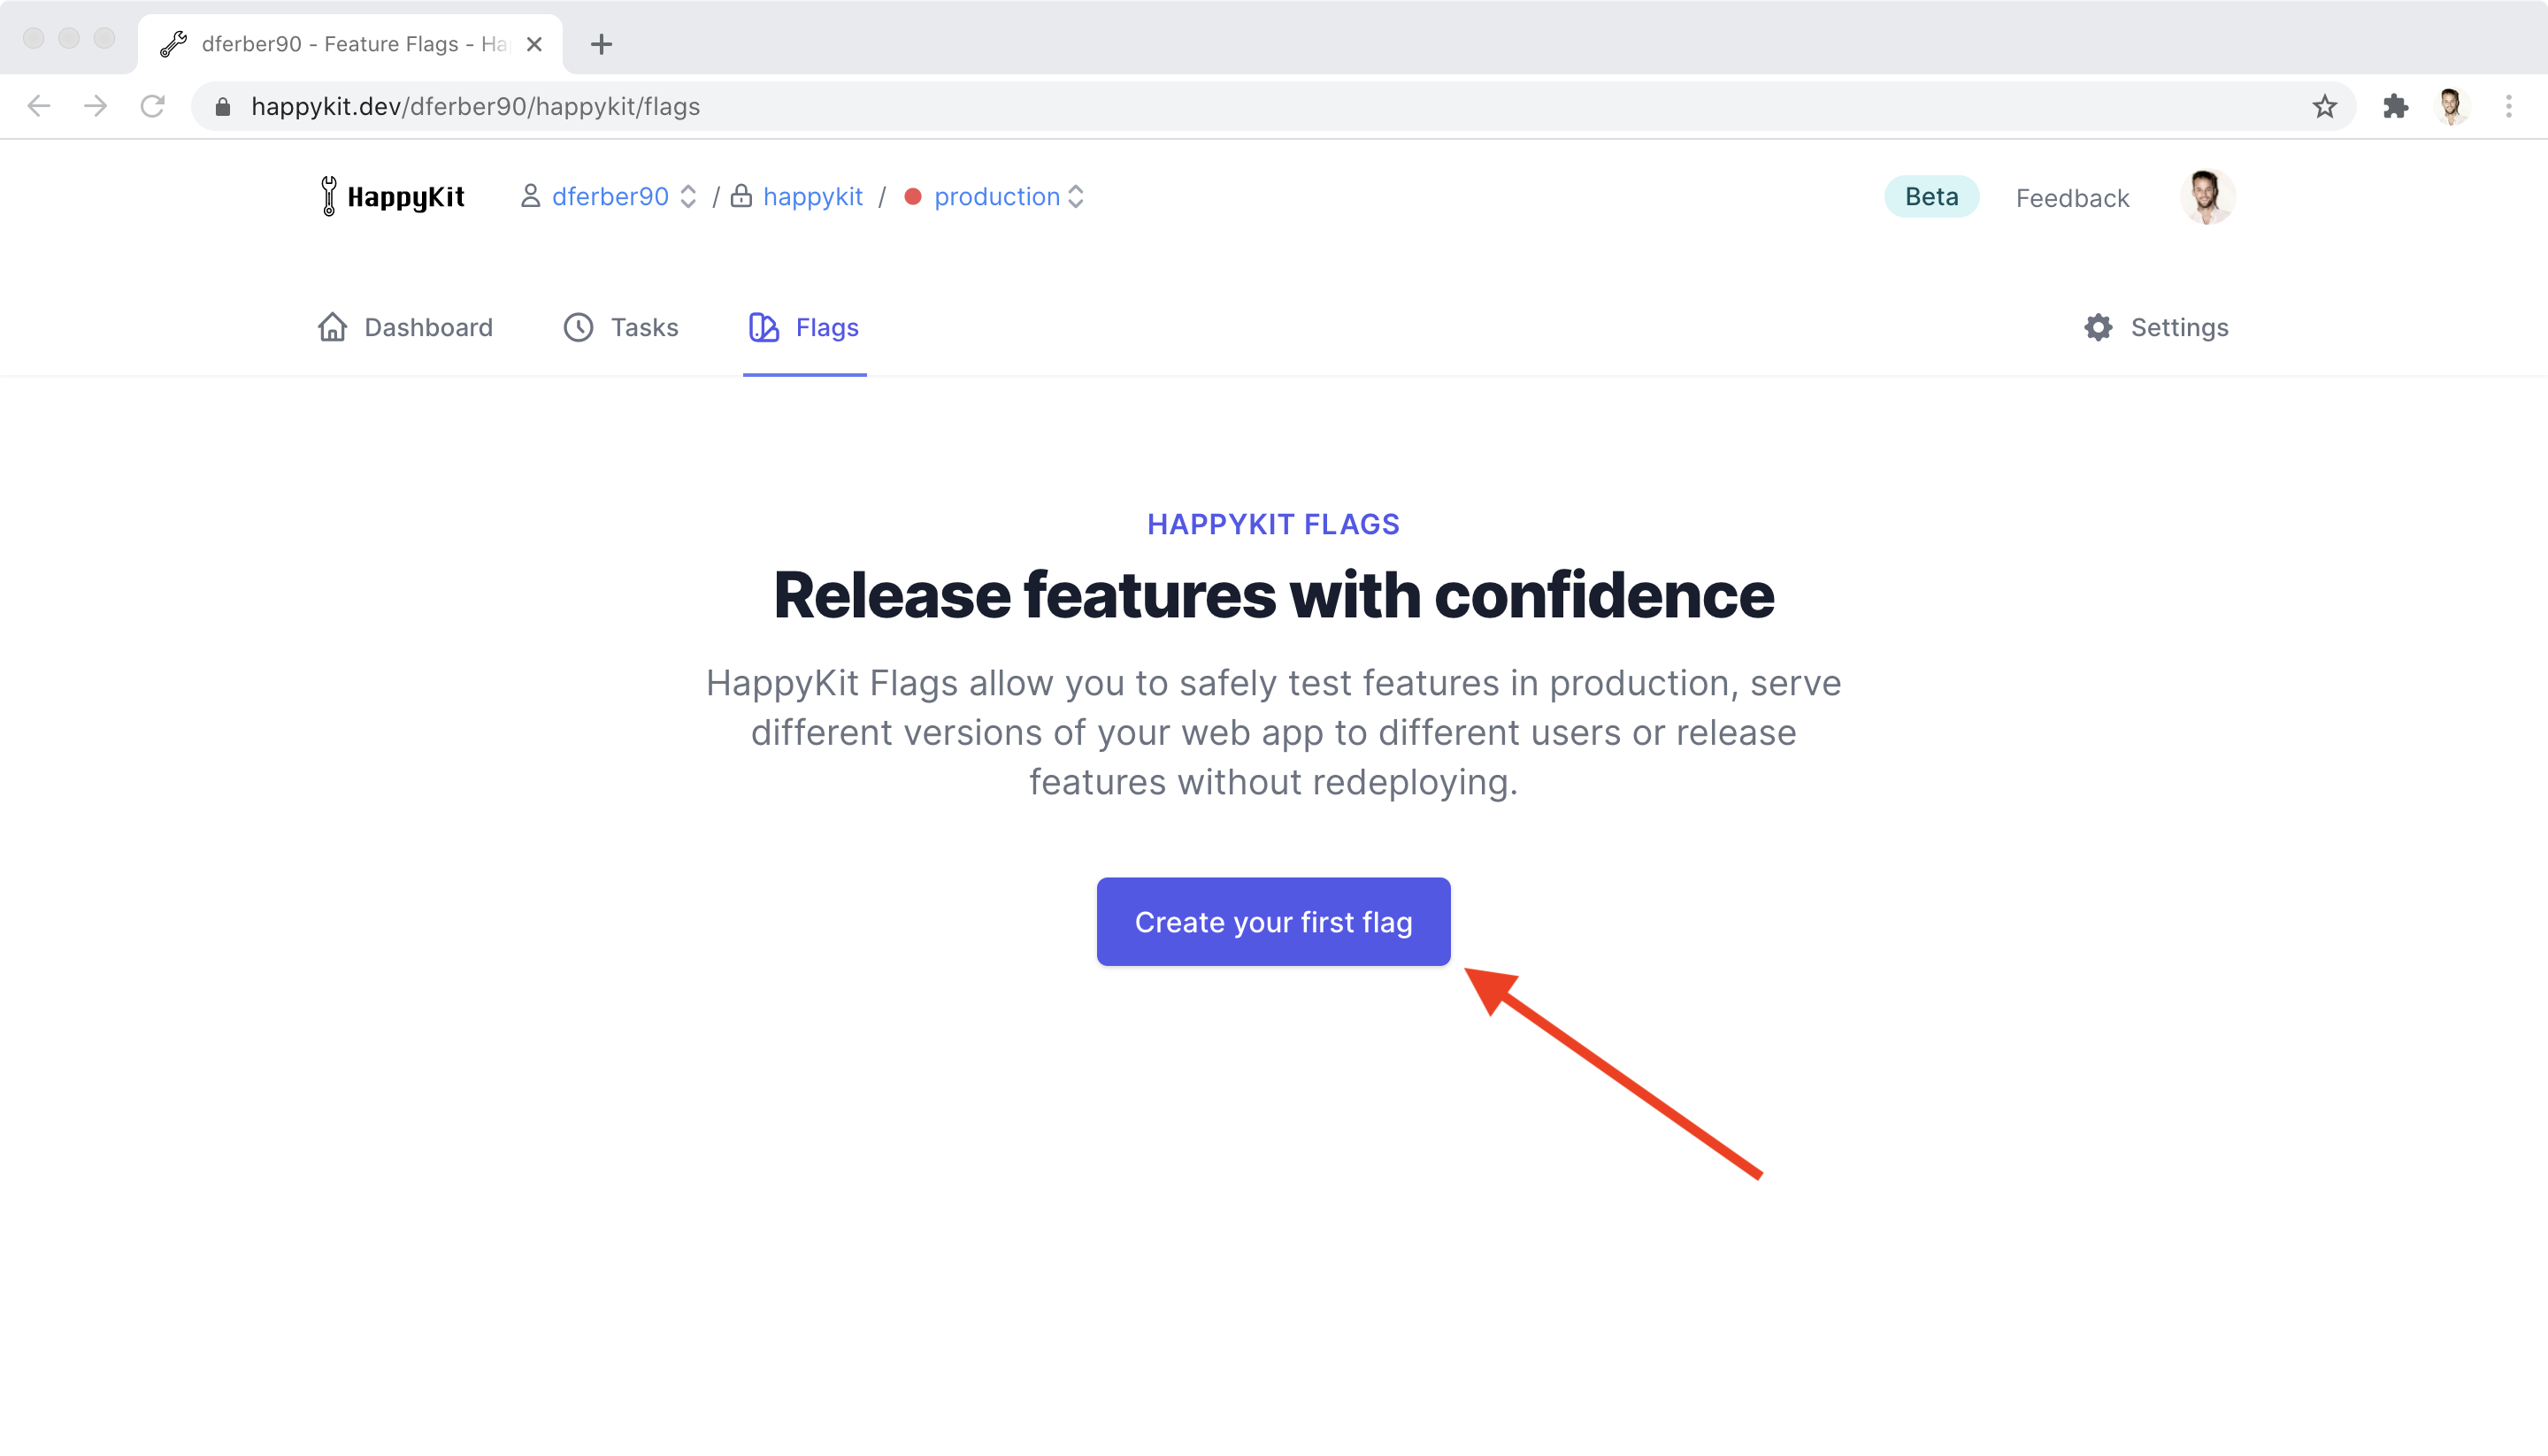
First, we’ll create a feature flag called dog in HappyKit. Navigate to “Flags” and click on “Create your first flag”:
首先,我们将在HappyKit中创建一个称为dog的功能标志。 导航到“标志” ,然后单击“创建您的第一个标志” :
Set the Key to “dog”, add an optional description and leave the rest as-is.
将“密钥”设置为“ dog”,添加可选描述,其余部分保持原样。

Finally, click the “Create” button to establish our first feature flag! That’s it, we now have a feature flag we can use in our application. So let’s do that!
最后,单击“创建”按钮以建立我们的第一个功能标志! 就是这样,我们现在有了可以在我们的应用程序中使用的功能标志。 因此,让我们开始吧!
使用我们的第一个功能标志 (Using our first feature flag)
So far we’ve configured @happykit/flags and created our first Feature Flag called dog. The next, tiny step is to actually use our feature flag. And conveniently, this is done with a hook called useFlags() that you can add to any of your pages.
到目前为止,我们已经配置了@ happykit / flags并创建了我们的第一个Feature标志,称为dog 。 下一步是实际使用我们的功能标志。 方便地,这可以通过一个名为useFlags()的钩子完成,您可以将其添加到任何页面中。
Assume you have a plain page which only says “Hello World” like this:
假设您有一个简单的页面,仅显示“ Hello World”,如下所示:
export default function IndexPage() {
  return (
    <div>
      <p>Hello World.</p>
    </div>
  )
}
Now, to use our dog feature flag, we’ll call the useFlags() hook like this:
现在,要使用我们的dog功能标志,我们将像这样调用useFlags()钩子:
import { useFlags } from "@happykit/flags"


export default function IndexPage() {
  const flags = useFlags()

  return (
    <div>
      <p>Hello World.</p>
      {flags.dog && (
        <img src="https://images.unsplash.com/photo-1502673530728-f79b4cab31b1?&w=400" />
      )}
    </div>
  )
}
The flags object returned by useFlags contains the evaluated values of all flags defined in HappyKit. In this case it contains { "dog": true } as the dog feature flag is currently turned on.
useFlags返回的flags对象包含useFlags中定义的所有标志的评估值。 在这种情况下,它包含{ "dog": true }因为当前打开了dog功能标记。
When you open the page in the browser you should now be greeted by a lovely dog with a big smile on his face. That’s it, you’ve now got the basic setup done and your first Feature Flag set up!
当您在浏览器中打开页面时,现在应该被一只可爱的狗打招呼,他的脸上露出灿烂的笑容。 就是这样,您现在已完成基本设置并设置了第一个功能标记!
Congratulations, you’ve made it this far so you deserve this happy guy 🐶
恭喜,您已经做到了这一点,所以您值得拥有这个快乐的人🐶

环境环境(Environments)
Now, feature flags have one more clever twist to them. A feature flag can hold a different value depending on the environment it’s used in. This allows you to switch features on and off separately for development, preview deployments and production.
现在,功能标志变得更加巧妙。 功能标记可以根据使用的环境保留不同的值。这使您可以分别打开和关闭功能以进行开发,预览部署和生产。
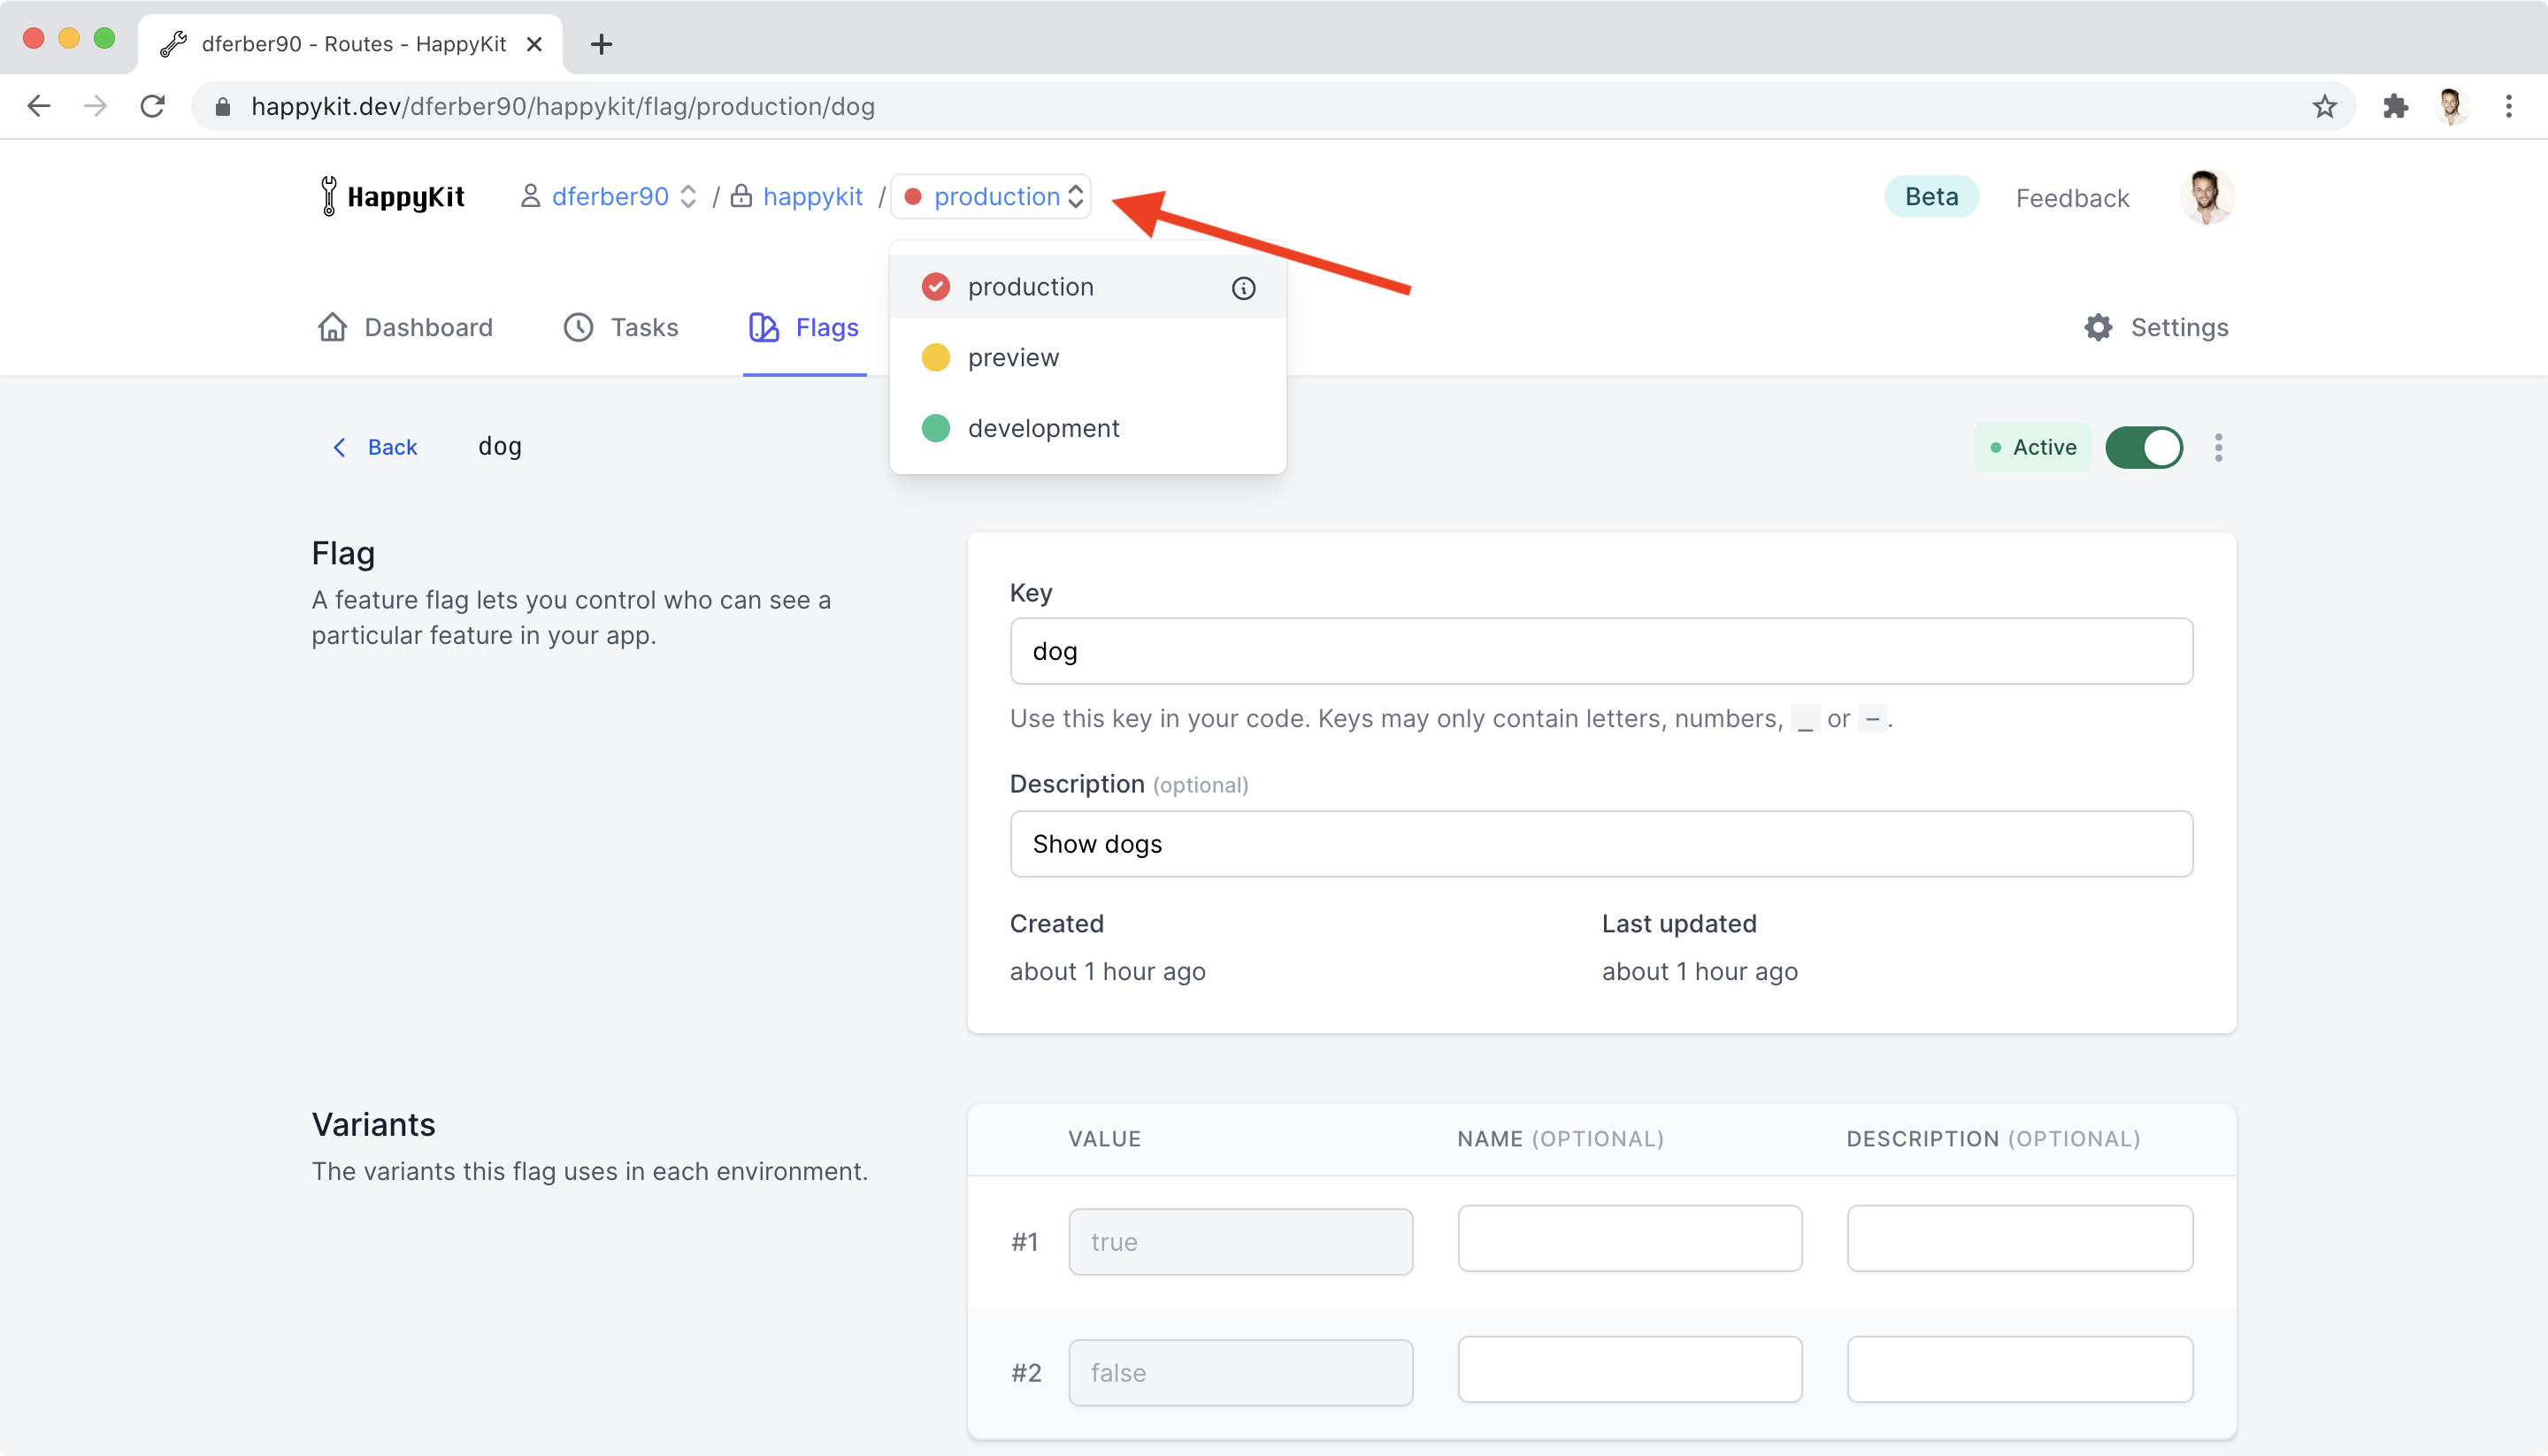
You can change the environment by using the dropdown at the top of the application. Whether you turn a feature on or off in one environment doesn’t affect the other environments. Only the key, description and variants are shared across all environments — and you’ll rarely change those as they’re used in your code.
您可以使用应用程序顶部的下拉菜单来更改环境。 在一个环境中打开或关闭功能不会影响其他环境。 在所有环境中仅共享键,描述和变体,并且您很少更改它们,因为它们已在代码中使用。
When setting up @happykit/flags we configured it with the development client id. This means that changes to the production environment won’t have any effect on our local development.
设置@ happykit / flags时,我们使用开发客户端ID对其进行了配置。 这意味着生产环境的变化不会对我们当地的发展产生任何影响。
So switch to the “development” environment using the dropdown in the previous screenshot.
因此,使用上一个屏幕截图中的下拉列表切换到“开发”环境。
开启和关闭功能 (Toggling features on and off)
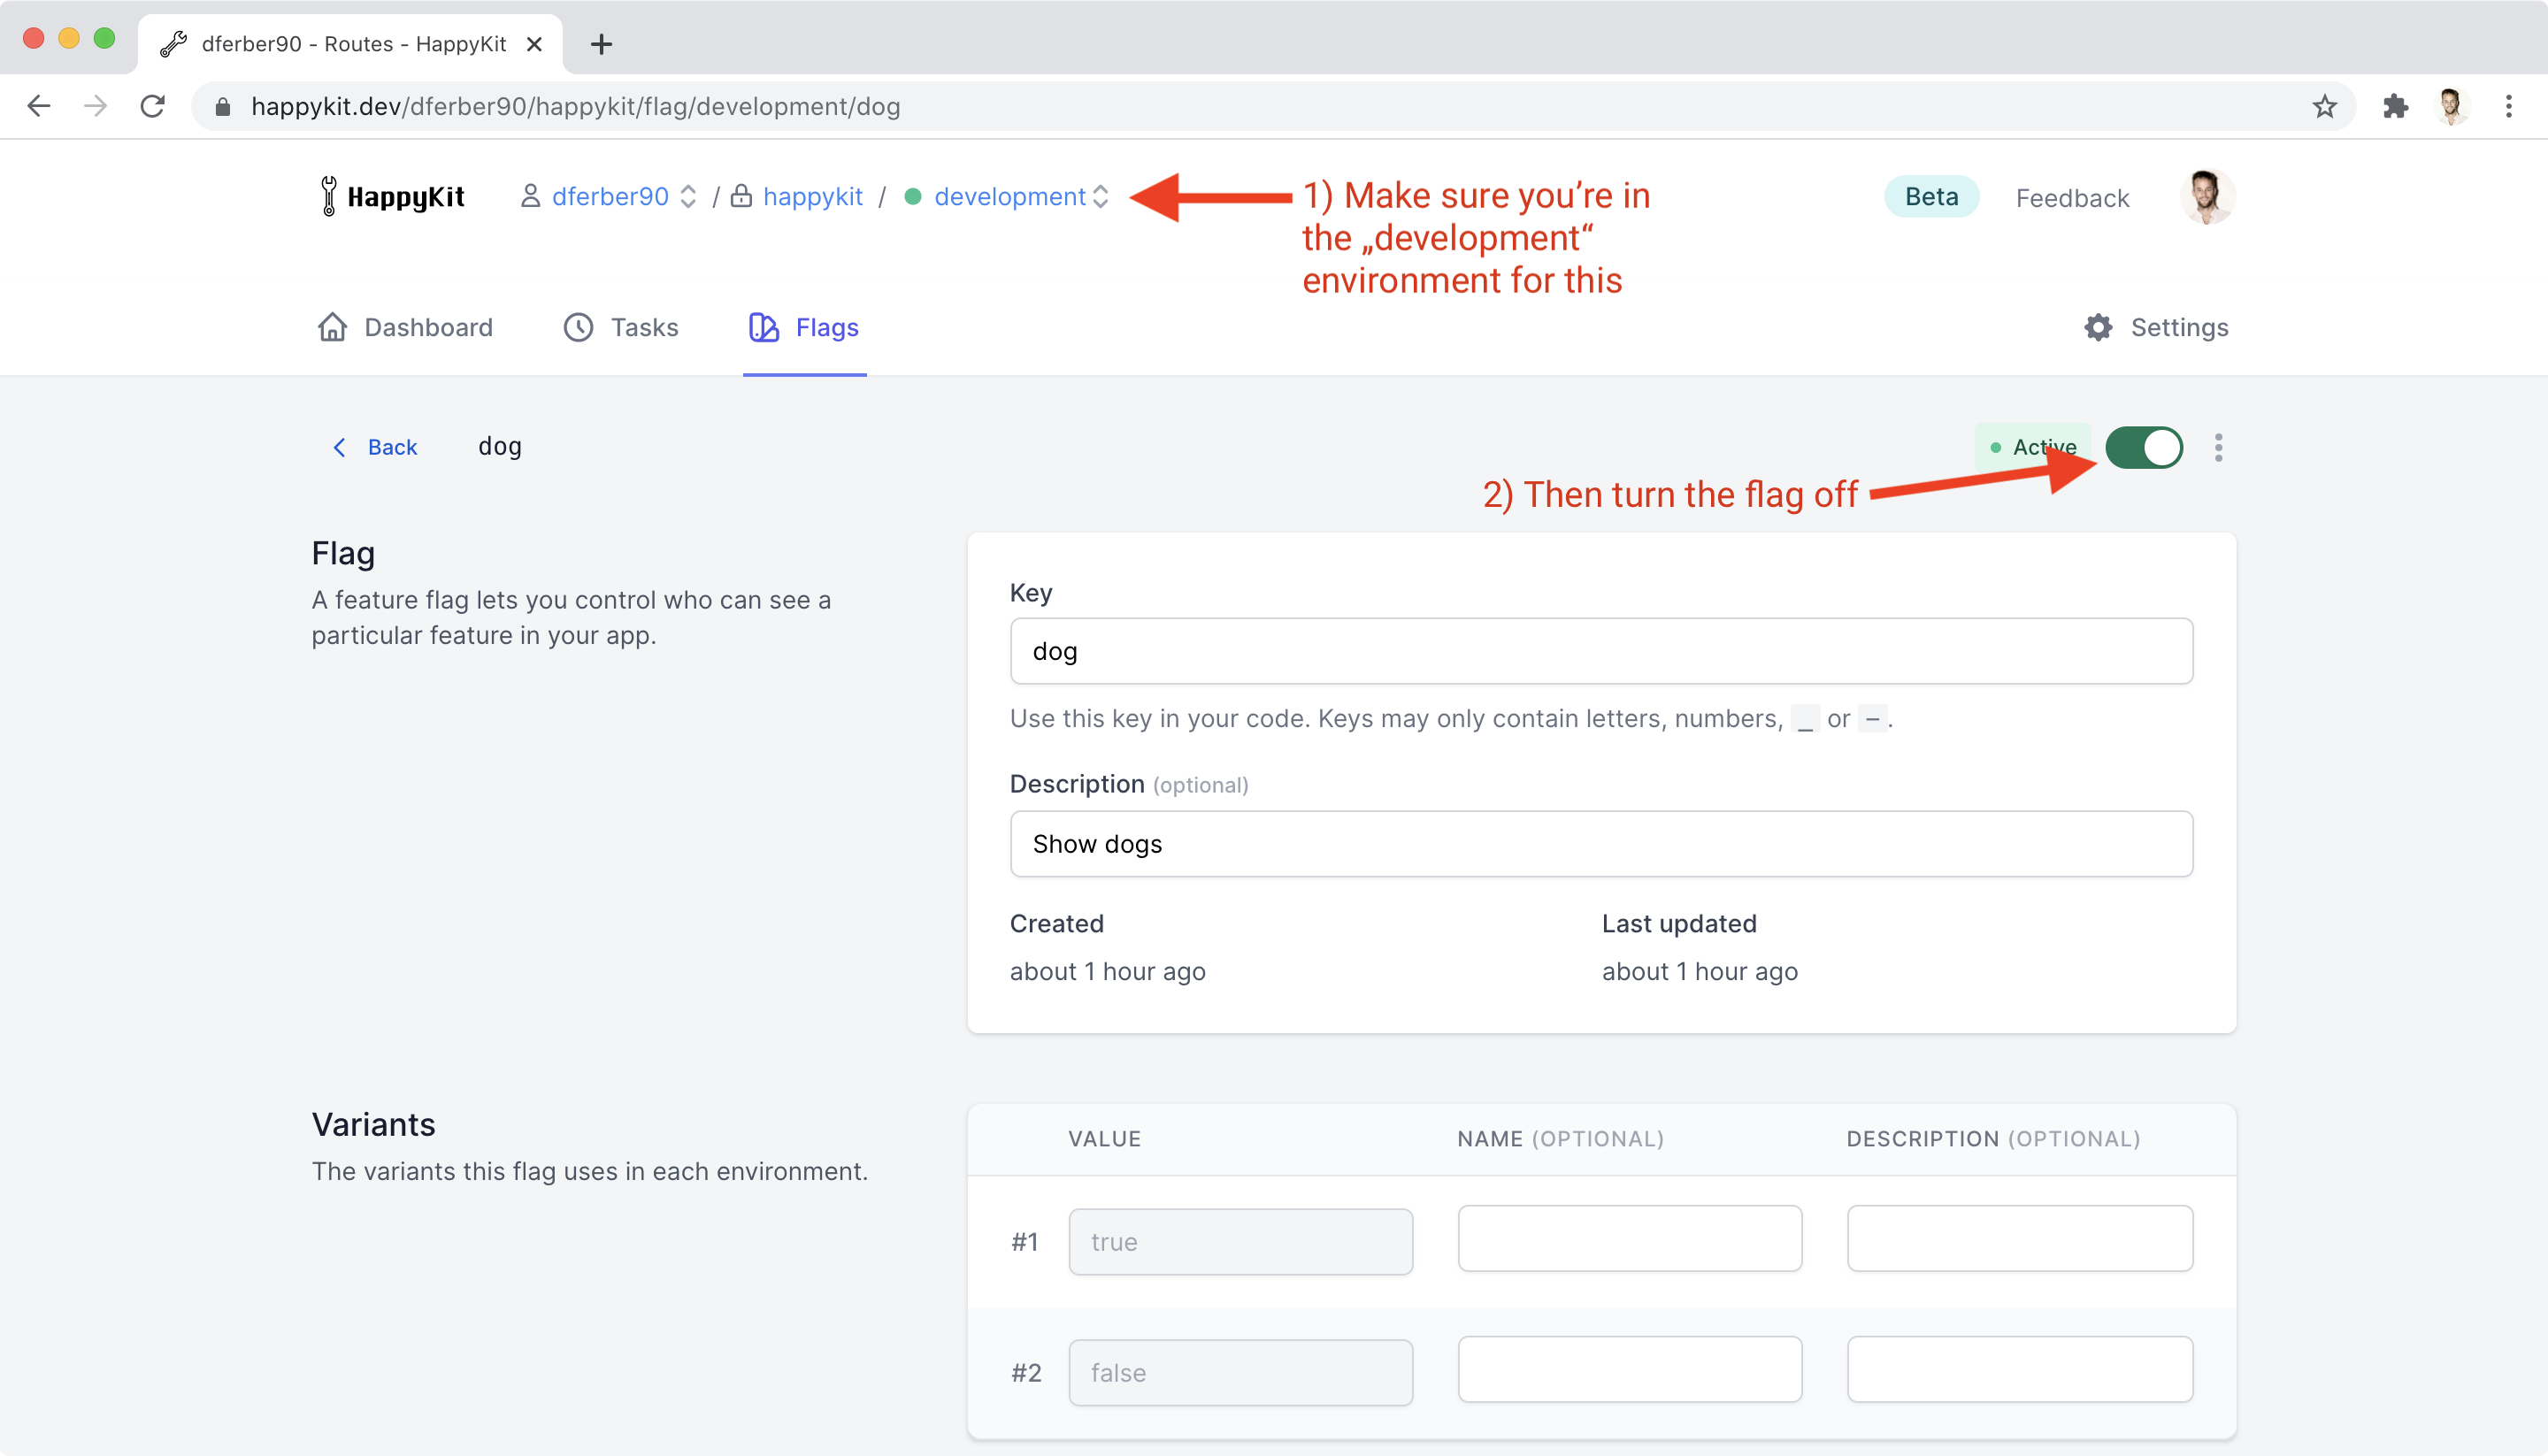
To prove that feature toggling actually works, let’s now turn the dog feature flag off for the development environment.
为了证明功能切换确实有效,现在让我们在开发环境中关闭dog功能标记。
Again, make sure you’re in the development environment by checking the dropdown at the top of the page.
再次,通过检查页面顶部的下拉菜单,确保您处于开发环境中。
Then press the green switch to deactivate the feature flag.
然后按绿色开关停用功能标志。
Voi là!
瞧!
Refresh the page in your Next.js application after a few seconds to see the change in action. The happy dog should have disappeared.
几秒钟后刷新Next.js应用程序中的页面,以查看操作中的更改。 快乐的狗应该消失了。
Note that it may take up to 60 seconds before the changed flag is seen in your application. This is a tradeoff made in exchange for being able to serve feature flags really quickly. Our average response time to read feature flags is below 100ms. As feature flags are read far more often than they’re changed, we’ve felt this tradeoff is worth it.
请注意,最多可能需要60秒才能在您的应用程序中看到更改的标志。 这是一个折衷,以换取能够真正快速地提供功能标志。 我们读取功能标志的平均响应时间低于100毫秒。 由于功能标志的读取次数远远多于更改的时间,因此我们认为这种权衡是值得的。
Contrary to some other Feature Flagging services, HappyKit feature flags are not updated in real time. We feel that it’s weird when whole sections disappear in front of your users eyes as you turn features off, without any explanation of why it’s happening. Instead, we revalidate the feature flags on page transitions or when the browser window regains focus after it has been left. This way, turning a feature flag on or off is less intrusive to your users.
与其他某些功能标记服务相反,HappyKit功能标记不会实时更新。 我们认为,当您关闭功能时整个部分都消失在用户的眼前,这很奇怪,而没有任何解释原因。 取而代之的是,我们在页面过渡时或浏览器窗口离开后重新获得焦点时重新验证功能标志。 这样,打开或关闭功能标记对用户的干扰就较小。
添加服务器端渲染支持 (Adding server-side rendering support)
At the moment our feature flags are loaded on the client-side only. Depending on your use-case, this might be okay. However, if you want to preload the feature flags on the server, you can use getFlags. This function returns the same object as useFlags but it can be used on the server. This is great for server-side rendering.
目前,我们的功能标记仅在客户端加载。 根据您的用例,这可能没问题。 但是,如果要在服务器上预加载功能标志,则可以使用getFlags 。 该函数返回与useFlags相同的对象,但是可以在服务器上使用。 这非常适合服务器端渲染。
It’s then up to you to use the flags as props directly, or to pass them through useFlags. Passing them through useFlags has the benefit that the flags will be refreshed when the window regains focus. It will also ensure any default flag values you might have configured using configure() are respected.
然后由您直接将标志用作道具,或将其通过useFlags传递。 通过useFlags传递它们的好处是,当窗口重新获得焦点时,将刷新标志。 它还将确保遵守您可能使用configure()配置的任何默认标志值。
import { useFlags, getFlags } from '@happykit/flags';


export default function IndexPage(props) {
  const flags = useFlags({ initialFlags: props.initialFlags });

  return (
    <div>
      <p>Hello World.</p>
      {flags.dog && (
        <img src="https://images.unsplash.com/photo-1502673530728-f79b4cab31b1?&w=400" />
      )}
    </div>
  )
}


export const getServerSideProps = async () => {
  const initialFlags = await getFlags();
  return { props: { initialFlags } };
};
Since HappyKit Flags are extremely fast the added request of getFlags isn’t really noticeable to end users. You can even run it in parallel to your existing requests.
由于HappyKit Flags的速度非常快, getFlags最终用户并不真正注意到getFlags的添加请求。 您甚至可以将其与现有请求并行运行。
A full example can be found at github.com/happykit/flags-example, which is deployed to flags-example.vercel.app.
完整示例可在github.com/happykit/flags-example中找到,该示例已部署到flags-example.vercel.app中。
准备生产 (Getting production ready)
In the setup phase, we’ve defined an environment variable holding your HappyKit Flags client id. There is actually one client id per environment, so one for development, one for preview deployments and one for production.
在设置阶段,我们定义了一个环境变量,其中包含您的HappyKit Flags客户端ID。 实际上,每个环境有一个客户端ID,一个用于开发,一个用于预览部署,一个用于生产。
Make sure to set the NEXT_PUBLIC_FLAGS_CLIENT_ID environment variable accordingly. You can find the remaining client ids in HappyKit under Project Settings > Keys just like before.
确保相应地设置NEXT_PUBLIC_FLAGS_CLIENT_ID环境变量。 您可以像以前一样在HappyKit中的Project Settings> Keys下找到其余的客户端ID。
还有更多 (There’s more)
In this walkthrough we’ve created a boolean feature flag, one that is either on or off. You might have noticed that it’s possible to create other types of feature flags like strings or numeric ones. Although less common, these can be used to serve different versions of a feature or to determine how many items of something should be shown in a list.
在本演练中,我们创建了一个布尔功能标志,该标志处于打开或关闭状态。 您可能已经注意到,可以创建其他类型的功能标志,例如字符串或数字标志。 尽管不太常见,但是它们可以用于提供功能的不同版本或确定应在列表中显示多少项。
Additionally, HappyKit Flags may target individual users. You can pass a user object like useFlags({ "key": "user-id-1" }) when evaluating the flags. Combine that with the ability to serve a specific variant of a feature flag depending on the user key and you can release features to individual users only.
此外,HappyKit标志可能针对单个用户。 您可以在评估标志时传递诸如useFlags({ "key": "user-id-1" })类的用户对象。 将其与根据用户密钥提供特定功能标记的功能相结合,可以将功能仅发布给单个用户。
An example of this can be found here.
一个例子可以在这里找到。
This can also be combined with server-side rendering which is shown here.
这也可以与此处显示的服务器端渲染相结合。
还有更多的来 (And there’s more coming)
At the moment support for deploy hooks is added to HappyKit Flags as well! By using deploy hooks, HappyKit Flags will be able to trigger redeployments of your application whenever you change a feature flag.
目前,还为HappyKit标志添加了对部署挂钩的支持! 通过使用部署挂钩,每当您更改功能标志时,HappyKit标志都将能够触发应用程序的重新部署。
Imagine you’ve got a feature flag which is only activated for your team members. Once you’re ready to release the feature, you simply activate it for everyone. The change is visible immediately. But now your application gets redeployed automatically, so even the static pages will respect the feature flag by default — all without changing a line of code.
想象一下,您有一个功能标记,仅对您的团队成员激活。 准备发布该功能后,只需为所有人激活它即可。 更改立即可见。 但是现在您的应用程序会自动重新部署,因此即使是静态页面也将默认使用功能标志-所有这些都无需更改任何代码。
That way, you can release features without changing your code. Just remember to eventually remove the flag from your code once the feature flag is no longer needed.
这样,您可以发布功能而无需更改代码。 只要记住,一旦不再需要功能标志,最终从代码中删除该标志。

结语(Wrapping up)
We’ve now seen how feature flags can be used to serve different versions of our application to different users. We can take advantage of this by serving upcoming features to team members only, even in production.
现在,我们已经了解了如何使用功能标志为不同的用户提供不同版本的应用程序。 我们可以通过仅向团队成员提供即将发布的功能来利用此功能,即使在生产中也是如此。
In case of an issue with a newly built feature, the flag can be turned off again.
如果新建功能出现问题,可以再次关闭该标志。
This combination of being able to test in production without affecting real users, and of being able to “unrelease” features quickly makes production releases much less exhausting.
能够在生产环境中进行测试而又不影响真实用户,以及能够快速“释放”功能的结合,使生产版本的工作量大大减少。
Happy Feature Toggling!
快乐功能切换!
Get started with feature flags on happykit.dev/signup
开始使用happykit.dev/signup上的功能标志
翻译自: https://medium.com/frontend-digest/using-feature-flags-in-next-js-c5c8d0795a2


 246
246

 被折叠的 条评论
为什么被折叠?
被折叠的 条评论
为什么被折叠?
 到【灌水乐园】发言


