


javascript模块
This is a continuation of my past blog series on coding an animated character, however I’ll now be going in a different direction with less emphasis on the animation and more on building a modular system to build simple levels with.
这是我过去有关动画角色编码的博客系列的延续,但是我现在将朝着不同的方向发展,不再强调动画,而更多地关注构建用于构建简单关卡的模块化系统。
See the Animation series here: Part 1, Part 2, Part 3.
请参见此处的动画系列: 第1 部分 , 第2 部分 , 第3部分 。
Since I want to build a modular system, there needs to be an interface for creating levels. For now, I’m going with the simplest solution, which is to have the user draw pixels onto a canvas, with colors corresponding to different objects. Once the user has a map they’re satisfied with, they should be able to generate a playable version with all the objects in place.
由于我要构建一个模块化系统,因此需要一个用于创建关卡的界面。 现在,我将采用最简单的解决方案,即让用户在画布上绘制像素,并使用颜色对应不同的对象。 用户拥有满意的地图后,他们应该能够在所有对象都放置到位的情况下生成可播放的版本。
For the HTML, we want one canvas to be our generator, and one canvas to run the game. It’s important to make them have the same ratio, as we will be transposing the smaller one as a map for the larger one. The toolbox for now is just a simple color select with three colors. Two for placing objects, and one for erasing objects.
对于HTML,我们希望一个画布成为生成器,并希望一个画布运行游戏。 使它们具有相同的比例很重要,因为我们将把较小的比例转换为较大的比例。 现在的工具箱只是一个简单的颜色选择,具有三种颜色。 两个用于放置对象,一个用于擦除对象。

For the JS, we’ll get the generator canvas that we just made in HTML, but we’ll also create an offscreen canvas to hold the minimum amount of information, while also allowing us to easily keep any pixels drawn locked into a large grid.
对于JS,我们将获得刚刚用HTML制作的生成器画布,但我们还将创建一个屏幕外画布以容纳最少的信息,同时还允许我们轻松地将绘制的任何像素锁定在大网格中。

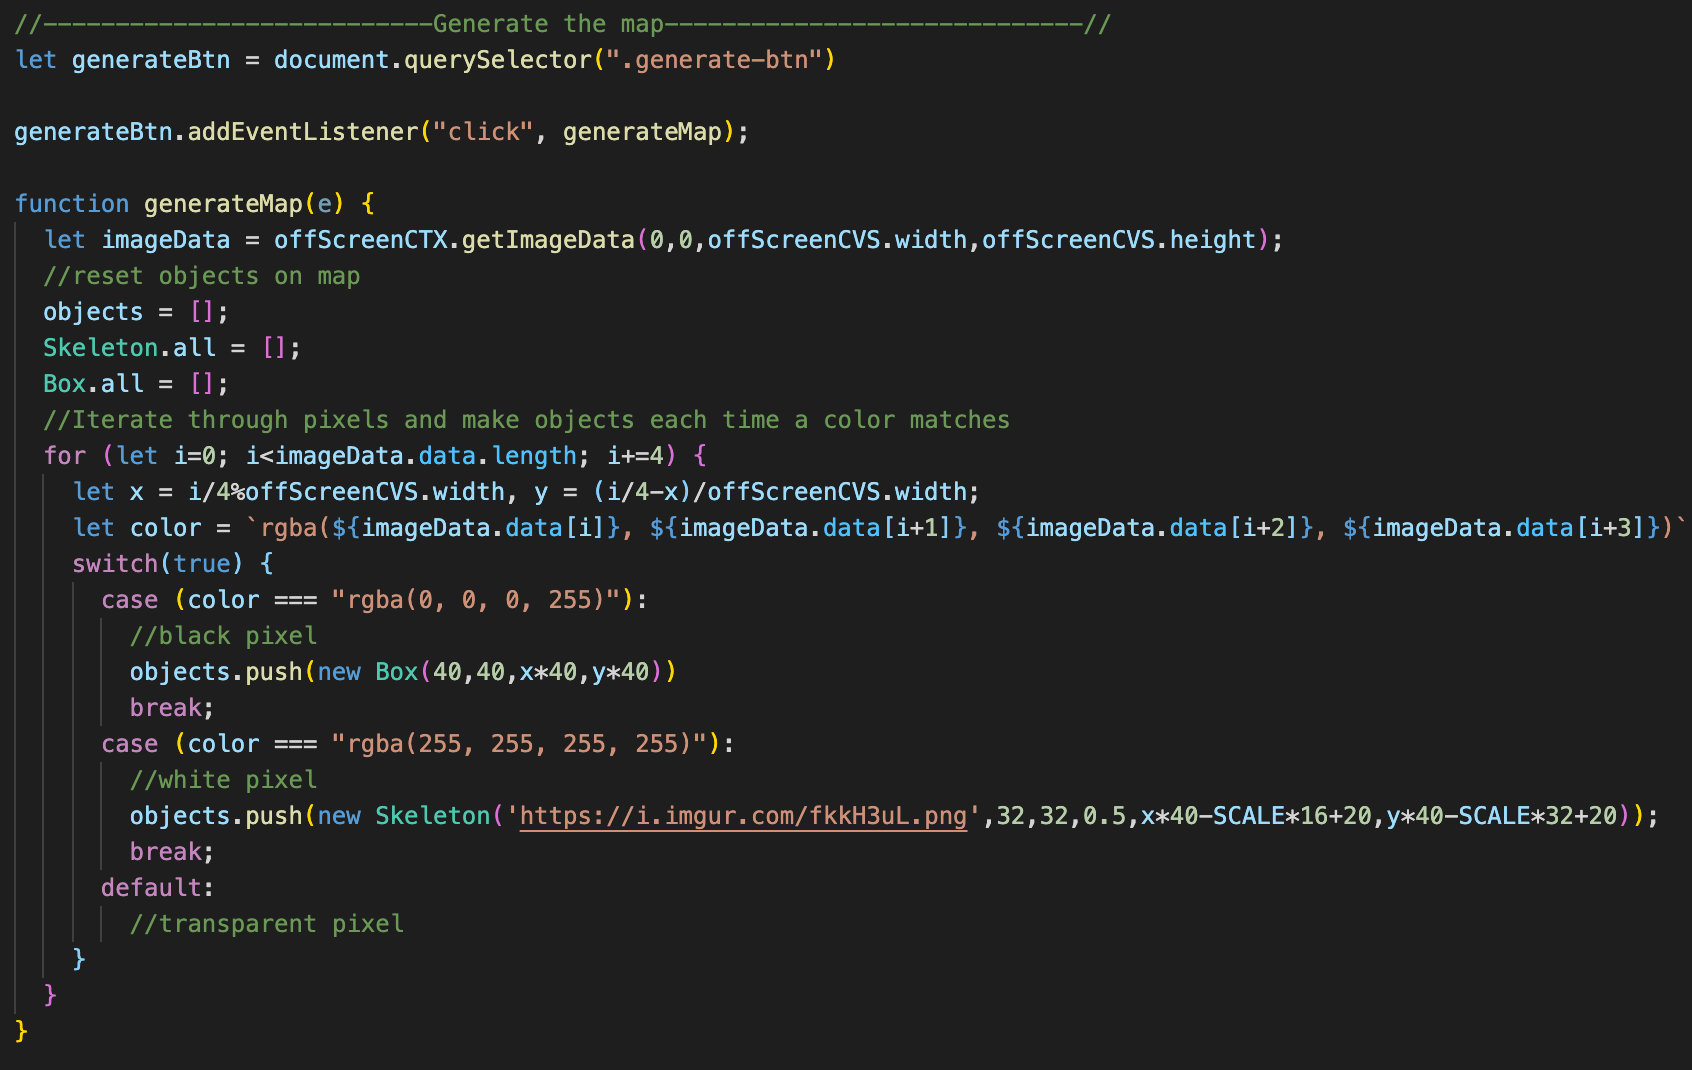
As you can see, the dimensions are 16x10 pixels for the offscreen canvas, the same ratio as the other two canvases. This means that our level grid will also be 16x10. Any objects we draw on that grid will need to fit in a 40x40 space, since the game canvas is 640x400.
如您所见,屏幕外画布的尺寸为16x10像素,与其他两个画布的比例相同。 这意味着我们的关卡网格也将为16x10。 由于游戏画布为640x400,因此我们在该网格上绘制的所有对象都需要适合40x40的空间。
We’ll create a blank image to use a starting point, just to cover the edge case where a user generates the map without drawing anything. This image will be updated in the draw function any time a change is made to the canvas. To draw on the generator canvas, we’ll add event listeners for when the mouse is pressed down, when the mouse is let go of, and when the mouse moves.
我们将创建一个空白图像以用作起点,以覆盖用户在不绘制任何内容的情况下生成地图的边缘情况。 每当对画布进行更改时,此图像都将在绘图功能中更新。 为了在生成器画布上进行绘制,我们将添加事件侦听器,用于按下鼠标,放开鼠标以及鼠标移动时。
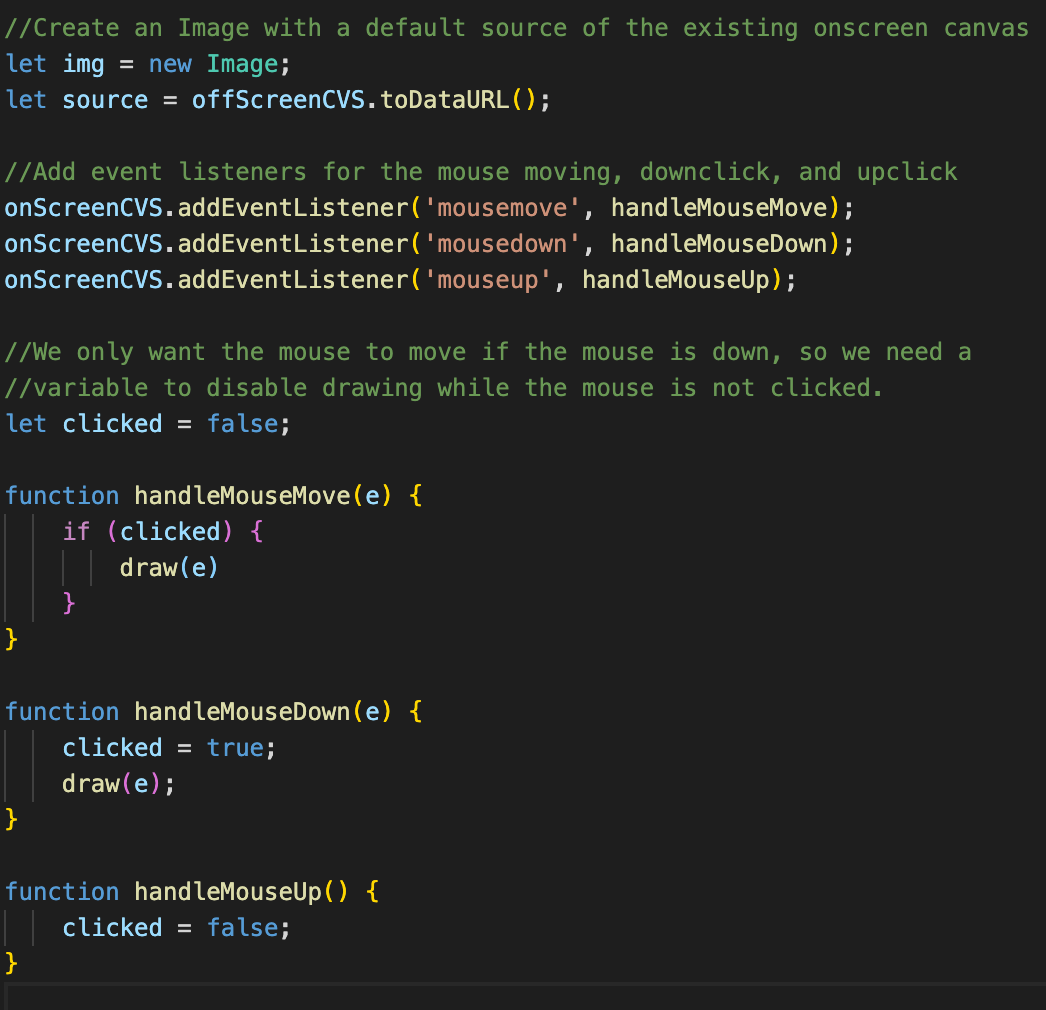
Any time a user tries to draw on the onscreen canvas, it will actually draw on the offscreen canvas, then render the image of the offscreen canvas onto the onscreen one.
每当用户尝试在屏幕上的画布上绘画时,它实际上都会在屏幕外的画布上绘画,然后将屏幕外的画布的图像渲染到屏幕上的画布上。

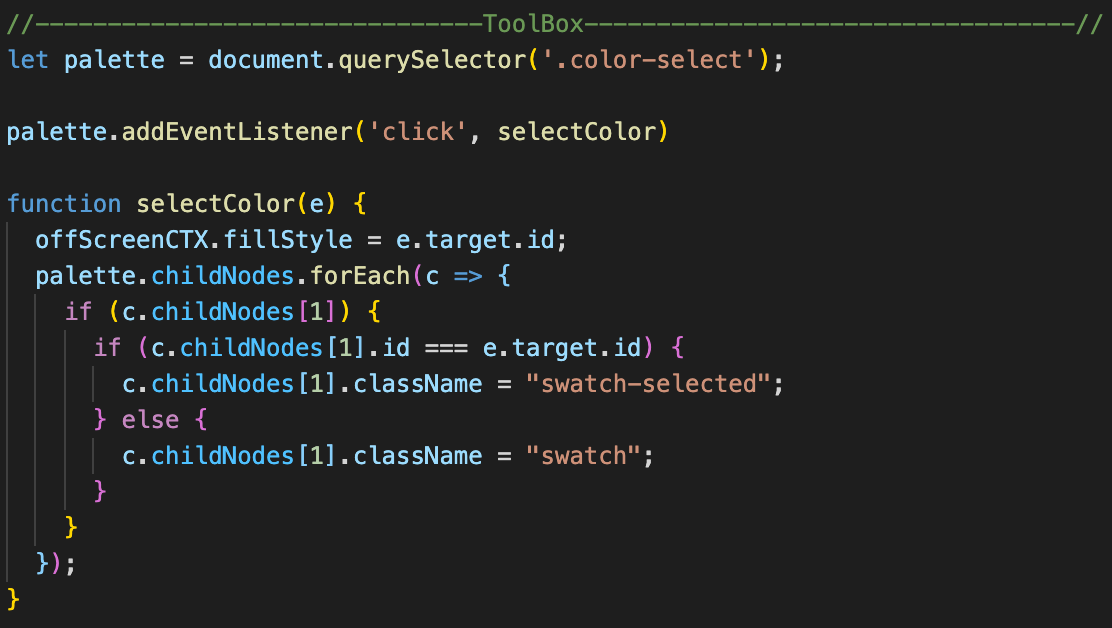
There’s not much to the toolbox. Just an event listener that allows the fillStyle to be changed based on which element is clicked on.
工具箱里没有多少东西。 只是一个事件侦听器,它允许根据单击的元素来更改fillStyle。
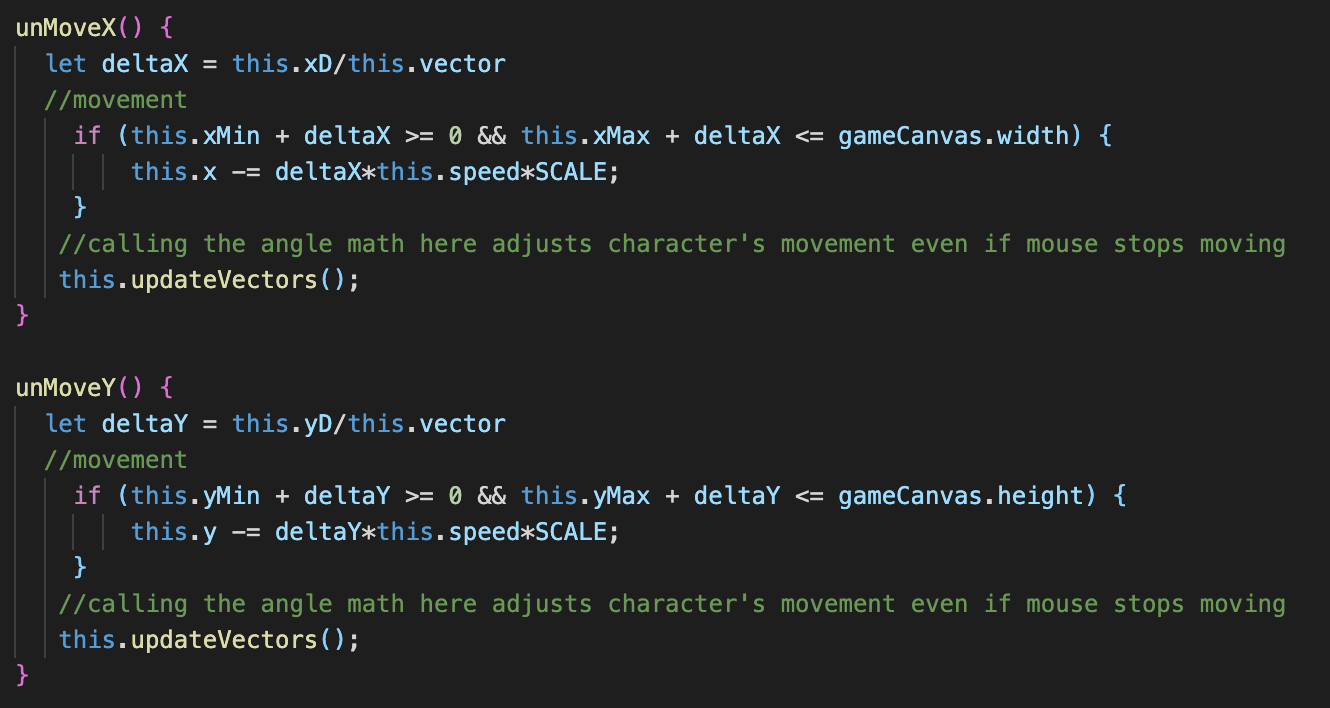
Finally, we can get to the game logic. I’m not going to go over every detail, because a lot was already covered in past blogposts, and you can see all the code on the codepen. Anyway, in part 3 of my character animation series I touched on some basic collision logic. That code worked by testing for exclusion. In other words, checking at each frame if the character was not touching the rectangle. This won’t work now that we’re scaling up to have many objects. Even if you’re touching one rectangle, you’re not touching a different one. So the code from the one you’re not touching would constantly interfere with the code that’s trying to stop movement. To get around this, we’ll check for inclusion. To do this we’ll give the rectangles a class just like the skeleton character, and the skeleton will now have two additional move functions, each one designed to counteract the x and y movements. Note that this will only work for rectangular objects. It will not feel right to use this collision code for diagonals or rounded objects.
最后,我们可以了解游戏逻辑。 我不会讨论所有细节,因为过去的博客文章已经介绍了很多内容,并且您可以在Codepen上看到所有代码。 无论如何,在角色动画系列的第3部分中,我谈到了一些基本的碰撞逻辑。 该代码通过测试排除来起作用。 换句话说,检查每一帧字符是否未接触矩形。 现在我们要扩展到拥有许多对象,这将无法正常工作。 即使您触摸一个矩形,也不会触摸另一个矩形。 因此,您未接触的代码将不断干扰试图停止移动的代码。 为了解决这个问题,我们将检查是否包含。 为此,我们将给矩形一个类似于骨架字符的类,并且骨架现在将具有两个附加的移动功能,每个功能都旨在抵消x和y的运动。 请注意,这仅适用于矩形对象。 将此碰撞代码用于对角线或圆形对象将感觉不对。
To check for inclusion inside a rectangle, we’ll need to give both the rectangle’s class and the skeleton class variables for their left, right, down and up borders.
要检查是否包含在矩形中,我们需要为矩形的左边界,右边界,下边界和上边界同时提供矩形的类和骨架类变量。
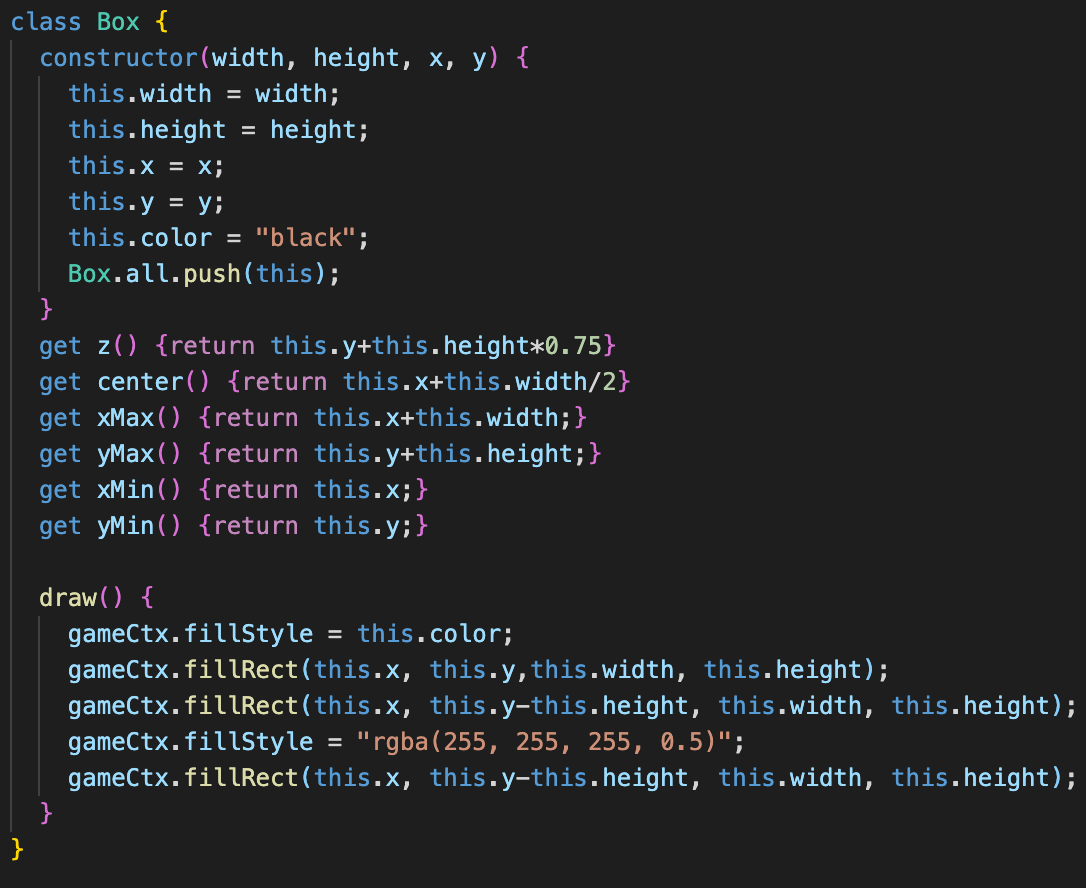
The newly created Box class will be representing rectangles from now on. Let’s write an inclusion based collision code now that we have bounding coordinates for all objects.
从现在开始,新创建的Box类将代表矩形。 现在,我们已经为所有对象定义了边界坐标,让我们编写一个基于包含的碰撞代码。

As long as the lower coordinate of both is less than the greater coordinate of the other, the rectangles will be overlapping. Here’s an image to help explain:
只要两个坐标的下坐标小于另一个坐标的大坐标,矩形就会重叠。 这是一张有助于说明的图片:
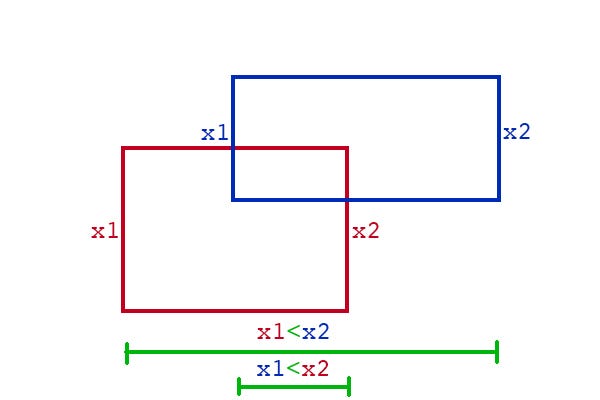
We also need to know from which direction the objects are meeting, so there are variables to check if obj1 is left, right, up or down from obj2. With these you can check one pixel ahead in the direction the character is moving by taking the sign of it’s x and y vectors. This is a much more robust collision system than we had before, because not only can you have multiple objects on screen, if you manage to glitch further than one pixel inside the wall, it will be able to push you out rather than let you through.
我们还需要知道对象从哪个方向会合,因此有一些变量可以检查obj1是从obj2左移,右移,向上还是向下。 使用这些,您可以通过获取x和y向量的符号来检查字符移动方向上的一个像素。 这是一个比以前强大得多的碰撞系统,因为不仅屏幕上可以有多个物体,而且如果您设法将毛刺移动到墙内一个像素以外的地方,它还能将您推出而不是让您通过。
Since we also now have handy center coordinates for our objects, named center for the x direction and z for the y direction, we can use these to sort the order in which we draw objects. This allows objects to dynamically go in front of or behind objects based on the y-axis. Because this allows us to draw the object in a projected psuedo 3D space, I called it “z”, for z-axis.
由于我们现在还为对象提供了方便的中心坐标,将中心坐标命名为x方向,将z命名为y方向,因此我们可以使用这些坐标对绘制对象的顺序进行排序。 这允许对象基于y轴动态地位于对象的前面或后面。 因为这使我们能够在投影的伪3D空间中绘制对象,所以我将其称为“ z”(z轴)。
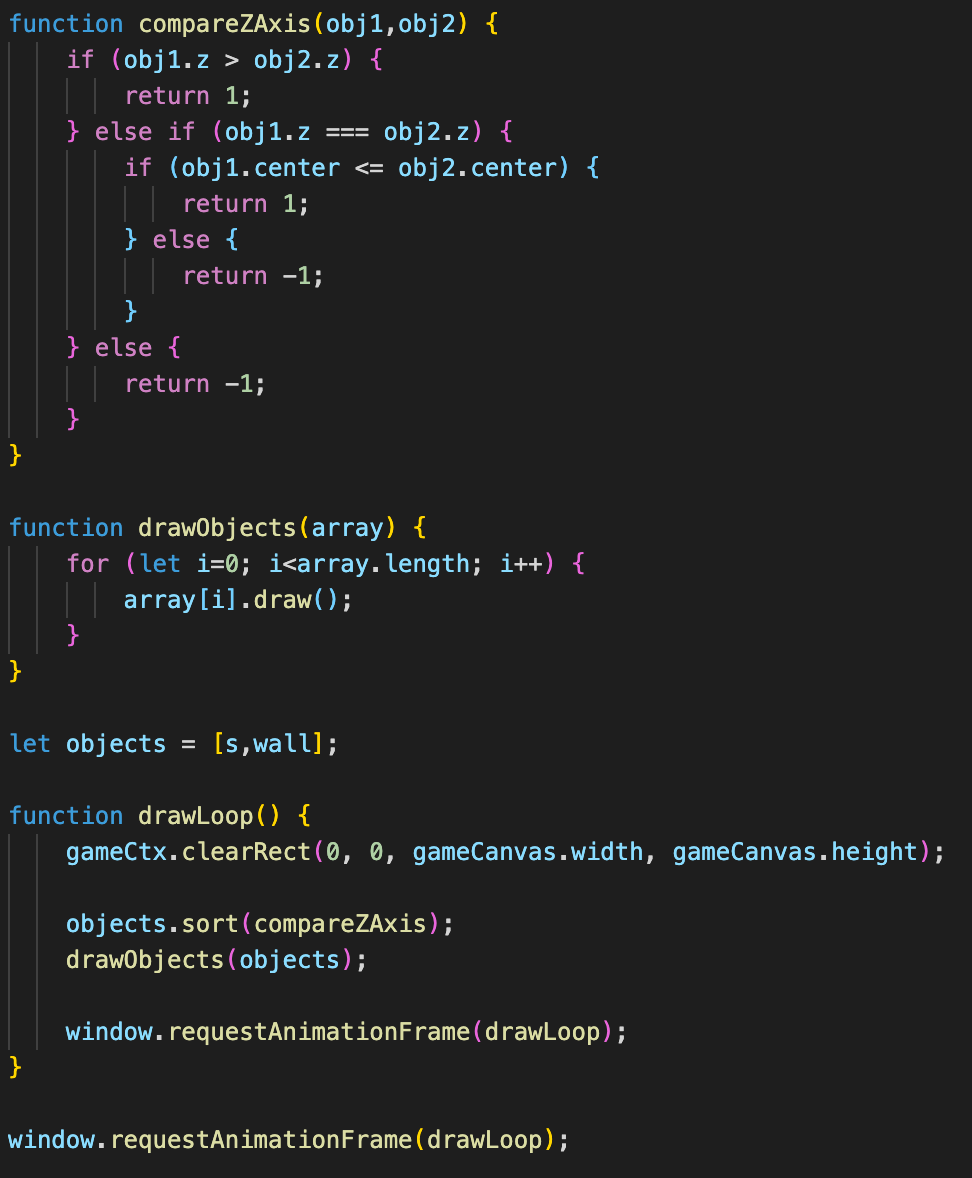
And here’s the code that draws the objects onto the game canvas:
这是将对象绘制到游戏画布上的代码:
See all of the code on codepen, and try playing with it for yourself:
查看Codepen上的所有代码,然后尝试自己玩:
翻译自: https://medium.com/@cantwell.tom/creating-a-modular-game-in-javascript-part-1-a2e8cacb7746
javascript模块


 2109
2109

 被折叠的 条评论
为什么被折叠?
被折叠的 条评论
为什么被折叠?
 到【灌水乐园】发言


