


echars堆叠区域表
Ever since Apple released the iPhone X, using the safe area has been a must-do for developers. You don’t want your work hidden under the notch or clipped beneath the status bar or under the rounded corners, etc.
自从苹果发布iPhone X以来,开发人员就必须使用安全区域。 您不希望您的工作隐藏在槽口下或在状态栏下或圆角下等被剪掉。
The launch of the iPhone X along with the safe area came back in 2017, so I think it’s safe to say every iOS developer knows how to use it — if not, here’s the documentation.
iPhone X以及安全区域的发布要追溯到2017年,因此,我认为可以肯定地说每个iOS开发人员都知道如何使用它-如果没有,请参阅此处的文档 。
But sometimes you need to dive deeper. You might want the safe area present in some views but not in others — maybe a blur partially under the status bar, tall enough to contain a button. Thankfully, anything you build with the safe area is really quite easy!
但是有时您需要更深入地研究。 您可能希望在某些视图中显示安全区域,而在其他视图中则不存在–可能是状态栏下方部分模糊,高度足以容纳一个按钮。 值得庆幸的是,使用安全区域构建的任何东西都非常容易!
In this article, I’ll go over some of these designs and how to build them. Everything will be done in the storyboard without a single line of code … so sit back, relax, and enjoy!
在本文中,我将介绍其中一些设计以及如何构建它们。 一切都将在情节提要中完成,而无需一行代码……因此,请坐下来放松身心,尽情享受吧!
延伸到顶部的自定义标题 (A Custom Header That Stretches to the Top)
Let’s start with a plain, normal UIView— I’ll call it View from now on. Change its background color to something other than white so it’s easier to see. We’ll constrain the top, leading, and trailing to “Safe Area”. For now, also constrain height to 100.
让我们从一个普通的普通UIView -从现在开始我将其称为View 。 将其背景颜色更改为白色以外的颜色,以便于查看。 我们将约束top , leading和trailing到“ Safe Area”。 现在,也将height限制为100 。


Now, let’s add a UILabel inside View. Constrain top, leading, and bottom to View with an offset of 16.
现在,让我们在View添加一个UILabel 。 约束top , leading和bottom ,以View有偏移的16 。


UILabels have something called an intrinsic content size, which is basically the width and height they should ideally be. Currently, only the intrinsic width of Label is active — because the top and bottom are constrained to View, the intrinsic height is overridden.
UILabel具有称为内在内容大小的东西,基本上是理想情况下的宽度和高度。 当前,只有Label的固有宽度处于活动状态-因为顶部和底部被限制为View ,因此固有高度被覆盖。
Let’s enable the intrinsic height! Simply delete View’s height constraint of 100. Now Label is free to take its ideal size and View will shrink along to fit.
让我们启用固有高度! 只需删除View的高度限制100 。 现在, Label可以自由选择其理想大小,并且View会缩小以适合。


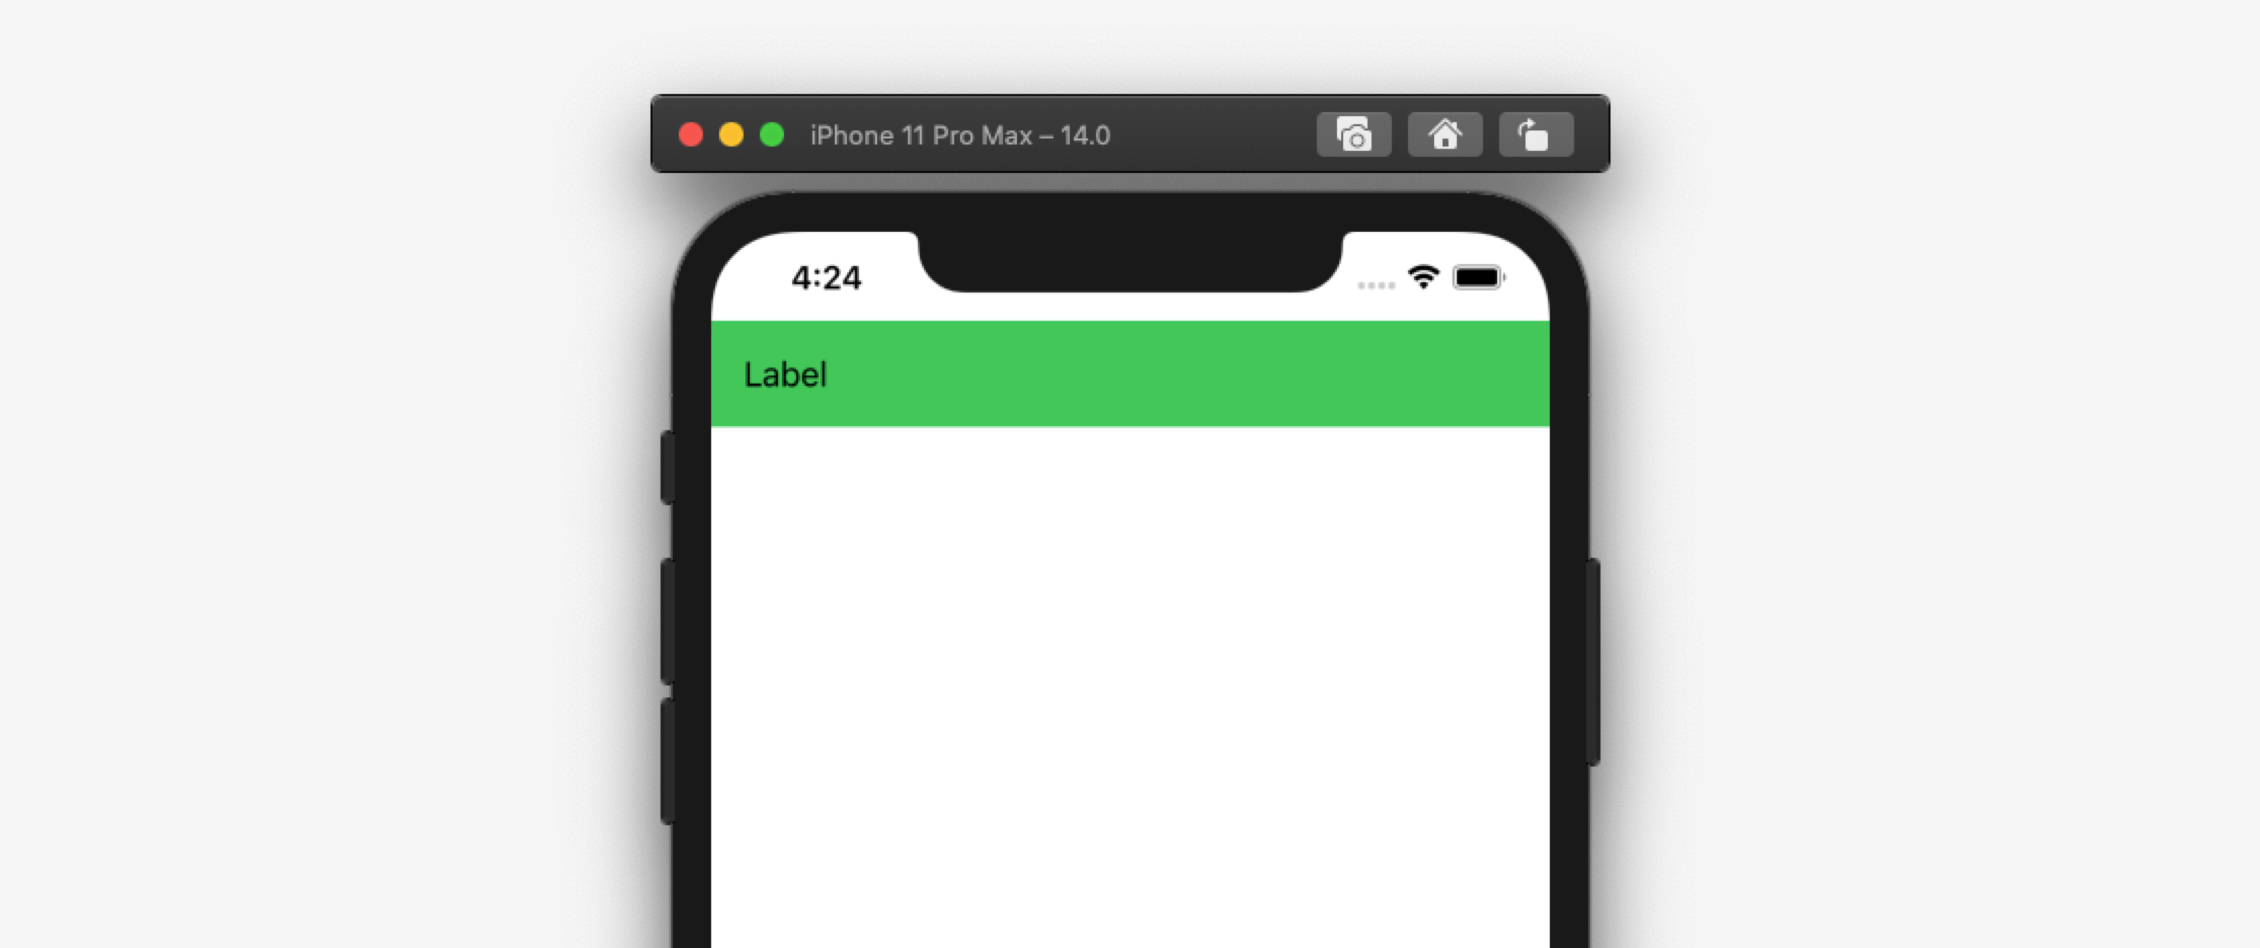
OK, looks all right … but if you build and run, the empty space above the green View becomes very noticeable. That’s because we constrained the top of the View to the safe area, and the safe area stops just below the notch.
OK,看起来还不错……但是,如果您构建并运行,绿色View上方的空白区域将变得非常明显。 这是因为我们将“ View的顶部限制在安全区域,并且安全区域停止在槽口的下方。
Wouldn’t it be nice to extend the green into the top of the screen? Something like this:
将绿色延伸到屏幕顶部不是很好吗? 像这样:

A quick fix would be to constrain the top of the header to Superview instead of the safe area. This is the result:
一个快速的解决方法是将标题的顶部限制为Superview而不是安全区域。 结果如下:

But then the label is covered! Well, we can fix this by changing Label’s top constraint from 16 to something like 40:
但是,然后标签被覆盖了! 好吧,我们可以通过将Label的top约束从16更改为40来解决此问题:

OK, looks fine — but how does it look running on a phone without a notch?
好的,看起来不错-但是在没有缺口的情况下在手机上运行情况如何?

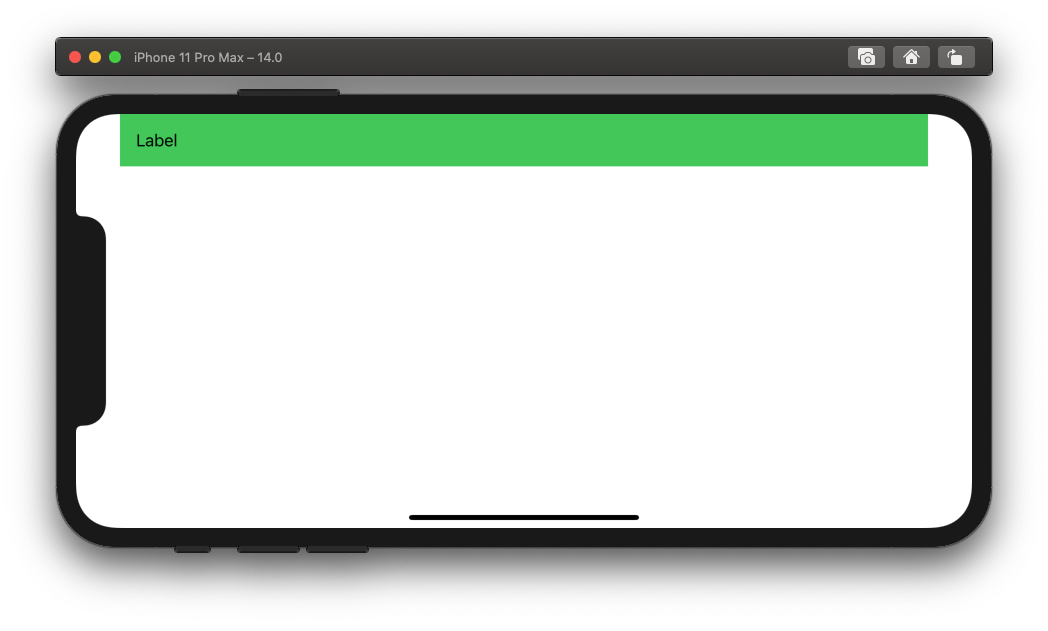
Well, not bad … however, you should never use hardcoded values. Let’s say we rotate this sideways, where there’s no status bar:
好吧,还不错...但是,您永远不要使用硬编码的值。 假设我们将其横向旋转,其中没有状态栏:

That’s a huge waste of space!
那是巨大的空间浪费!
安全区域布局指南 (Safe Area Layout Guide)
So how can we constrain the green View to Superview (so it can go under the notch and status bar) but still constrain Label to the safe area? The answer lies in an attribute called “Safe Area Layout Guide.”
那么我们如何才能将绿色的“ View限制为“ Superview View (这样它就可以进入缺口和状态栏下方),但仍将Label限制在安全区域了? 答案在于名为“安全区域布局指南”的属性。

By default, this is unchecked. So what happens when you check it?
默认情况下,未选中。 那么当您检查它时会发生什么呢?

Wow — we now have a safe area inside the green View!
哇,我们现在在绿色View 内部有一个安全区域!
Safe Area Layout Guide enables/disables the safe area for each view. This is why there’s a safe area when you first create the project — by default, the base UIView has “Safe Area Layout Guide” checked.
“安全区域布局指南”启用/禁用每个视图的安全区域。 这就是为什么在初次创建项目时会有一个安全区域的原因-默认情况下,基本UIView选中了“安全区域布局指南”。
Now let’s compare the original, default safe area with the new one:
现在,让我们将原始的默认安全区域与新区域进行比较:

Obviously, the original one is a lot larger — but would you believe me if I told you they’re both the same?
显然,原始版本要大得多-但是如果我告诉您它们都一样,您会相信我吗?
The original safe area belongs to the base UIView that comes with every UIViewController. The new, smaller safe area belongs to the green View that we added. However, they are simply slices of the same safe area. It’s like a Venn diagram — wherever the safe area and the view overlap, that overlapping part is the slice.
原始的安全区域属于每个UIViewController附带的基本UIView 。 新的较小的安全区域属于我们添加的绿色View 。 但是,它们只是同一安全区域的一部分。 就像维恩图一样,无论安全区域和视图何时重叠,重叠的部分都是切片。

The slice may be bigger or smaller depending on where the view overlaps the safe area, but the safe area will always be the same.
切片可能会更大或更小,具体取决于视图与安全区域重叠的位置,但是安全区域将始终相同。

Now that we’ve got the Safe Area Layout Guide covered, we can properly constrain our header! Remember Label’s hardcoded top constraint?
现在我们已经涵盖了《安全区域布局指南》,我们可以适当地限制标题了! 还记得Label的硬编码top约束吗?
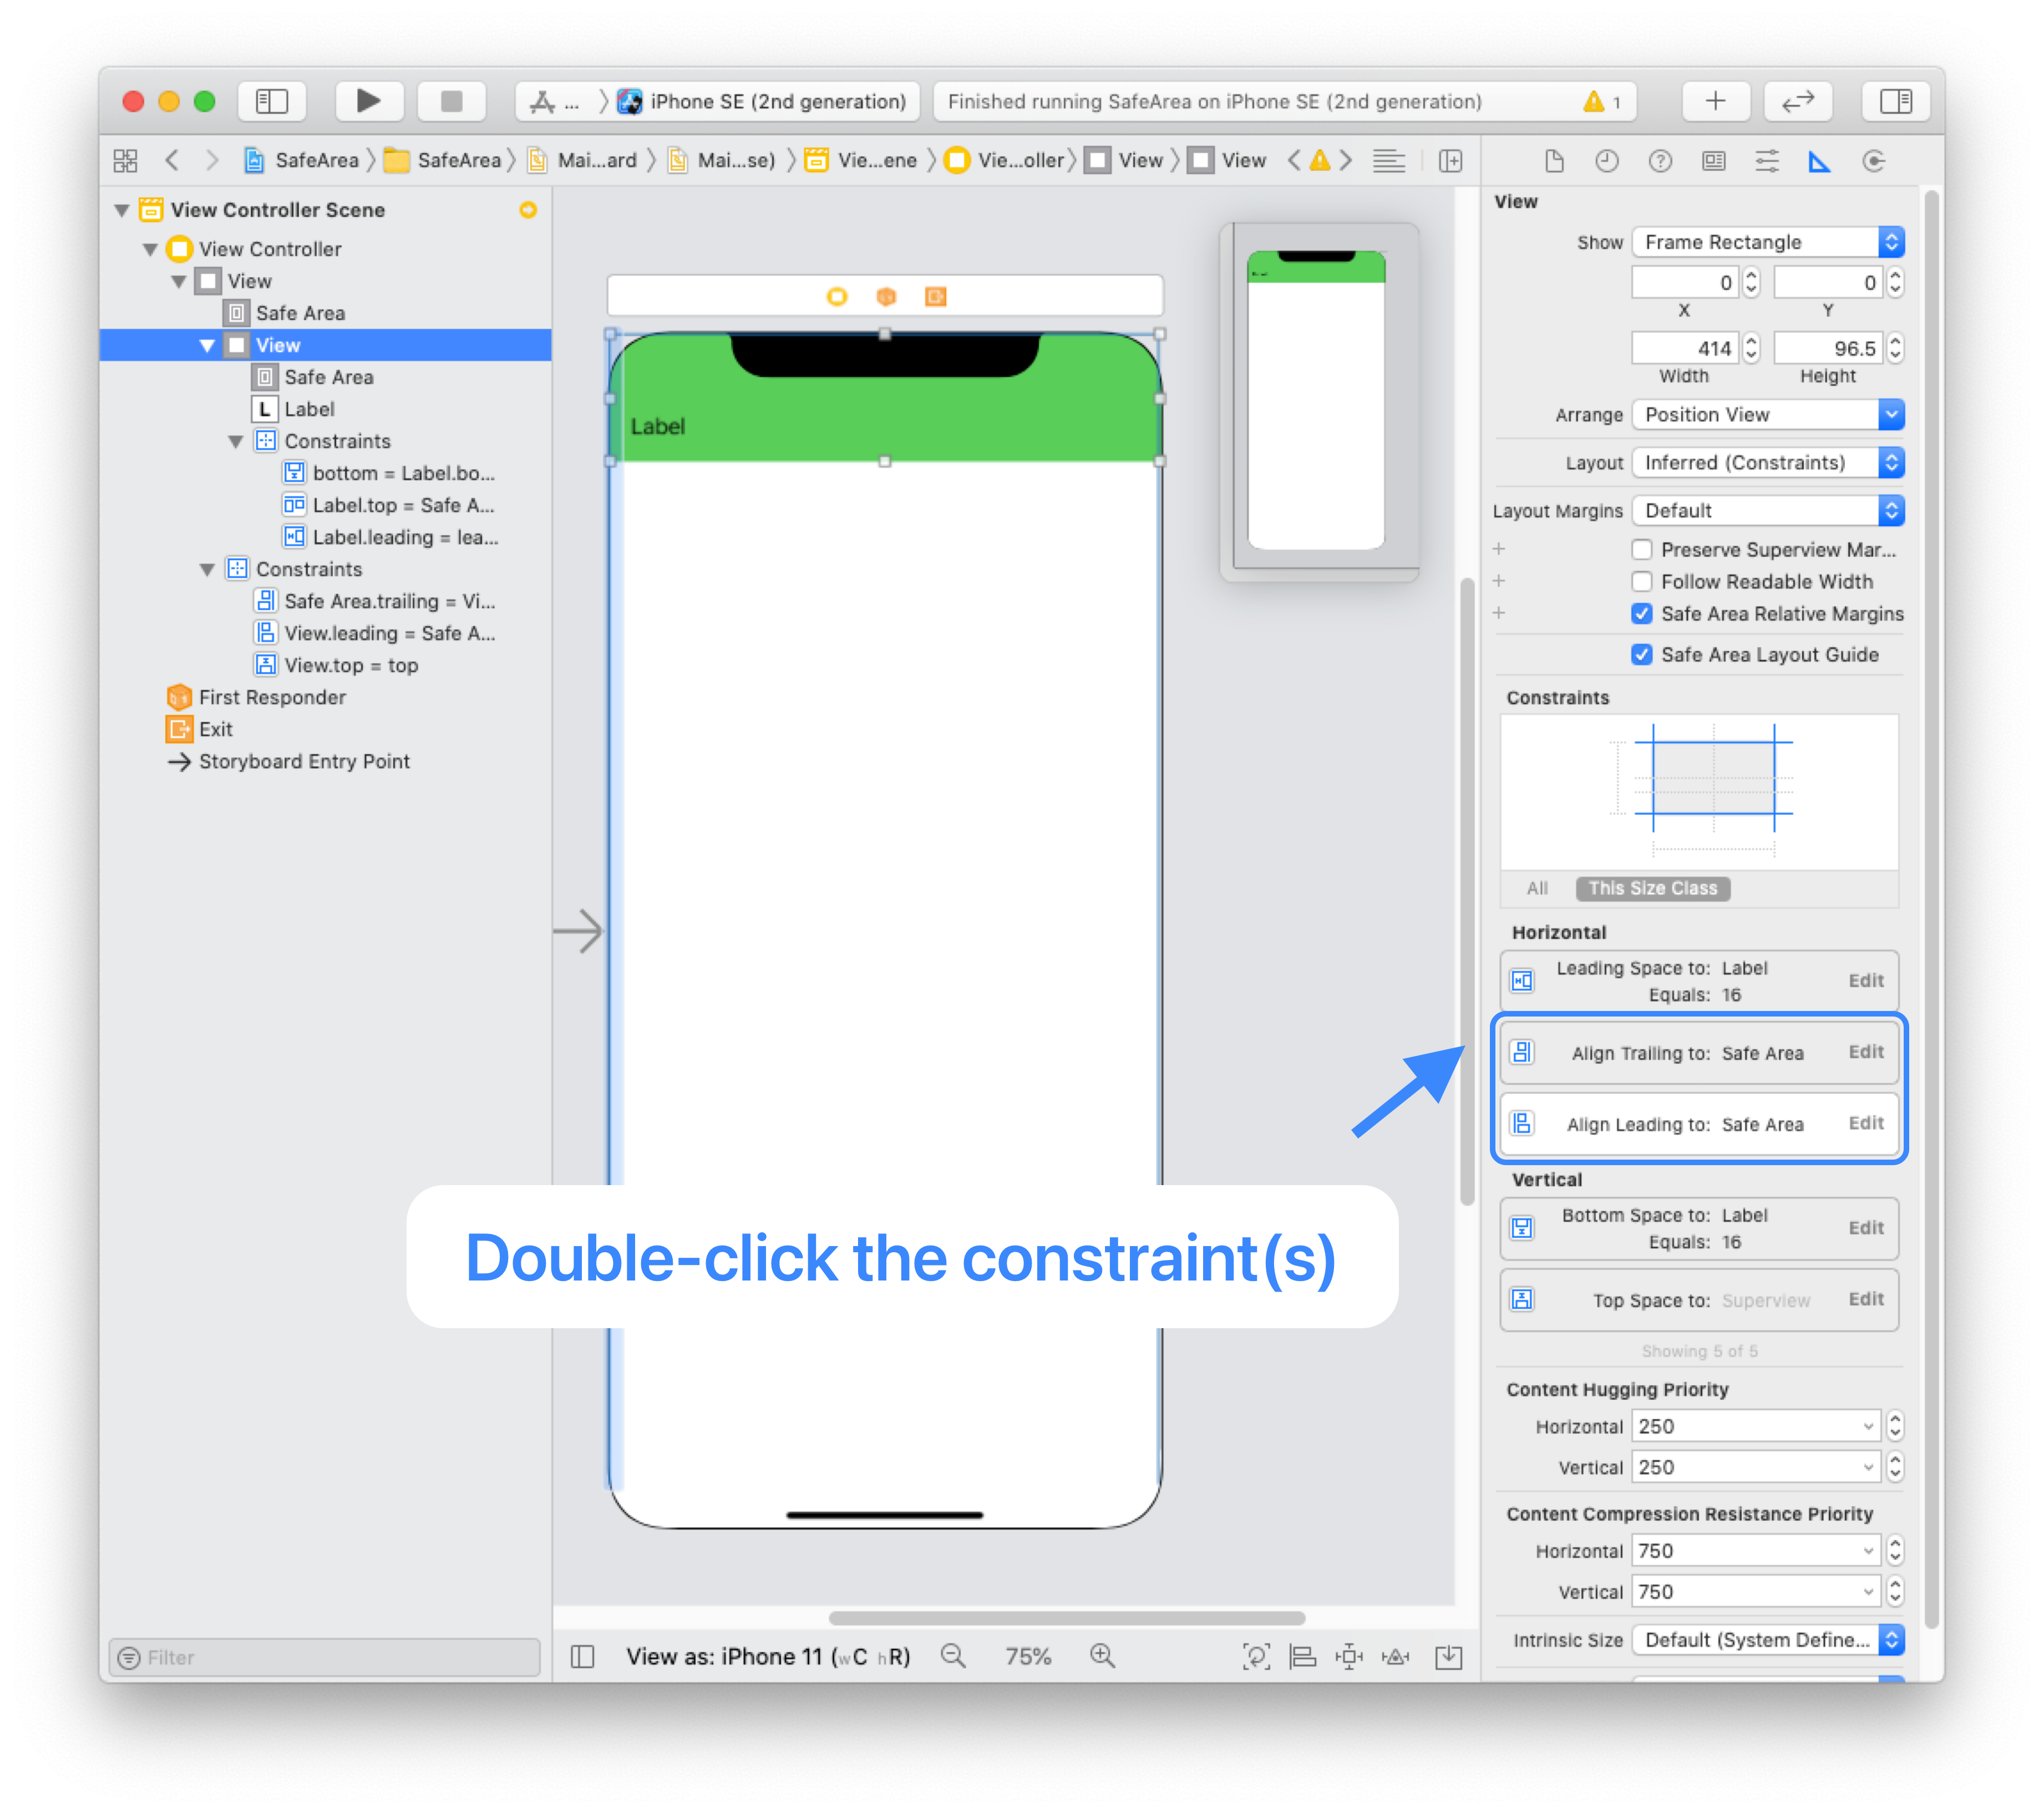
Now that we’ve enabled the safe area for the green View, we can pin Label’s top constraint to the safe area instead! To edit the constraint, first double-click on it:
现在我们为绿色View启用了安全区域,我们可以将Label的top约束固定到安全区域! 要编辑约束,首先双击它:

Then, choose “Safe Area” under “Second Item.”
然后,在“第二项”下选择“安全区域”。

And, finally, change the “Constant” from -4 to something with more padding, like 16.
最后,将“常量”从-4更改为具有更多填充的内容,例如16 。

Great! Now, build and run — it works perfectly on every orientation and device.
大! 现在,构建并运行-它可以在任何方向和设备上完美运行。


Just one more thing: Notice how when on the iPhone X, there’s a gap on the sides of the green header?
还有一件事:请注意,当在iPhone X上的绿色标头的侧面留有间隙时,该怎么办?
That’s because the green View’s current constraints are:
这是因为绿色View的当前约束是:
ToptoSuperviewSuperviewTopLeadingto safe areaLeading安全区域Trailingto safe areaTrailing至安全区
If we want the left and right to extend over the safe area and into the edges of the device, we can just set leading and trailing to Superview instead!
如果我们希望左右延伸到安全区域并延伸到设备的边缘,我们可以直接设置Superview leading和trailing !

Because the safe area is always the same, changing the green View’s leading and trailing to Superview won’t affect the Label’s constraints at all! Let me prove it:
由于安全区始终是相同的,不断变化的绿色View的leading和trailing于Superview都不会影响Label的所有限制! 让我证明一下:

Wait, oops … the green View now stretches to the sides, but Label followed along. That’s because we forgot to update Label’s leading constraint: Currently, it’s still constrained to Superview. We want that to be safe area instead.
等等,糟糕……绿色的View现在向两侧延伸,但是Label跟着走。 这是因为我们忘记更新Label的leading约束条件:目前,它仍然仅限于Superview 。 我们希望将其改为安全区域。

By now, you’re probably a pro at changing constraints! Double-click, select “Second Item,” and change it to “Safe Area.” Here’s the result:
到目前为止,您可能是改变约束的专家! 双击,选择“第二项”,然后将其更改为“安全区域”。 结果如下:

Awesome!
太棒了!
无尽的设计可能性 (Endless Design Possibilities)
From here on out, it’s smooth sailing. Because we already understand and know how to activate the Safe Area Layout Guide, the design possibilities are endless! Here are some examples:
从这里开始,航行顺畅。 因为我们已经了解并知道如何激活《安全区域布局指南》,所以设计的可能性是无限的! 这里有些例子:
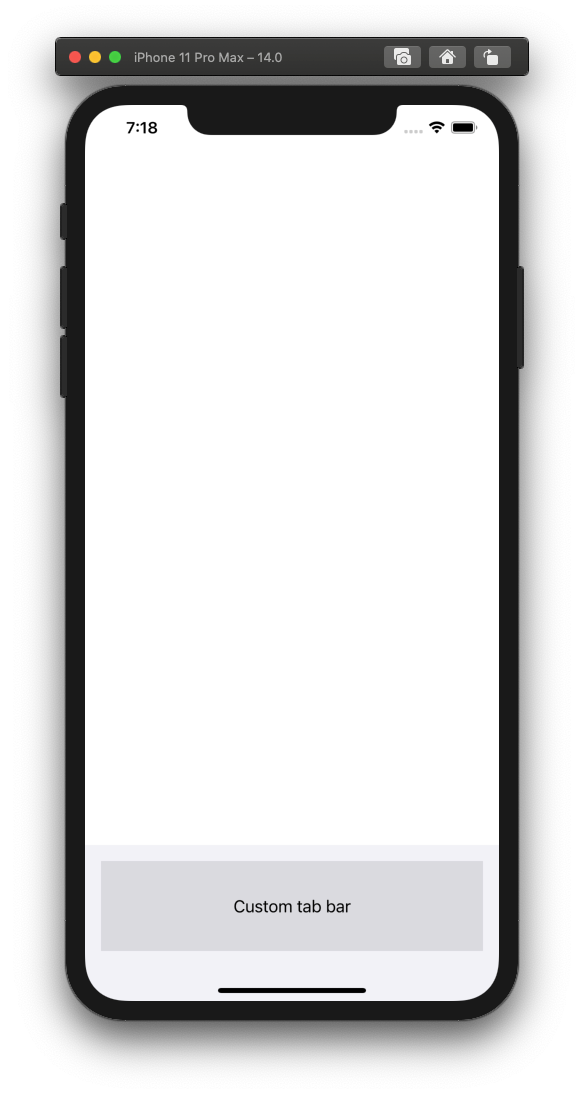
自定义标签栏 (A custom tab bar)

自定义导航栏 (A custom navigation bar)


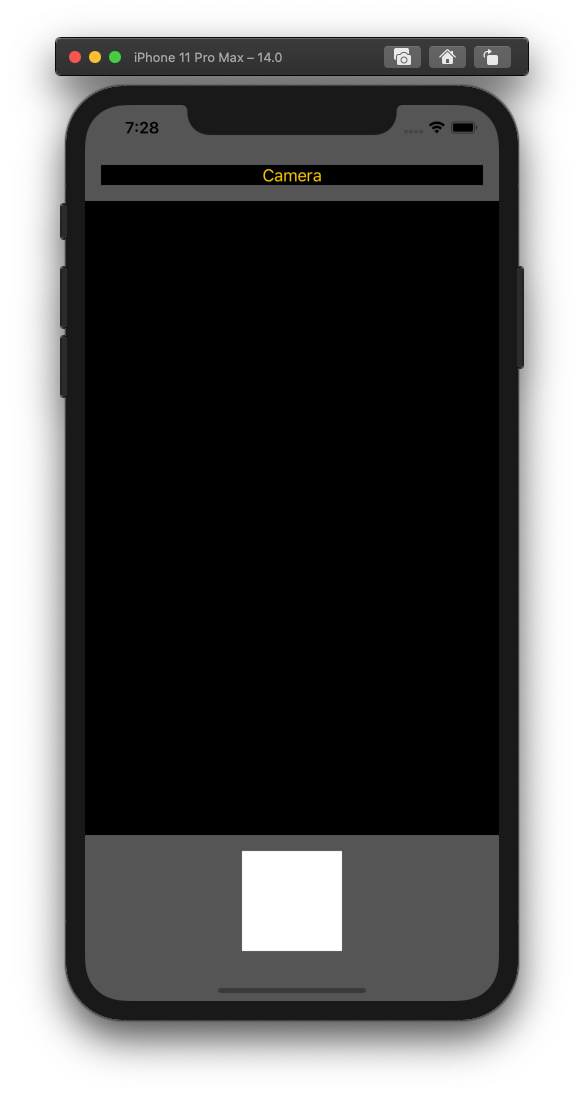
自定义相机应用 (A custom camera app)

Build whatever you can think of!
建立您能想到的一切!
快速备忘... (A Quick Note Before You Go …)
Whenever you’re making a UIView that’s going to have “Safe Area Layout Guide” enabled, it needs to be constrained on all 4 sides. That means pinning leading, trailing, top, and bottom— or, alternatively, substituting one of them for a width or height constraint.
每当您要创建要启用“安全区域布局指南”的UIView ,都需要在所有四个方面进行约束 。 这意味着固定leading , trailing , top和bottom ,或者用其中之一替换width或height约束。
This will work:
leading = 0,trailing = 0,top = 0,bottom = 0这将起作用:
leading = 0,trailing = 0,top = 0,bottom = 0This will work:
leading = 0,trailing = 0,top = 0,height = 100这将起作用:
leading = 0,trailing = 0,top = 0,height = 100This won’t work:
leading = 0,trailing = 0,top = 0这将不起作用:
leading = 0,trailing = 0,top = 0
You must do this before adding any subviews. Remember constraining leading = 0, trailing = 0, top = 0, and height = 100 to the green View, before adding the UILabel? That was to satisfy Xcode — without a height, View's safe area doesn’t activate correctly… and without the safe area, Label’s intrinsic content size is useless.
您必须在添加任何子视图之前执行此操作。 还记得在添加UILabel之前将leading = 0 , trailing = 0 , top = 0和height = 100约束到绿色View吗? 那是为了满足Xcode的要求-如果没有height ,则View的安全区域将无法正确激活…而没有该安全区域, Label的固有内容大小将毫无用处。
If the view isn’t perfectly constrained, this will happen:
如果视图没有完全约束,则会发生这种情况:
Yikes! But after you add the height constraint (properly activating the safe area), you’re safe to add subviews and use their intrinsic content sizes. Like we did at the beginning of this article, you can add a UILabel, constrain its top and bottom… and after that, you can safely remove the height constraint.
kes! 但是,在添加height约束(正确激活安全区域)之后,可以安全地添加子视图并使用其固有的内容大小。 就像我们在本文开头所做的那样,您可以添加UILabel ,限制其top和bottom …之后,您可以安全地删除height约束。
And that’s it for this one. Thanks for reading!
就是这个。 谢谢阅读!
翻译自: https://medium.com/better-programming/build-complex-stacked-layouts-with-the-safe-area-fd2cef780d75
echars堆叠区域表


 469
469


 被折叠的 条评论
为什么被折叠?
被折叠的 条评论
为什么被折叠?
 到【灌水乐园】发言


