


Dialogflow is a natural language understanding (NLU) platform provided by Google. It is used to design and integrate conversational user interfaces into mobile and web apps, devices, bots, and interactive voice systems. In this tutorial, we’ll demonstrate how to integrate with the Dialogflow and Vonage SMS APIs to build a quiz bot that interacts with the end user via SMS. We won’t be covering every piece of the application, so if you’re starting from scratch check out the full project repo (or read one of our previous tutorials on Flask development from the ground up!)
Dialogflow是Google提供的自然语言理解(NLU)平台。 它用于设计会话用户界面并将其集成到移动和Web应用程序,设备,机器人和交互式语音系统中。 在本教程中,我们将演示如何与Dialogflow和Vonage SMS API集成以构建一个测验机器人,该机器人通过SMS与最终用户进行交互。 我们不会覆盖应用程序的每个部分,因此,如果您是从头开始的话,请查看完整的项目存储库 (或从头开始阅读有关Flask开发的先前 教程之一!)
Vonage API帐户 (Vonage API Account)
To complete this tutorial, you will need a Vonage API account. If you don’t have one already, you can sign up today and start building with free credit. Once you have an account, you can find your API Key and API Secret at the top of the Vonage API Dashboard.
要完成本教程,您将需要一个Vonage API帐户 。 如果您还没有,请立即注册并免费获得信用。 拥有帐户后,您可以在Vonage API控制台的顶部找到您的API密钥和API密钥。
This tutorial also uses a virtual phone number. To purchase one, go to Numbers > Buy Numbers and search for one that meets your needs.
本教程还使用虚拟电话号码。 要购买一个,请转到“号码” >“ 购买号码”,然后搜索满足您需求的号码 。

创建一个应用程序 (Create an Application)
We will begin by using the Nexmo CLI mode to create an app. Install the Nexmo CLI on your machine as follows:
我们将从使用Nexmo CLI模式创建应用程序开始。 如下所示在您的计算机上安装Nexmo CLI:
Create a directory for your application locally:
在本地为您的应用程序创建目录:
Inside the directory, run the following command:
在目录中,运行以下命令:
In the interactive CLI mode:
在交互式CLI模式下:
Application Name: your-app-name
Select capabilities: press the space bar to select voice, messages and rtc
Use default HTTP methods?: yes
Voice answer url: press enter to leave it as default (https://example.com)
Voice Fallback Answer URL: Optional Voice Event URL: press enter to leave it as default (https://example.com)
Messages Inbound URL: use ngrok to create a URL and add '/update/' on the end
Messages Status URL: press enter to leave it as default (https://example.com)
RTC Event URL: press enter
Public key path: press enter
Private Key path: your private key (downloadable from the nexmo dashboard)
The application should now be created. Visit the dashboard and navigate to Applications. Your shiny new app should be listed there.
现在应该创建该应用程序。 访问仪表板并导航到“ 应用程序” 。 您的闪亮新应用应在此处列出。
设置Dialogflow代理 (Set Up the Dialogflow Agent)
To set up the Dialogflow agent, visit https://console.cloud.google.com and create a new project:
要设置Dialogflow代理,请访问https://console.cloud.google.com并创建一个新项目:
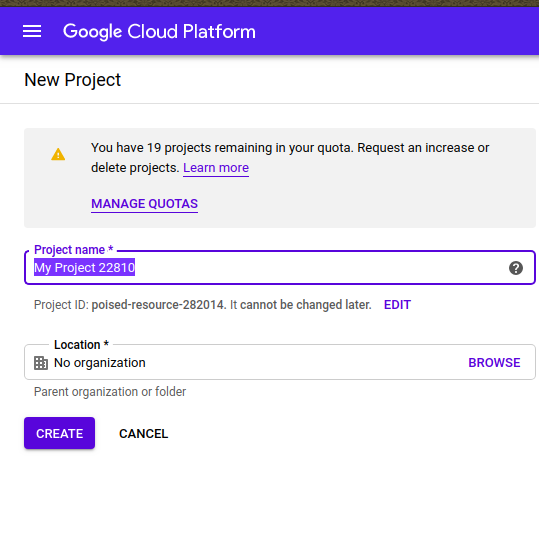
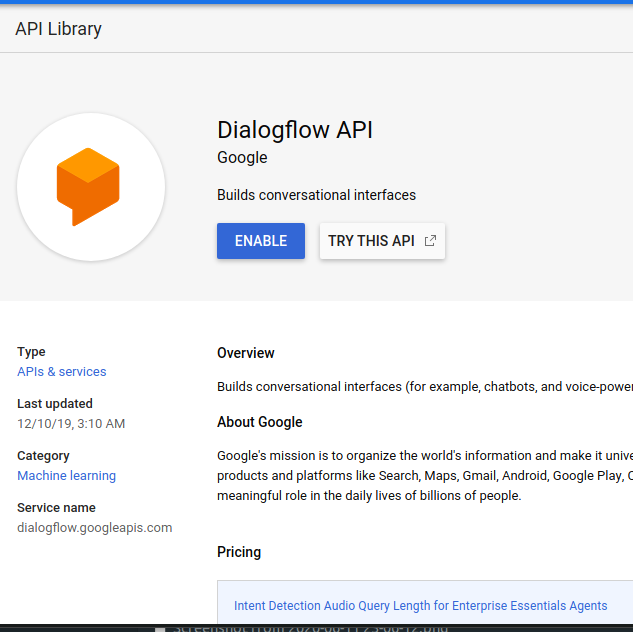
Take note of the PROJECT ID. Enable the Dialogflow API from the list of APIs:
记下PROJECT ID 。 从API列表中启用Dialogflow API:
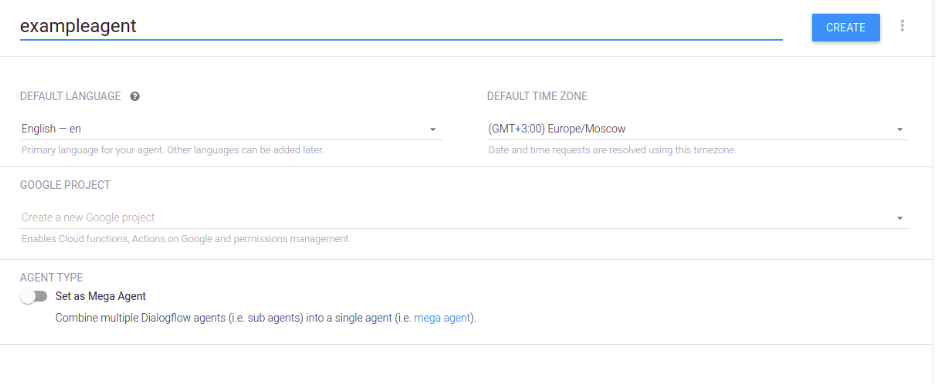
Visit https://dialogflow.cloud.google.com to create a new agent:
访问https://dialogflow.cloud.google.com以创建新代理:
To make it easy to get your application up and running, I’ve included a zip file in the GitHub repo for this project. Navigate to the dialogflow directory, and under resources download the quizzie.zip file. This zip is exported from the Dialogflow settings page and it contains all the intents, contexts, and responses required to set up an agent on the Dialogflow dashboard.
为了使您的应用程序易于启动和运行,我在该项目的GitHub存储库中包含一个zip文件。 导航到dialogflow目录,然后在resources下下载quizzie.zip文件。 该zip从Dialogflow设置页面导出,其中包含在Dialogflow仪表板上设置代理所需的所有意图,上下文和响应。
On the Dialogflow dashboard, click Settings and navigate to Export/Import. Import the zip file we just downloaded:
在Dialogflow仪表板上,单击“设置” ,然后导航到“ 导出/导入” 。 导入我们刚刚下载的zip文件:
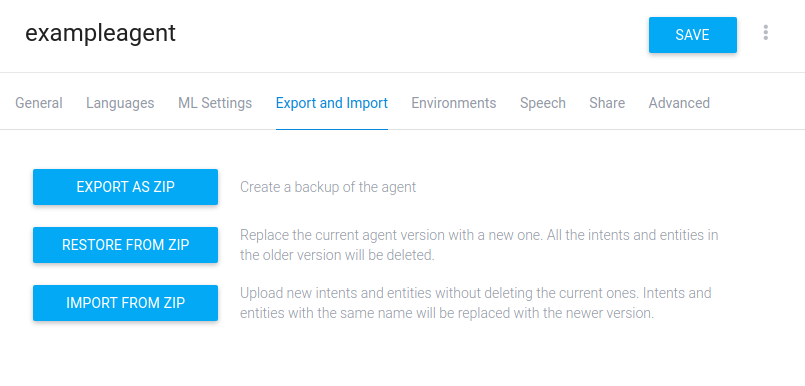
Our Dialogflow quiz agent is all set up and ready to go!
我们的Dialogflow测验代理已全部设置好并可以使用!
For the next steps, we need to create the logic that will handle the back and forth messaging between the end user and our Dialogflow agent.
对于下一步,我们需要创建逻辑来处理最终用户与Dialogflow代理之间的来回消息传递。
申请代码 (Application Code)
We want to write an interface for sending an SMS to the end user. First, make sure you have the Nexmo Python library installed:
我们想要编写一个用于向最终用户发送SMS的接口。 首先,请确保您已安装Nexmo Python库:
The function for sending an SMS looks like this:
发送短信的功能如下所示:
Next, add the code that will notify our customer:
接下来,添加将通知我们的客户的代码:
Once the end user receives the messages, we want them to reply. We need to create an incoming webhook endpoint to receive the reply. Remember, we set up the inbound sms URL while creating an app earlier. It is now time to add logic to our webhook:
最终用户收到消息后,我们希望他们回复。 我们需要创建一个传入的Webhook端点来接收回复。 记住,我们在创建应用程序时设置了入站短信URL。 现在是时候为我们的webhook添加逻辑了:
We need to chain the responses we receive from the end user as input to our Dialogflow agent. For this, we need to use the Dialogflow REST agent.
我们需要将最终用户收到的响应链接起来,作为Dialogflow代理的输入。 为此,我们需要使用Dialogflow REST代理。
Specifically, we need to detect the user intent and pass it as input to the agent:
具体来说,我们需要检测用户意图并将其作为输入传递给代理:
结论 (Conclusion)
The basic setup is now complete. We’ve shown the logic necessary for the app to send and receive SMS messages, as well as how to connect to the Dialogflow agent. To see the full code for the app, check out the project repo: https://github.com/nexmo-community/Vonage-QnA-app. And for any further questions, feel free to shoot me an email.
基本设置现已完成。 我们已经展示了应用程序发送和接收SMS消息所必需的逻辑,以及如何连接到Dialogflow代理。 要查看该应用程序的完整代码,请查看项目存储库: https : //github.com/nexmo-community/Vonage-QnA-app 。 如有其他疑问,请随时给我发送电子邮件 。
翻译自: https://medium.com/@VonageDev/add-dialogflow-and-the-vonage-sms-api-to-your-flask-app-70c3e535693c


 623
623


 被折叠的 条评论
为什么被折叠?
被折叠的 条评论
为什么被折叠?
 到【灌水乐园】发言


